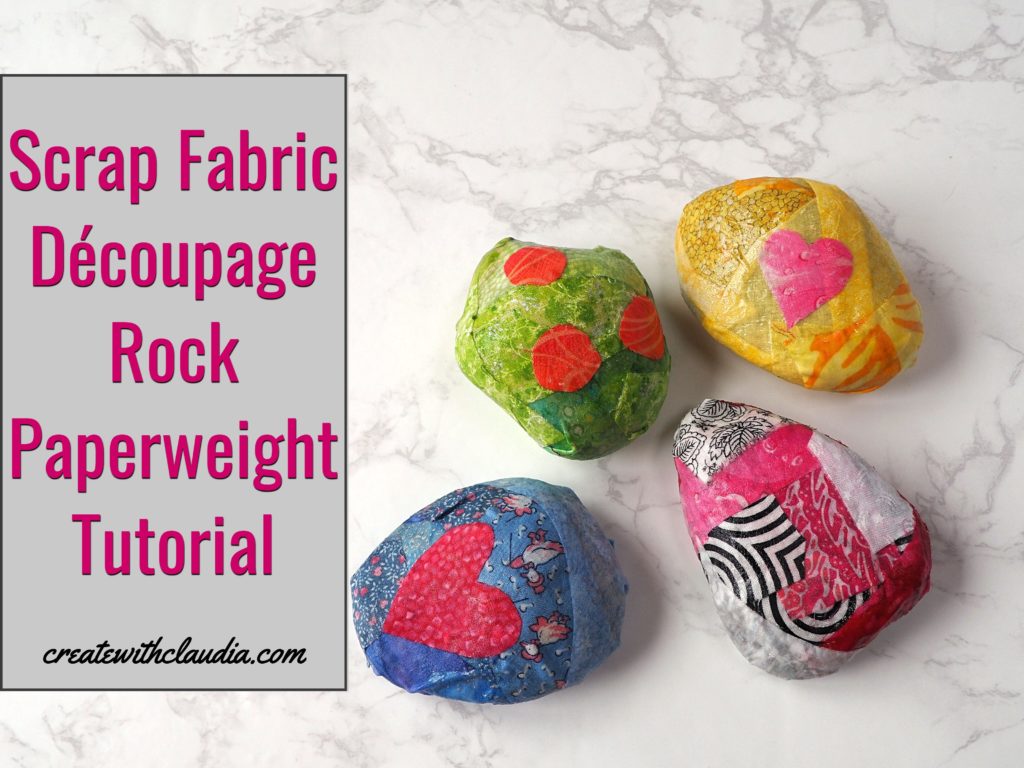
Fabric Découpage Rock Paperweight
As kids, we all loved playing with rocks. I know I did, and so did my daughter. Now that I’m an adult who makes crafts, I’m seeing them in a whole new light, and looking for fun projects to do with them. I think I’ve found an ideal one for them with this fabric découpage rock paperweight.
We still have a big tub of rocks in our junk room, so I was lucky to have an ample supply of them to choose from. For my paperweights I used rocks that were about the size of the palm of my hand. I also looked for ones that had a flatter side so they would sit well on a desk.
The only limit to this fun project is your imagination. Gather up fabric scraps and a rock or two, and get ready to make this unique paperweight.
Check Out My Video Showing You How To Make These Paperweights
Supplies You Will Need (For One Paperweight)
- Rock – About the size of the palm of your hand, with one side that is flatter.
- Fabric scraps – smaller pieces, no larger than about 2” if you want a scrappy look
- Fabric Mod Podge
- Paint brush or sponge
- Wax paper
- Scissors
Items You Can Use To Make This Project
You can find many of the items that I used to make this project in my Amazon Store.
As an Amazon Associate I earn from qualifying purchases.
Project Tips:
- You will get messy. Have paper towels and a damp rag close by to keep your hands clean.
- Work fairly quickly. The Mod Podge dries rapidly.
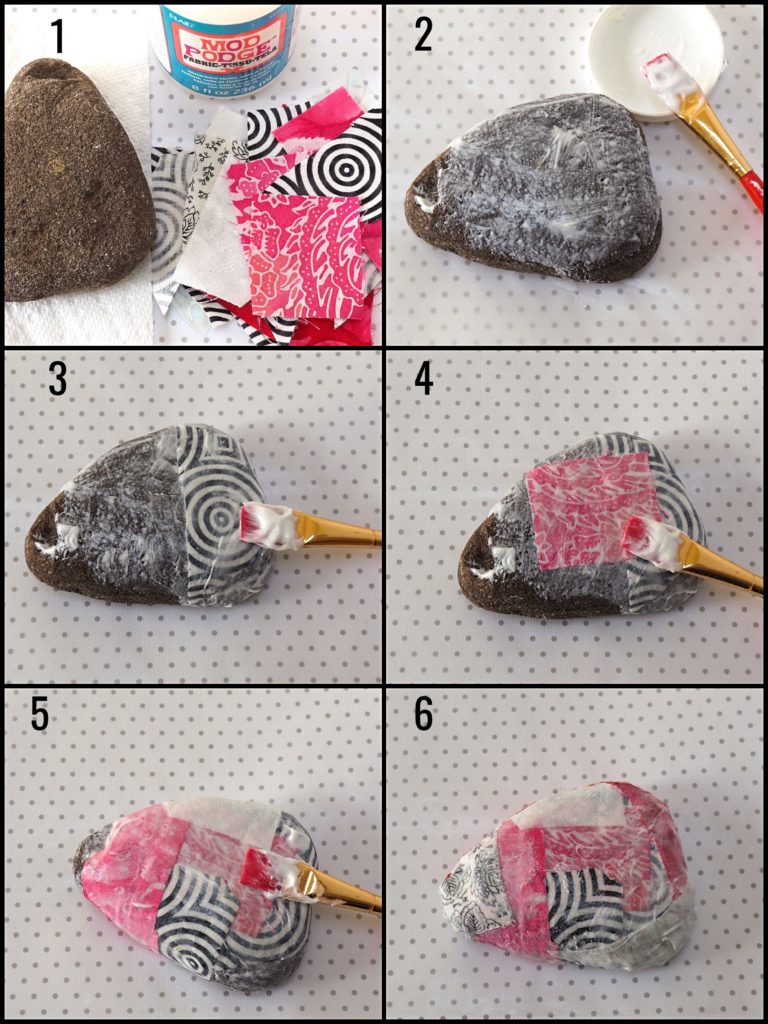
How To Make The Paperweight
- Cover your work surface with wax paper. You can use something else, but the fabric Mod Podge is sticky and I have found that it is easier to peel the glue away from wax paper than from anything else.
- Make sure your rock is clean and dry.
- Apply a coating of fabric Mod Podge to the top of the rock.
- Add the first fabric scrap, pressing down.
- Next, cover the scrap with more Mod Podge.
- Add another piece of fabric, overlapping the first piece. Cover with more Mod Podge.
- Continue until the entire rock is covered.
- Smooth down any bubble or folds as best as possible.
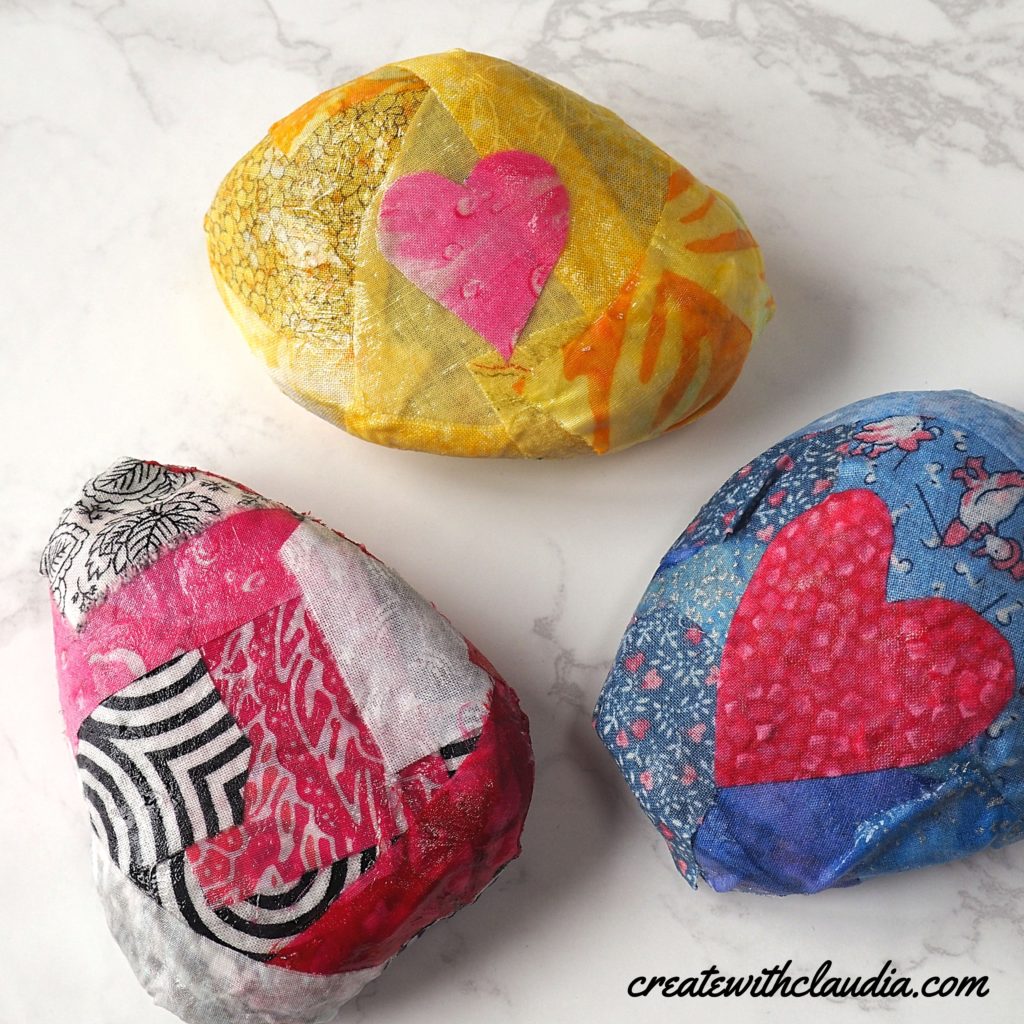
- Once done, you can add any fabric shapes, like the heart or the polka dots, on some of my rocks.
To Add A Fabric Shape
- First, cut out the shape you want to add. For my rocks, I traced hearts on the wrong side of the fabric and cut it out.
- Then place it where you would like it to go and cover with mod podge.
Finish the Fabric Découpage Rock Paperweight
- Once you are happy with the rock, it needs to dry. Place it on a clean piece of wax paper and set aside to dry.
- For the first couple of hours, check it every 20 minutes or so and flip it over. If you don’t, it will get stuck to the wax paper.
If you are looking for a special idea for Mother’s or Father’s Day, this scrap fabric découpage rock paperweight is a good one. Grandparents would love them too. The best part is that they are fun and easy to make, unique, and useful.
Happy Crafting!