
Stars of the Prairie Free Quilt Pattern
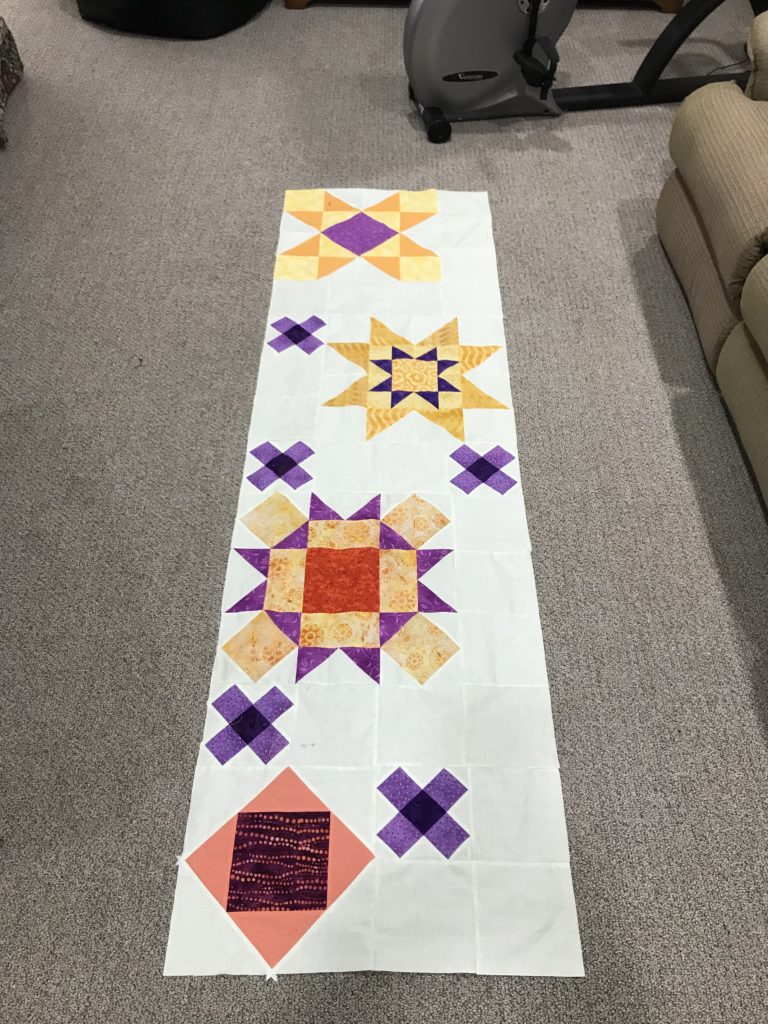
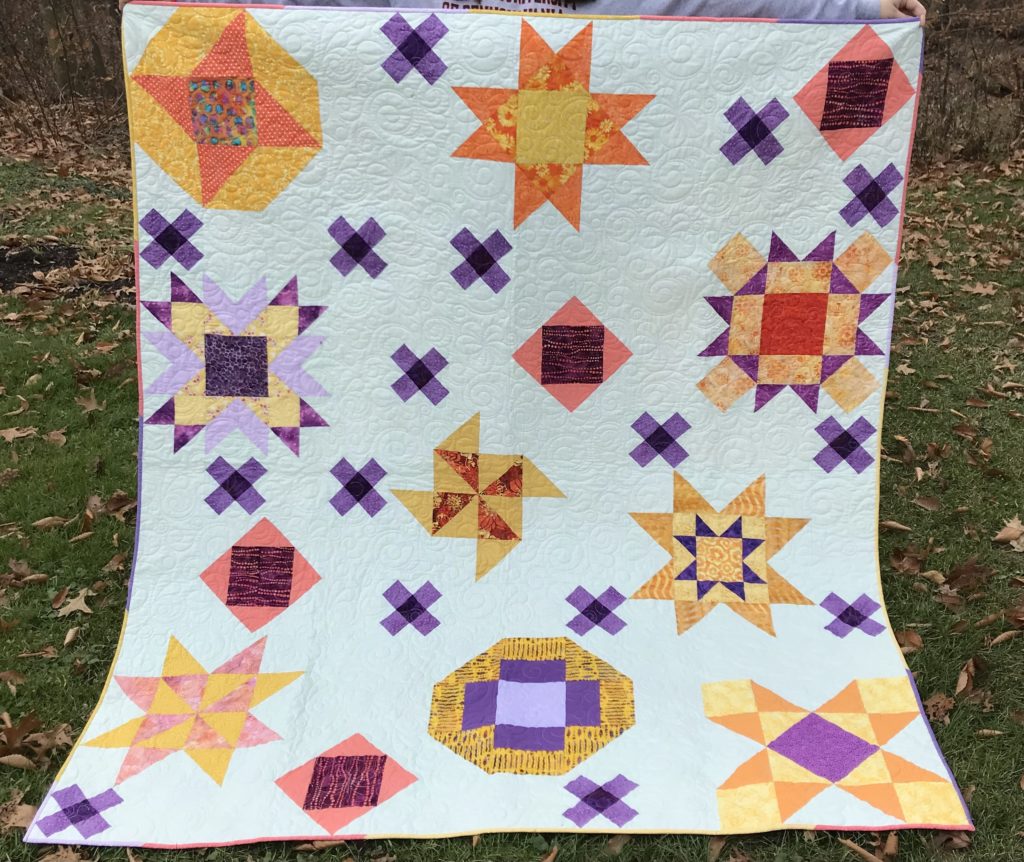
Well, here we are in December and it is finally time to put our quilt together! I’m so excited to show you final results of the 2021 Stars of the Prairie free mystery quilt. I hope you all had as much fun as I did when putting it all together. If you are interested in this quilt, I still have all of the patterns available on my website. In addition, if you are interested in learning how to make one block in particular, you will find links to them throughout this article.
It is fairly easy to assemble the quilt, you just need to stay organized and do it in sections. If you do that, it will come together in a snap. Once finished, your Stars of the Prairie quilt top should measure about 72″ x 84″.
To stay organized you will want to download the pattern. You can find it here:
*DOWNLOAD THE STARS OF THE PRAIRIE QUILT PATTERN HERE*
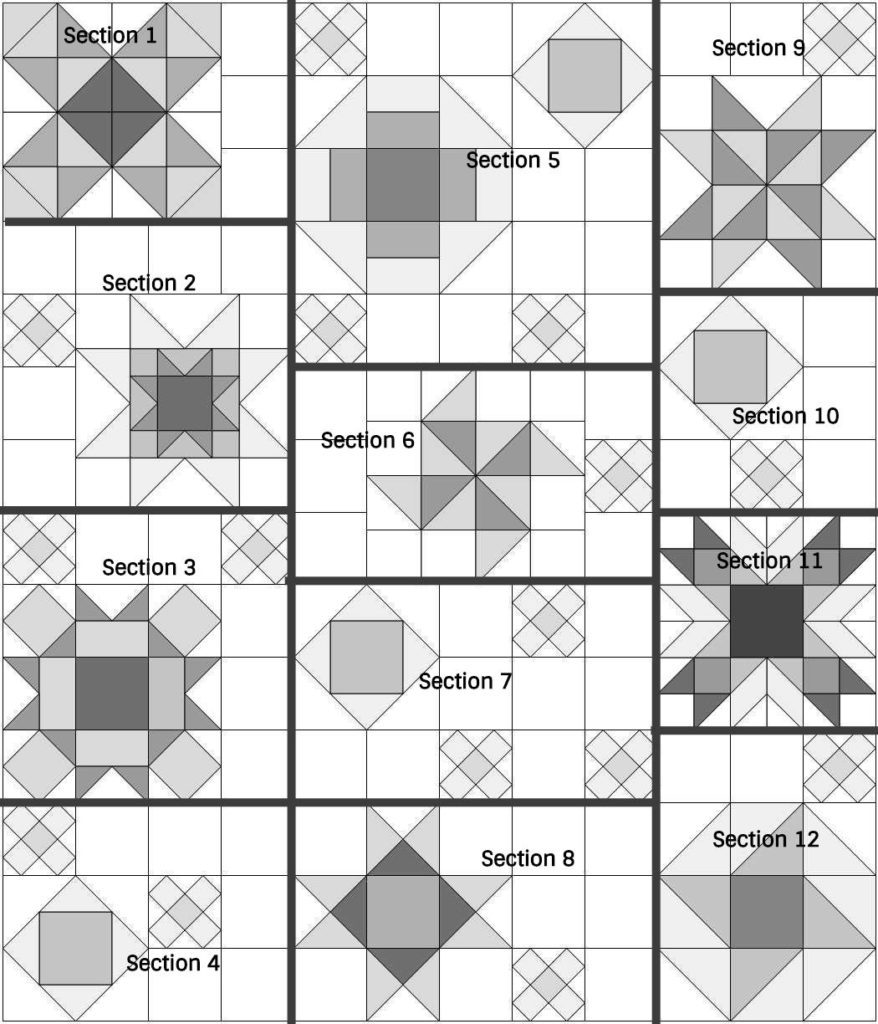
Assembling the Sections
Sew each section together first and then sew them into three columns, as shown. Lastly, sew the columns together.
Video on How to Assemble This Quilt
I did a quick video showing you these same steps. It includes a description of the quilt and how it ended up looking.
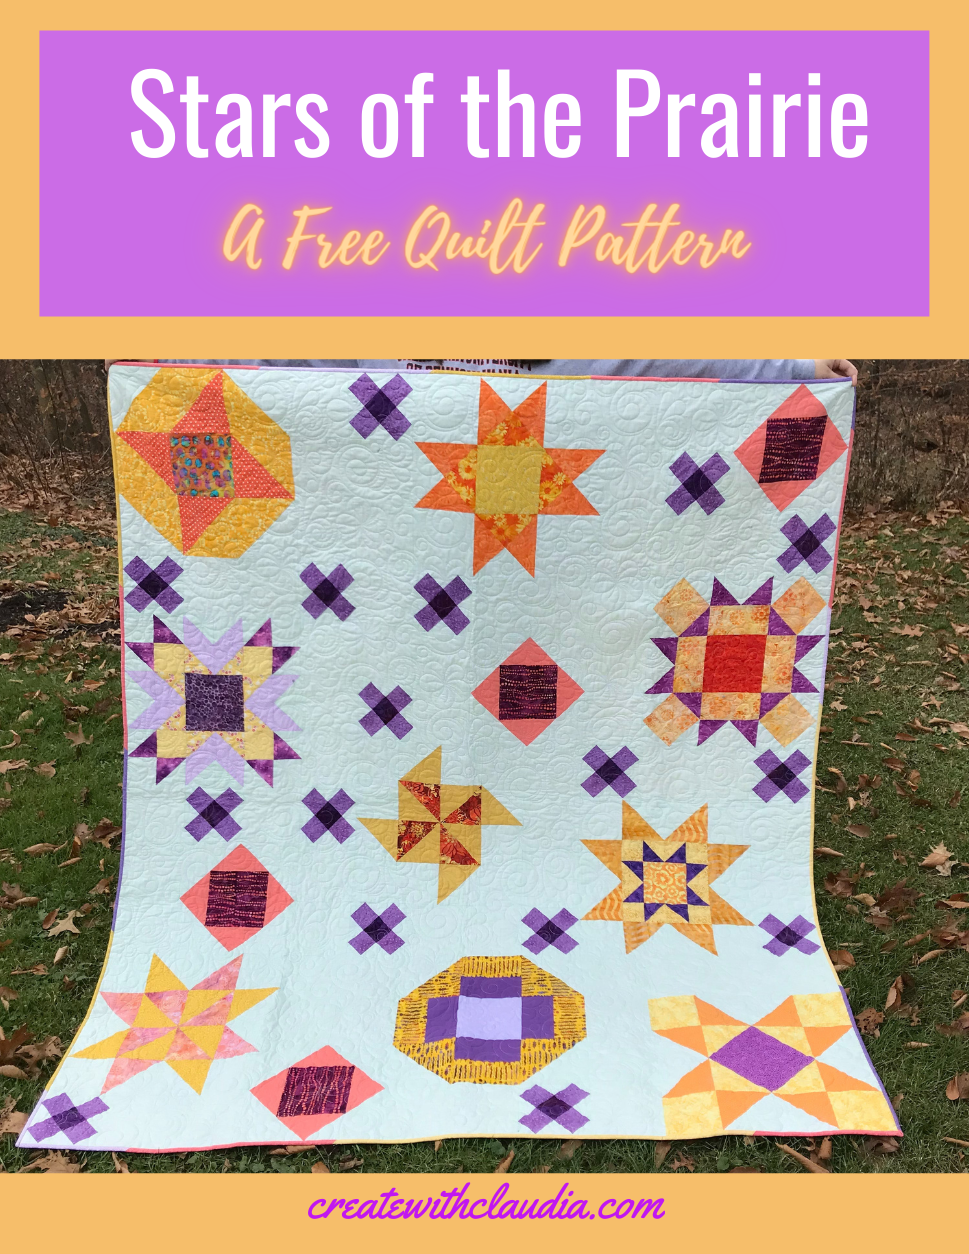
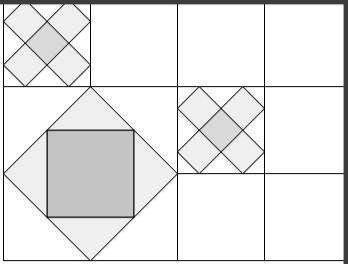
Section 1
For this section you will need the November block as well as 3 of the background squares. Sew the 3 background squares together first and then join them to the November block, on the right side.
Section 2
For this section you will need 6 background squares, one of the January blocks and the July block. Sew together 4 of the background blocks in a row. That will form the top row. Next sew the January block and two of the background blocks in a row. Add this column to the left side of the July block. Finally, join the row of background blocks to the top of the unit you just made.
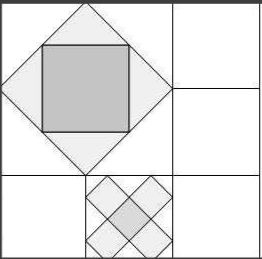
Section 3
For this section you will need 5 of the background squares, 2 of the January blocks and the September block. First, sew together 3 of the background squares in a row. Join it to the right side of the September block. Next, sew together the 2 January blocks and 2 background squares (with the background squares in the center) to form a row. Finally, sew the row you just made to the top of the larger section.
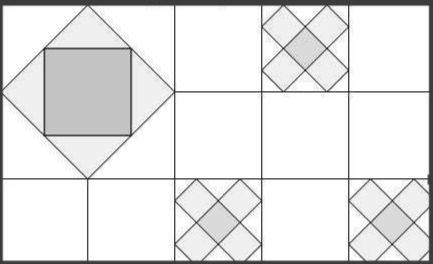
Section 4
For this section you will need 1 of the February blocks, 2 of the January blocks and 6 of the background squares. First, make a row consisting of 1 January block and 3 background squares (in that order). Then make a four patch unit consisting of 1 January block and 3 background squares. Add this section to the right side of the February block. Lastly, add the row you made first and attach to the top of the section you just made.
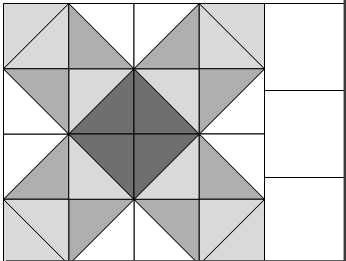
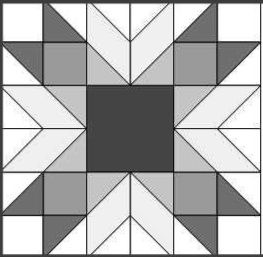
Section 5
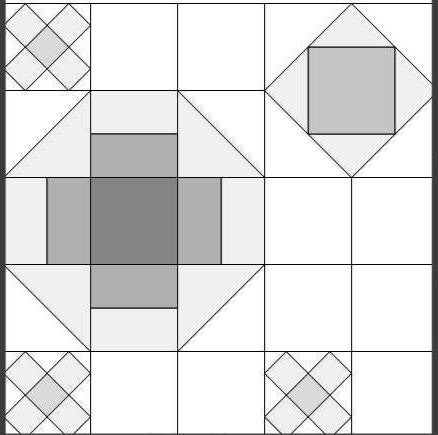
For this section you will need the March block, 1 of the February blocks, 3 of the January blocks and 9 of the background squares. Sew one January block and 2 background squares to form a row (in that order). Repeat to make one more row. Sew one of these rows to the top of the March block and one to the bottom of it, both with the January block on the left side. Set aside.
Next, sew 2 of the background squares together. Repeat one time. Add these two units to the bottom of the February block. Then sew one January block to one background square. Add this to bottom of the unit.
Finally, add this last section you just made to the right side of the first section you made.
Section 6
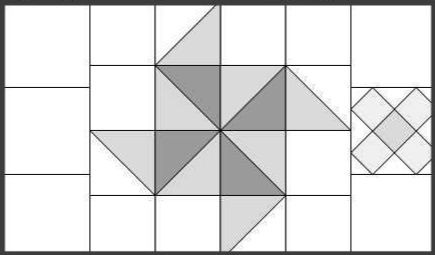
For this section you will need 1 January block, 5 background squares and the June block. First, sew together 3 background squares in a row. Then sew 2 background squares and the January block in a row (with the January block in the center) Add the 1st row sewn to the left side of the June block. Add the 2nd row sewn to the right side of the June block.
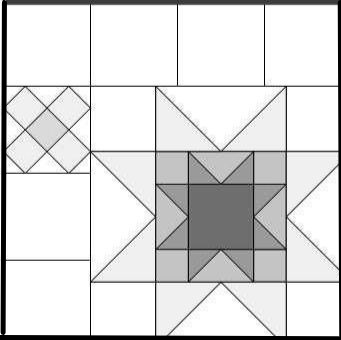
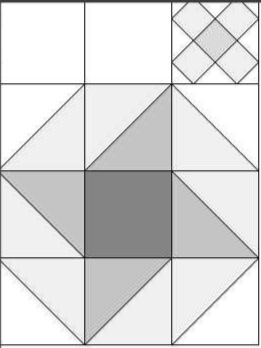
Section 7
For this section you will need one February block, 3 January blocks and 8 background squares. Sew together 2 of the background squares and add this row to the bottom of the February block. Next make 3 rows; the first one made up of a background square, a January block and a background square (in that order), the second one made up of 3 background squares and the third made up of 1 January block, 1 background square and 1 January block (in that order). Sew the 3 rows together and add this section to right side of the section you made earlier.
Section 8

For this section you will need the May block, 1 January block and 5 background squares. Sew together 4 of the background squares in a 4 patch. Next, sew together the January block to 1 background square. Add this row to the bottom of the 4 patch. Lastly, sew this unit to the right side of the May block.
Section 9

For this section you will need the April block, 1 January block and 2 background squares. Sew together 2 background squares and the January block in a row (in that order). Add this row to the top of the April block.
Section 10
For this section you will need 1 February block, 1 January block and 4 background squares. Sew together 2 of the background squares and add this unit to the right side of the February block. Then make a row of 1 background square, 1 January block, and 1 background square (in that order). Add this row to the bottom of unit you made earlier.
Section 11
This one is super easy, it’s just the October block.
Section 12
For this section you will need 2 background squares, 1 January block and the August block. First, make a row with 2 background squares and the January block (in that order). Add this row to the top of the August block.
Assembling the Stars of the Prairie Free Quilt Pattern
Once all of the sections have been completed, sew the quilt top together in columns as shown in the diagram below. Quilt and bind as desired.
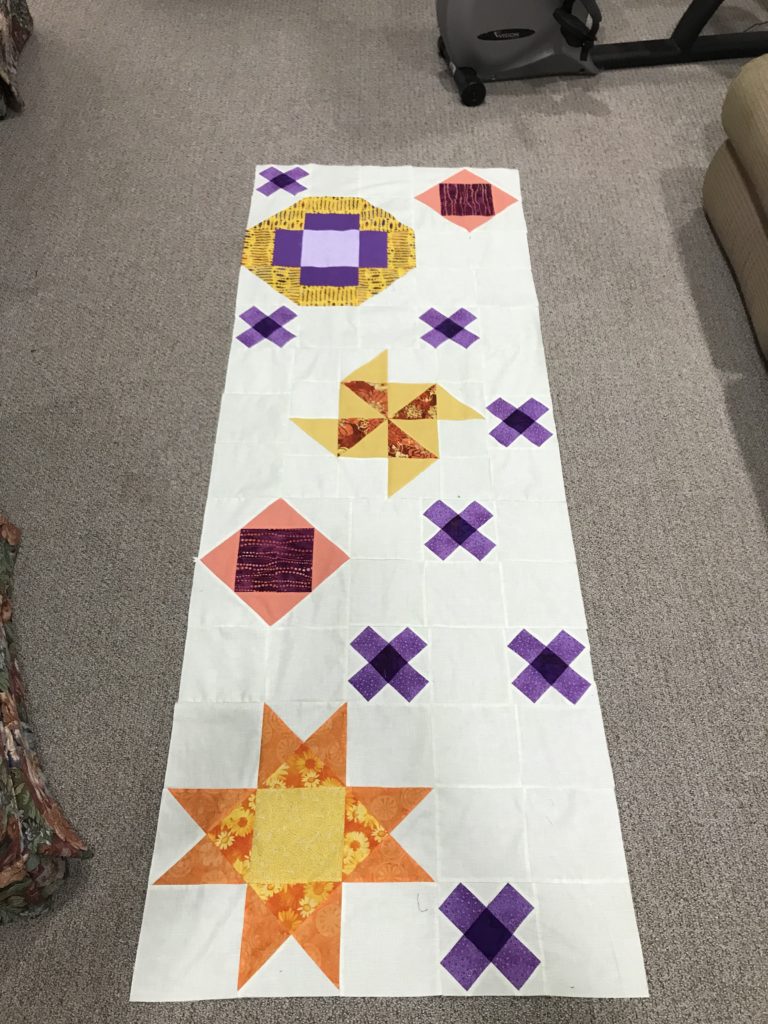
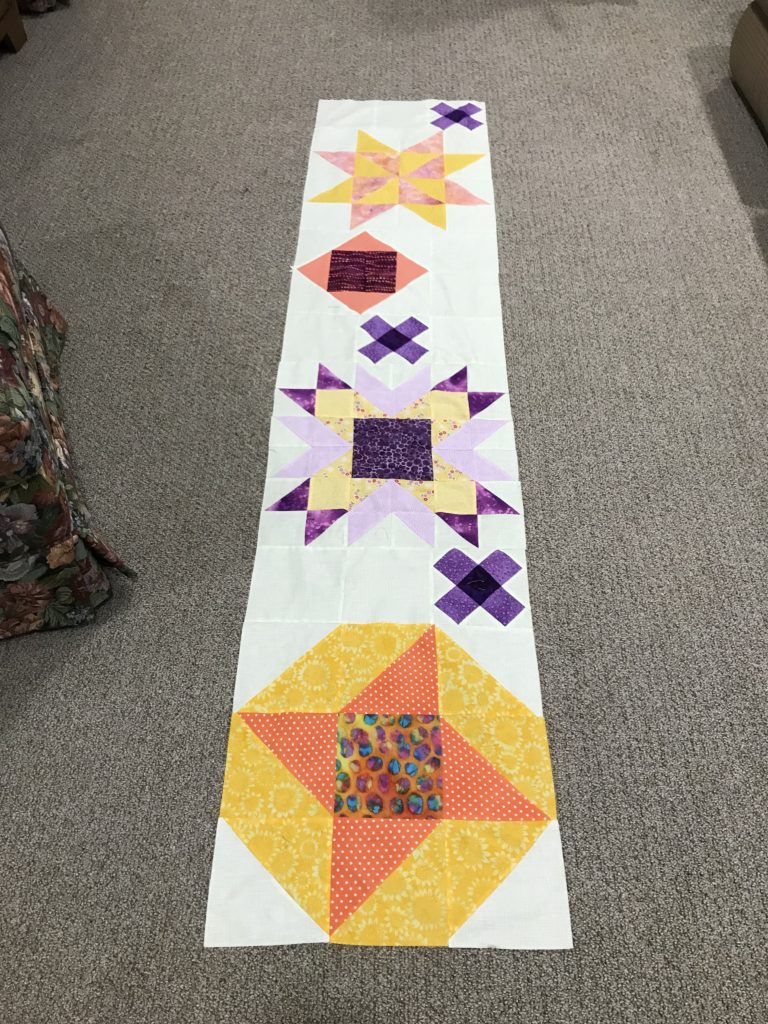
Tip: I sewed my quilt top together in columns first. Then sewed the long columns together.
I sent this quilt out to my longarmer, Melinda Keppler of ScottieBelle Designs to do the quilting. I absolutely love how it turned out!
Thank you for joining me in the 2021 Create with Claudia Mystery Quilt. I hope you had as much fun as I did and that you love your prairie stars.
I plan to do another mystery quilt in 2022, however it will not be as long as this one. If you are interested, I have this facebook group which is all about my mystery quilts. Members show off their beautiful blocks throughout the event and it is loads of fun to see the different color combinations people come up with. See you next year!
Happy Quilting! – Claudia
![❄️ I’m excited to be part of the Winter Haven Project Hop! ❄️
I’m joining a group of talented makers to celebrate Winter Haven, the newest fabric collection by @designsbyrr for @benartex_fabrics.
Inspired by quiet winter woods, cozy handmade traditions, and little woodland surprises, Winter Haven is perfect for quilts, bags, home décor, garments, and holiday sewing.
I’ll be sharing my [PROJECT NAME] made with Winter Haven, and I can’t wait for you to see it!
🎁 GIVEAWAY
One lucky winner will receive:
• A Winter Haven fabric bundle from @benartex_fabrics
• Pattern prizes from participating designers
• Additional patterns from @designsbyrr
✨ HOW TO ENTER
✔️ Follow the makers participating in the hop
✔️ Like and comment on any Winter Haven Project Hop post
✔️ Tag friends for extra entries (1 tag = 1 entry)
✔️ Share your favorite hop post for bonus chances to win
❄️ FOLLOW ALONG
✨ @designsbyrr — Understory • Near & Deer • Merry Mixer • Oh Tannenbaum
✨ @katiemaequilts — Oh What Fun Mini Quilt
✨ @bretquiltdesigns — Quilted Casserole Hot Pad
✨ @everydaystitches — Windy City Quilt
✨ @createwithclaudia — Festive Table Runner
✨ @briannaroberts71 — Tabitha Tote
✨ @shadowvalleyquilts — Northern Glow Mini Quilt
✨ @slightlybiasedquilts — Starlit Night Quilt
The hop runs July 20–30, with a new featured project every day. Follow along for lots of winter sewing inspiration!
#WinterHavenFabric #RachelRossiFabric #Benartex #Quiltspiration #Quilting Sewing ModernQuilt QuiltPattern HandmadeHoliday WinterSewing ProjectHop](https://www.createwithclaudia.com/wp-content/plugins/instagram-feed/img/placeholder.png)