
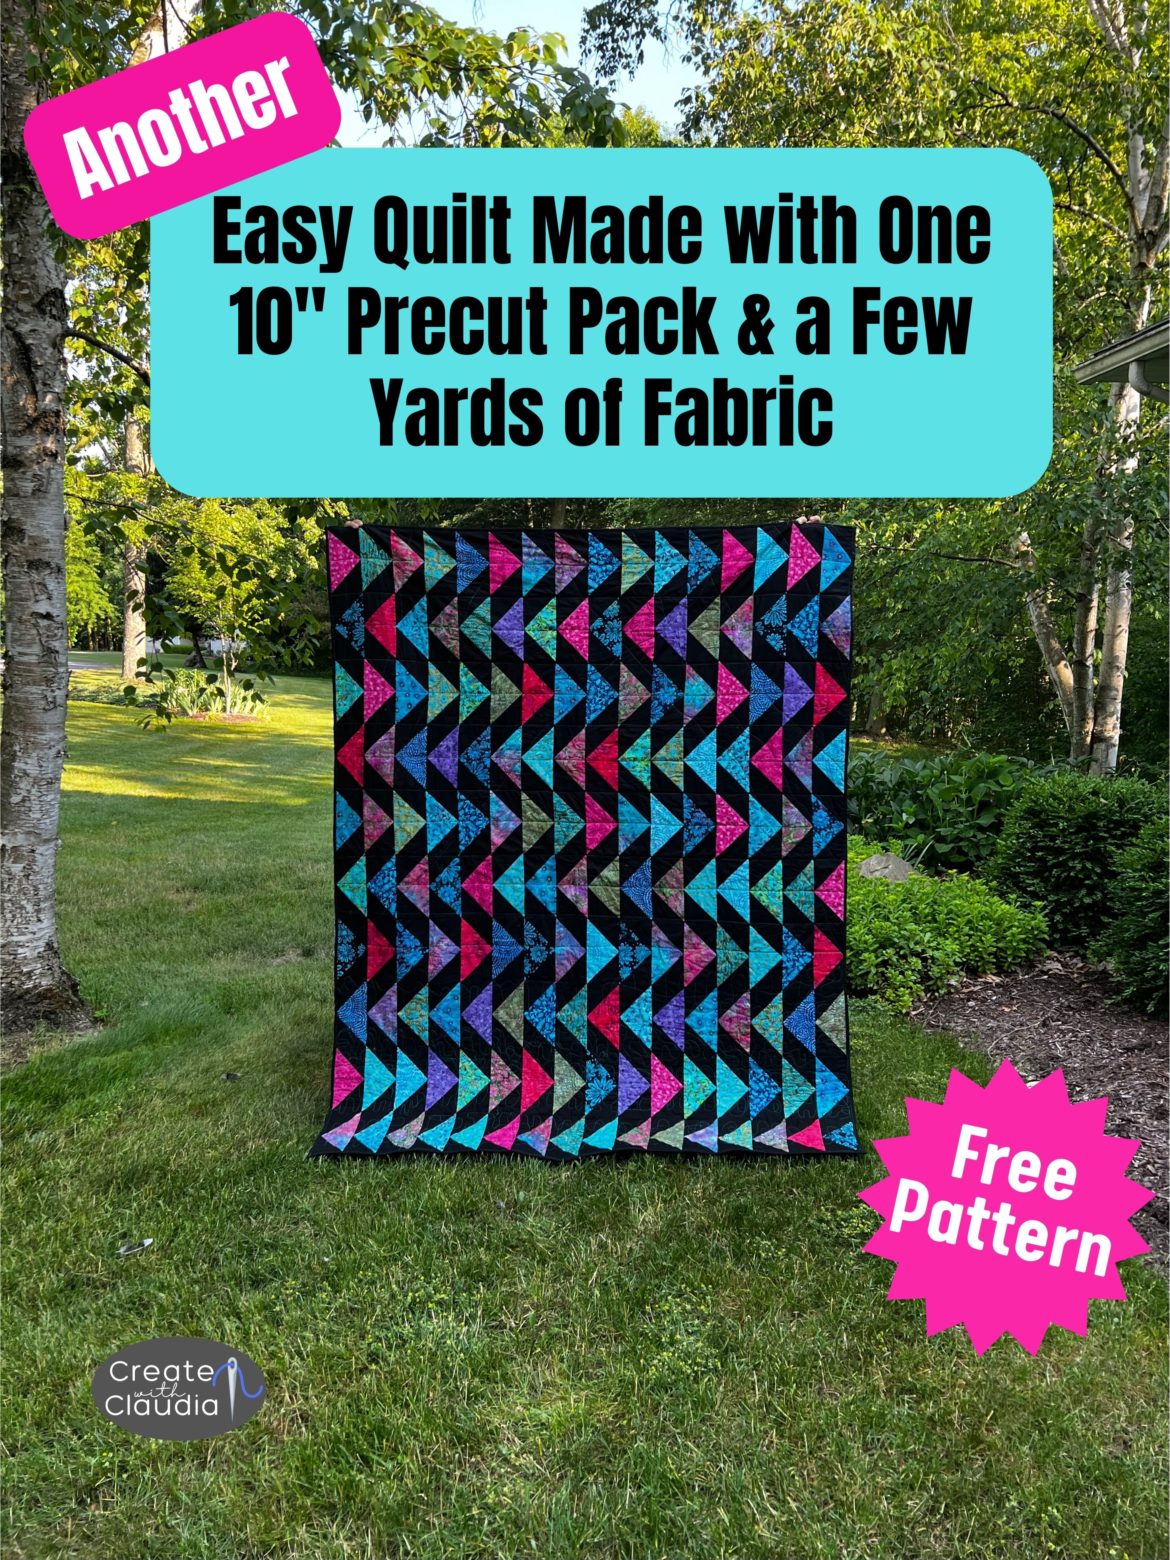
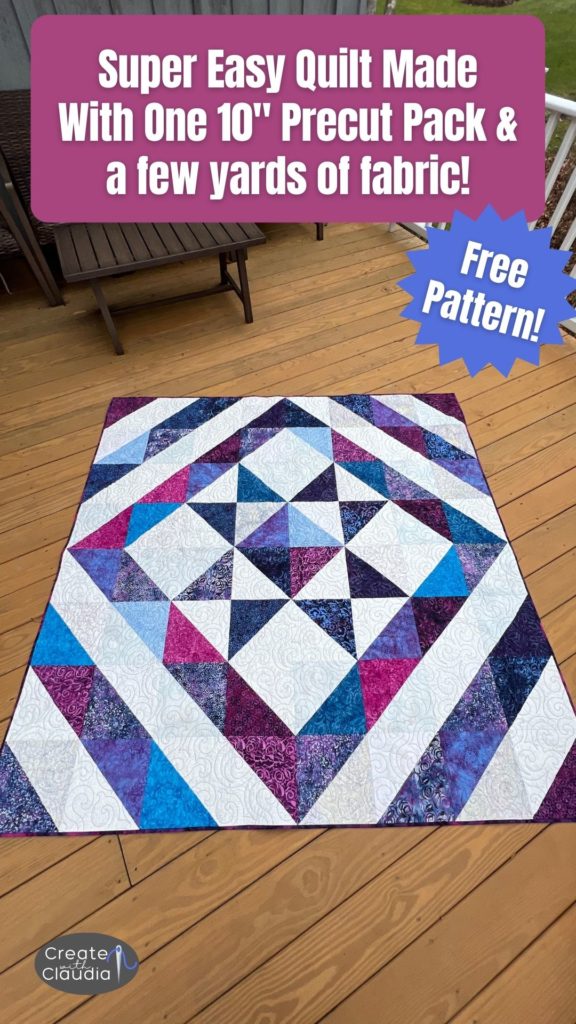
Easy Quilt Pattern Made with Precuts & How to Make Flying Geese 4 at a Time
I always love it when it is time for another Island Batik ambassador challenge. This month we were asked to make something with a Flying Geese design using one of the precuts that they sent us. One of the precuts I received was ideal for the project that I had in mind. Stay tuned while I show you my easy quilt pattern made with a pack of 10″ precuts and some background fabric.
You can watch my video tutorial which guides your through the quilt-making process or read on for complete directions. You will also find a free downloadable pattern further on in the article.
This project is ideal for your favorite 10″ precut stack.

Disclosure: Items in the post were generously provided by Island Batik, Hobbs Batting, Aurifil Thread and Schmetz Needles
What I Used to Make This Quilt
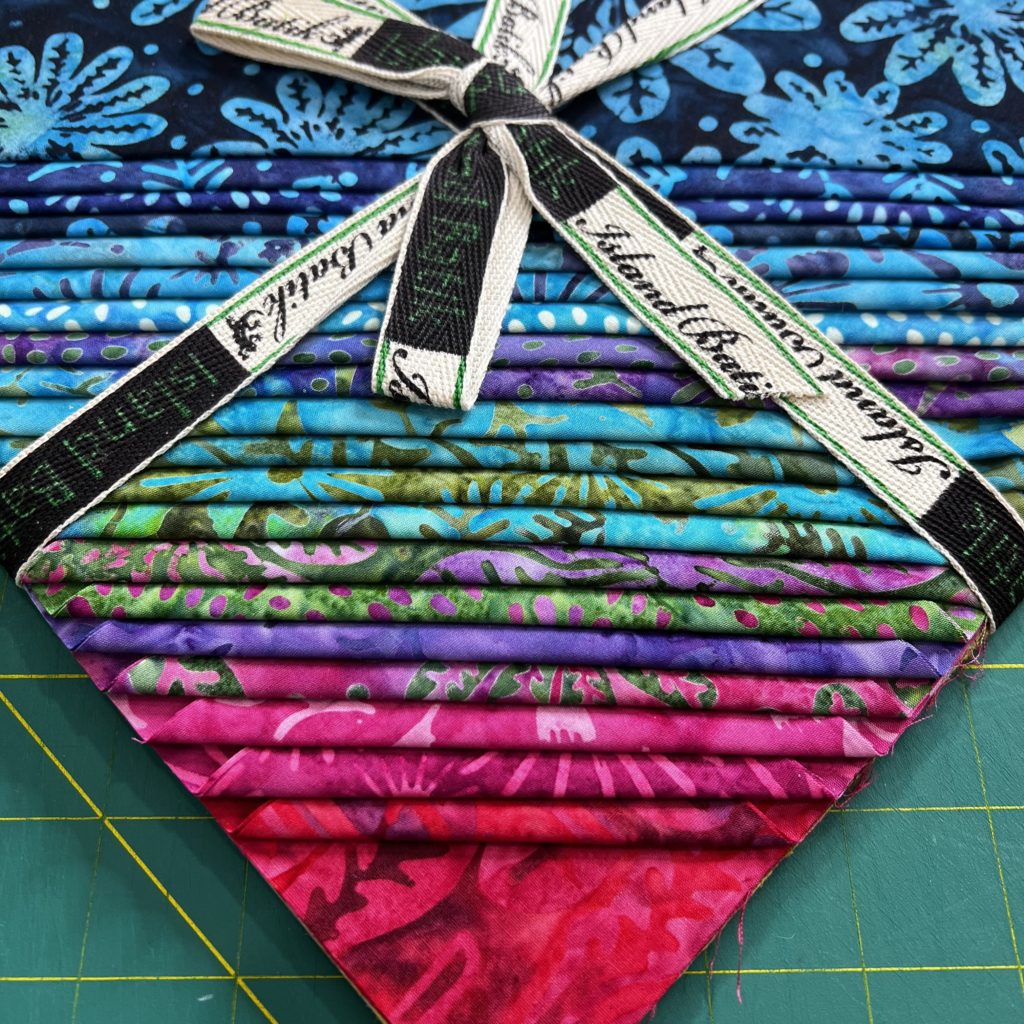
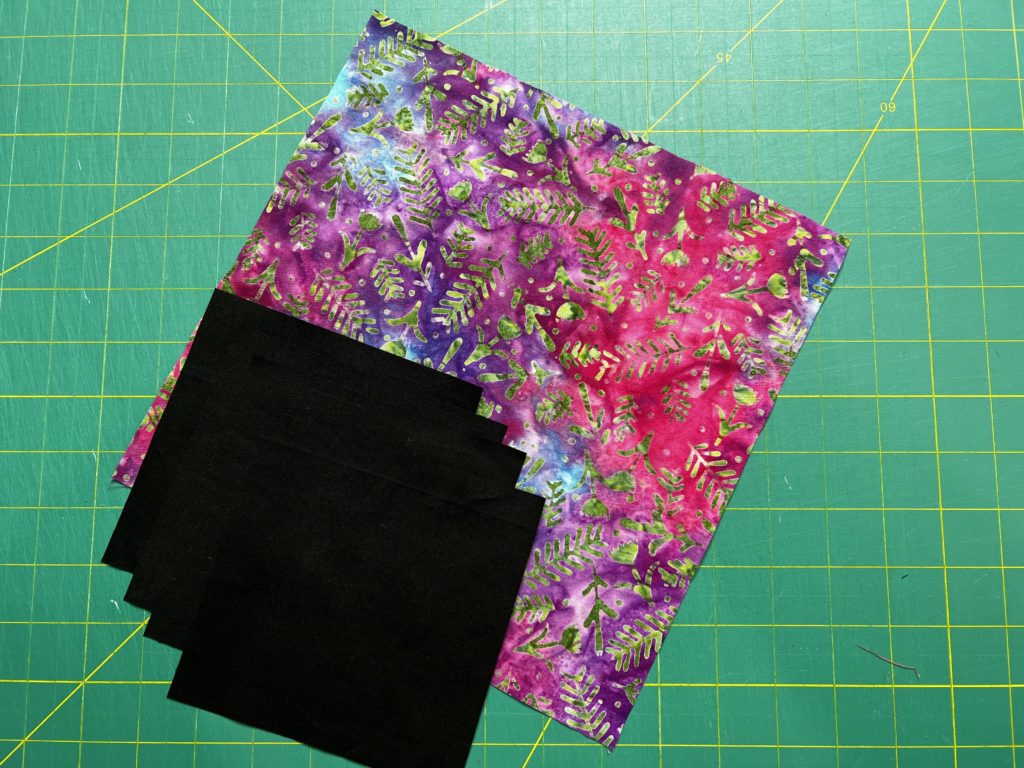
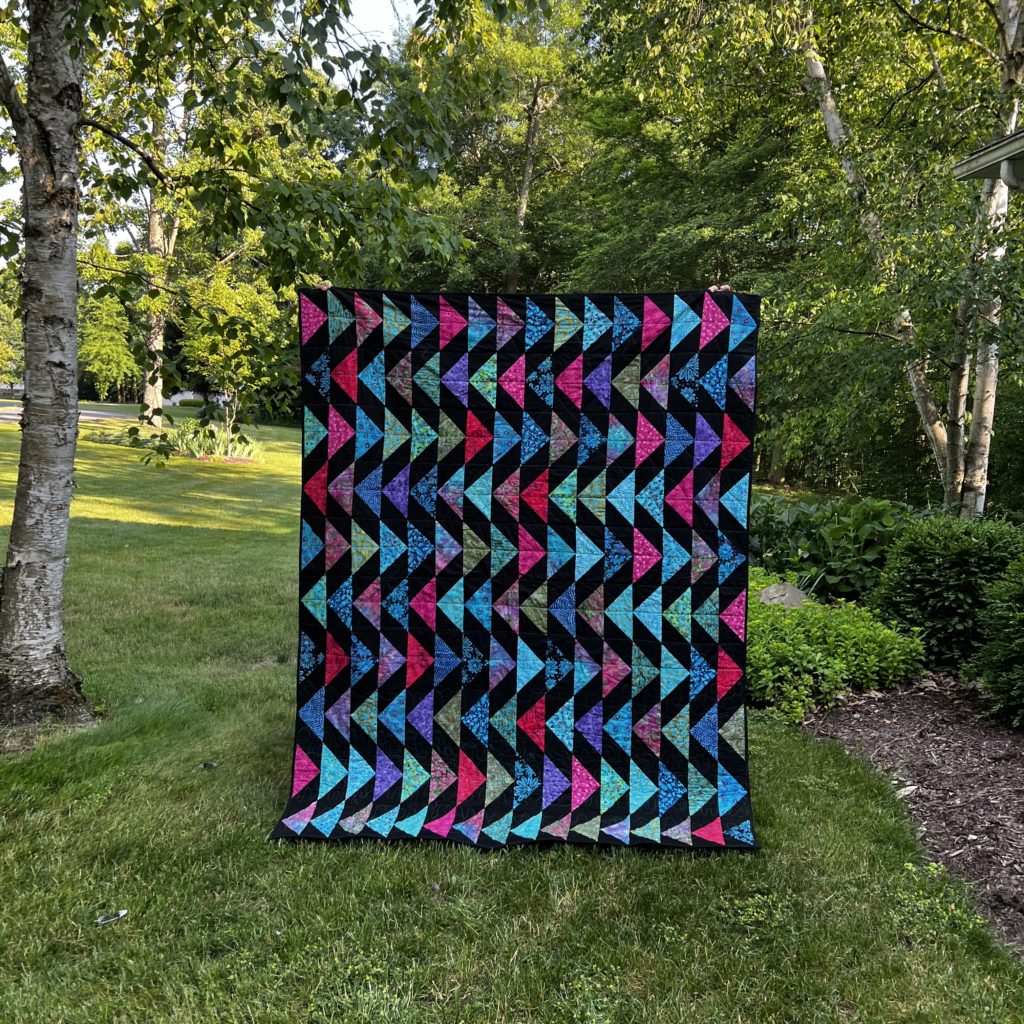
Of course the highlight of any quilt is the fabric and I was given this gorgeous 10″ precut stack of Island Batik’s new line called Summer Twilight. It was designed by Tammy Silvers of Tamarinis. What can I say about this line….It Is Stunning! Look at those jewel tones.
For the background fabric I used Island Batik’s solid black. If you have never given their solids a try, I urge you to because they have a wonderful feel to them.
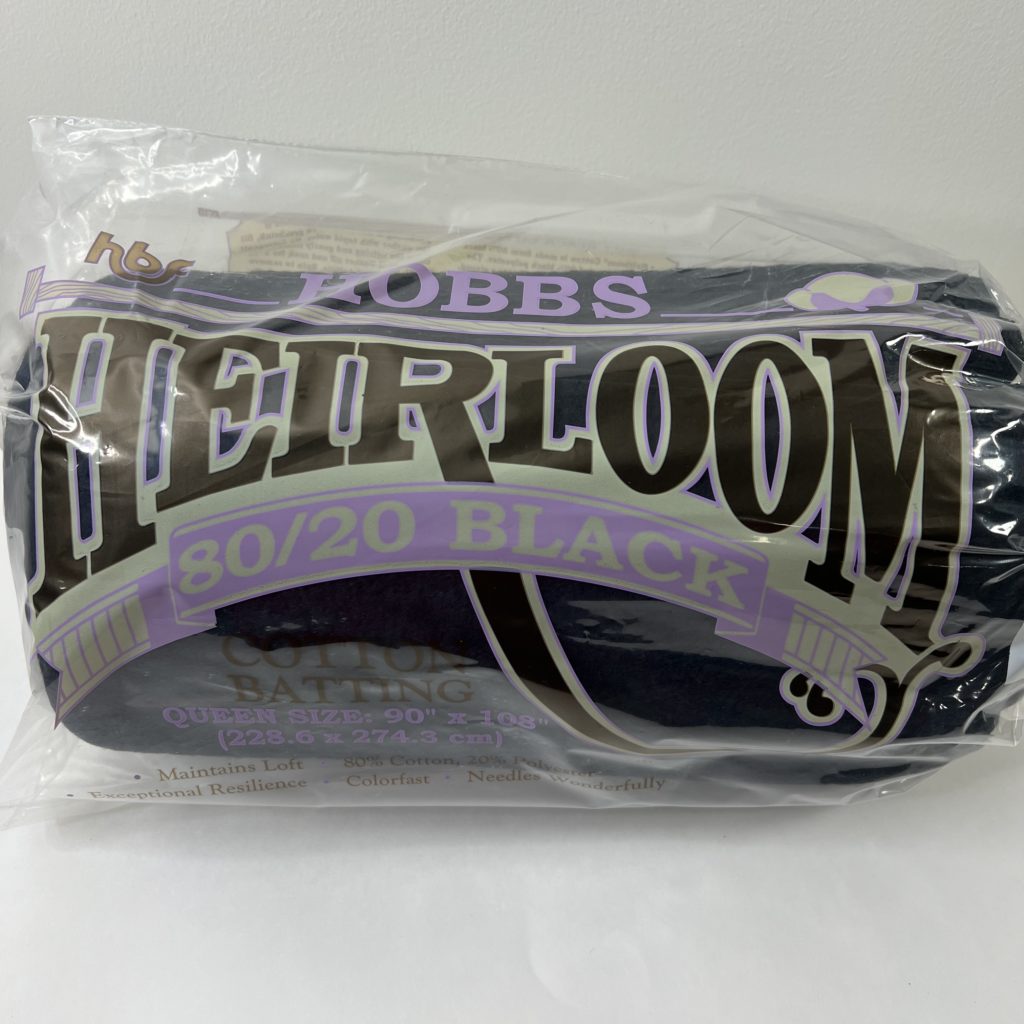
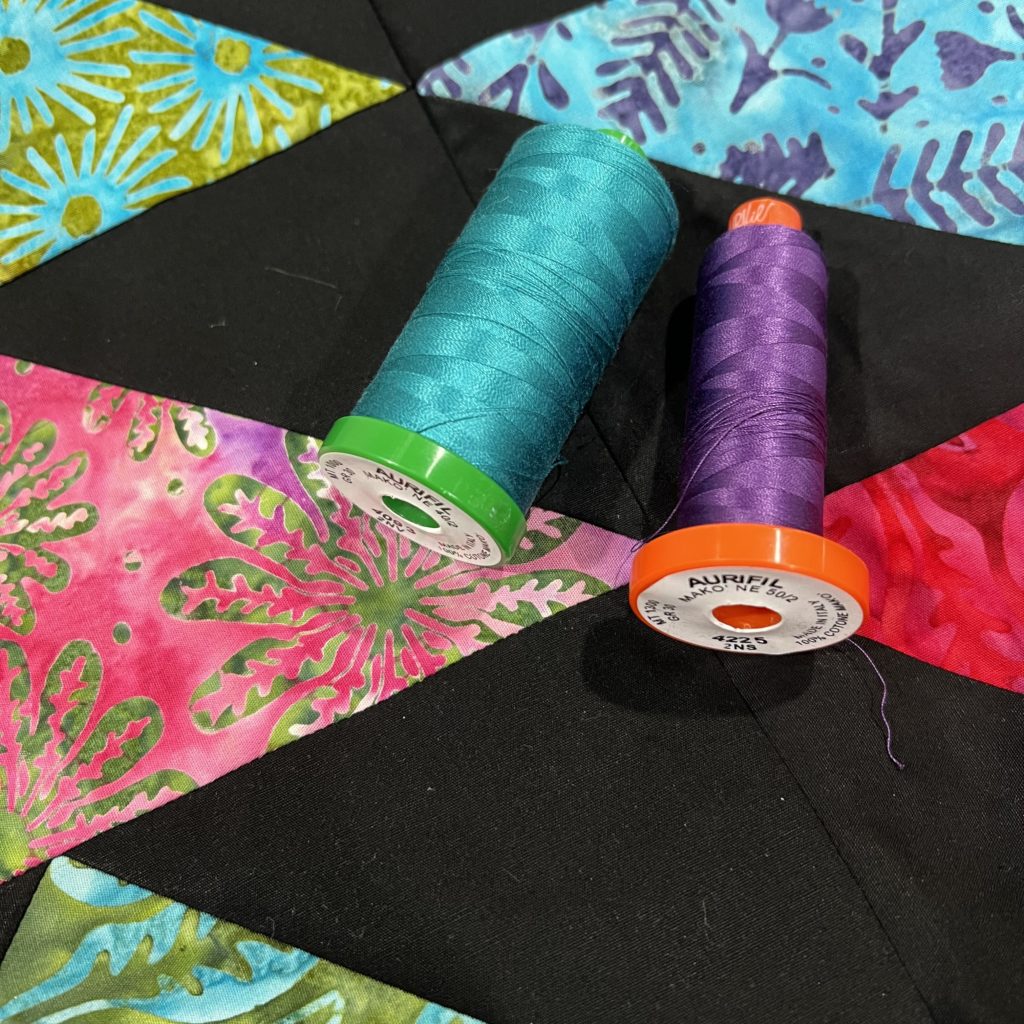
For the batting I used Hobbs Heirloom 80/20 Black. It was perfect for this dark quilt. The thread I used was Aurifil. I used their Eggplant to piece the top and their Jade Teal to quilt it. In my machine I always use Schmetz 80/12 Microtex to quilt my batiks.
Let’s Make This Quilt!
**Download the Free Easy Quilt Pattern Made with a Stack of 10″ Precuts and Background Here**
Supplies Needed
- One stack of 10″ precuts (you’ll need 40 of them)
- 3 yards of background fabric cut into 160 squares that are 5 1/4″ square
- General quilting/sewing supplies
Making the Flying Geese
First you need to make the Flying Geese units. There are 160 in this quilt. They measure 4 1/2″ x 8 1/2″ unfinished each. To speed up the process I use the 4 at a time method.
You’ll need one of the 10″ squares and four of the 5 1/4″ squares of background fabric.
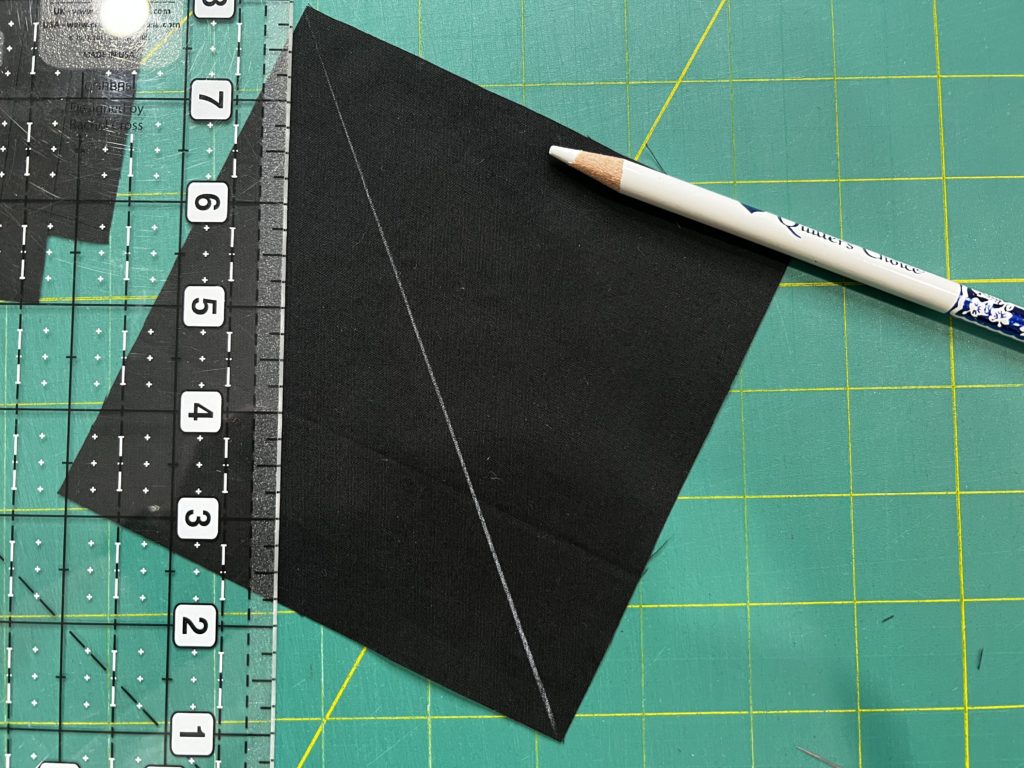

Draw a diagonal line on the back (wrong) side of the background fabric squares. Pin them to opposite corners of the larger square with right sides facing.
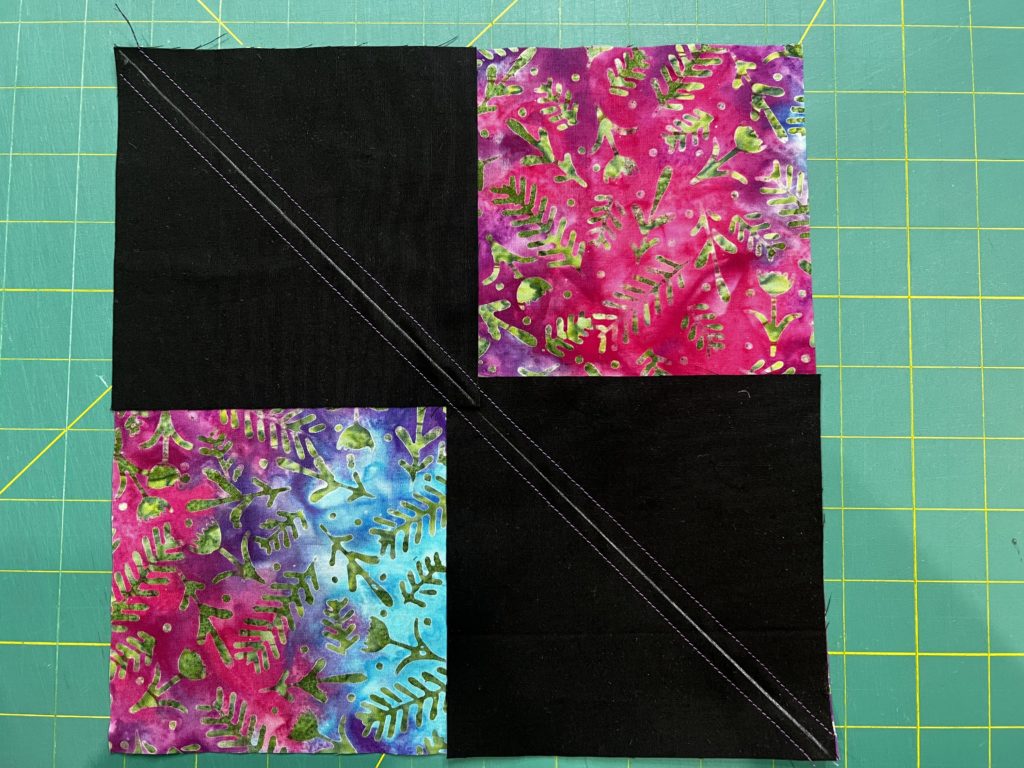
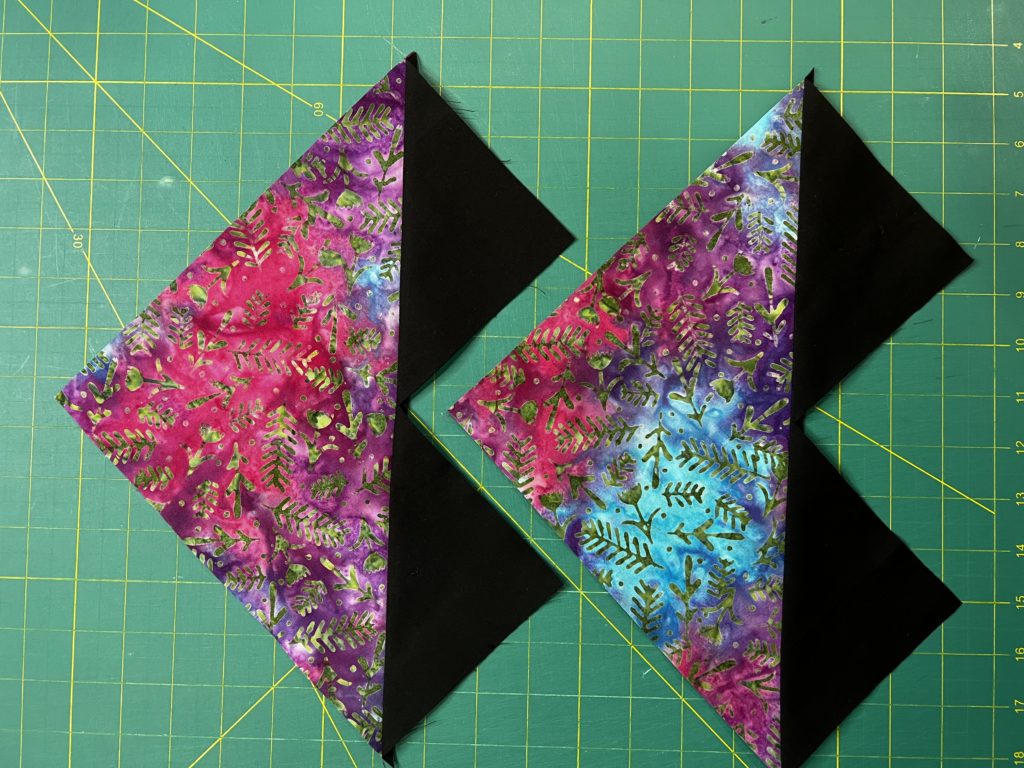
Sew a 1/4 inch seam along both sides of the drawn line. Then cut in half on the drawn line. Press towards the background fabric triangles.
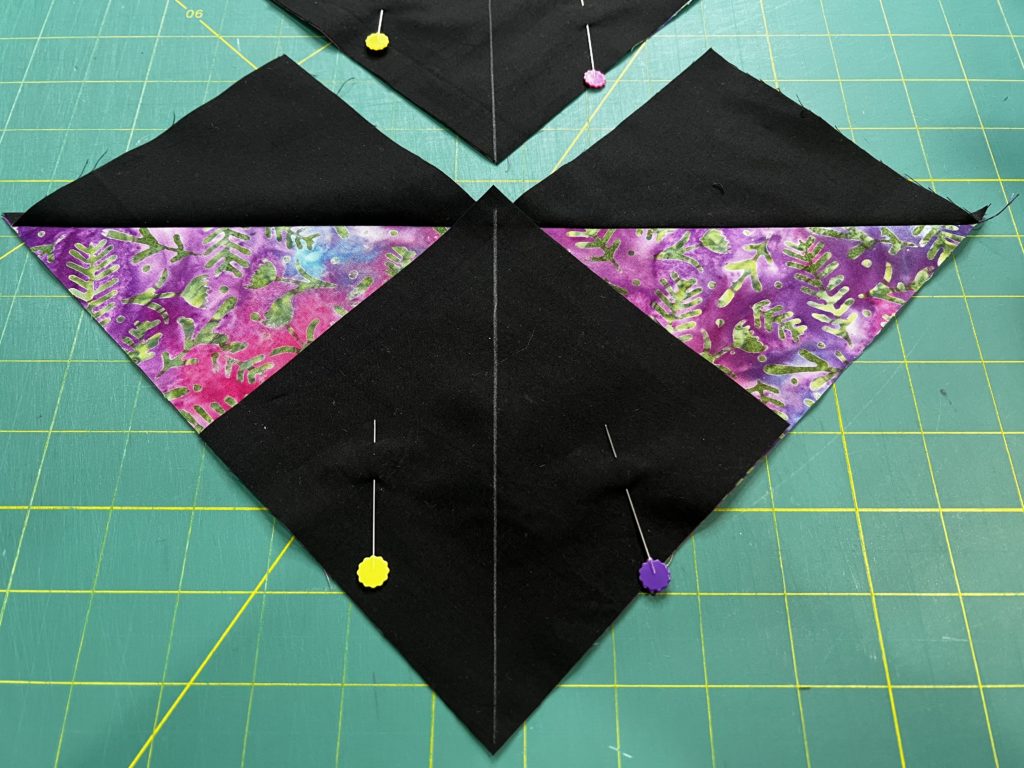
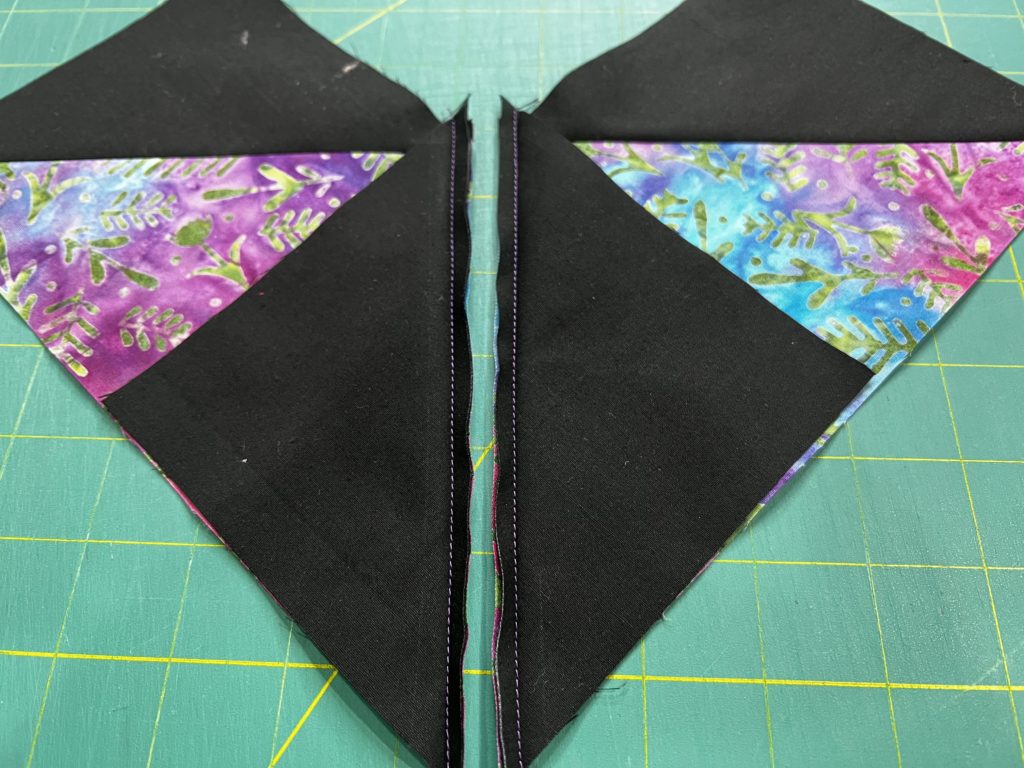
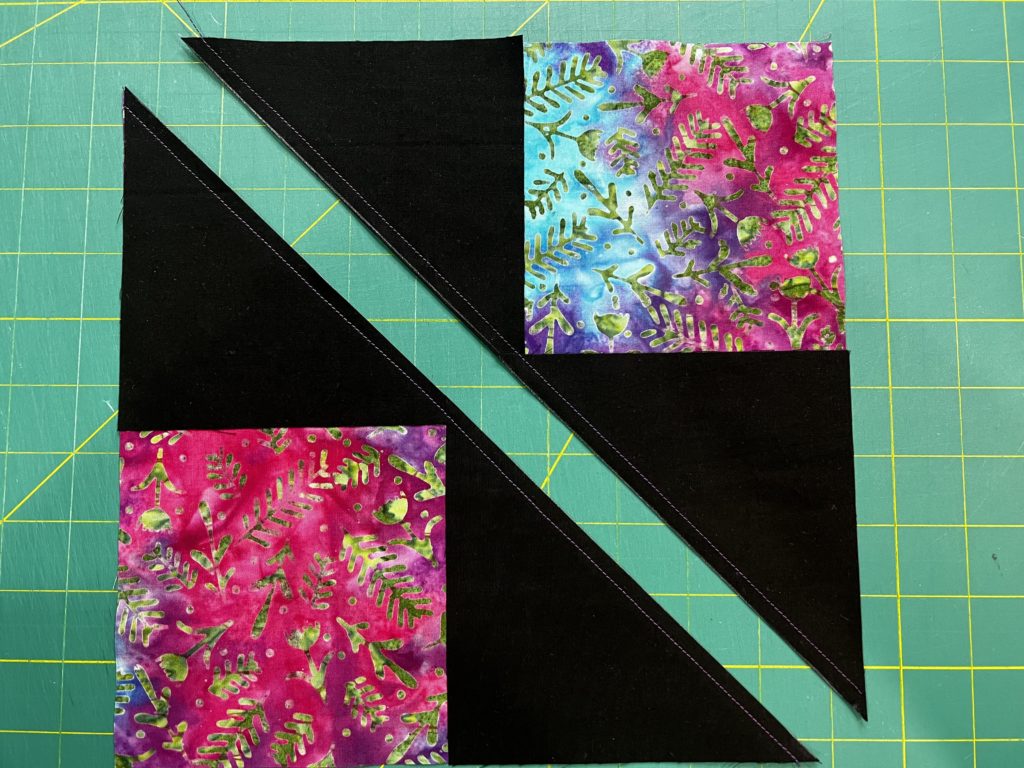
Next, pin one of the background fabric squares to the open corner of the unit made earlier. Sew a 1/4″ seam allowance along both sides of the drawn line. Cut in half on the drawn line. Press. Repeat and you end up with 4 flying geese that need to be trimmed to 4 1/2″ x 8 1/2″.
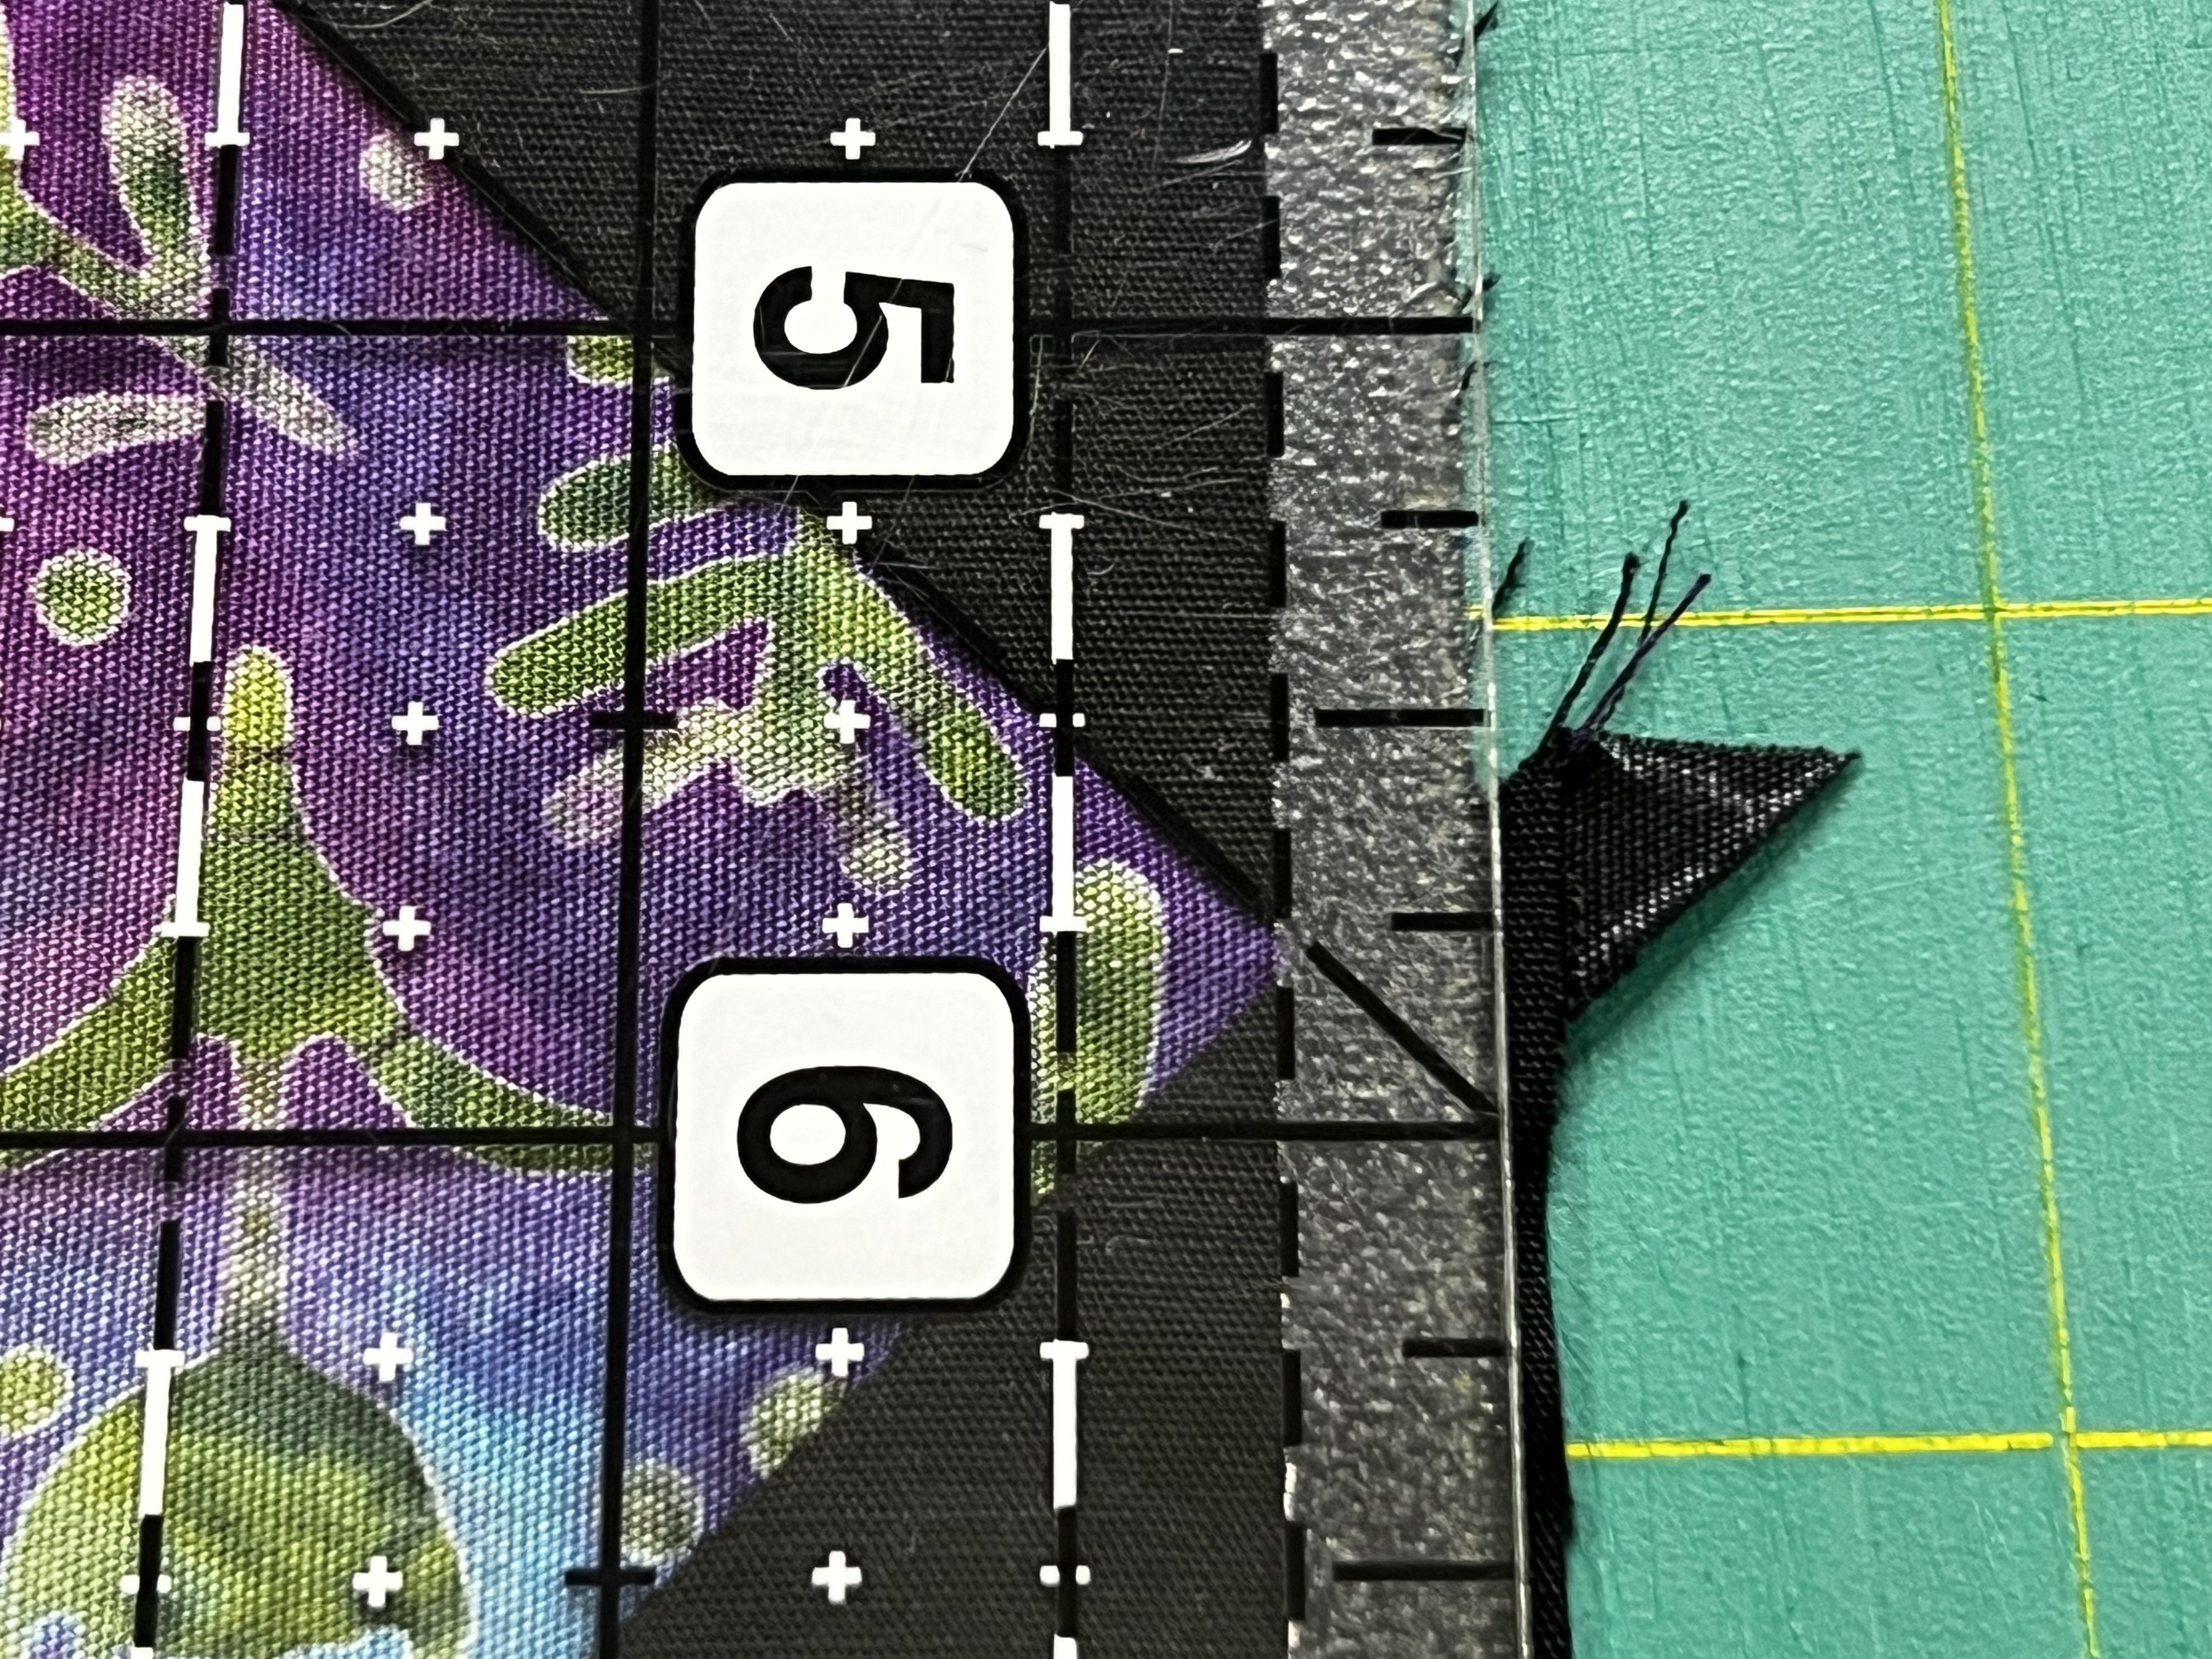
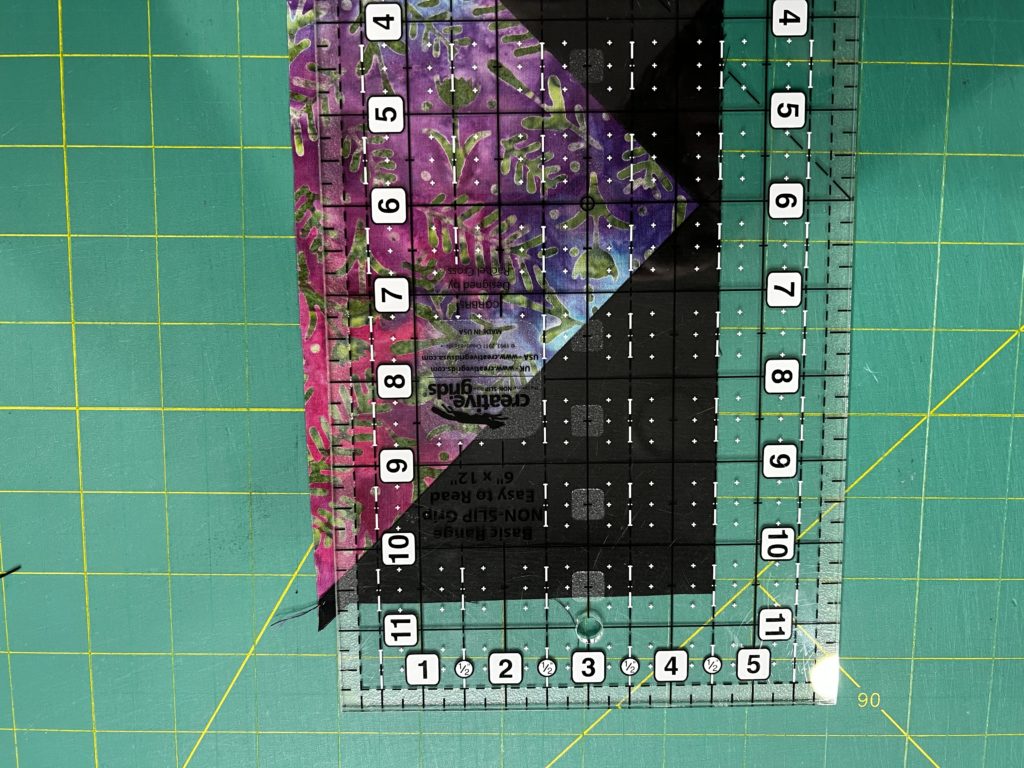
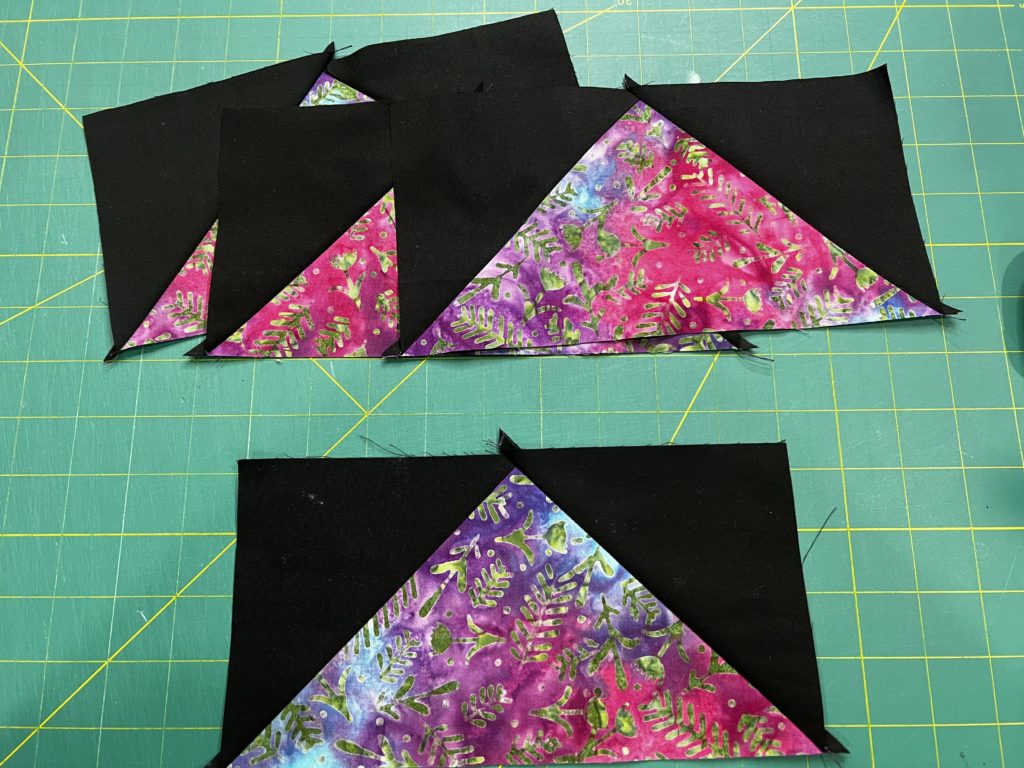
First trim the edge where the point is. Using your ruler and the 45 degree line will help you. You want to leave a 1/4″ from the triangle point to the edge of the fabric. There may be a very scant amount (or none) to trim. Trim the opposite edge (the long edge of the triangle), measuring 4 1/2″ from the top edge just trimmed.
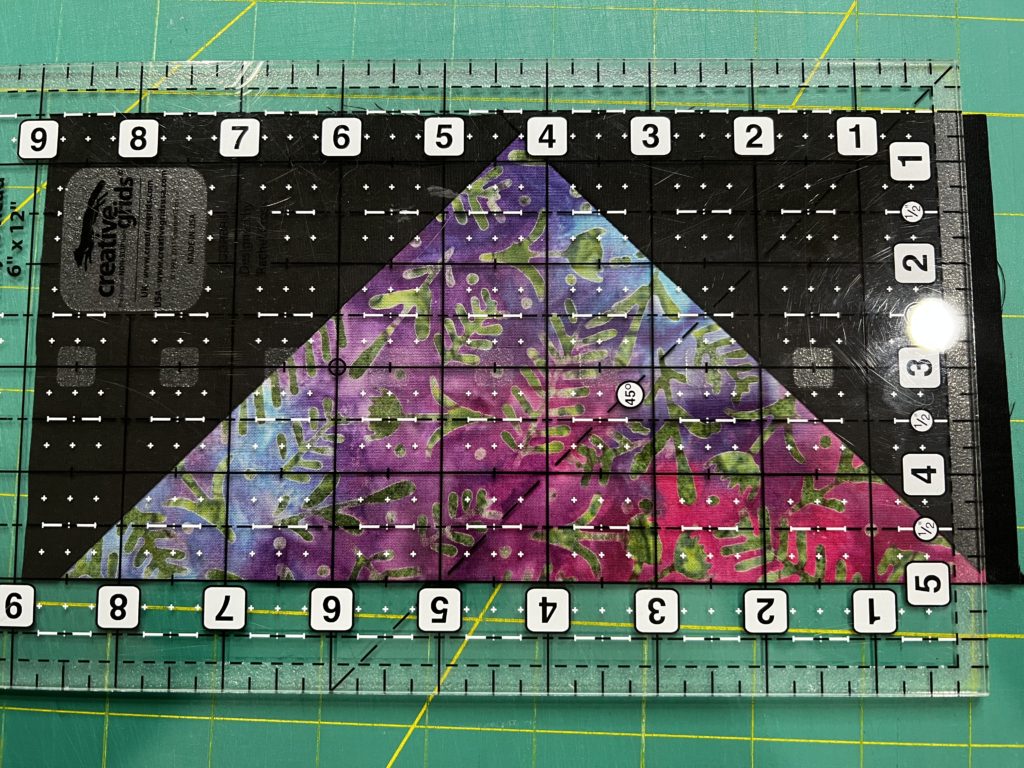

Line up your ruler with the bottom edge of the triangle and place the 4 1/4″ mark at the point of the triangle. Cut off the right side of the triangle. Lastly, measure 8 1/2″ from the edge you just cut and trim off the opposite edge. Repeat with all four flying geese.

Assembling the Quilt Top
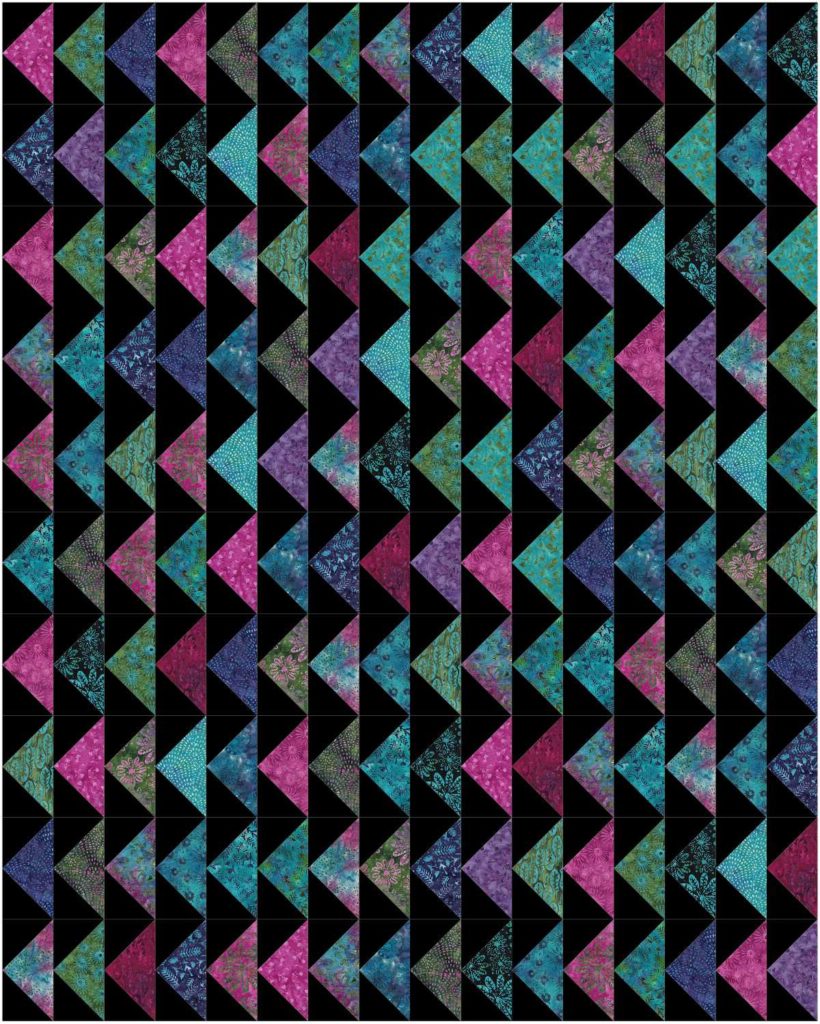
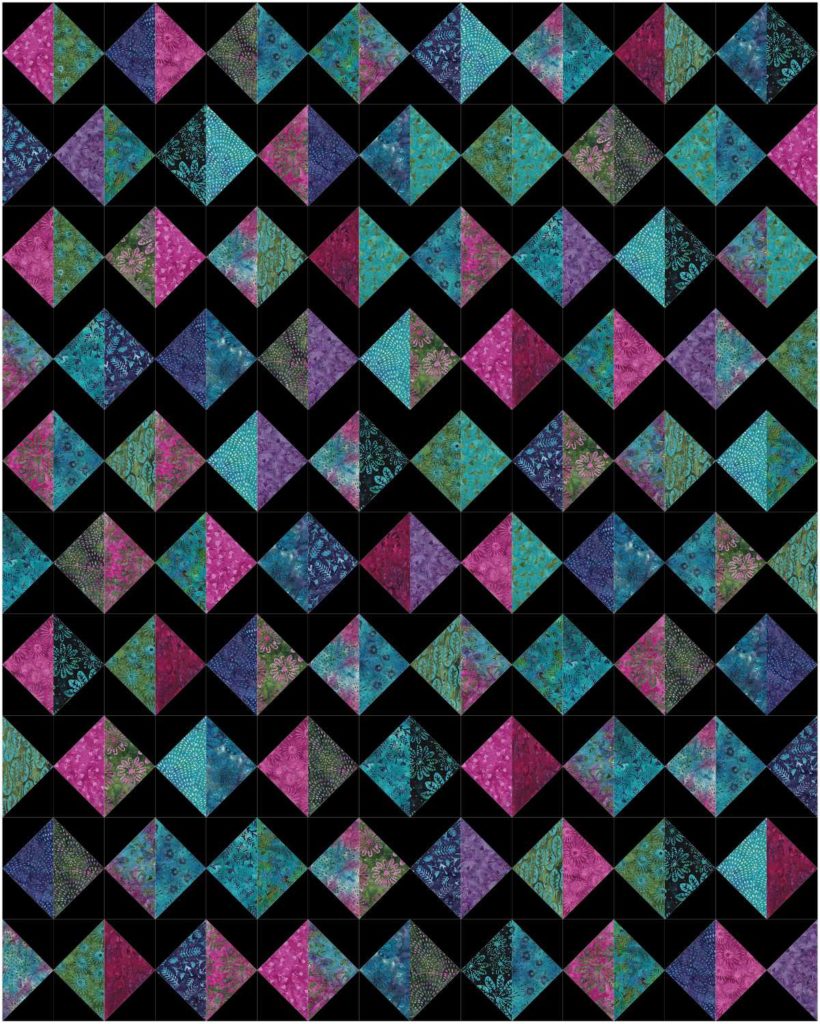
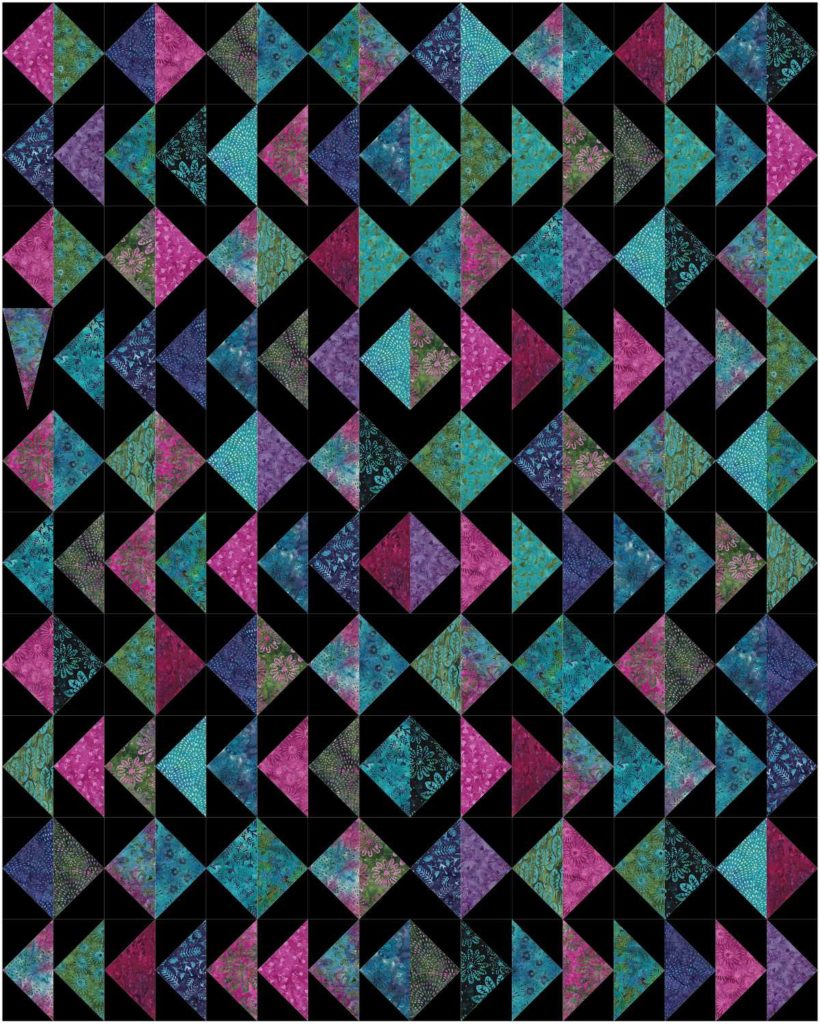
Once you have 160 flying geese you can start assembling the quilt top. I used Electric Quilt 8 to play around with various layouts. Once you decide on a layout, sew the quilt top together by individual rows first. Then sew the completed rows together. The top measures 64″ x 80″ and to get that size each row is made up of 16 flying geese. There are 10 rows in the quilt.
Possible Layouts
Once you are done with the top, finish the quilt as your normally would. Layer with backing and batting and quilt as desired. Finally add the binding.
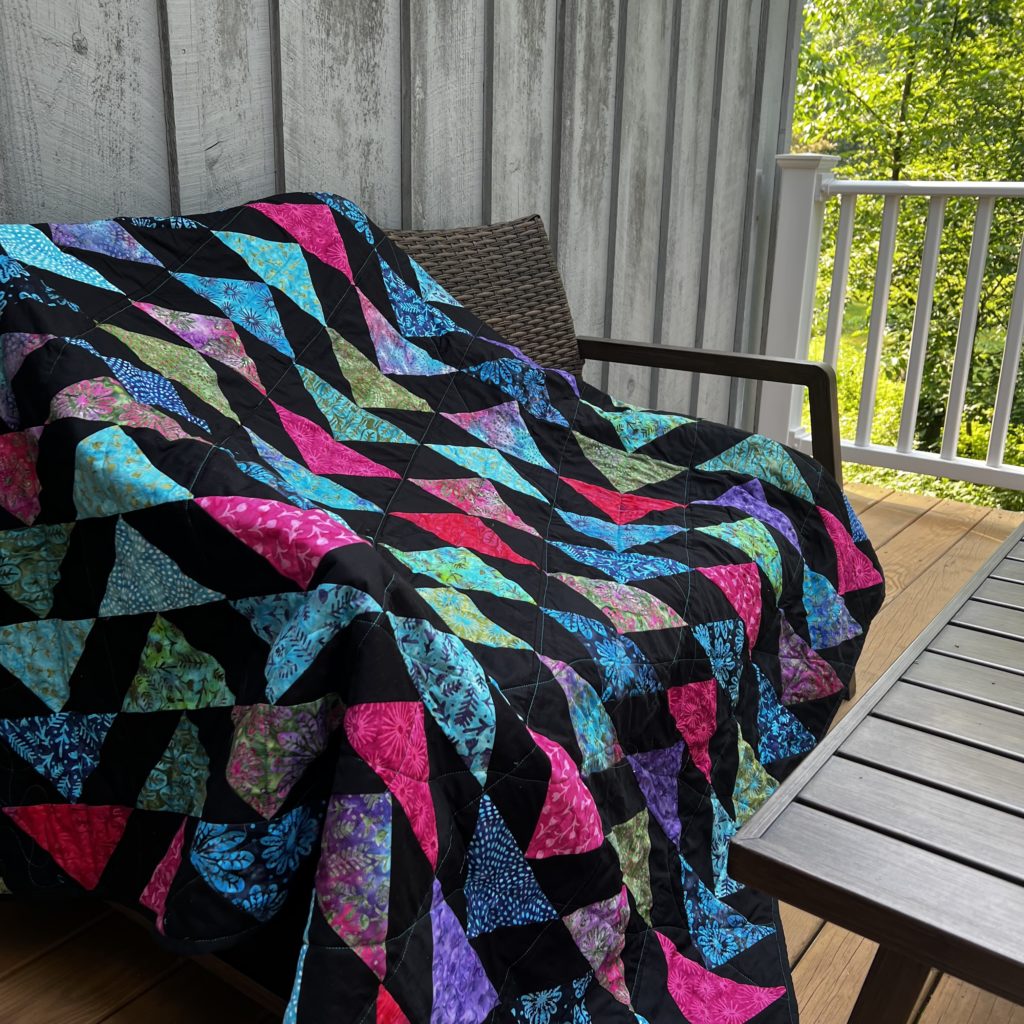
I love the way my quilt turned out with this fabric. You can find Summer Twilight precuts at the following stores. Yardage will be available in more stores when it ships in July and August of 2023.
| Bernina Plus | ND |
| Brennan’s Fine Designs-MA | MA |
| Fabric Shoppe-CA | CA |
| JellyRollFabric.Net | IN |
| Lori’s Country Cottage-CANADA | AB |
| Bob’s Variety | AZ |
| Creekside Quilts-OR | OR |
| Mulqueen Sewing & Fabric Centers | AZ |
| Quilter’s Corner-SD | SD |
| The Empty Bobbin | ND |
Another Easy Quilts Made with Precuts
This is my second easy quilt made with precuts. The first one is just as easy (maybe even a little bit easier) and is in my top 10 of popular Youtube videos! Make one today.
Happy quilting!

Thank you to Island Batik, Hobbs Batting, Aurifil Thread and Schmetz Needles.

4 Comments
kris
June 20, 2023 at 2:28 PMLOVE IT!! Wish I could get the download to work!
createwithclaudia_7j76hs
June 21, 2023 at 7:40 AMThank you. I tried it on a couple of different computers and my phone and I didn’t have a problem. Sorry it’s not working for you. The link is right below where it says Let’s Make This Quilt.
Brenda @ Songbird Designs
June 25, 2023 at 10:44 PMI love it, Claudia! The black batting was perfect for this one!
createwithclaudia_7j76hs
July 10, 2023 at 7:38 AMThanks Brenda!