
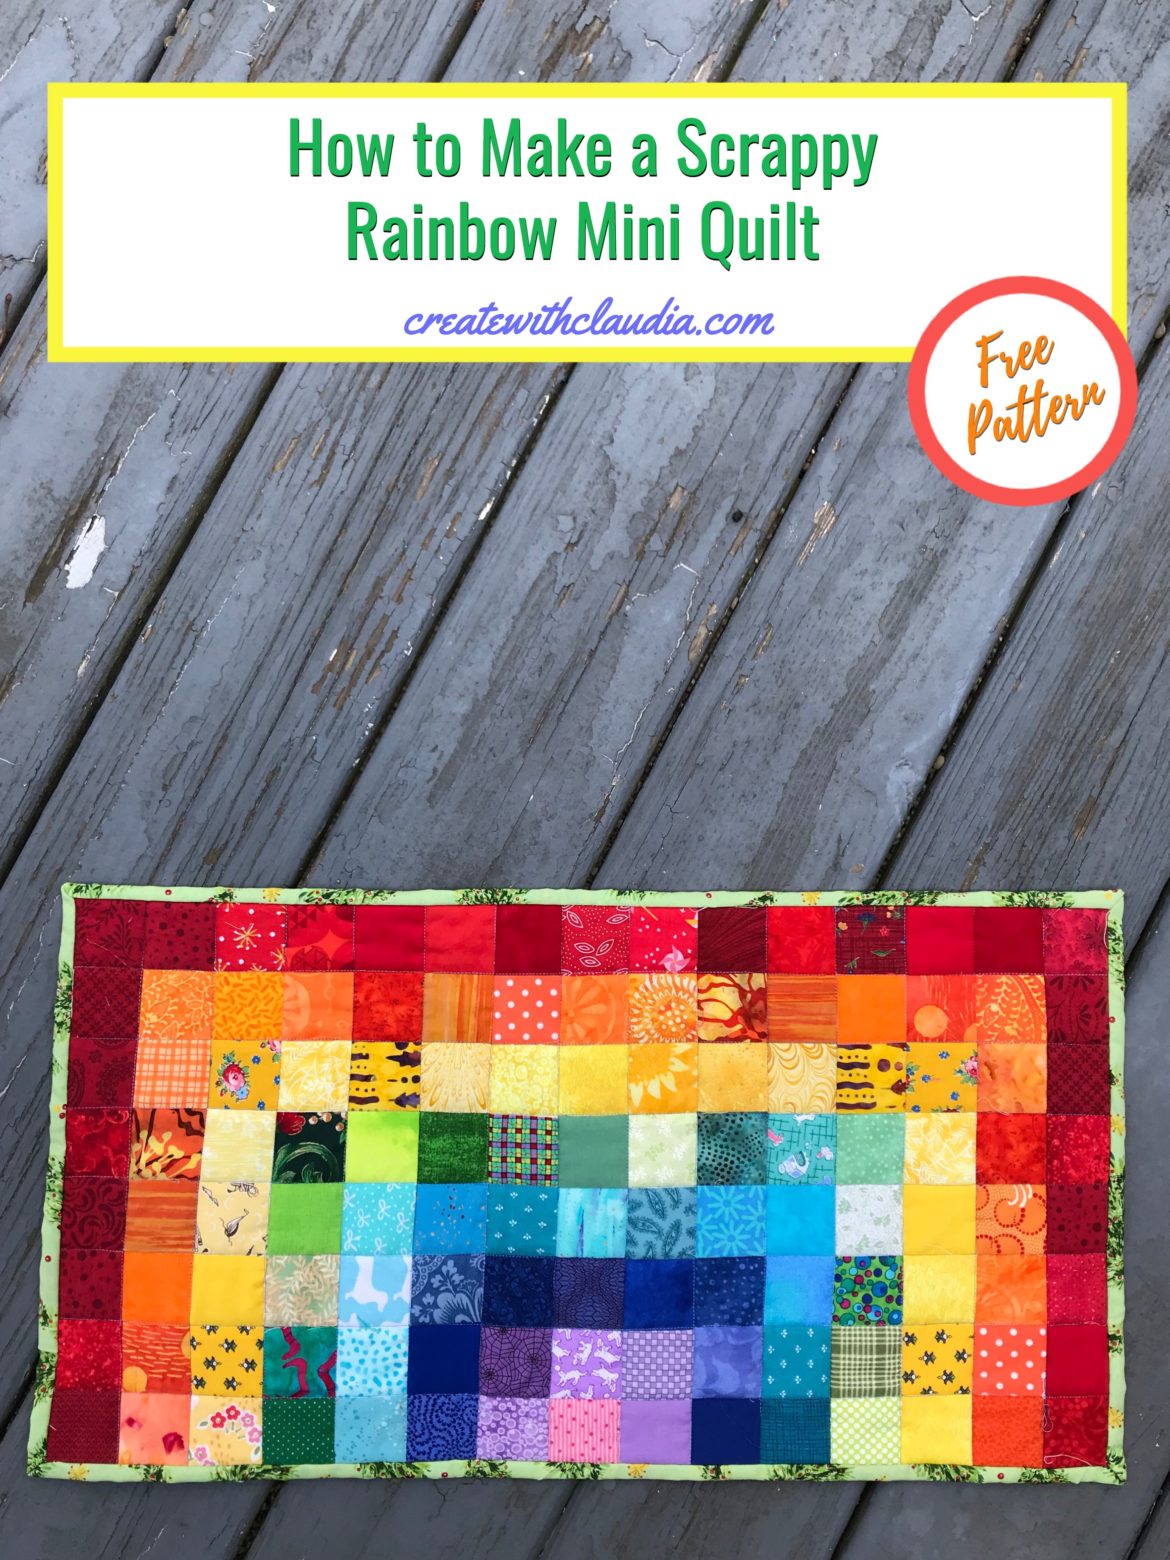
How to Make a Scrappy Rainbow Mini Quilt
Calling all scrap fabric project lovers! You will be using using in lots of scraps in all sorts of colors for this design. This is my second project for my new “Working Our Scraps Off” series over on my YouTube channel. This month I am teaching you how to make a scrappy rainbow mini quilt.
This sweet and happy project is super simple to make and is a great way to bust some of that fabric you don’t know what to do with. In addition, it is simple to adjust to any size. You will find a chart with various sizes.
I love quick and easy projects like this one. I get a lovely result with only a little bit of work.
“Working Our Scraps Off” Series
A couple of years ago I wrote a blog post about the best way to organize scraps. In my opinion it still is the best way, but unfortunately I just don’t have the time to do that anymore. Now my scrap bins are overflowing.
That was the main reason for beginning this series. The videos are also a little bit different from my others. My filming process shows a lot more of me sewing the projects.
I plan on bringing a new (and free) project to viewers every month. These will be smaller projects that can be made in a shorter time period than larger quilts. I hope you will join me. Look for announcements on my email and social media.
Make sure to join my Working Our Scraps Off facebook group so you can get sneak peeks at upcoming projects and see versions that other people are making.
Presenting Episode #2 of “Working Our Scraps Off”
How to Make a Scrappy Mini Rainbow Quilt
*Download the Scrappy Rainbow Mini Quilt Pattern Here*
Before You Begin
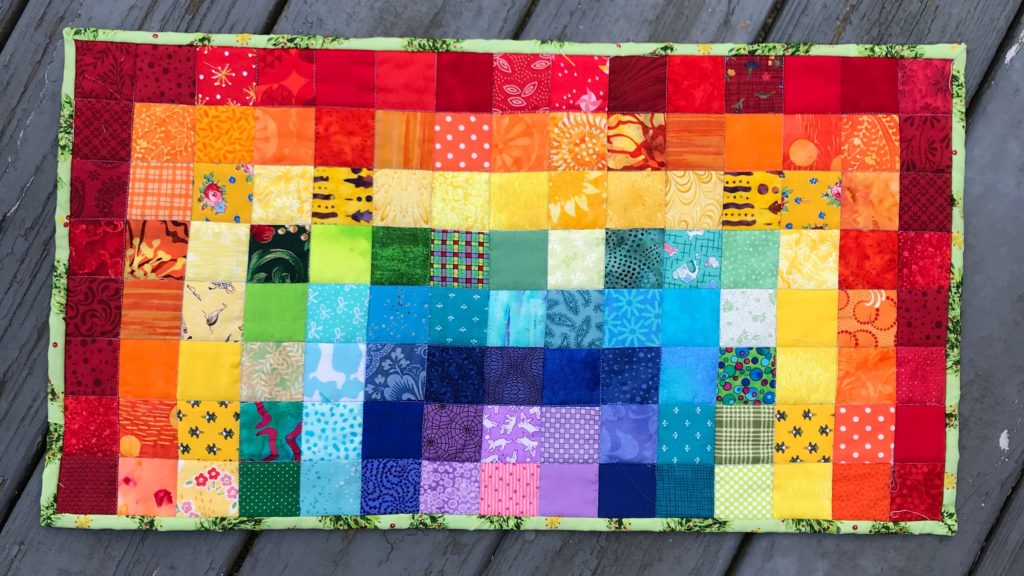
- Finished project size: About 12 1/2″ x 22 1/2″
- Please read through all of the instructions carefully.
- A 1/4″ seam allowance is used throughout the project.
Supplies needed
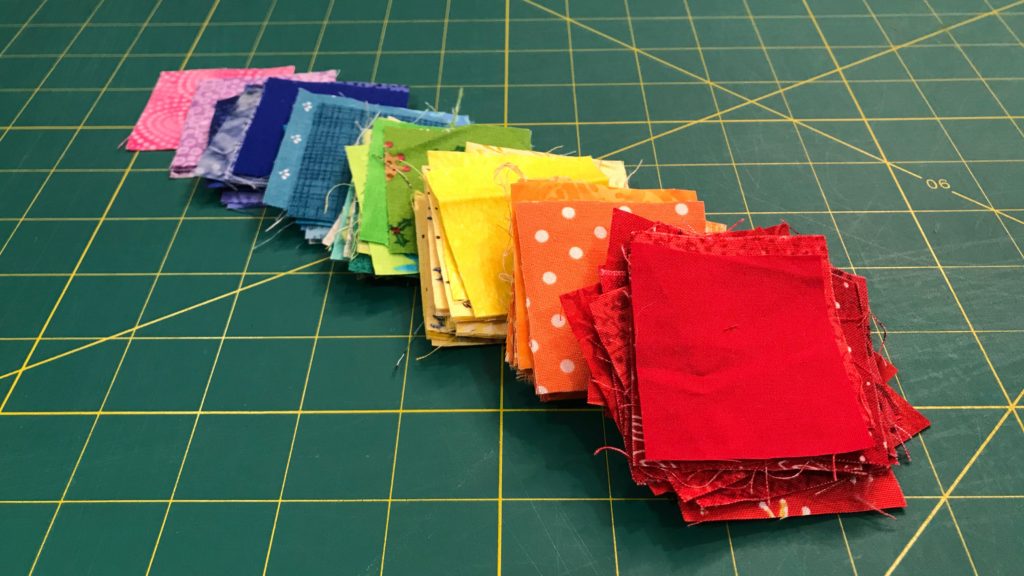
- Plenty of scrap fabrics (each one large enough to cut out a 2″ square)
- Cutting Mat
- Quilter’s Ruler
- Rotary Cutter
- Scissors
- Straight Pins
- General Quilting/Sewing Supplies
You can find many of the items that I used to make this project in my Amazon Store.
As an Amazon Associate I earn from qualifying purchases.
Cutting Instructions
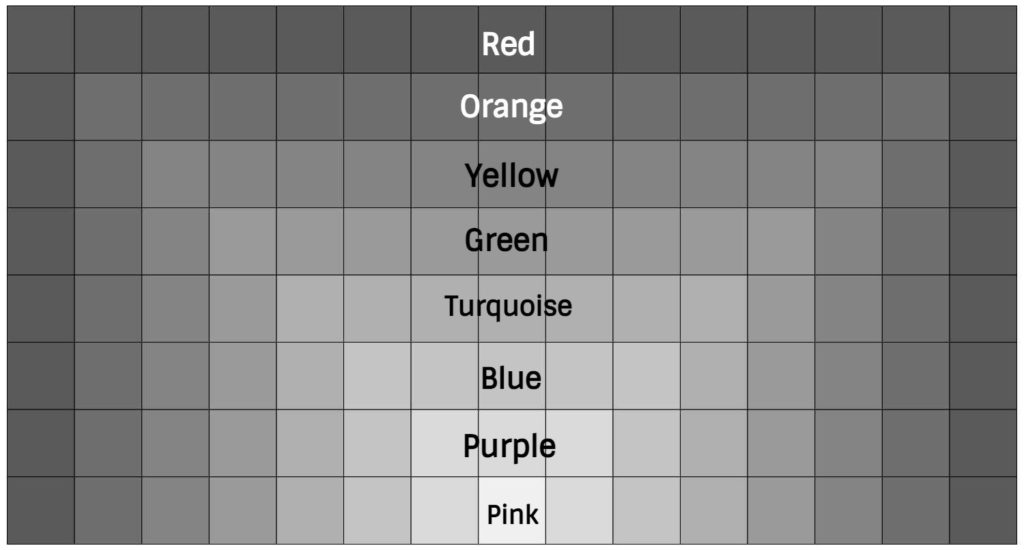
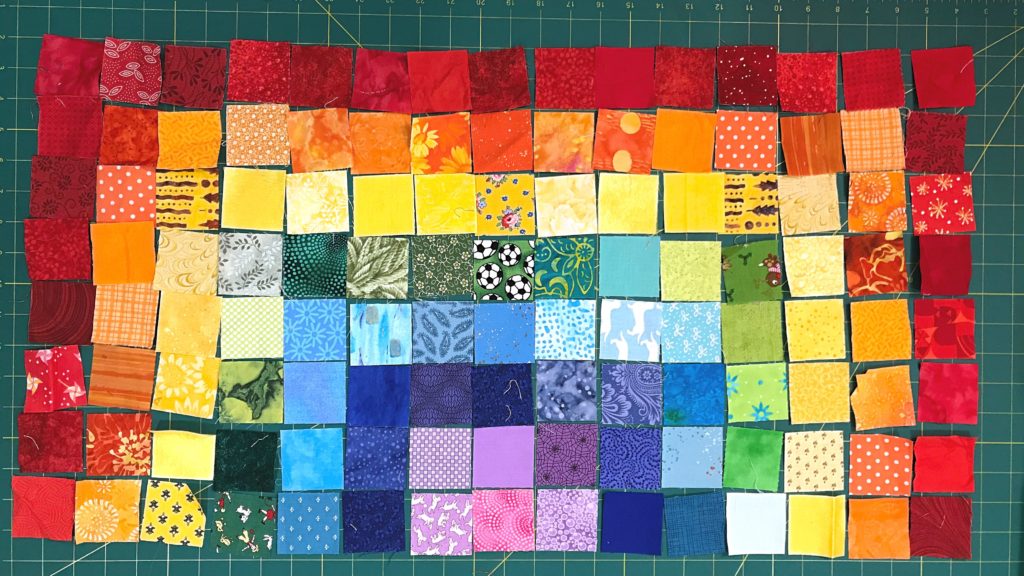
To make the rainbow you will need the following squares of fabrics. All of the squares should be cut 2″ x 2″.
- Pink – 1 square
- Purple – 5 squares
- Blue – 9 squares
- Turquoise – 13 squares
- Green – 17 squares
- Yellow – 21 squares
- Orange – 25 squares
- Red – 29 squares
Note that it is very easy to adjust this pattern. Simply change the size of squares you cut. The table below shows a number of different options.
| Size of Cut Squares | Finished Quilt Size (Approximately) |
| 2″ x 2″ | 12.5″ x 23″” |
| 2.5″ x 2.5″ | 16.5″ x 30.5″ |
| 3″ x 3″ | 20.5″ x 38″ |
| 3.5″ x 3.5″ | 24.5″ x 45.5″ |
| 4″ x 4″ | 28.5″ x 53″ |
| 5″ x 5″ | 36.5″ x 68″ |
Assembly
Color Order
My instructions are for this color order. However, if you want your rainbow in a different order (for example, blue on top), just adjust the number of squares accordingly.
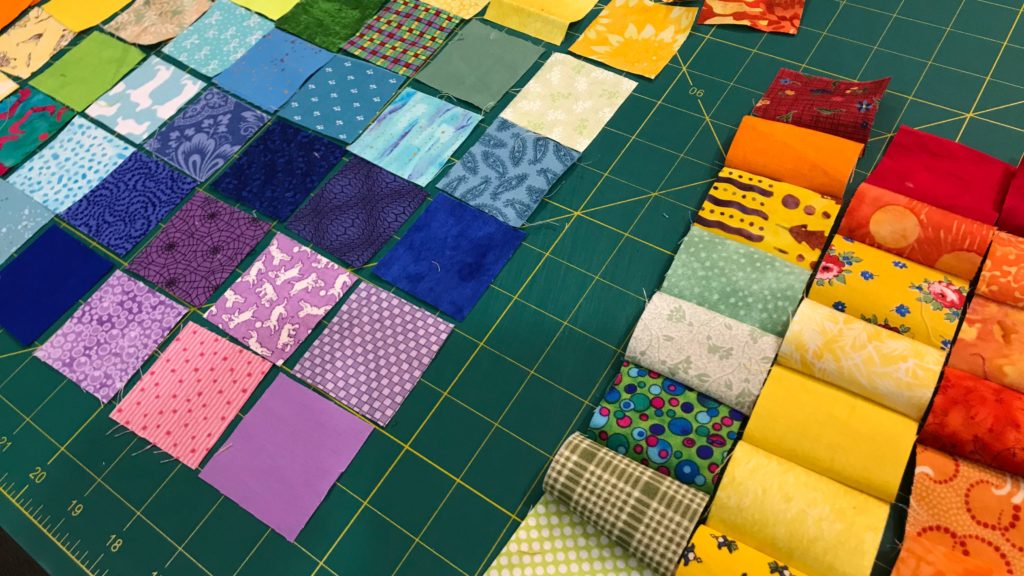
I find that this quilt is easiest assembled when laying out the entire piece next to my sewing machine. I piece together the columns first and then sew them together.
Sewing the individual columns together.
Finishing the Quilt
- Lay your backing fabric on a long surface, with wrong side facing up.
- Next, lay your batting on top of the backing.
- Lastly, lay the mini quilt on top with the right side facing up.
- Baste the layers together using your preferred method.
- Quilt as desired.
- Bind using your preferred method.
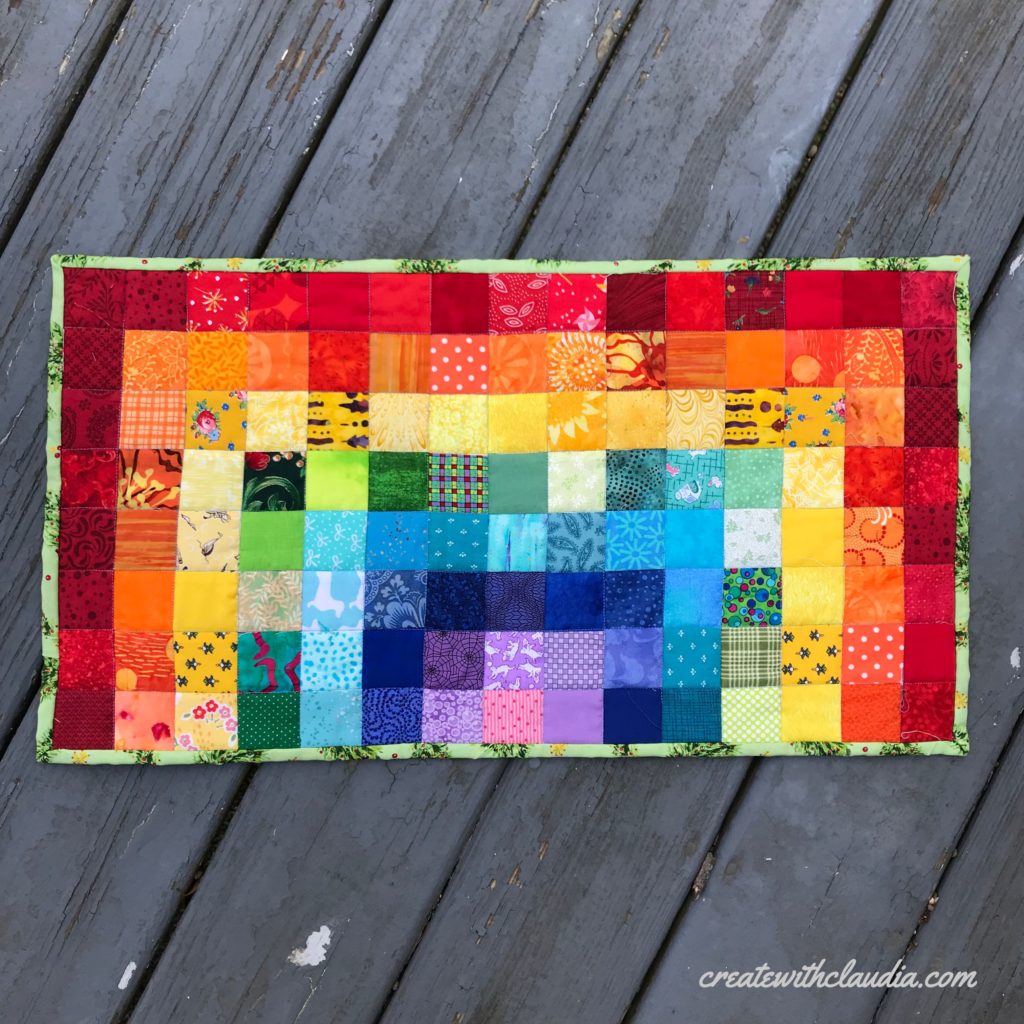
Enjoy your new mini quilt!
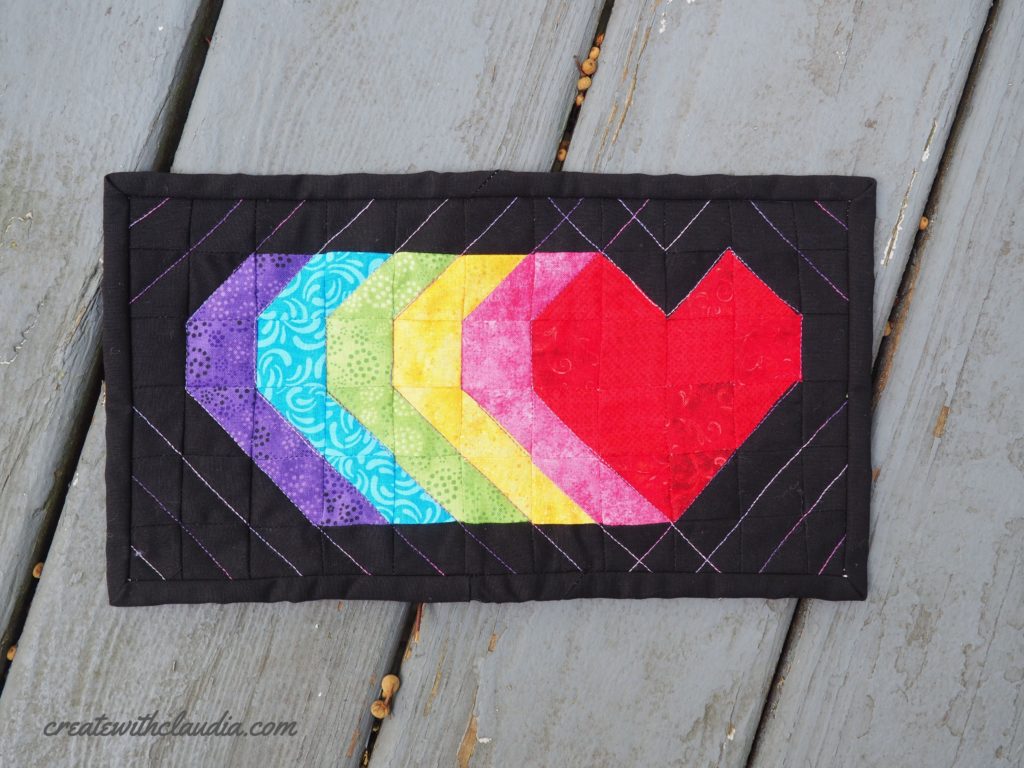
Like Rainbows?
Here’s a fun little free shooting hearts pattern I did in rainbow colors.
Happy Quilting!
