
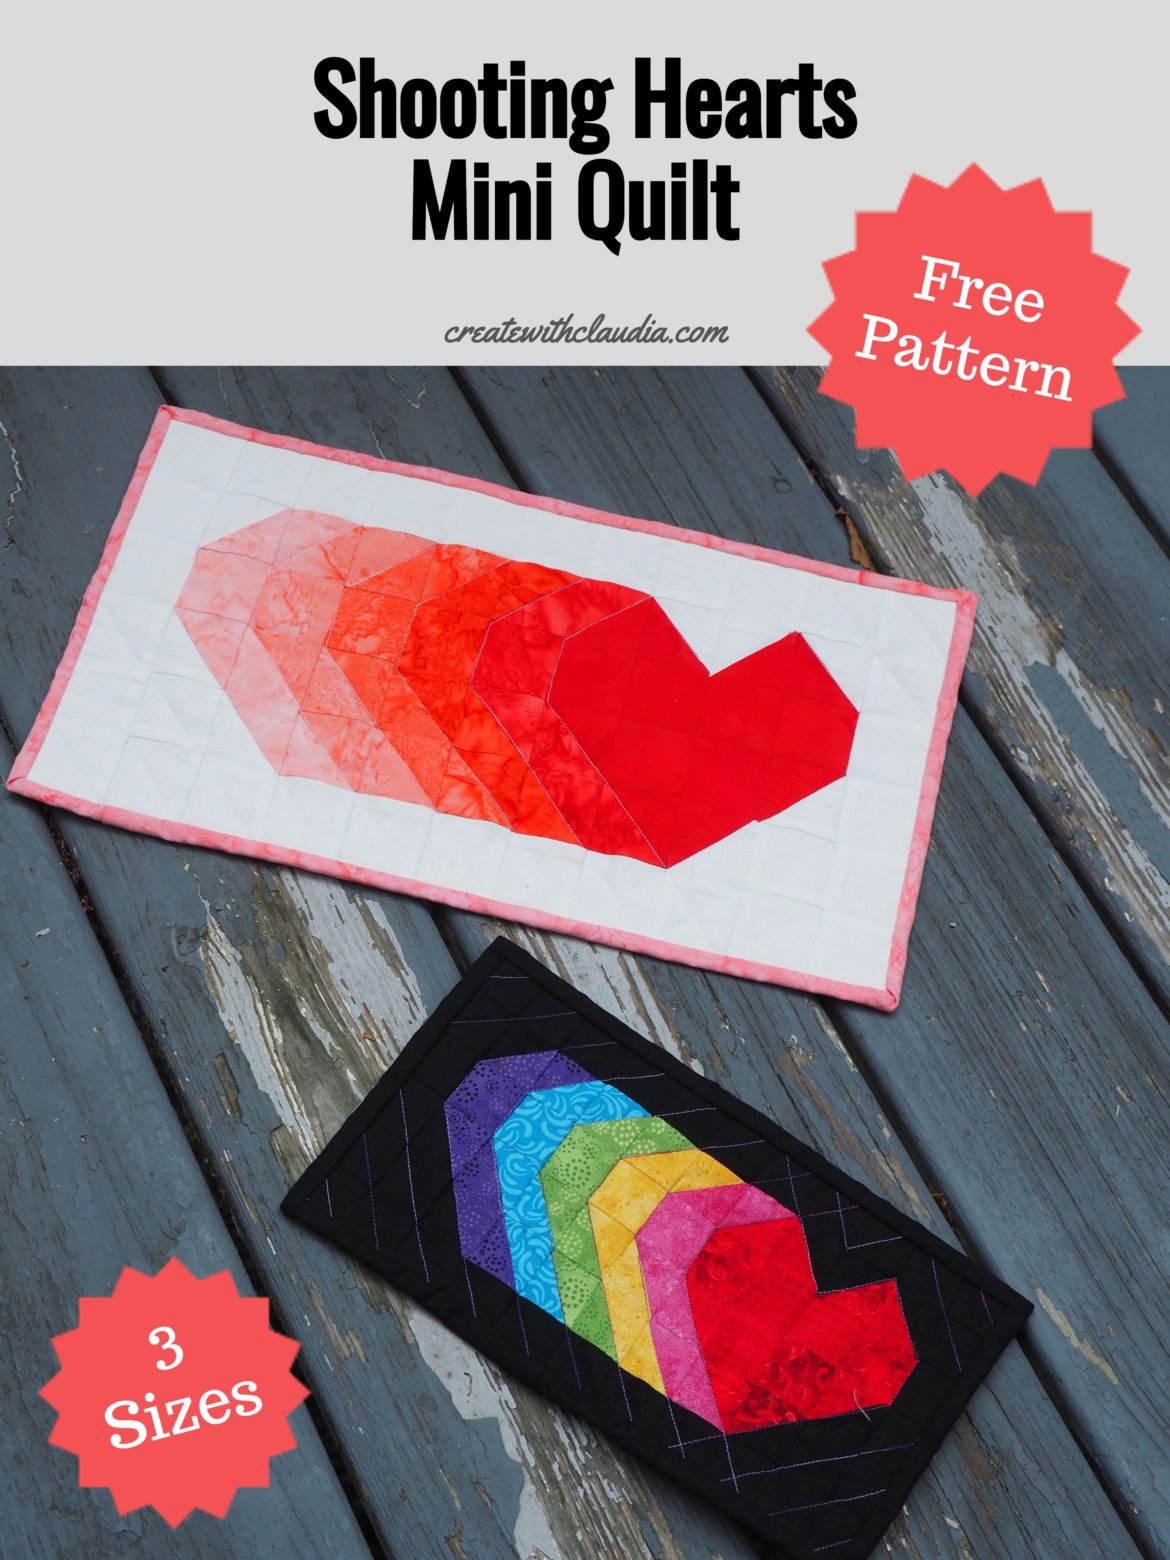
Shooting Hearts Mini Quilt Tutorial
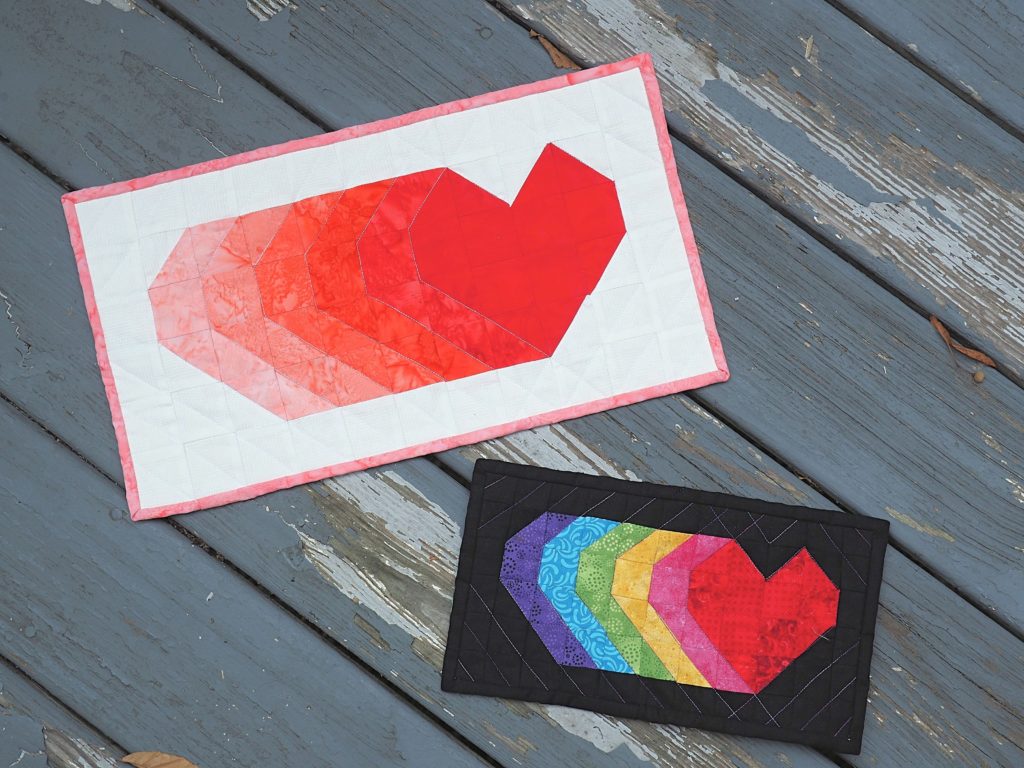
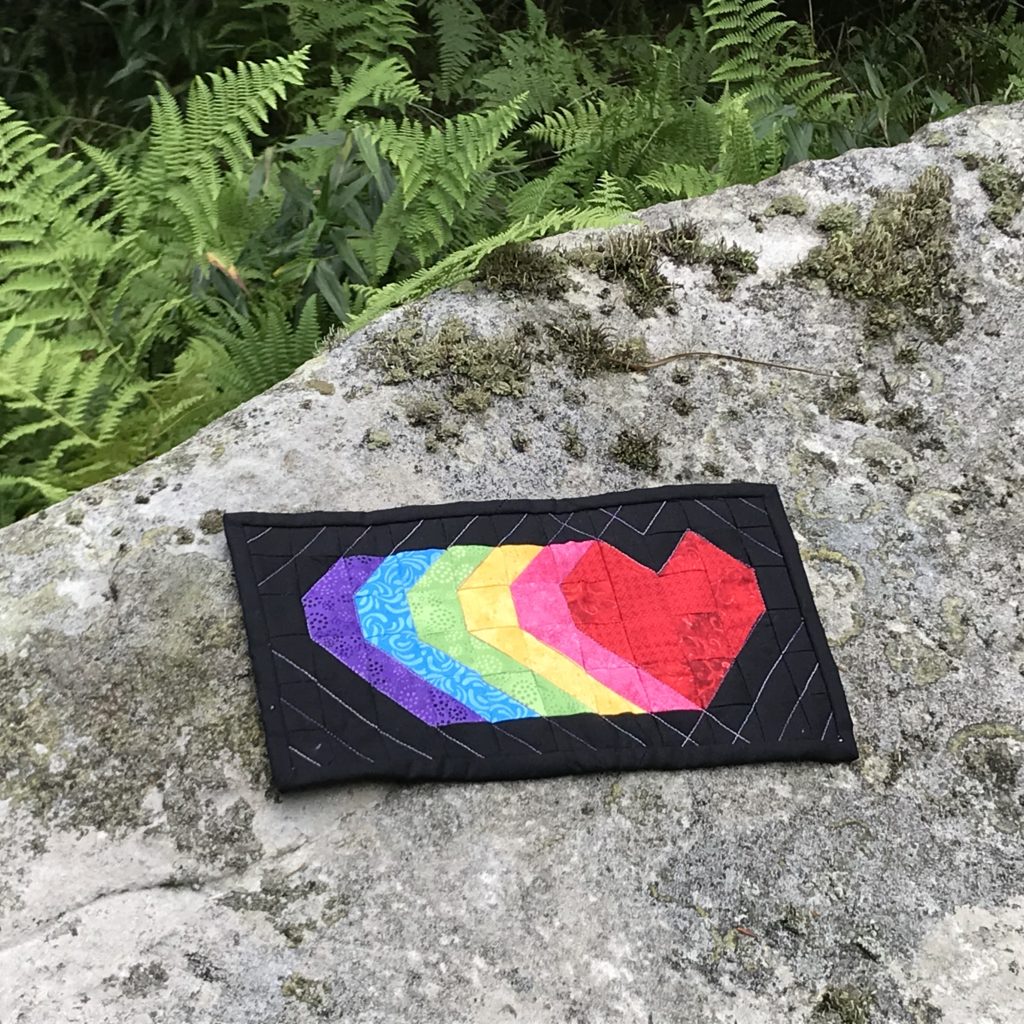
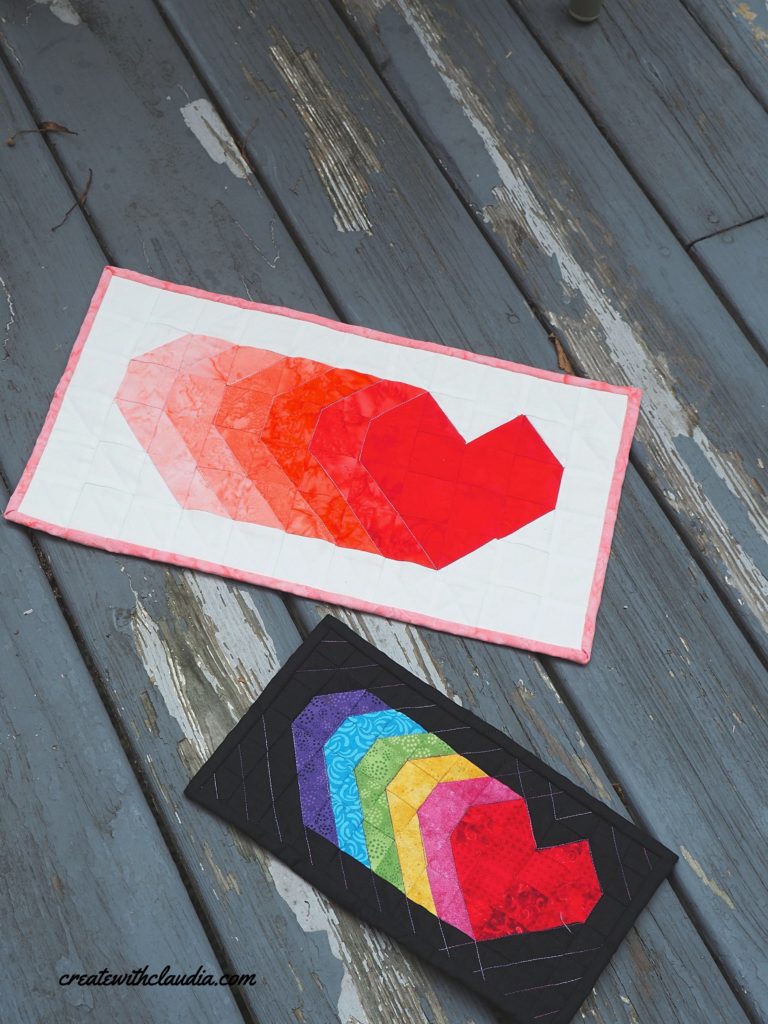
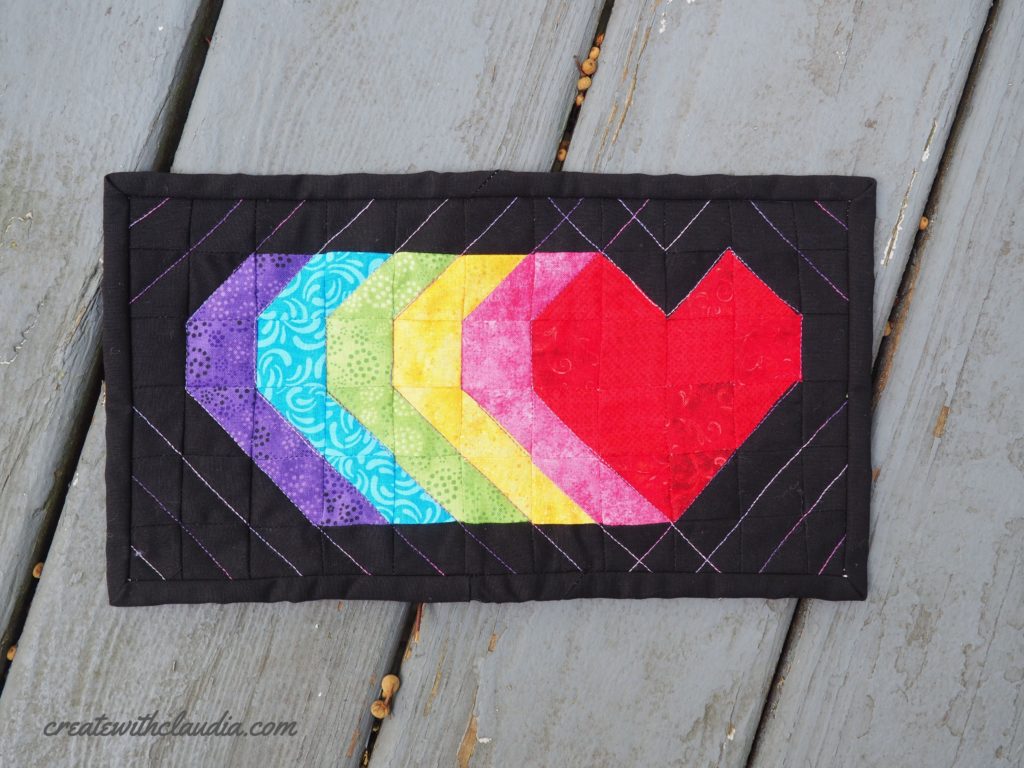
Perfect for a pack of charm squares or leftover scraps, the hearts in my Shooting Hearts mini quilt practically jump off the fabric.
I had so much fun designing this little mini that I tried it out in a couple of different colors and sizes. It just makes me happy. You could make it as a Valentine’s Day gift for a loved one ( that’s where the ombré one is going) or for yourself. I can’t decided where I want to hang mine.
You will find 3 different sizes to choose from. All of them are still minis, but I know that not everyone likes working with 1.5″ pieces, so I thought I’d throw in a couple more options. If you have a bit of quilting experience you could easily make this even larger than the options I’ve presented.
This mini is easy to assemble, but the tip is to stay organized. You can make this quilt in a day, honestly, even in a few hours.
Video Tutorial for the Shooting Hearts Mini Quilt
I always like making a video for my free quilt patterns. I find that many people prefer a video tutorial over a written one. In the video, you can see me making the ombré version. Enjoy!
*Download the Shooting Hearts Mini Quilt Free PDF Pattern Here*
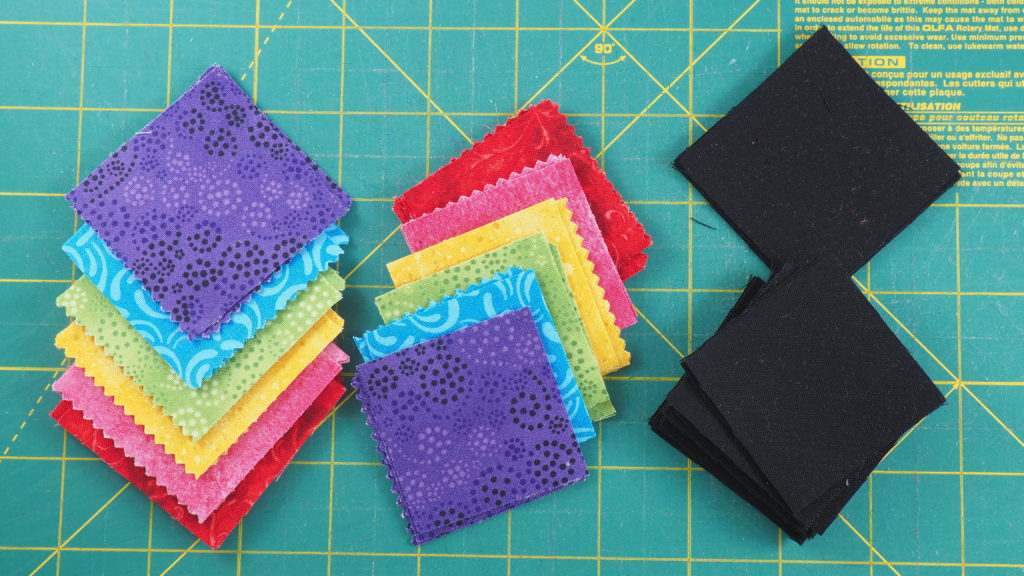
Fabric Requirements (For all 3 sizes) )
Please note that generous amounts are given.
| Finished Quilt Size | 6″ x 11″ | 9″ x 16.5″ | 12″ x 22″ |
| Background Fabric | 1/8 yard | 1/8 yard | 1/4 yard |
| Fabric A | 1/8 yard | 1/8 yard | 1/8 yard |
| Fabric B | 1/8 yard | 1/8 yard | 1/8 yard |
| Fabric C | 1/8 yard | 1/8 yard | 1/8 yard |
| Fabric D | 1/8 yard | 1/8 yard | 1/8 yard |
| Fabric E | 1/8 yard | 1/8 yard | 1/8 yard |
| Fabric F | 1/8 yard | 1/8 yard | 1/8 yard |
Other Fabric Requirements
Note that the sizes needed will depend on the size of the quilt you are making.
- Backing fabric
- Batting
- Binding Fabric
Tools Needed
- Cutting mat – Any size
- Rotary cutter
- Quilt ruler – A square one with a diagonal line is helpful
- General Sewing Tools
As an Amazon Associate I earn from qualifying purchases.
Cutting Instructions (For all 3 sizes)
| Finished Quilt Size | 6″ x 11″ | 9″ x 16.5″ | 12″ x 22″ |
| Background Fabric | 32 squares cut 1.5” 5 squares cut 2.25” | 32 squares cut 2” 5 squares cut 2.75” | 32 squares cut 2.5” 5 squares cut 3.25” |
| Fabric A | 6 squares cut 1.5” 5 squares cut 2.25” | 6 squares cut 2” 5 squares cut 2.75” | 6 squares cut 2.5” 5 squares cut 3.25” |
| Fabrics B, C, D, E & F (from each) | 1 square cut 1.5” 4 squares cut 2.25” | 1 square cut 2” 4 squares cut 2.75” | 1 square cut 2.5” 4 squares cut 3.25” |
Making the Half Square Triangles
To make the half square triangles you will need the larger squares for the quilt size you are making (for example, if you are making a 6″ x 11″ quilt you will need the 2.25” squares). Set aside the smaller squares. They will be used later.
Pair up the larger squares as as follows:
- Background Fabric with Fabric A – 3 pairs
- Background Fabric with Fabric F – 2 pairs
- Fabric A with Fabric B – 2 pairs
- Fabric B with Fabric C – 2 pairs
- Fabric C with Fabric D – 2 pairs
- Fabric D with Fabric E – 2 pairs
- Fabric E with Fabric F – 2 pairs
Then make the half square triangles with these pairs.
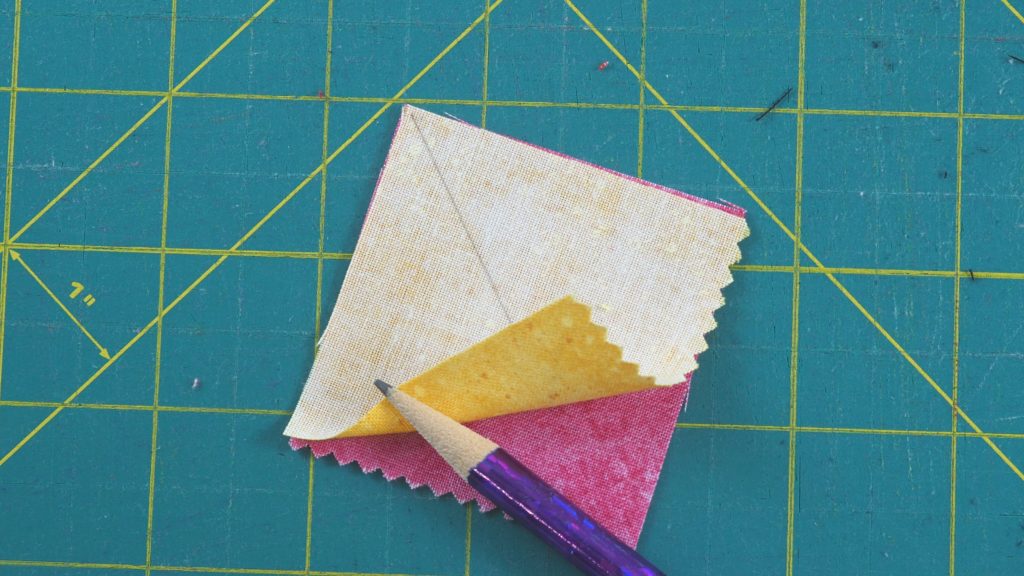
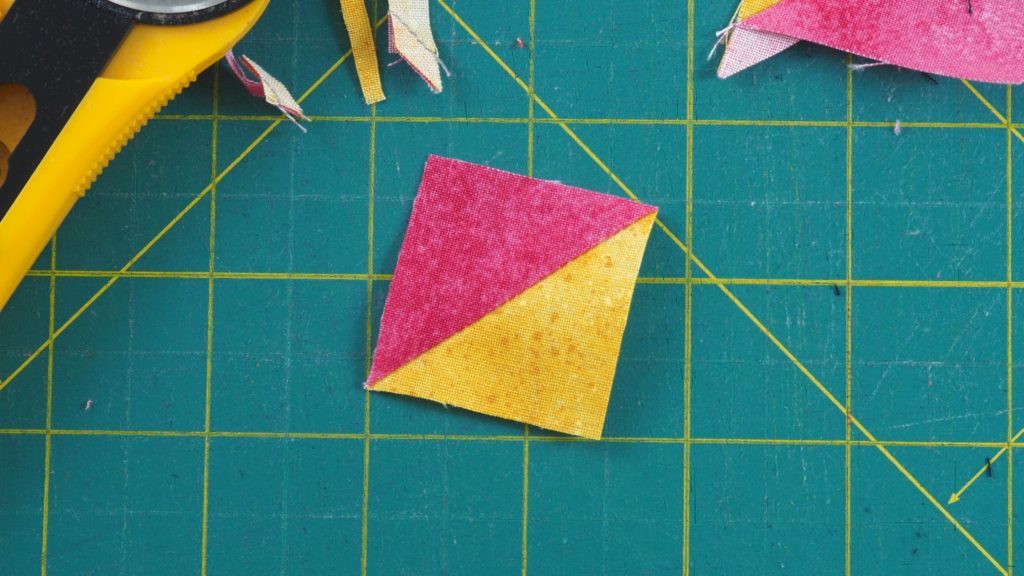
First, draw a diagonal line on the lighter side of back (wrong) side of one of the squares of fabric in a pair. This will be your sewing guide.
Line the two fabrics on top of each other with front (right) sides facing each other.
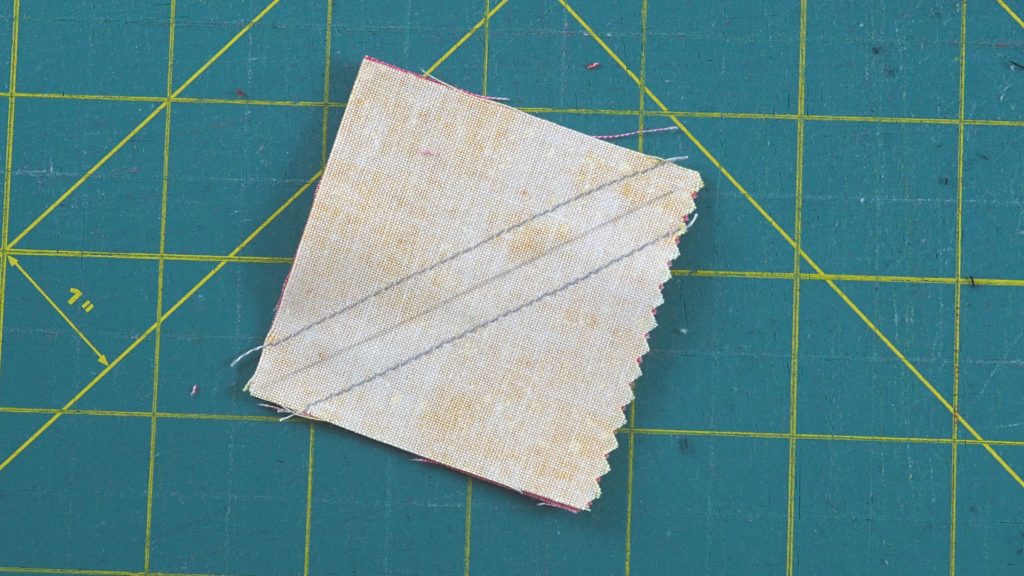
Using a ¼ inch seam allowance, sew along both sides of the diagonal drawn line.
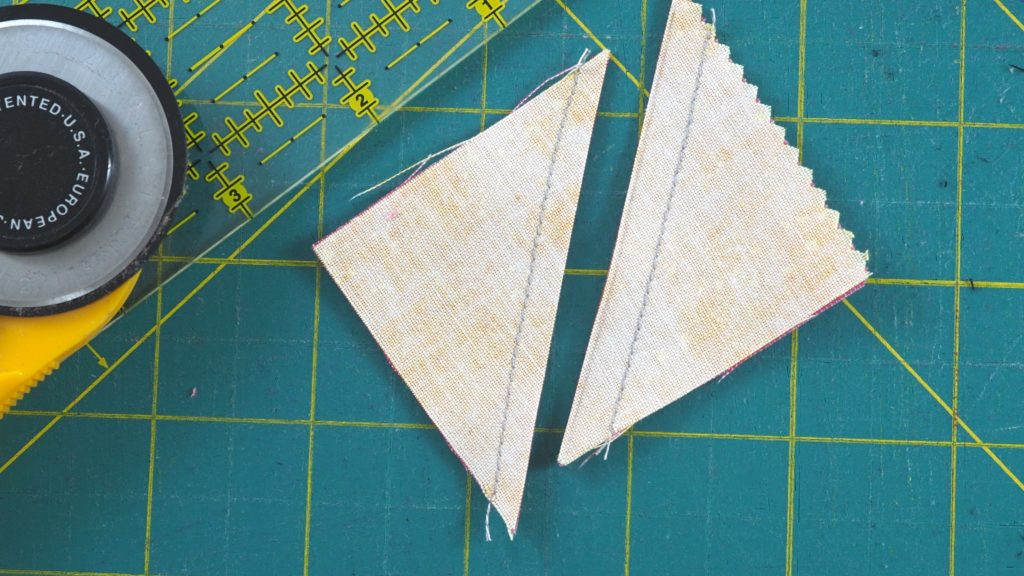
Cut down the center, along the drawn line. You will have two blocks that now need to be pressed open and trimmed down. Trim them down to the size indicated in the chart below (for example if you are making the 6″ x 11″ quilt size, trim the half square triangles down to 1.5″).
| Finished Quilt Size | 6″ x 11″ | 9″ x 16.5″ | 12″ x 22″ |
| Size to Trim Half Square Triangles | 1.5” | 2” | 2.5” |
Repeat with the remaining pairs of half square triangles. When finished there should be the following half square triangles (see below). Note: Because of the method used to make half square triangles, there will be a few extra ones left over.
Number of Finished Half Square Triangles Needed
- Background Fabric with Fabric A – 5
- Background Fabric with Fabric F – 3
- Fabric A with Fabric B – 3
- Fabric B with Fabric C – 3
- Fabric C with Fabric D – 3
- Fabric D with Fabric E – 3
- Fabric E with Fabric F – 3
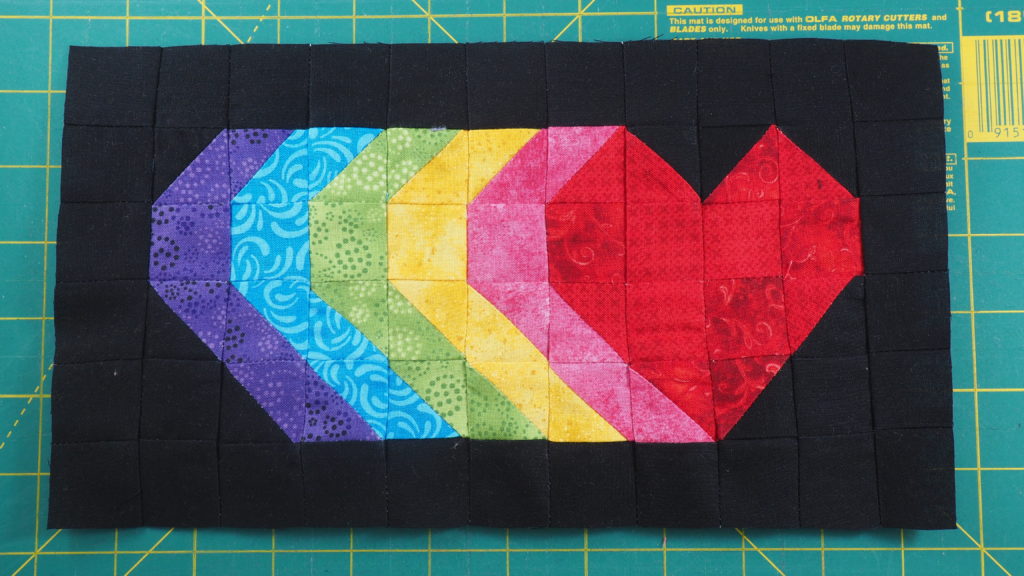
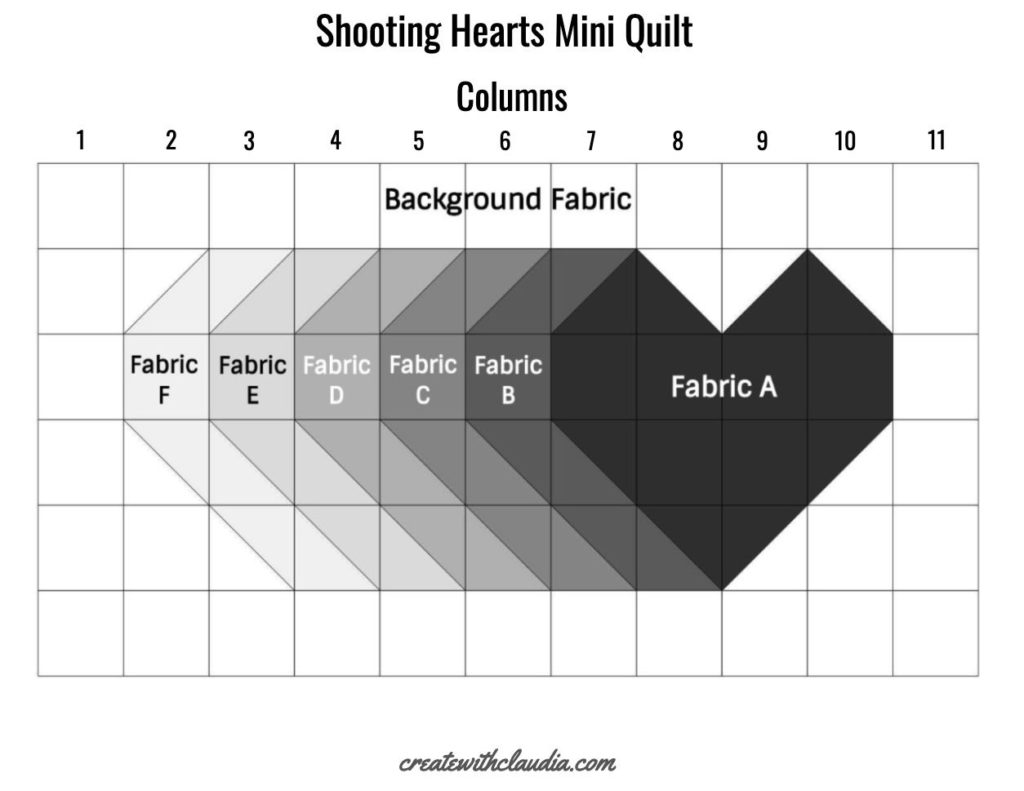
Assembly and Layout of the Shooting Hearts Mini Quilt
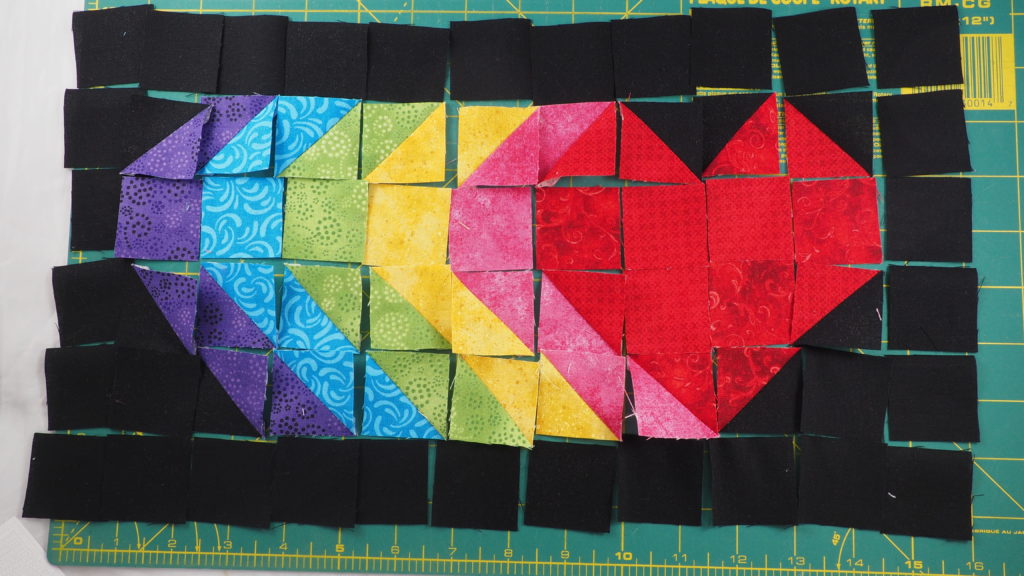
Lay out blocks as shown in the diagram.
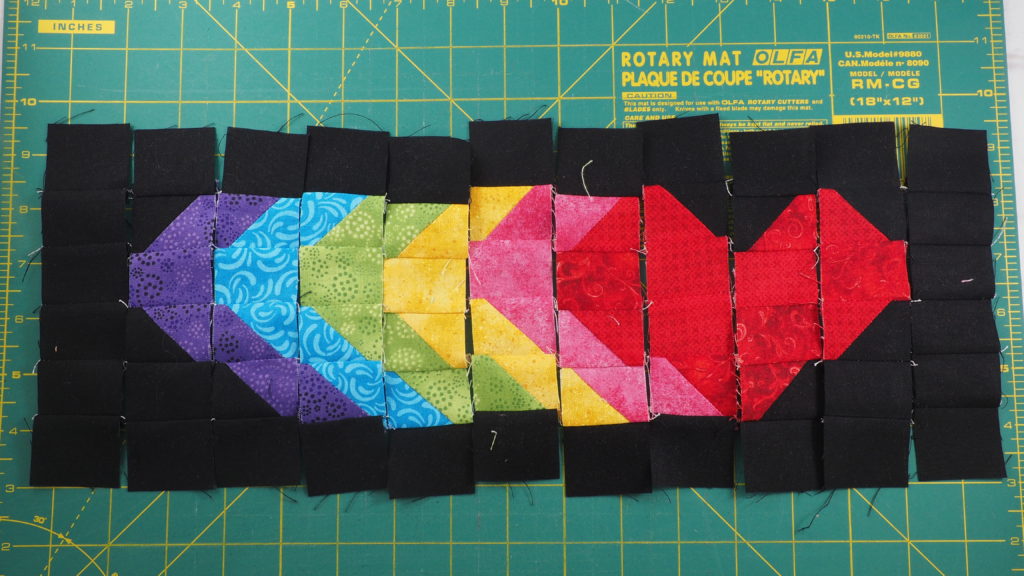
Sew together the columns first.
Once the individual columns are sewn, join all of the columns together.
Quilt and bind as desired.
Shooting Hearts Mini Quilt Pattern Layout
Bring a little love into your home with a Shooting Hearts mini quilt!
Happy Quilting!

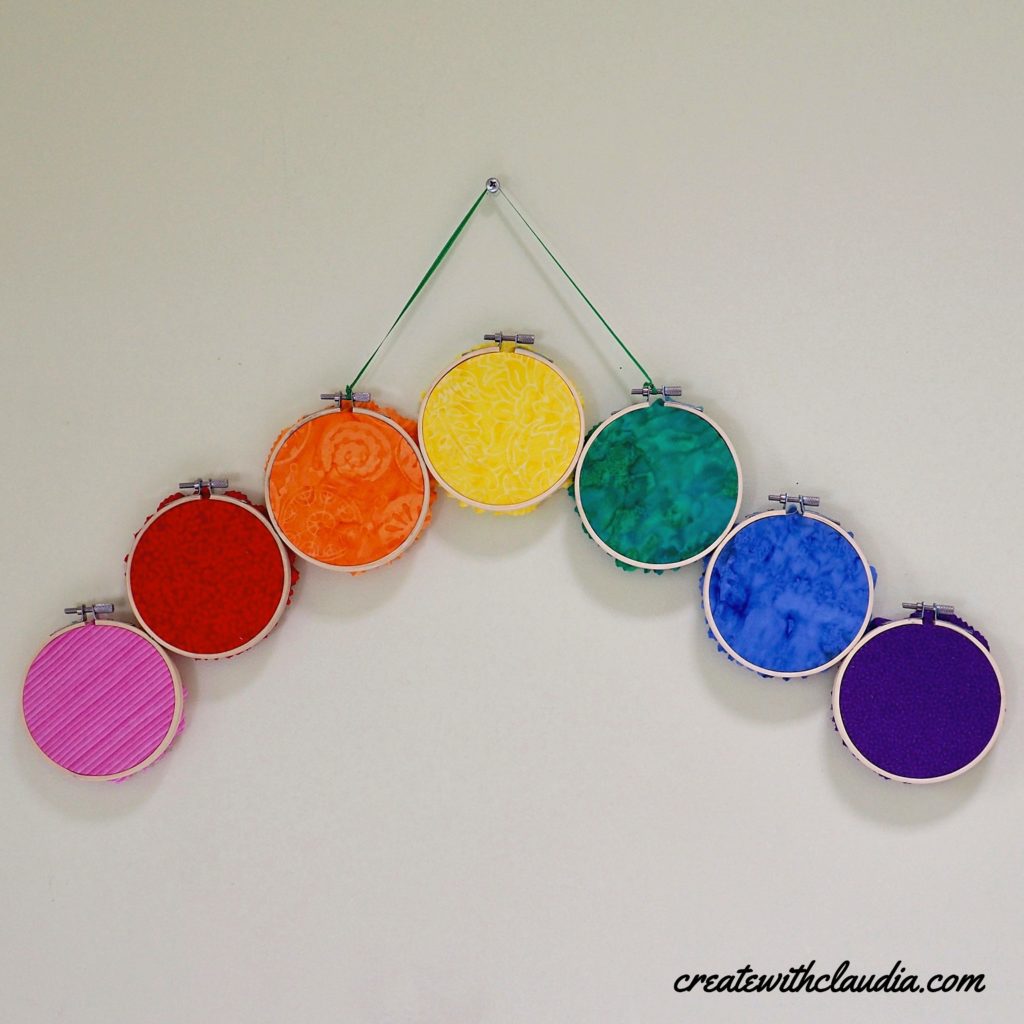
Like Rainbows & Scrap Fabric Projects?
Here’s a quick and easy no-sew rainbow wall hanging to try!

3 Comments
Barbara Frohne
October 1, 2020 at 11:35 AMThat is a great pattern.
createwithclaudia_7j76hs
October 1, 2020 at 3:18 PMThanks so much!
Susan
October 2, 2020 at 9:06 AMI love this pattern. Thank you for sharing it.