
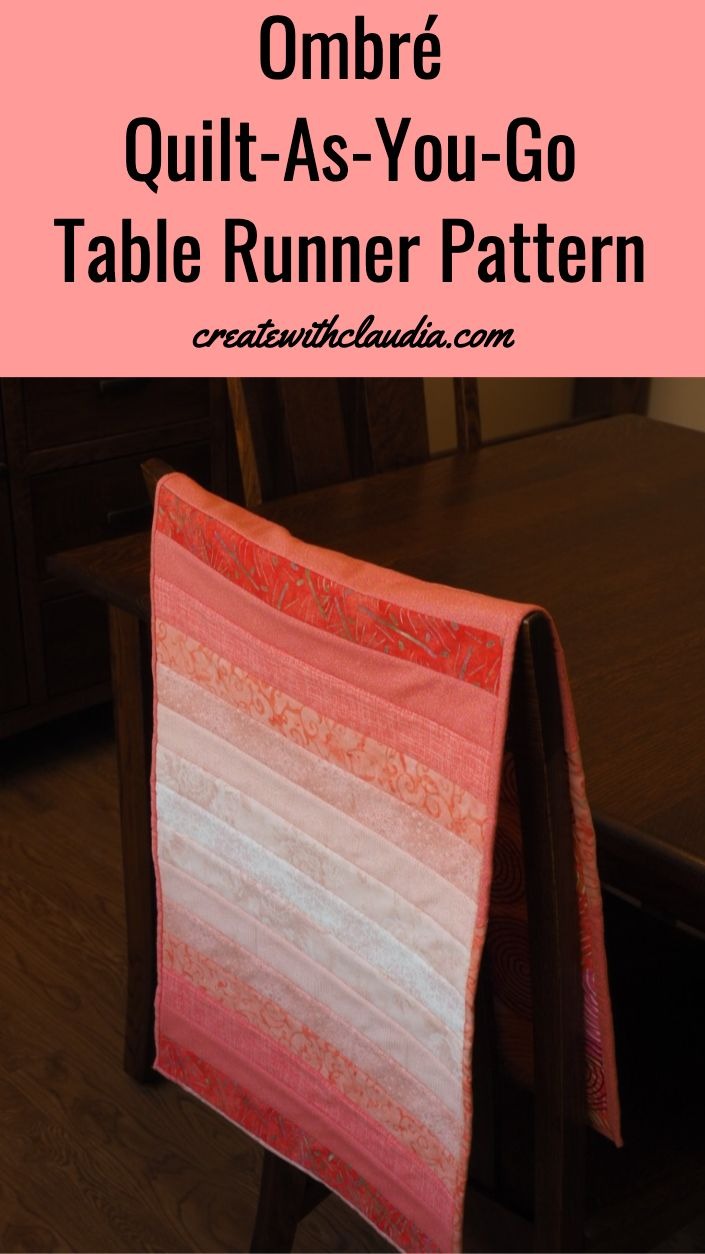
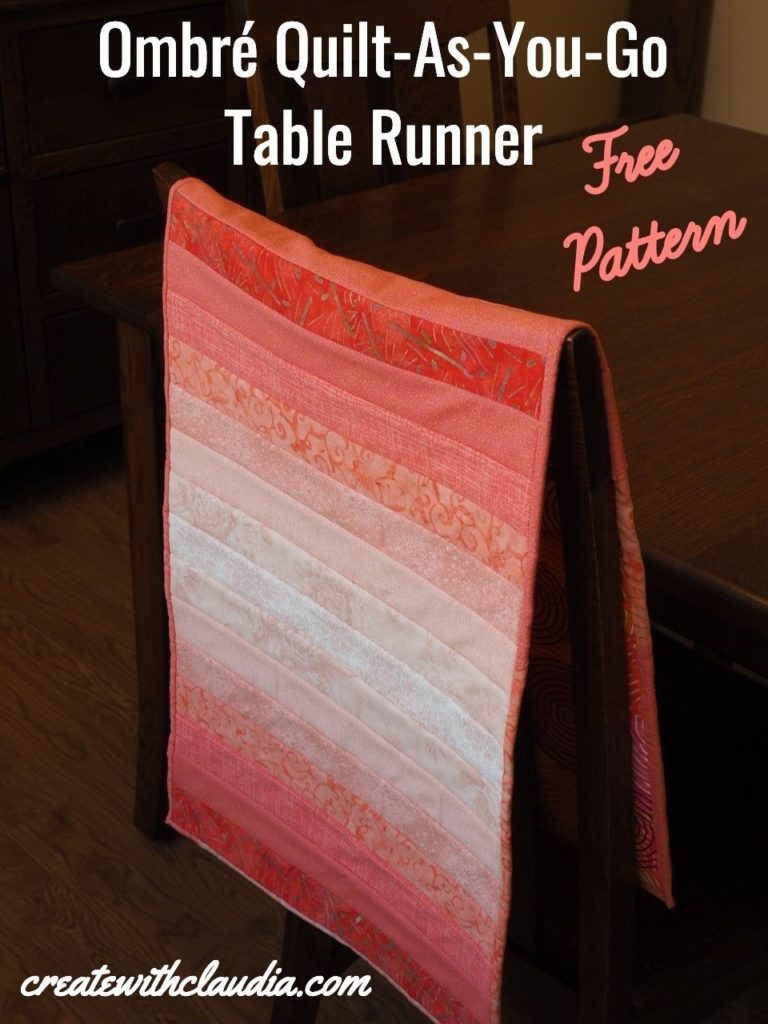
Ombré Quilt-As-You-Go Table Runner Pattern
Check out any home décor store these days and I am pretty sure you can find something in an ombré, or gradient, pattern. There is clothing, dinnerware and even hair done with the look. I think it is terrific, so I designed this table runner to get in on the trend. You will be amazed by how easy this ombré quilt-as-you-go table runner pattern is, and I have a hunch you will be pleased with the results.
One of my favorite things about this project is that it is quilted at the same time the fabrics are pieced together. You can finish it in a few hours.
For this project, I used coral colored fabrics. I absolutely love the 2019 Pantone Color of the Year, Living Coral, and it seems like much of what I have been designing these days is done in that color. You can use whatever color(s) you like to. I can imagine a red one for Valentine’s Day or orange for the fall.

Here is everything you need to know to make this beautiful table runner.
Supplies Needed
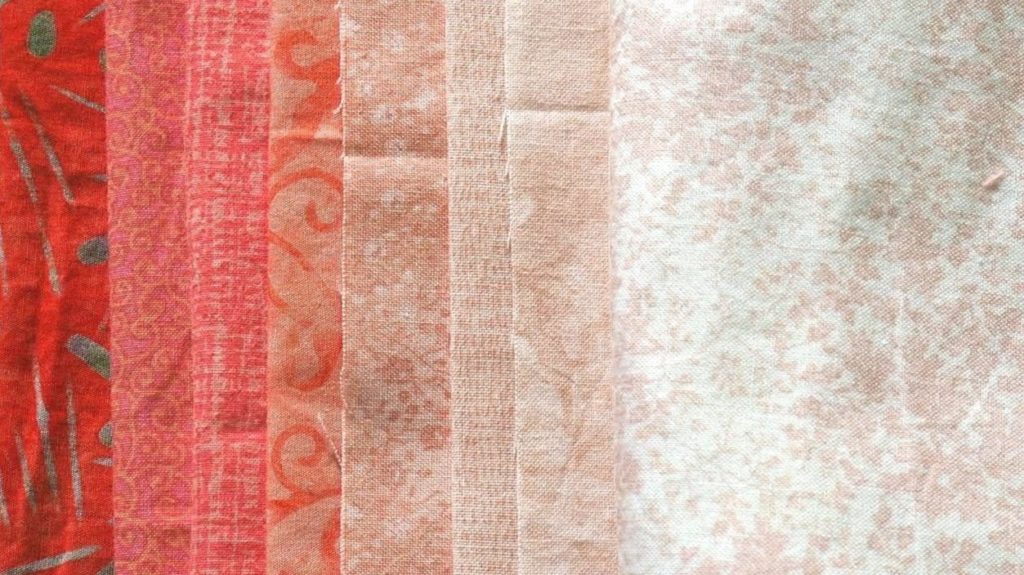
- 8 different fabrics in the same color family, but in varying shades, from light to dark
- Low loft batting
- Backing fabric of your choice
- Pins
- Rotary cutter
- Cutting mat
- Sewing machine
Items You Can Use To Make This Project
You can find many of the items that I used to make this project in my Amazon Store.
As an Amazon Associate I earn from qualifying purchases.
Step 1 – Choose Fabric
Oddly enough, unless you have a ombré fabric bundle, this is the longest part of the process. If you are not buying new fabric, go through your stash and pull out whatever catches your eye. Then narrow it down to the eight final choices.
Deciding on which fabric to use in a gradient quilt is not always easy, so I wrote this tutorial to help you out. I also made this video.
Step 2 – Cut Fabric

All strips are cut 2” X 16”
- A – Darkest – 3 strips
- B – One step lighter – 4 strips
- C – One step lighter – 4 strips
- D – One step lighter – 4 strips
- E – One step lighter – 4 strips
- F – One step lighter – 4 strips
- G – One step lighter – 4 strips
- H – Lightest – 2 strips
Backing Fabric – 1 piece – 18” X 46” – Note: If you do not have a piece long enough for the backing, sew together two pieces of the fabric to make one that is the correct size. You can see in the photo below that I needed to do that. If you are planning on binding using the backing fabric, then cut it 20” X 48” to ensure that you have enough.
Batting – Cut one piece 18” X 46” – I recommend using low loft batting. High loft will be too puffy and the runner won’t lay flat on the table. I used left over batting that I had on hand, but you can also get insulated batting.
Step 3 – Start Assembling the Table Runner
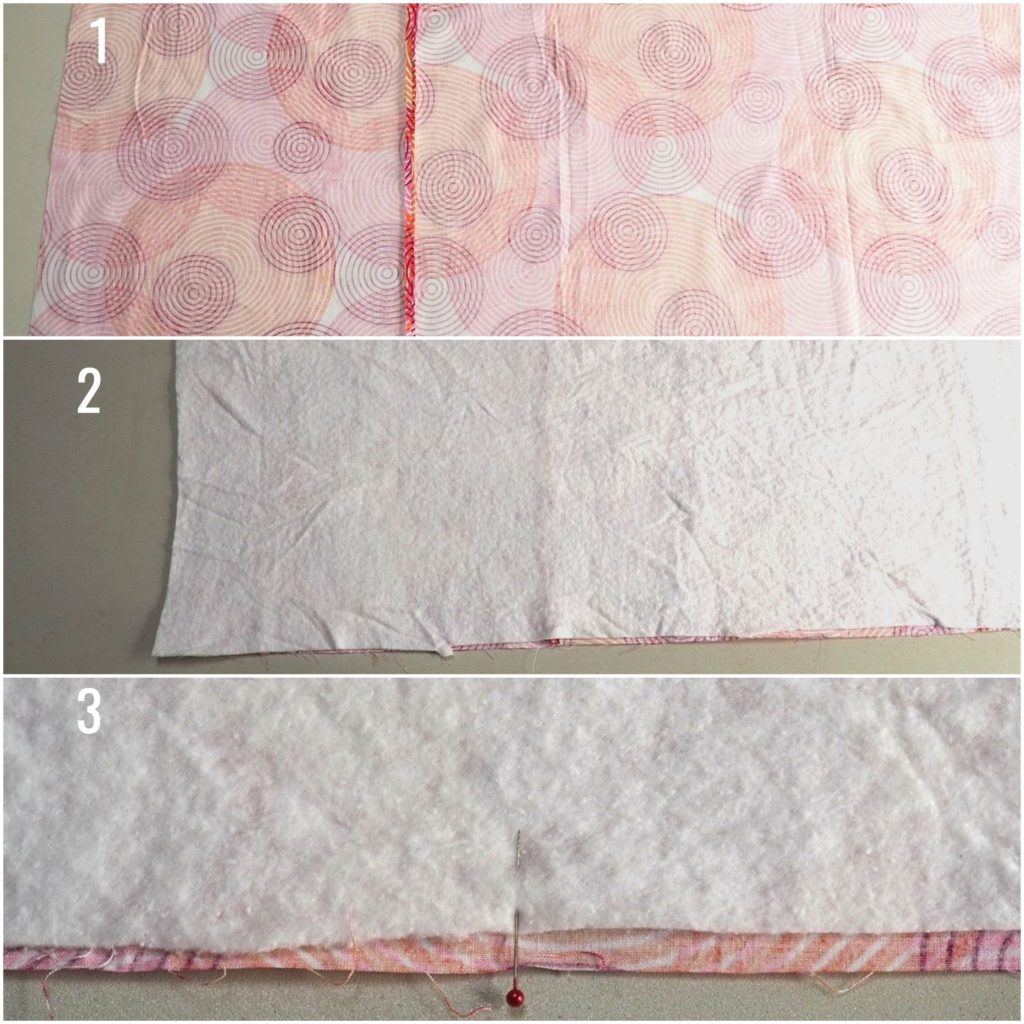
- First, on a flat surface, lay out the backing fabric, wrong side facing up.
- Next, place the batting on top of the backing and smooth out any lumps. Try to get it to match the backing fabric, making sure all four sides are even.
- Then, find the center of the runner. You can do this by measuring or fold the backing and batting in half and marking with a pin.
Step 4 – Sew
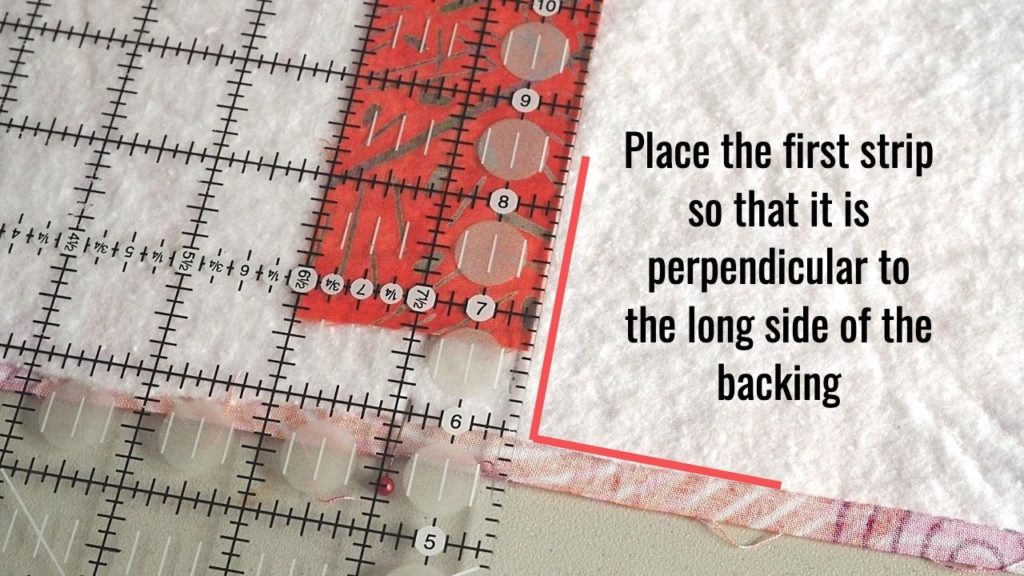
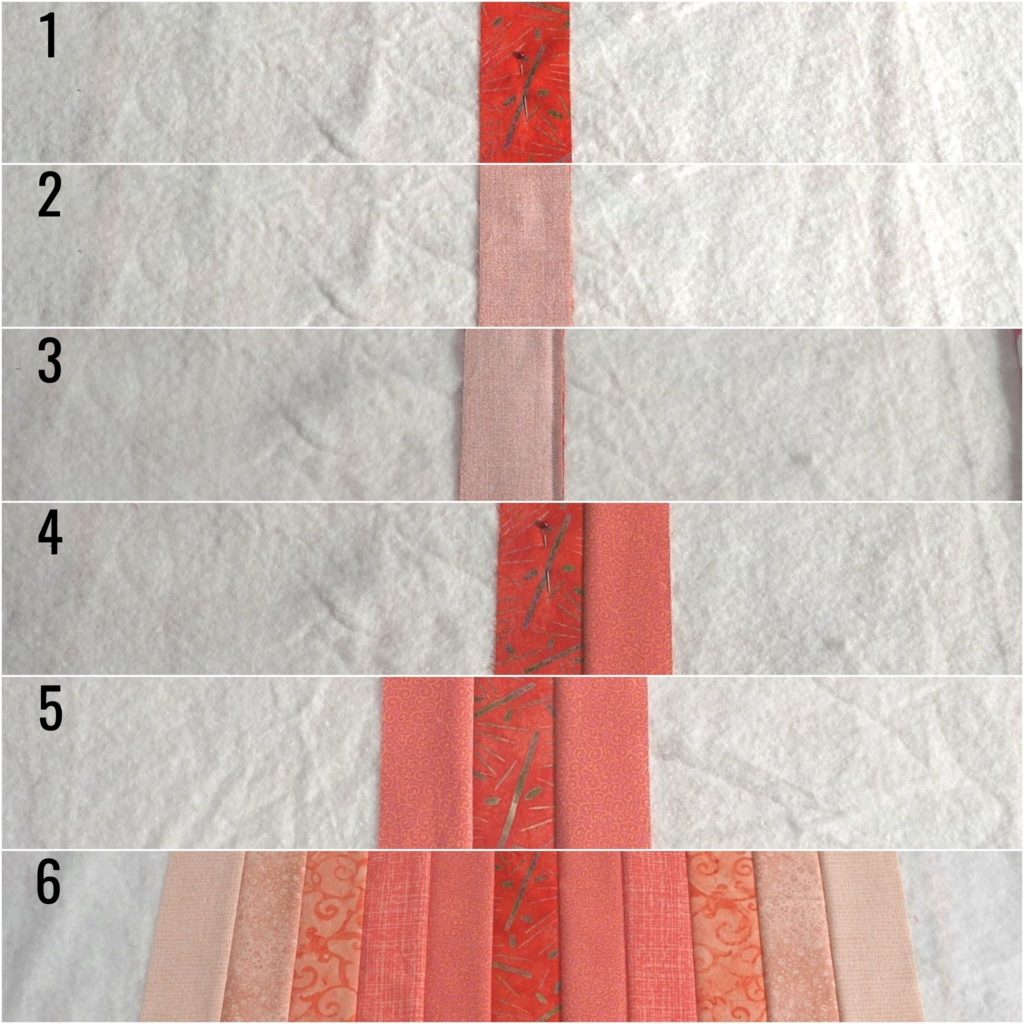
- Start with the center strip and work your way out.
- Take your first strip (A) and position it in the center, right side facing up. Make sure it is perpendicular to the long side of the runner. Pin it securely in place. You may want to use a ruler to make sure that you have a 90° angle.
- Take one strip of the next color (B) and place it on top of the first strip, right sides together, lining up the long edges.
- Sew along the long edge using a 1/4” seam. You will be sewing through the batting and the backing as well.
- Flip the top strip over and smooth down. Repeat on the other side of the center strip.
- Continue adding strips on both sides, until you are done.
Sewing Tips
- I do not pin my batting to my backing. Instead, I continually smooth out the various pieces. I roll up both sides of the table runner when I am sewing. I find it easier to handle it that way.
- Make sure you are lining up the strips as straight as possible. There will be some shifting and you want to keep an eye on your progress so the runner is not askew. The backing and batting are large enough that you should not run out of room.
Step 5 – Getting Ready To Bind
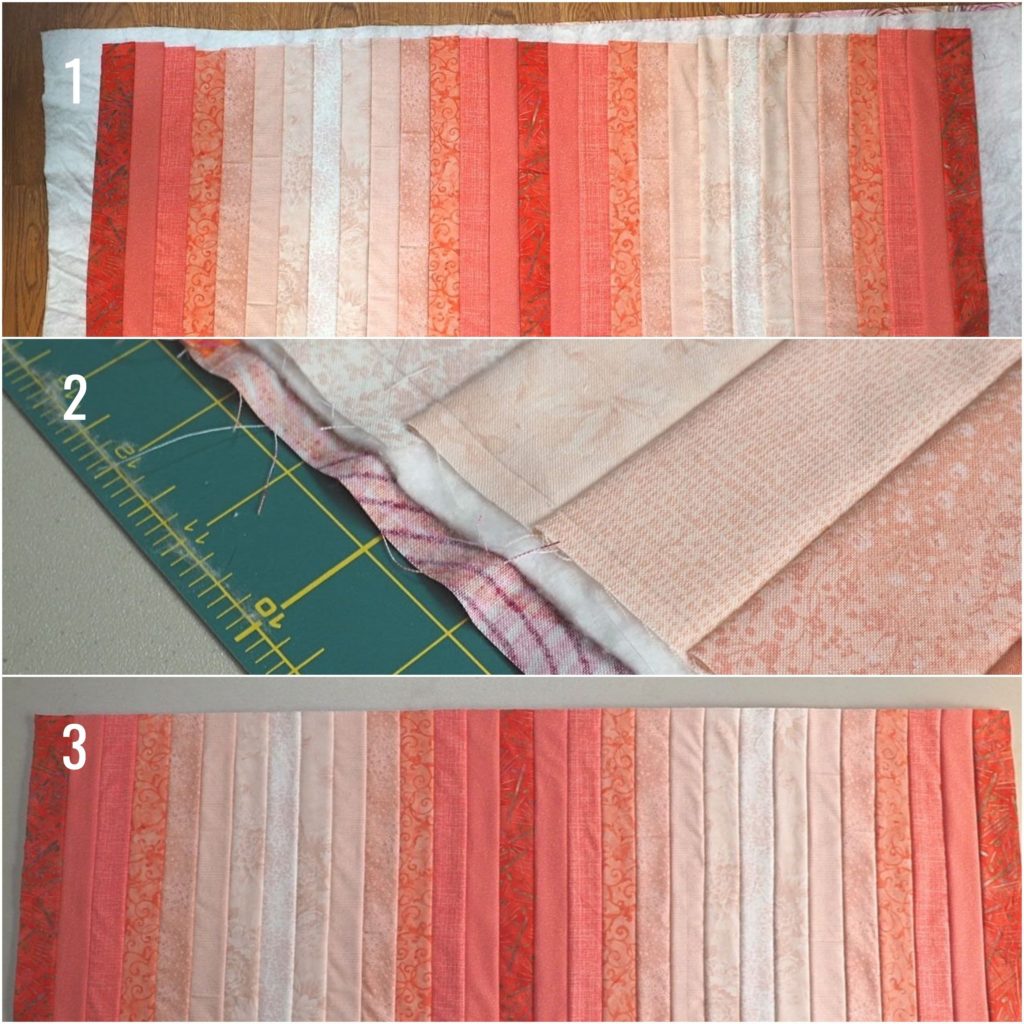
The edges will not be even so the runner will need to be trimmed before binding.
- First, lay out the runner on a cutting mat.
- Next, using a ruler, mark around the edges so the strips are vertical and all of the edges are even. I use a pencil and mark around the runner so I know where to cut.
- Finally, carefully trim around the edges.
Step 6 – Finish
Once you have added all of the strips on the runner, it is time to bind it. You can bind it in two ways.
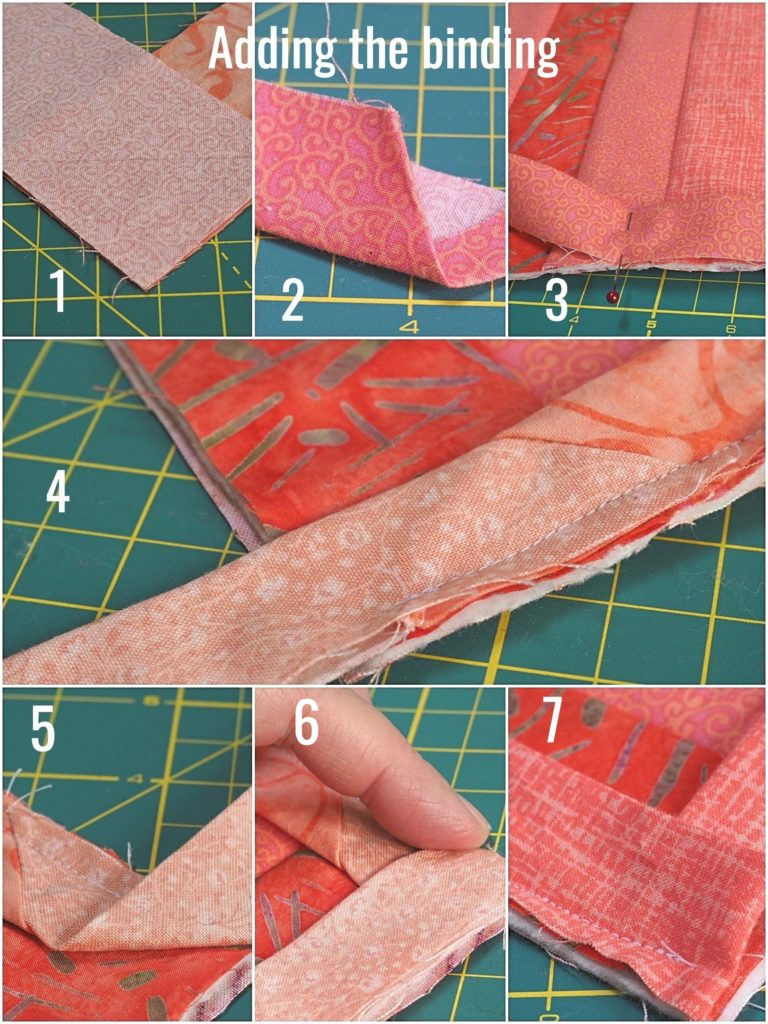
- You can use the traditional way which is what I have done. My binding strips are 2 ½” wide and I cut them from the various fabrics I used in the table runner. I like the scrappy look it gives.
- You can bind it using the backing fabric, as long as you have enough fabric and batting. If you are planning on using the second method, cut your back fabric at least two inches longer and wider. That way you know you will have enough fabric. If you would like to use this method, there is this great tutorial from Cluck Cluck Sew to show you how.
That Is All There Is To It
You are finished and you have a trendy and striking table runner that will make any table look terrific.
I hope you will try this ombré quilt-as-you-go table runner pattern and I hope it turns out beautifully!

1 Comment
Choosing Fabrics For Ombré Projects - Create with Claudia
March 13, 2019 at 7:31 AM[…] the photos in this article, I am using my table runner pattern. However, these tips can be used when planning any ombré […]