

How to Make a Mini Quilt As You Go Christmas Stocking
I love Christmas stockings so when I learned that this month’s Island Batik ambassador challenge was to make one, I was pretty excited. When I was trying to come up with an idea for my stocking I thought of making large ones for family members. However everyone has a stocking that is quite sentimental to them so that idea was out. Instead I decided to make mini stockings. I’ll be filling them with goodies and giving them as gifts this year. If you want to do that as well, here’s how to make a mini quilt-as-you-go Christmas stocking.
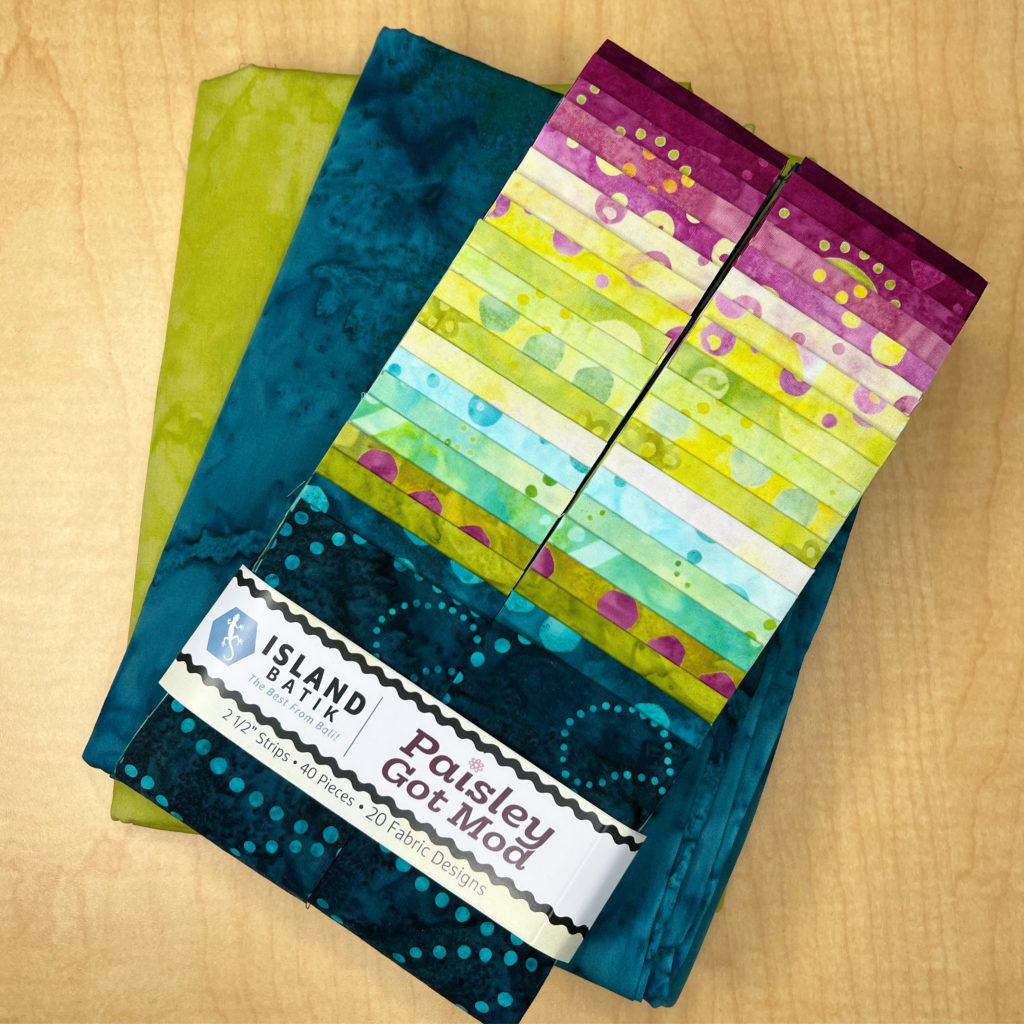
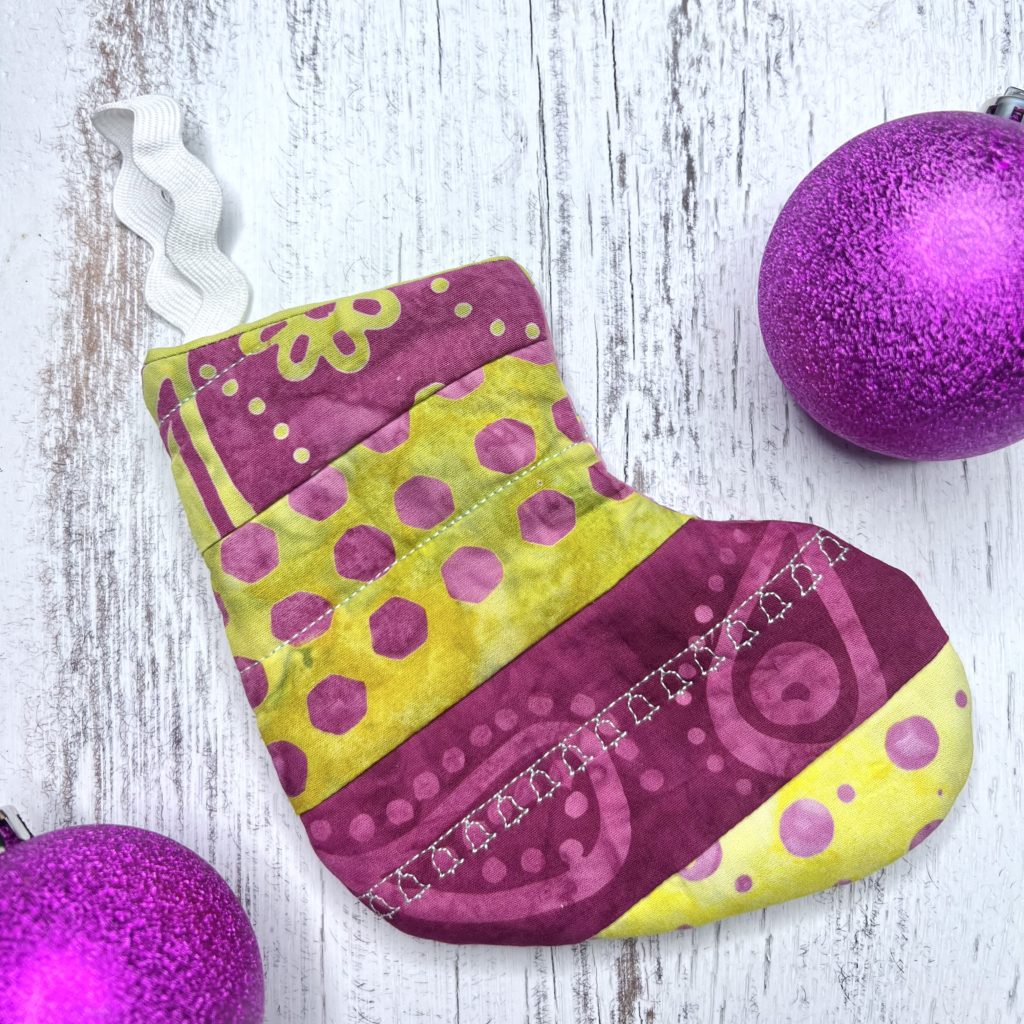
This is an easy project and it is ideal for using up your 2 1/2″ strips and a little bit of fabric for the lining. In fact, the fabric really is the star in this project. In one of my ambassador shipments I got this gorgeous strip set. It is Island Batik’s line called Paisley Got Mod. Designed by Kate Colleran of Kate Colleran Designs, it is so much fun! I thought the colors were a fun and groovy twist on the traditional red, white and green.
Disclosure: Items used in this post were generously provided by Island Batik, Hobbs Batting, Aurifil Thread and Schmetz Needles.

How to Make a Mini Quilt As You Go Christmas Stocking
All of my instructions are here in this post, but you can also watch me make it in my YouTube video.
What You’ll Need to Make 2 Mini Stockings
Note that this supply list is to make 2 mini stockings. You can easily increase the sizes and numbers of strips, backing fabric, batting and lining to make more. When finished the stockings measure about 5 1/2″ long.
7 to 8 strips of fabric – 2 1/2″ x 22″ – I used strips from the Island Batik “Paisley Got Mod” line
Mini stocking template (YOU CAN DOWNLOAD THE TEMPLATE HERE)
Batting – 1 piece about 22″ x 18″ – I use Hobbs Natural Cotton for my stockings. It is a lighter weight and thinner batting so it works well
Backing – 1 piece about 22″ x 18″ – I used Island Batik’s Chartreuse from their Foundations Glorious Greens line
Lining – 1 piece about 16″ x 18″ – I used Island Batik’s Chartreuse from their Foundations Glorious Greens line
Ribbon – 2 pieces (one for each stocking), about 5″ long for each stocking
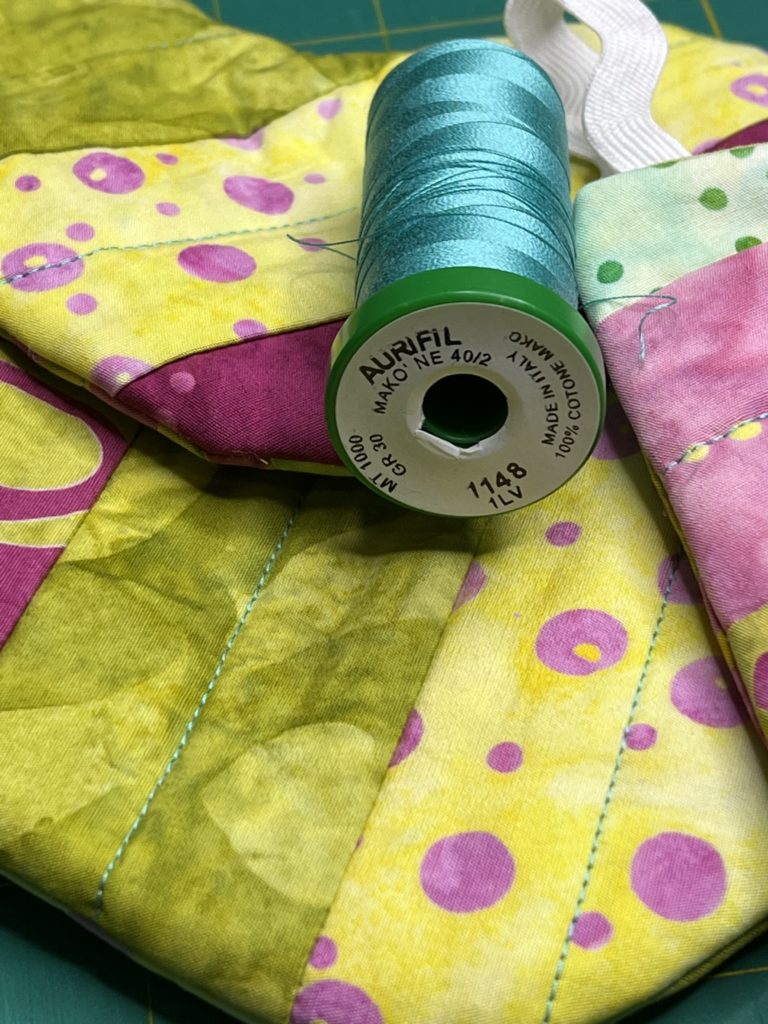
To piece and quilt my stocking I used Aurifil thread and I use Schmetz Microtex needles in my machine.
Making the Body of the Stocking Using the Quilt-As-You-Go-Method
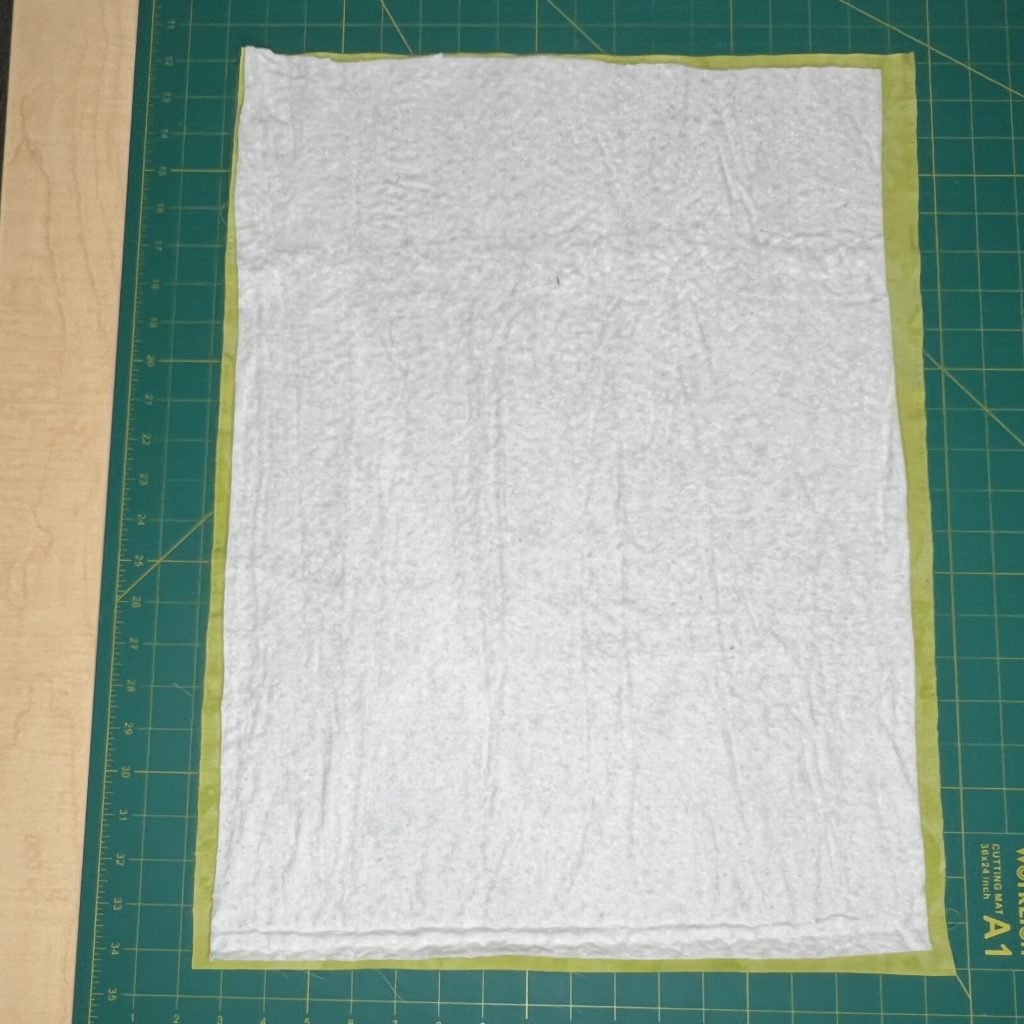
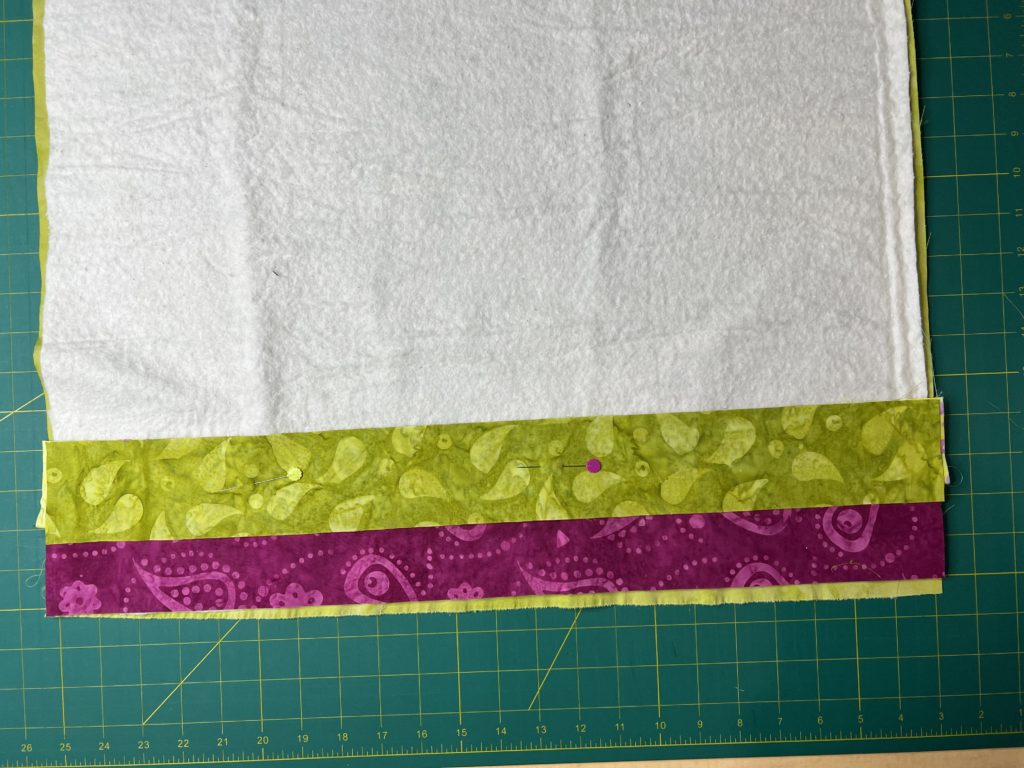
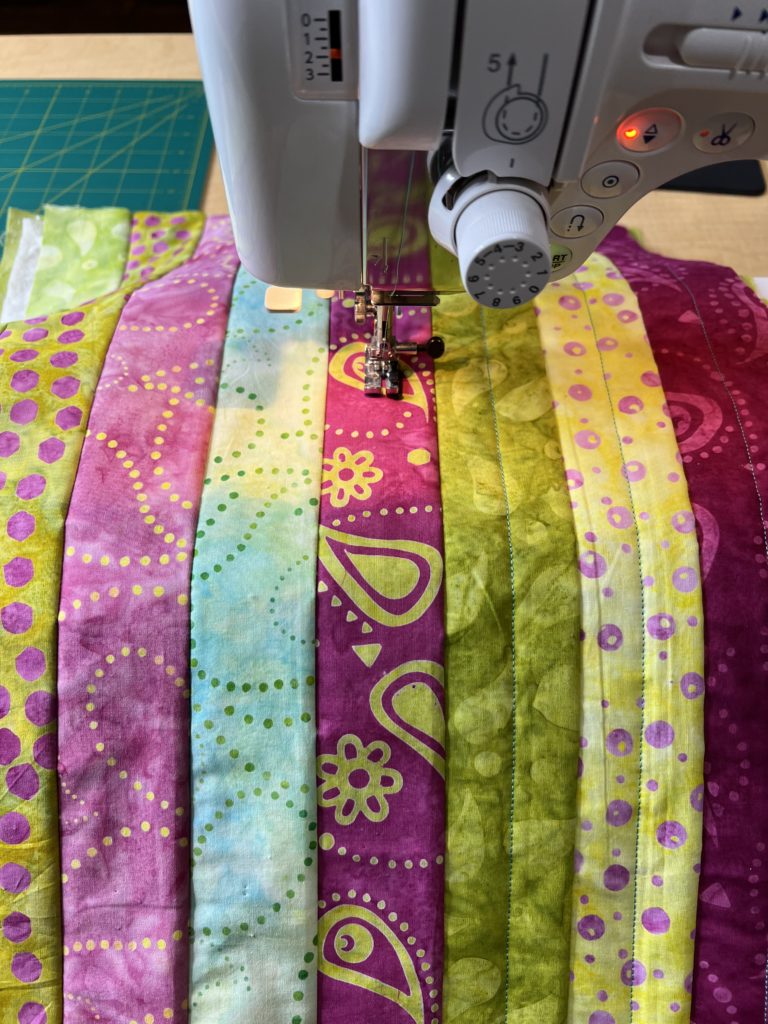
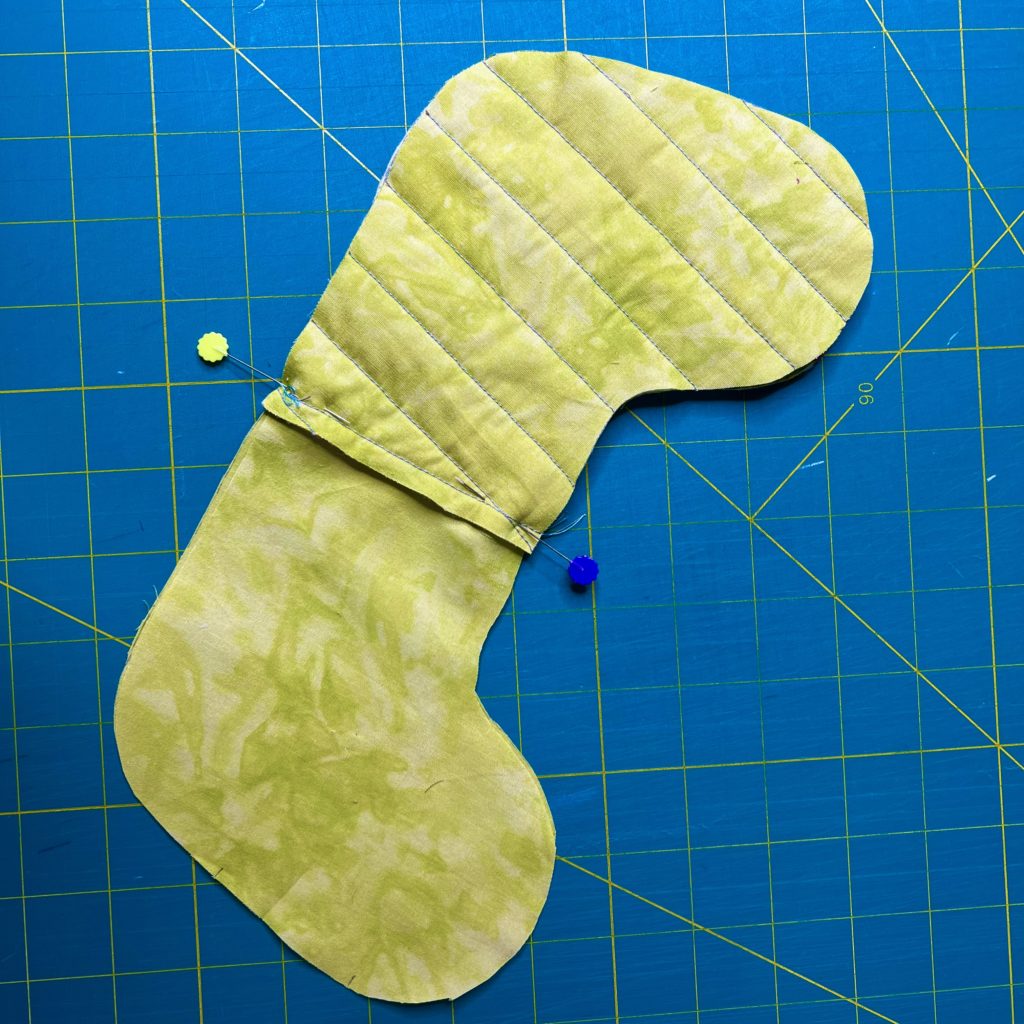
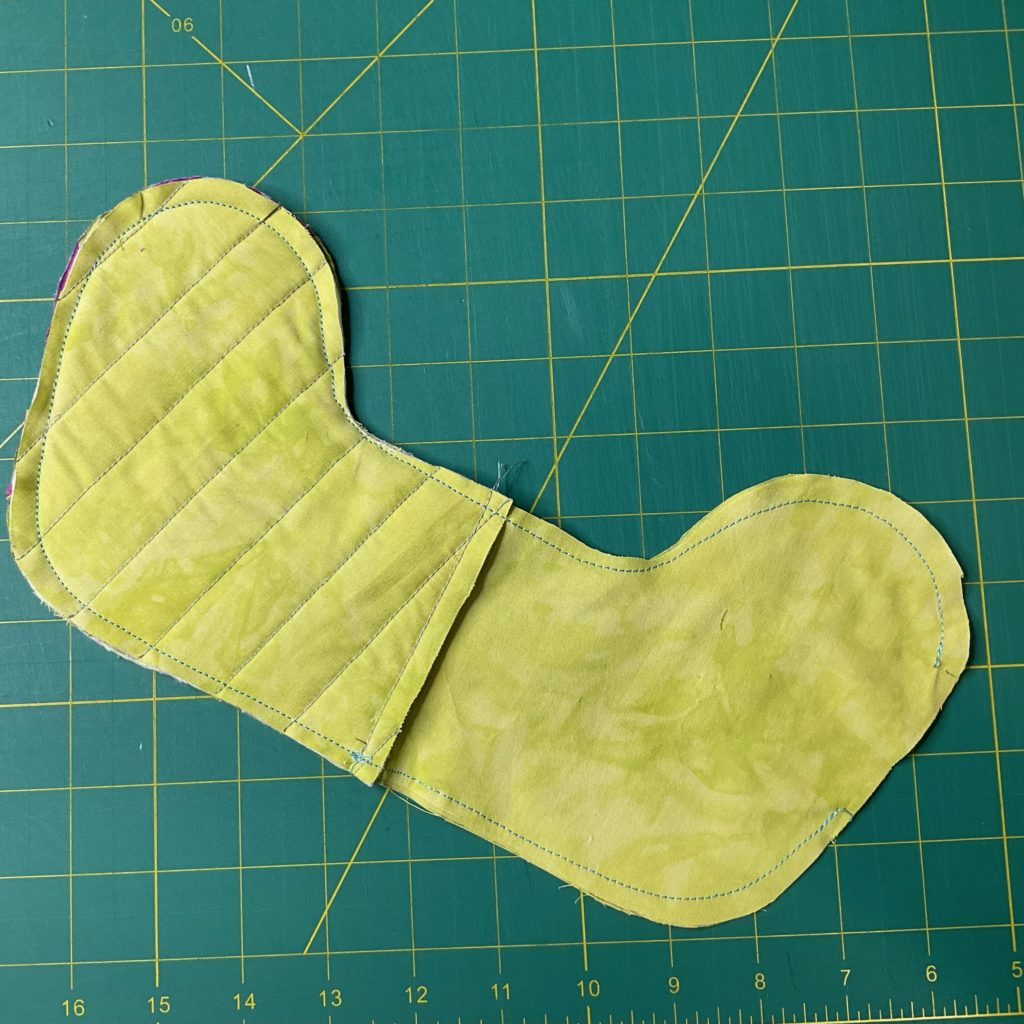
Lay the backing fabric, face (good side) down on a flat surface. Then line up the batting on top of that. Line up one the of the strips along the long bottom edge of the batting (face up). Pin in place. Lay another strip on top of the one pinned (right side facing pinned strip). Pin in place. Using a 1/4″ seam allowance, sew along the long top edge.
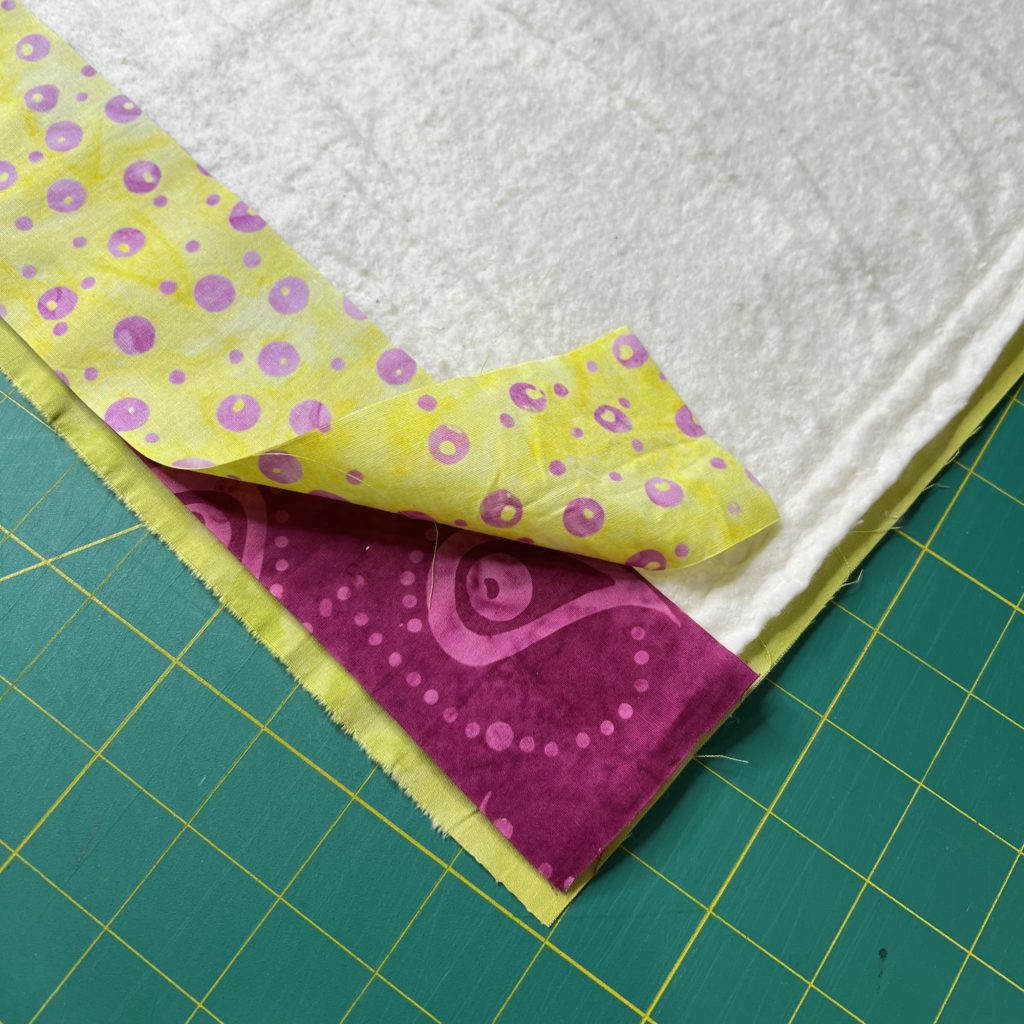
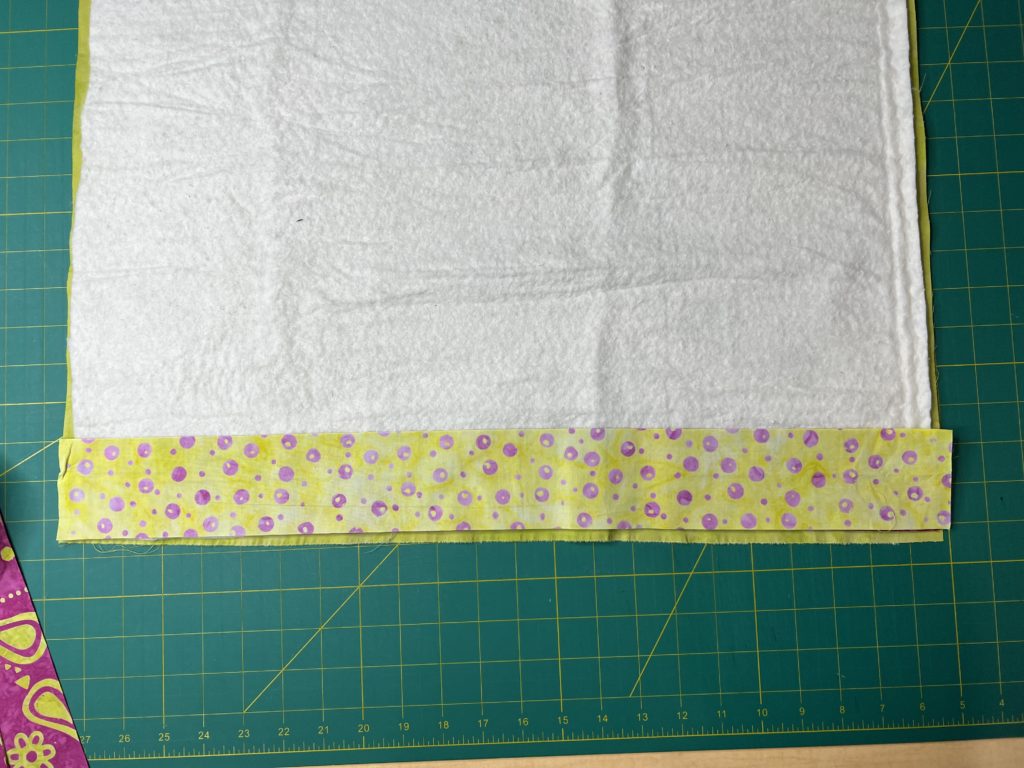
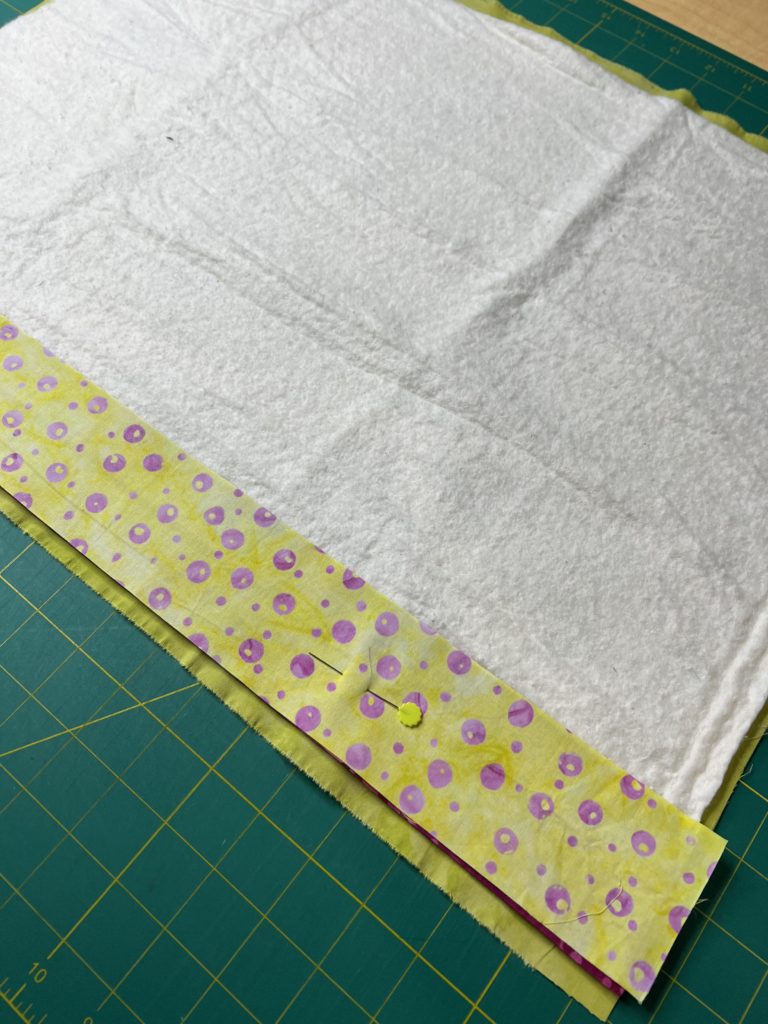


Flip the top strip back and smooth down. Add the next strip the same way. Continue until the entire surface is covered.
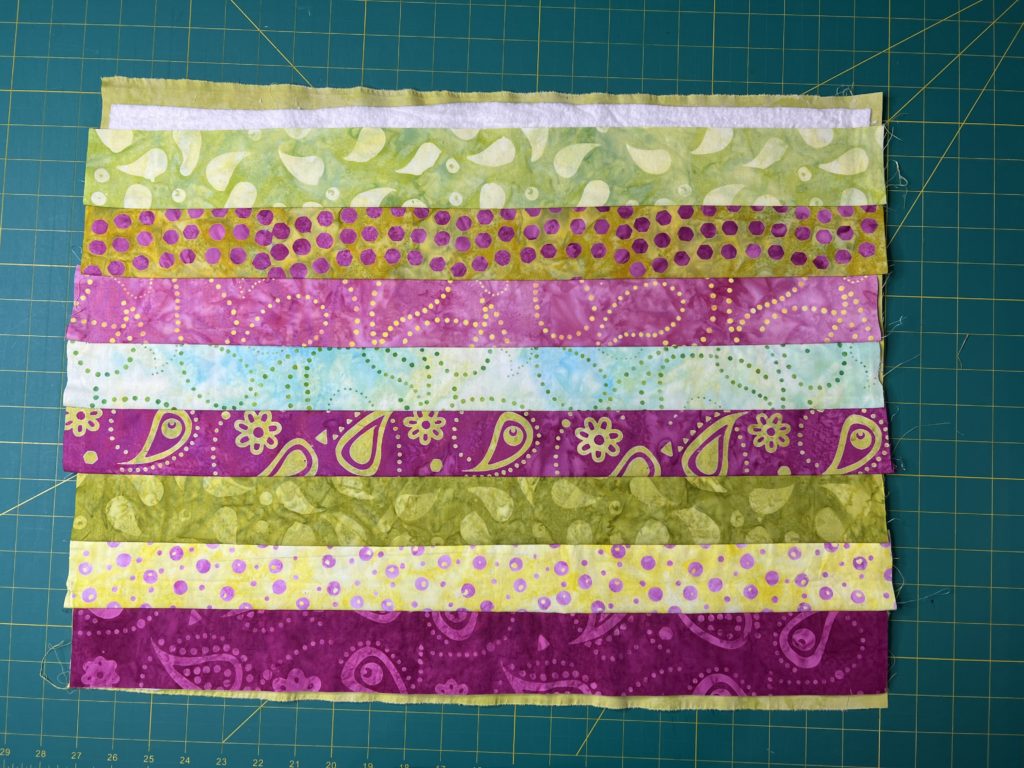
This next step is optional, but I like to add a little bit more quilting. I add some simple quilting down the center of each strip. To change it up a bit I added some decorative embroidery to one of the rows in another stocking I made (see photo at the end of the article).
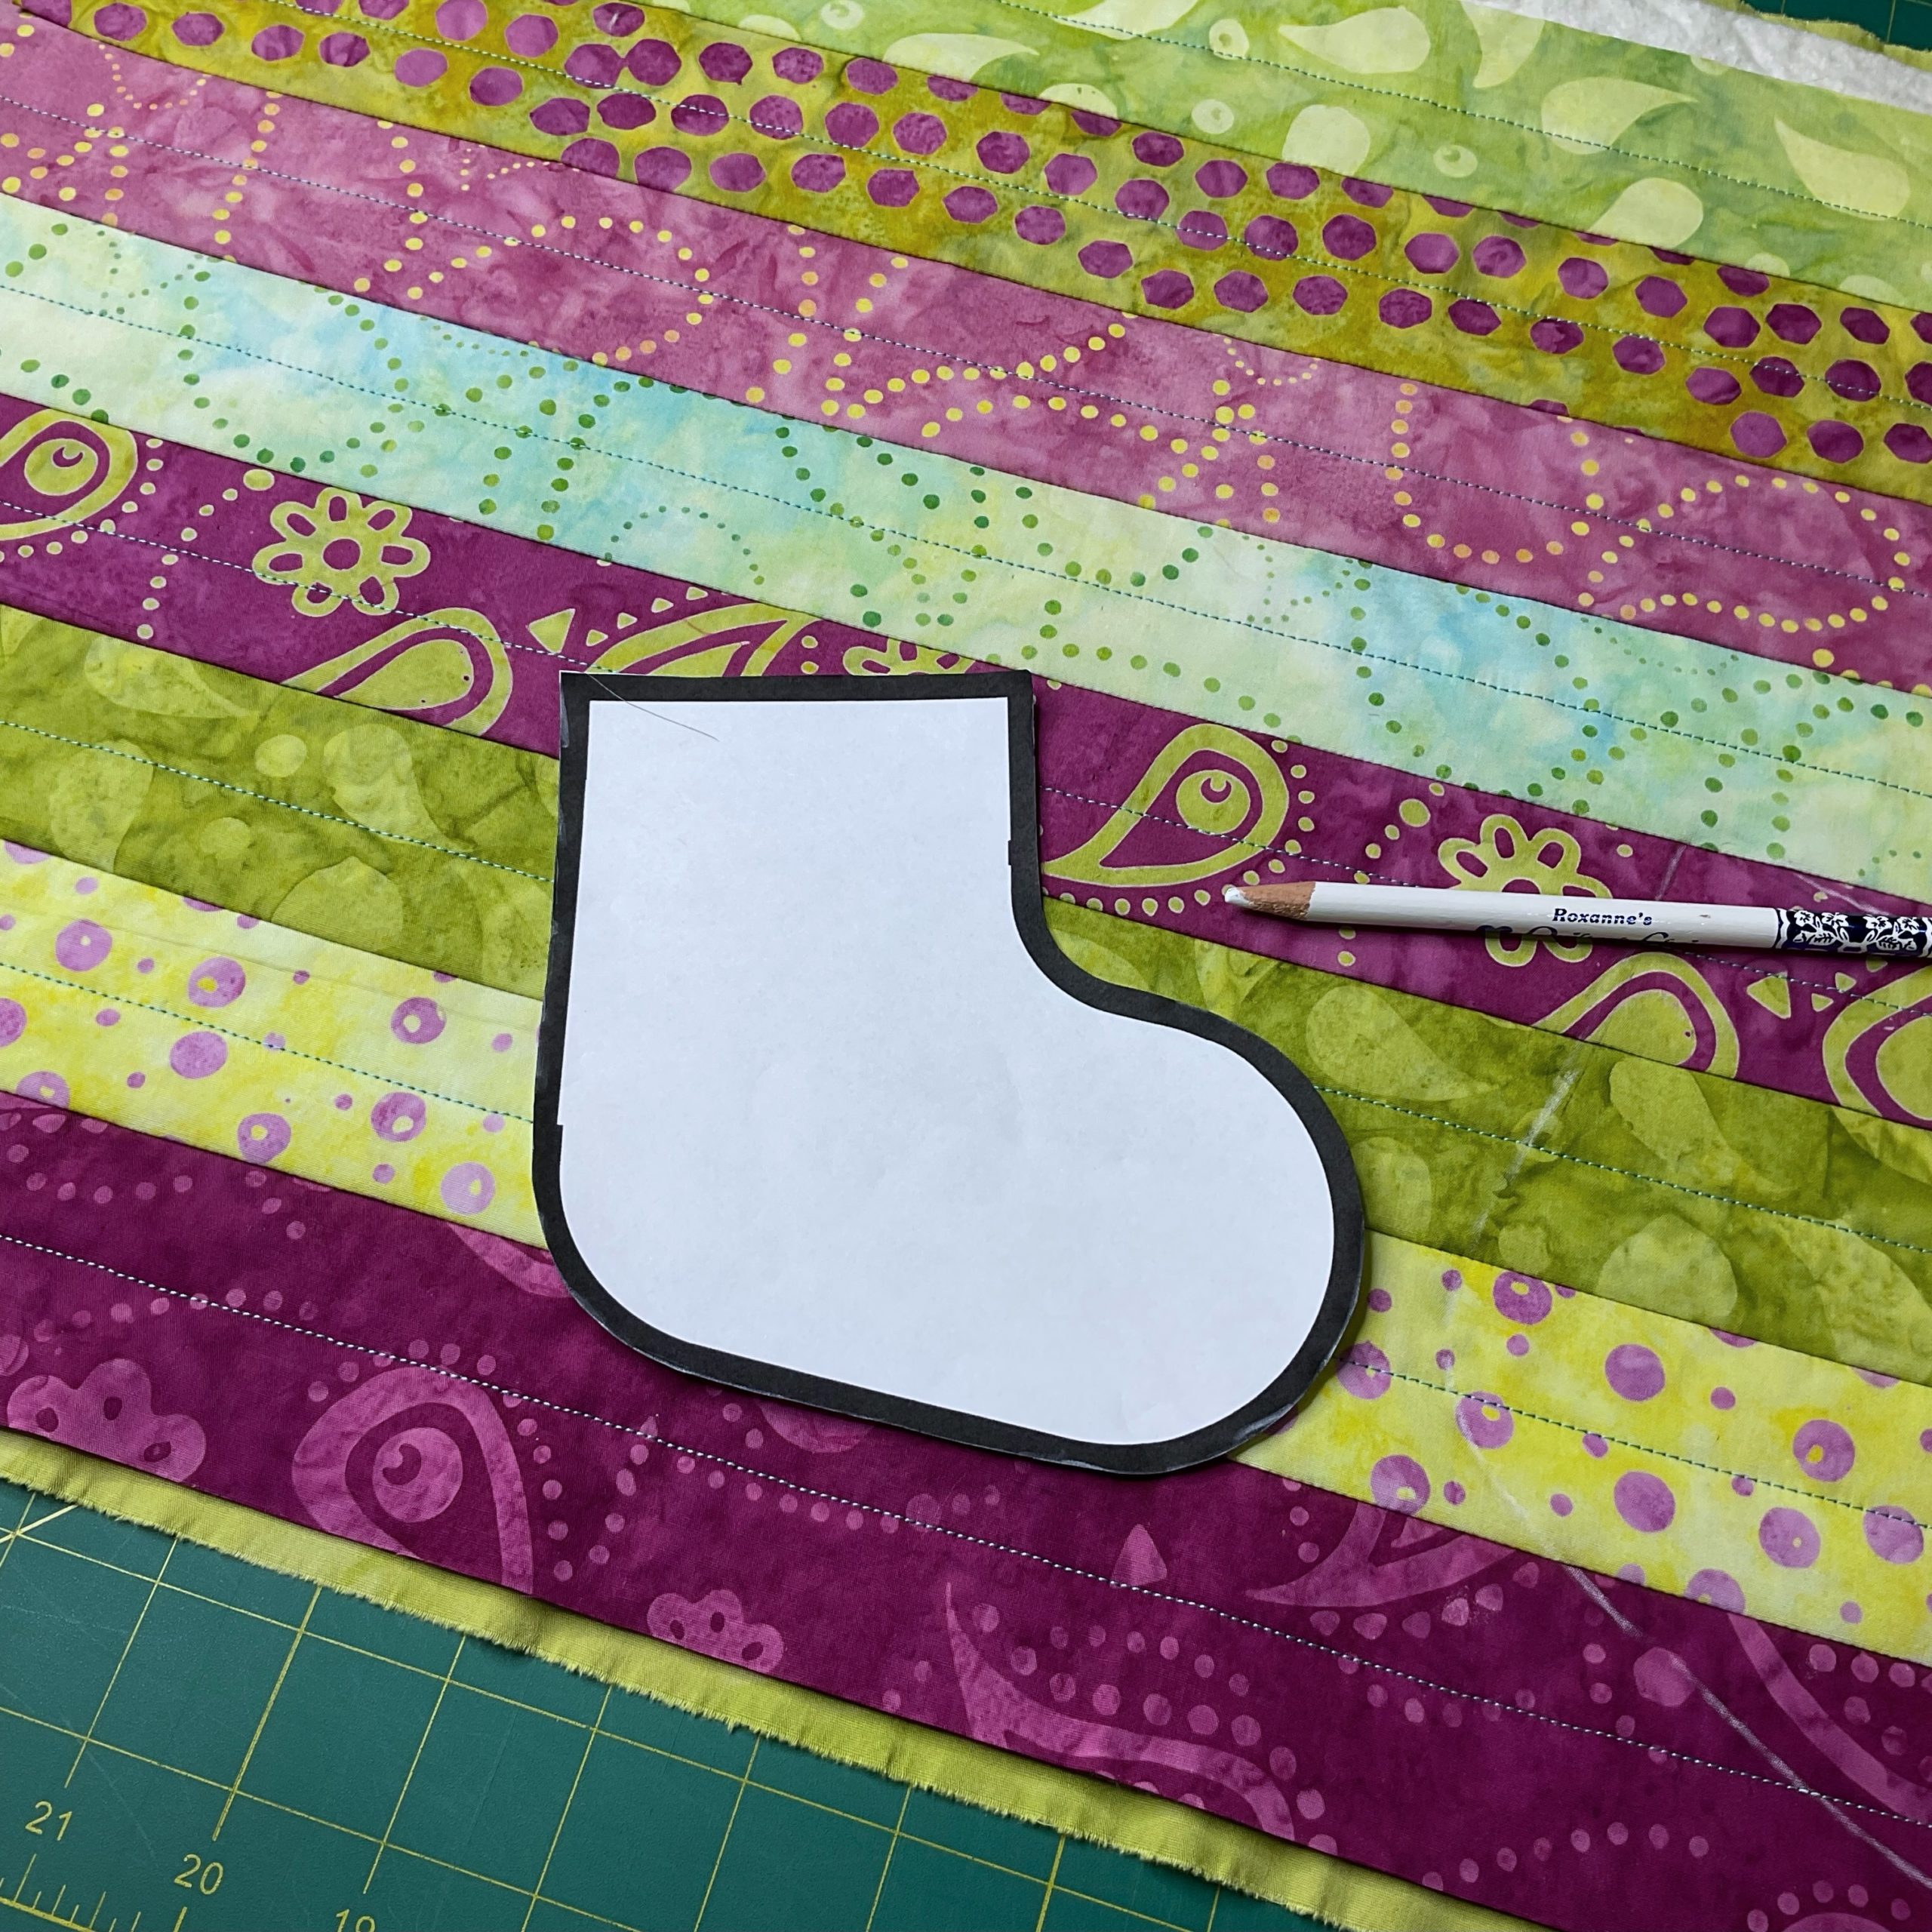
Cutting Out the Stocking Shape
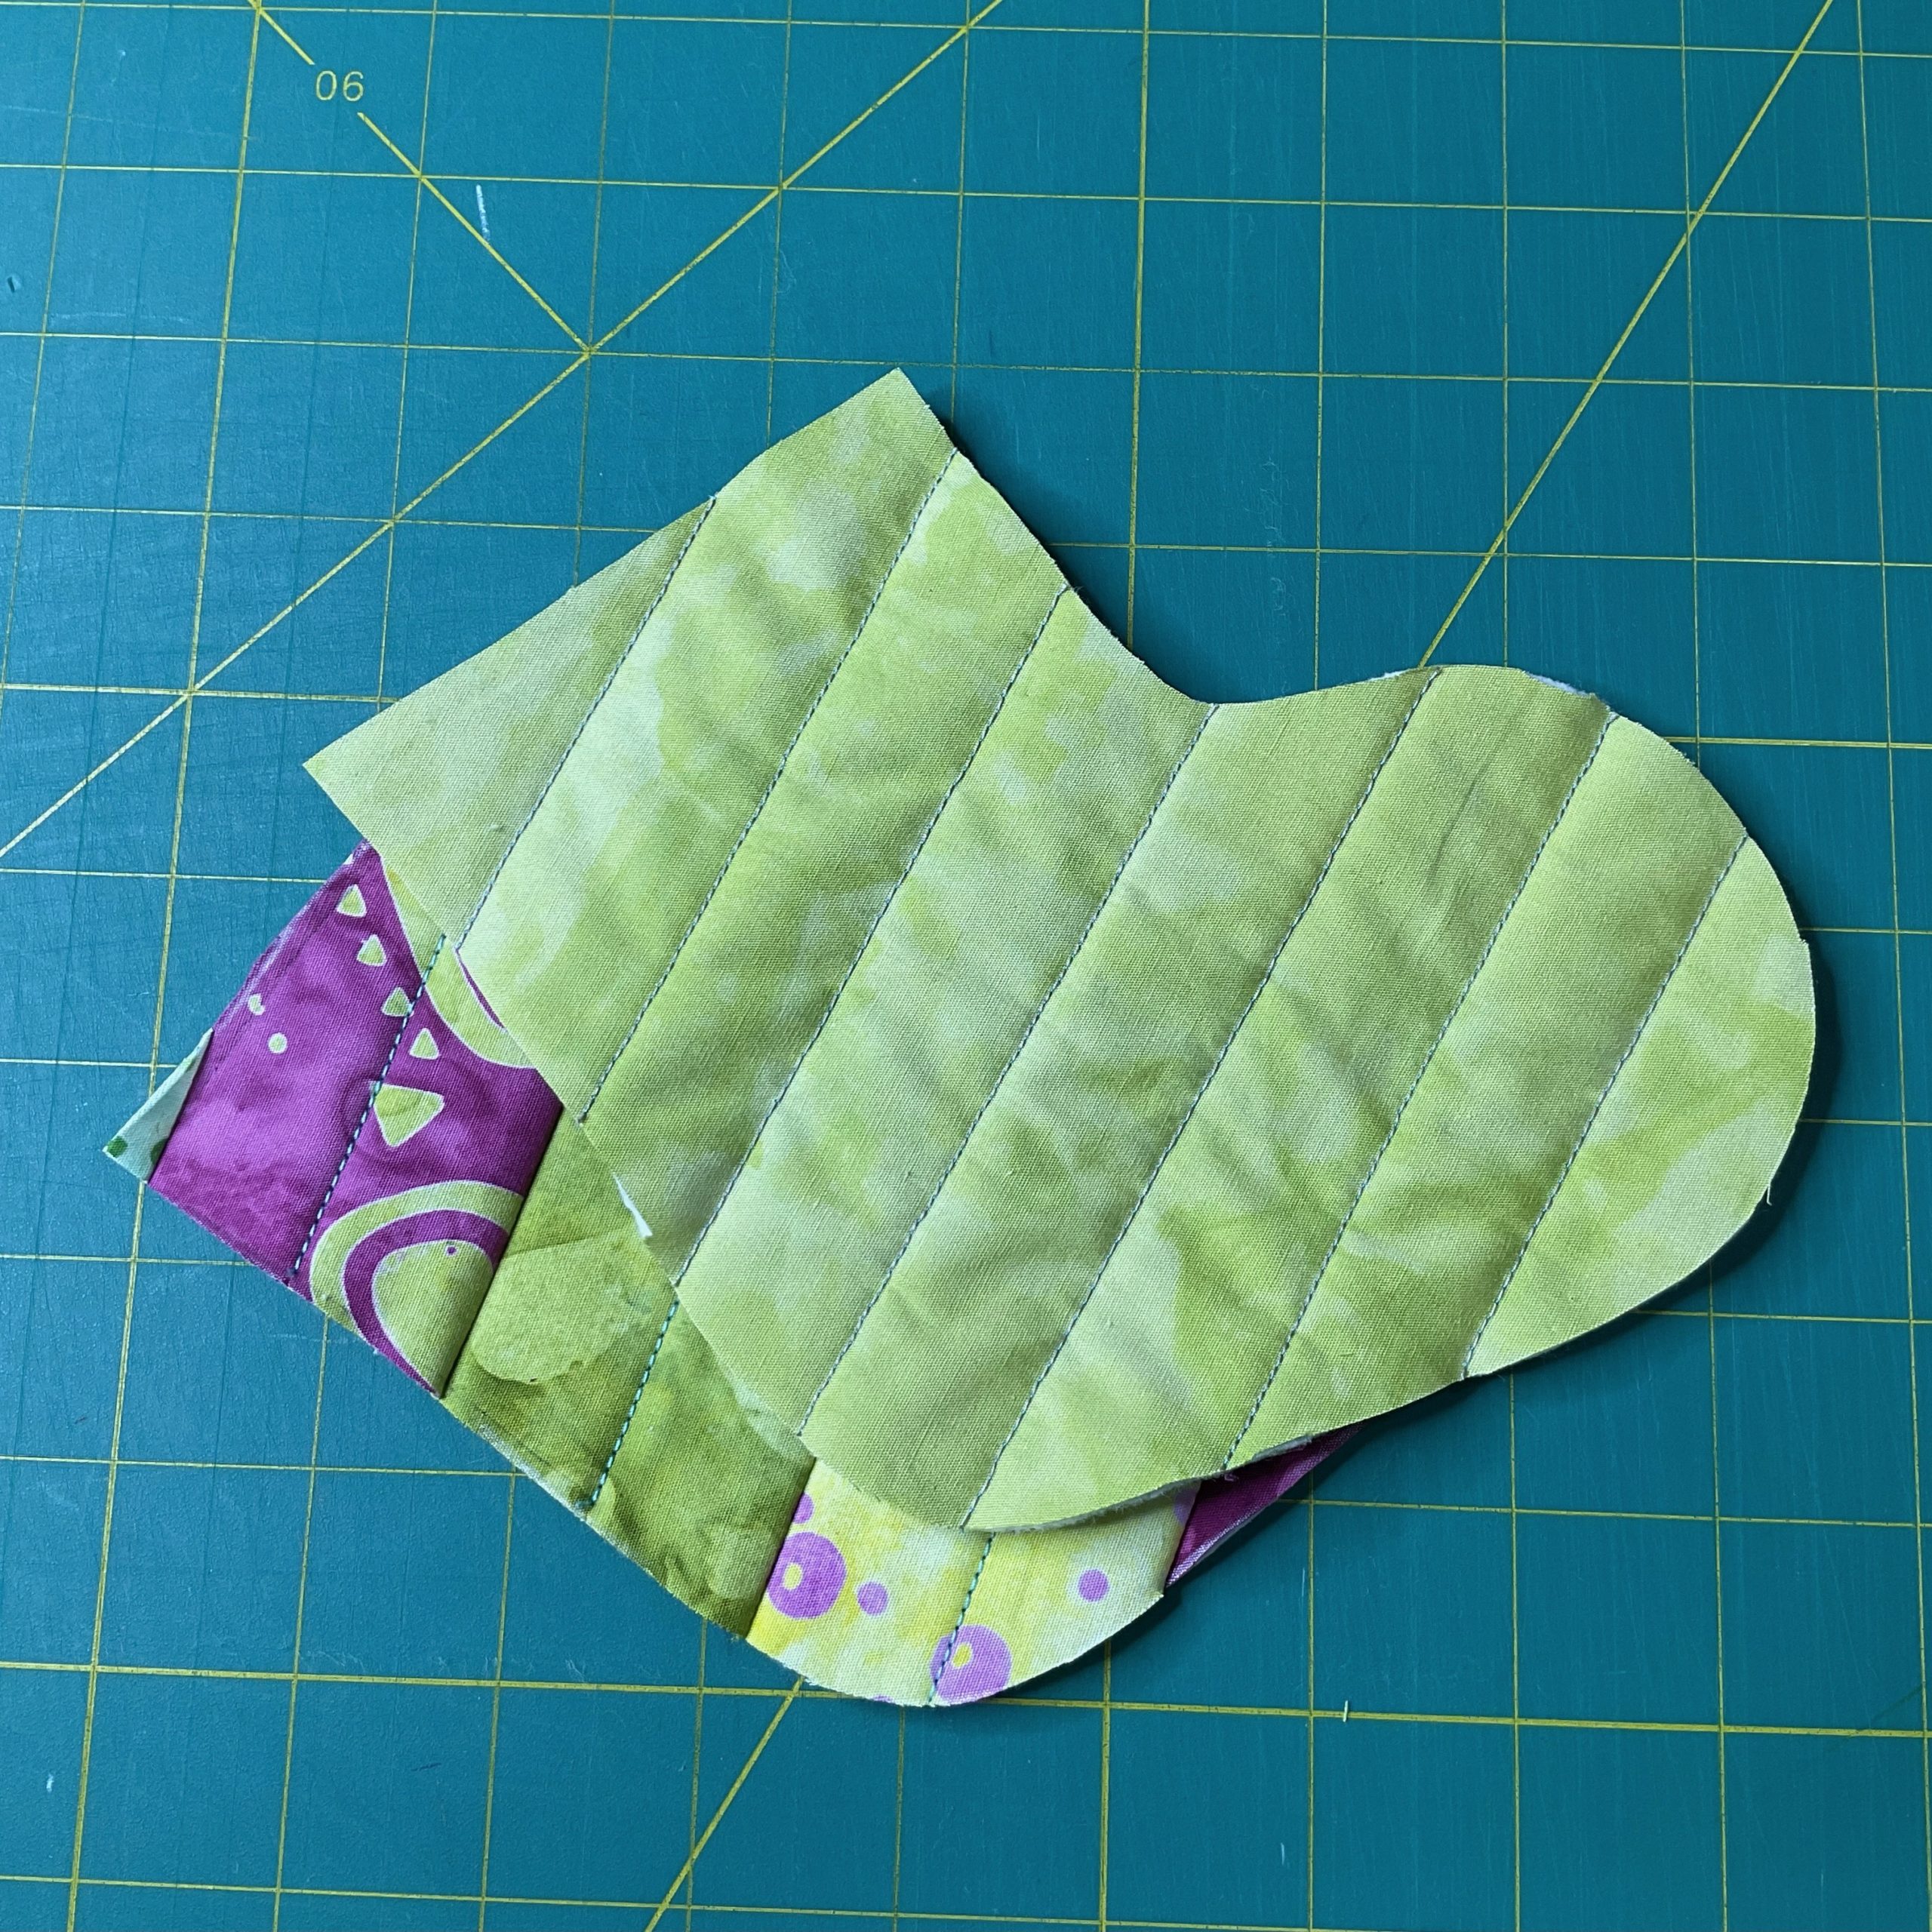
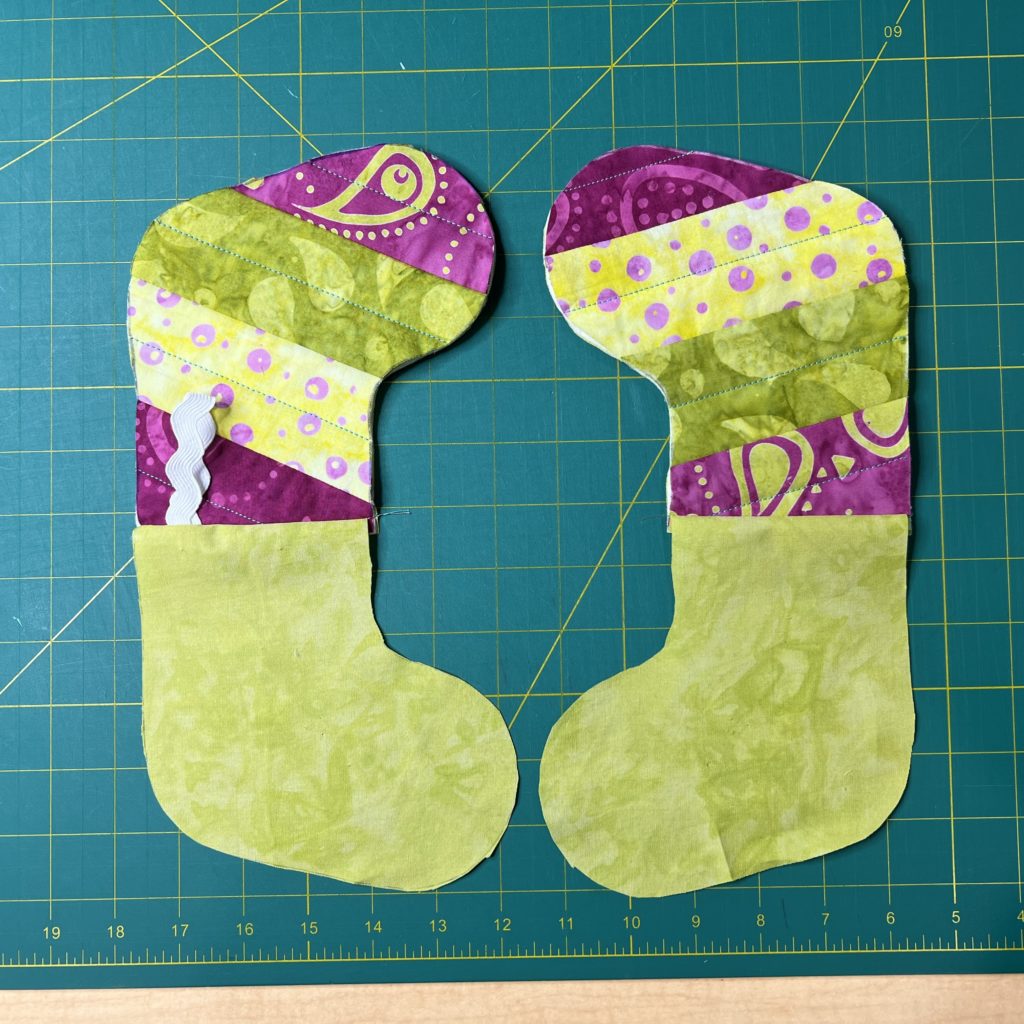
Cut out the stocking template and pin it onto the quilted fabric where desired. To make one stocking you will need two pieces from this quilted fabric. Important: You will want to flip the template over for the second shape or you won’t get the stripes on the outside.
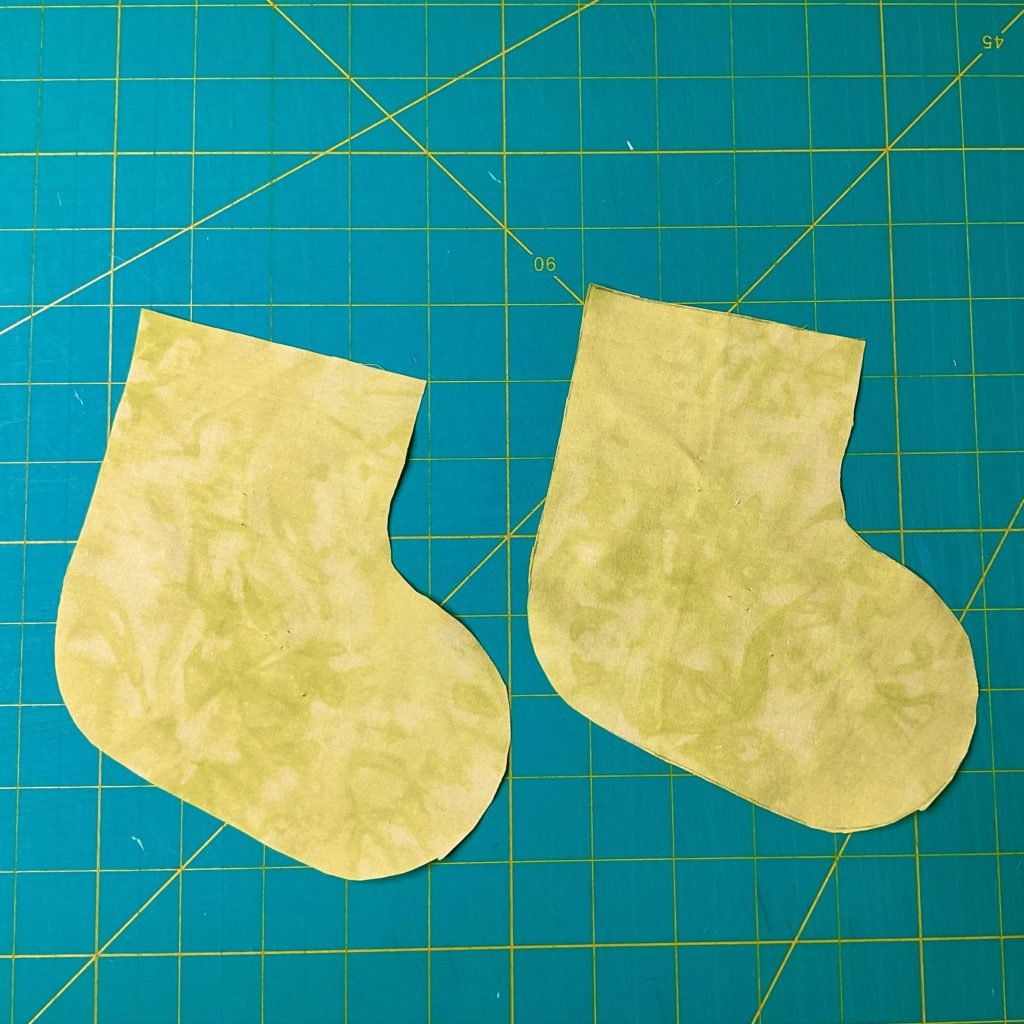
Using the same template, cut out 2 stocking shapes from the lining fabric.
Assembling the Stocking
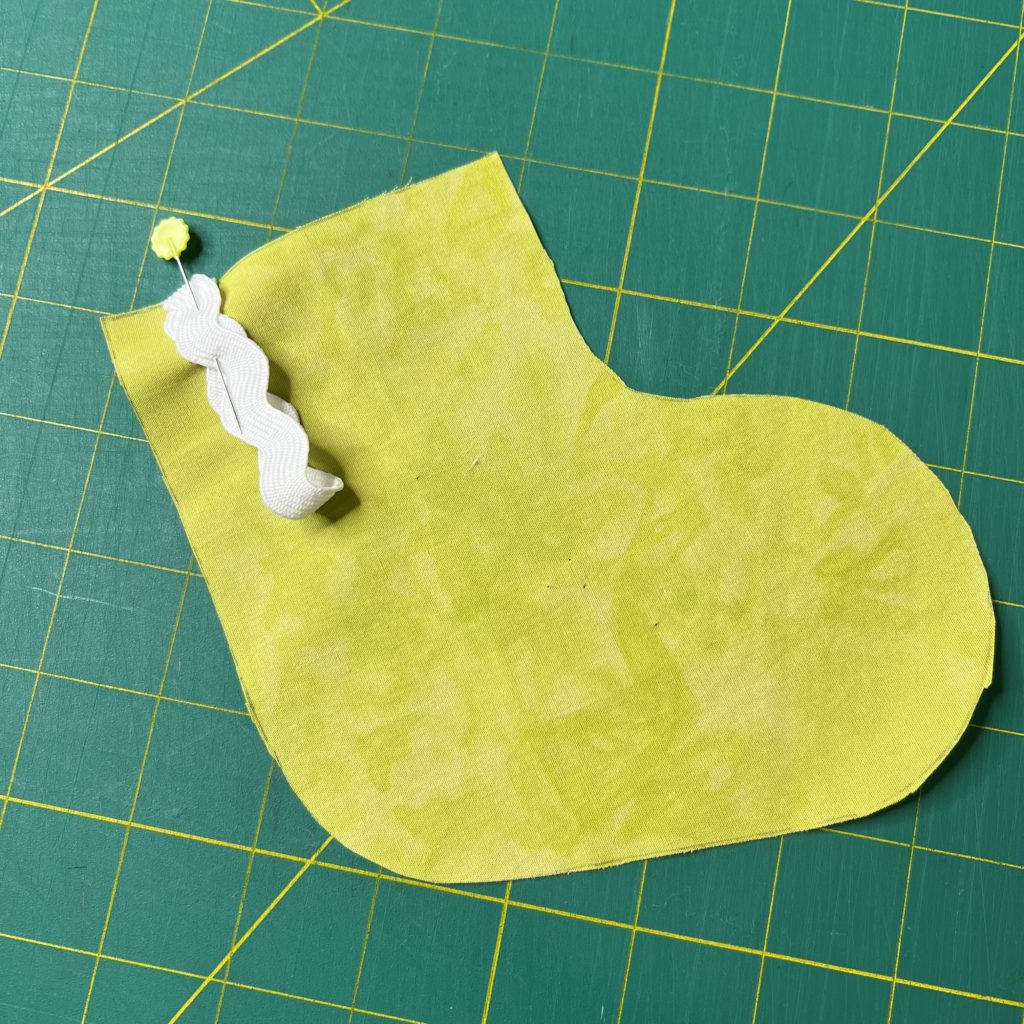
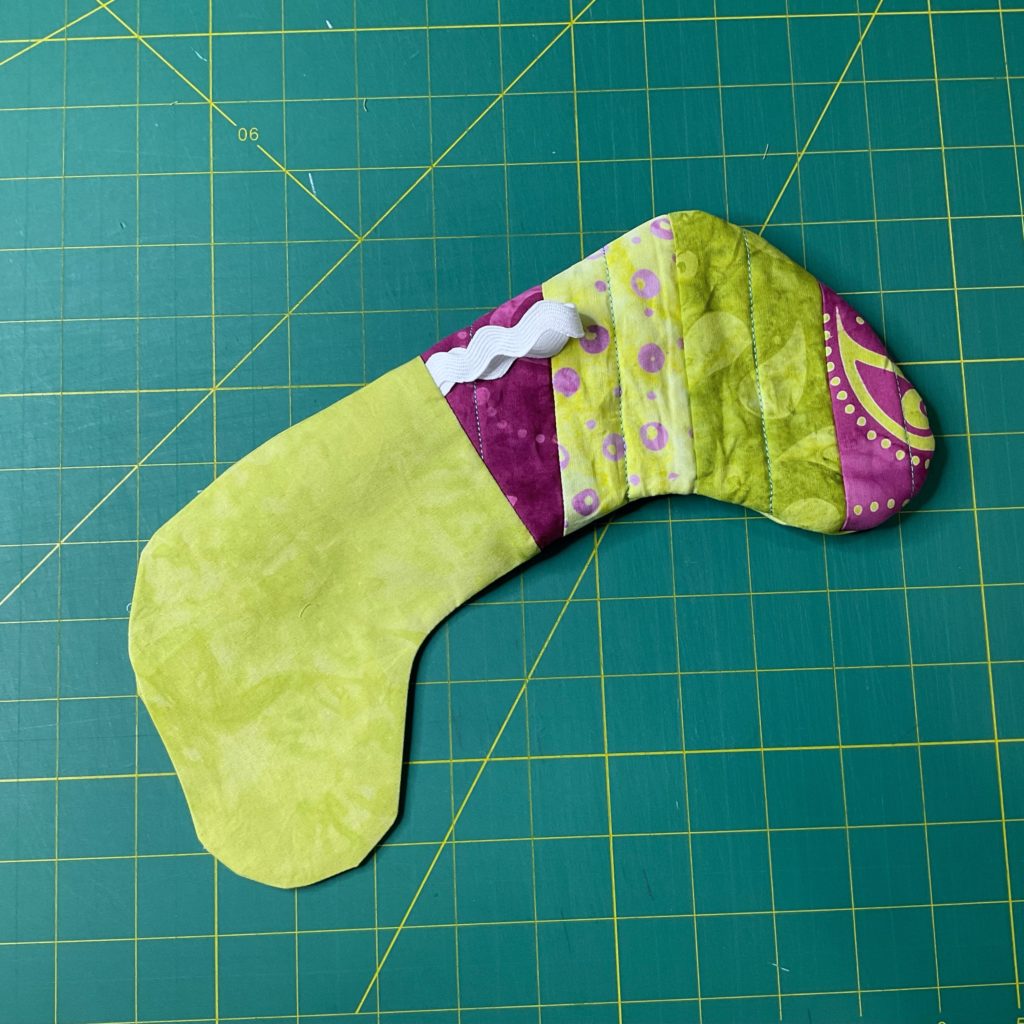
First add the hanging ribbon by folding it half and pinning it to the top left of one of the pieces of lining.
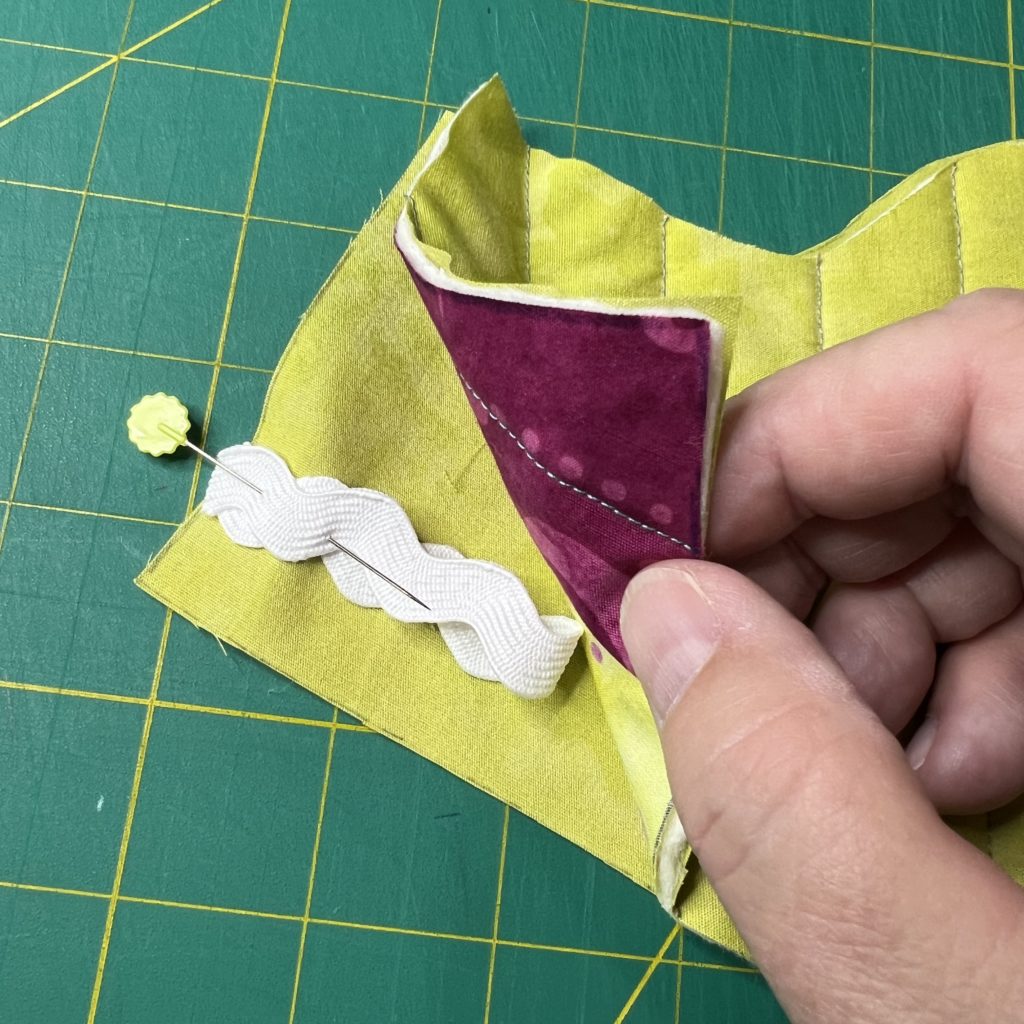
Now you need to attached the quilted stocking pieces to the lining fabric stocking pieces. Line them up, right sides facing, and sew along the top edge using a 1/4″ seam allowance. Make sure to keep the ribbon inside as shown in the photo on the left. Unfold the two sides and they should look like the photo on the right.
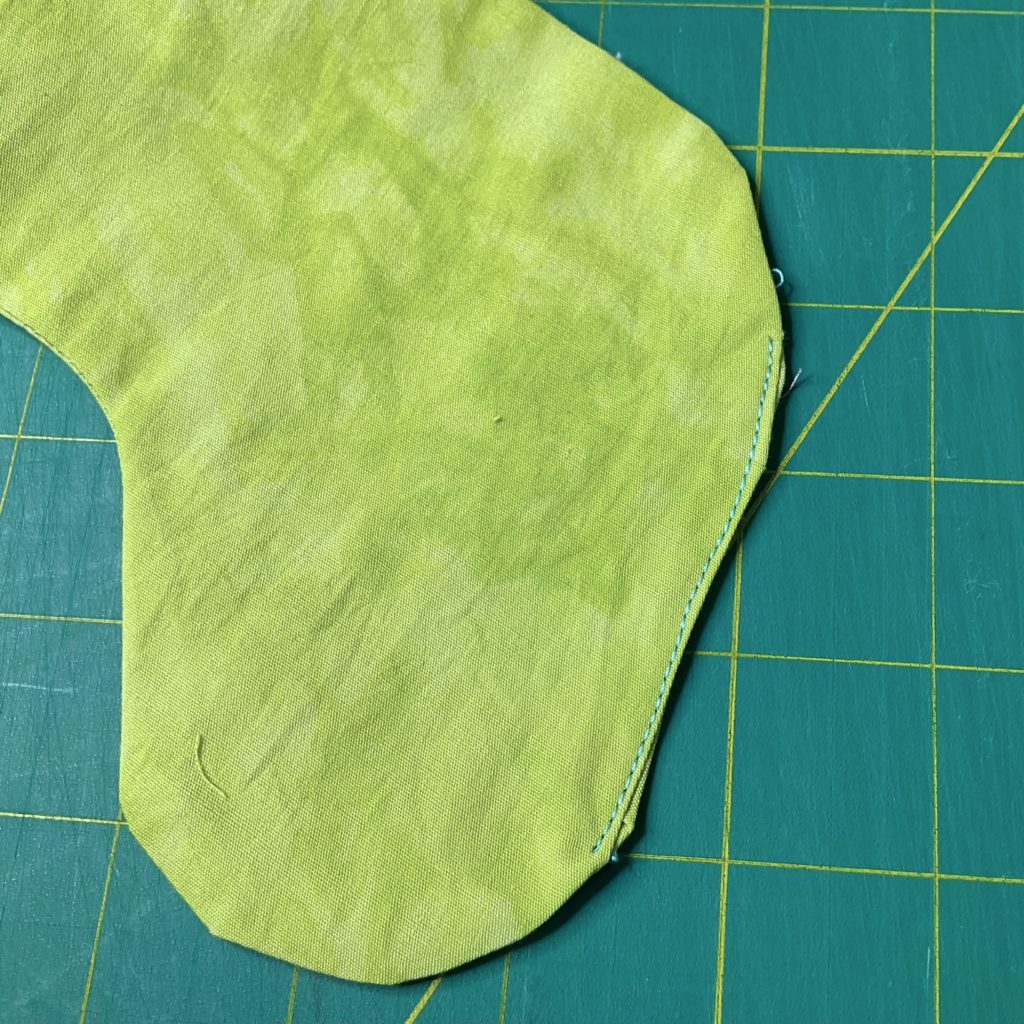
With right sides facing, carefully pin the two sides together, making sure that they line up, especially at the seams where the top meets. Sew around the entire stocking, leaving an opening in the lining so you can flip the stocking inside out. Important: Backstitch at the beginning and ending of the opening.
Finishing the Stocking
Using the opening in the lining, turn the stocking inside out. This can be a little tricky and you may want to use a pencil eraser or chop stick to help smooth all of the edges out. Press the stocking. Close up the opening in the lining by turning the edges and stitching along the edge.
Lastly, insert the lining into the stocking. This also takes a little bit of time and manipulation. I find it helps to use the eraser end of a pencil to help smooth the lining inside the stocking. Press to smooth out the stocking.
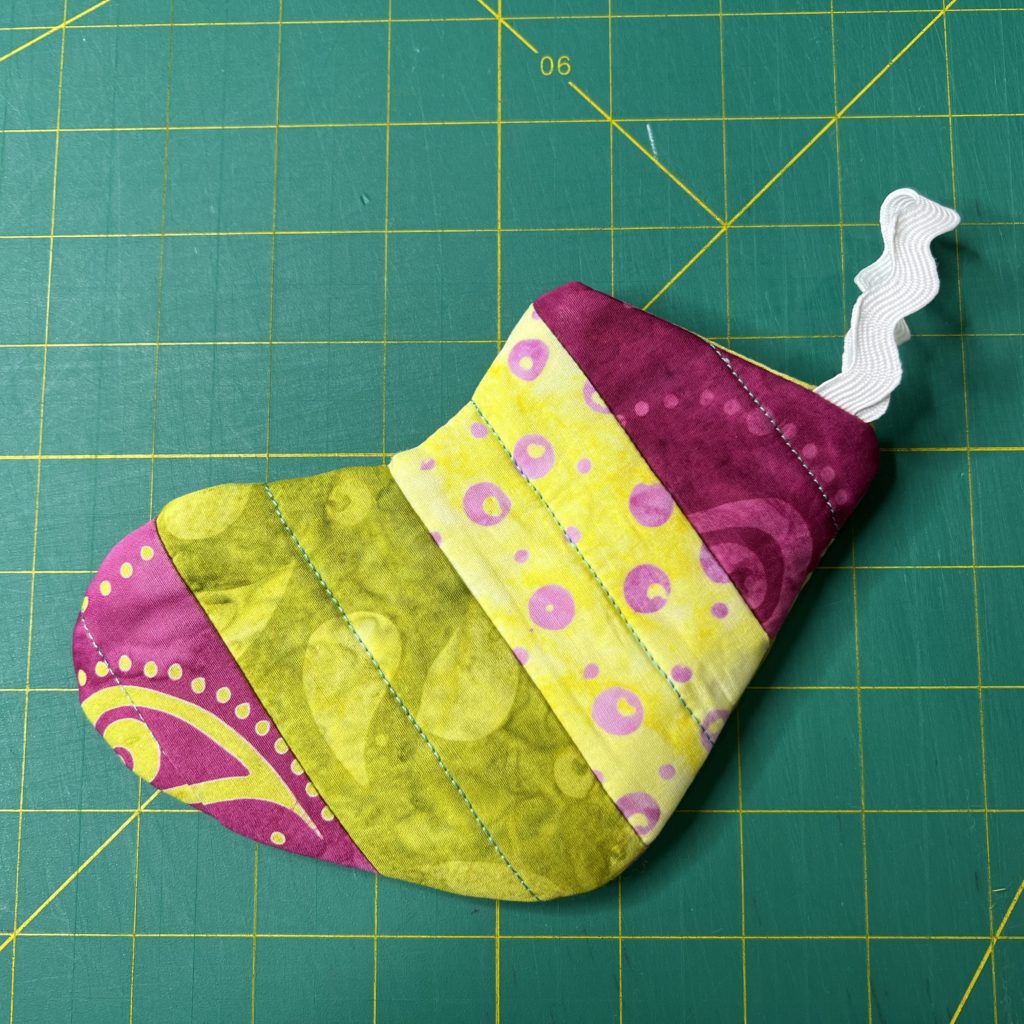
That’s it. Repeat to make a second mini stocking. To save time I cut out everything I needed and just sewed them both at the same time. Once you make one, these come together quickly.
What Will You Do with Your Mini Stocking?

I think that these will make great gifts. Some ideas for stocking stuffers would be sweet treats, money, a gift card, a few spools of thread or maybe even something sparkly and expensive. Whatever is inside, the recipient is sure to love their new mini quilt as you go Christmas stocking.
Make Sure to Check Out All of the Other Island Batik Ambassador Stockings
Brenda Alburl @ Songbird Designs
Megan Best @ Best Quilter
Jennifer Fulton @ Inquiring Quilter
Preeti Harris @ Sew Preeti Quilts
Jane Hauprich @ Stitch by Stitch Custom Quilting
Reed Johnson @ Blue Bear Quilts
Connie Kauffman @ Kauffman Designs
Emily Leachman @ Darling Dogwood
Denise Looney @ For the Love of Geese
Leah Malasky @ Quilted Delights
Maryellen McAuliffe @ Mary Mack Made Mine
Lisa Pickering @ Lisa’s Quilting Passion
Claudia Porter @ Create with Claudia <—– That’s Me!
Gail Renna @ Quilt Haven Threads
Brianna Roberts @ Sew Cute and Quirky
Andi Stanfield @ True Blue Quilts
Sandra Starley @ Textle Time Travels
Jennifer Thomas @ Curlicue Creations
Pamela Boatright @ PamelaQuilts
Suzy Webster @ Webster Quilt
Elizabeth DeCroos @ Epida Studio
Mania Hatziioannidi @ Mania for Quilts
Anorina Morris @ Samelia’s Mum
Michelle Roberts @ Creative Blonde

6 Comments
Jennifer Thomas
November 16, 2022 at 8:11 AMWell these are just adorable! Great job and fun idea for gift giving.
createwithclaudia_7j76hs
November 16, 2022 at 8:12 AMThanks! I’ve already made a bunch for little gifts.
Brenda @ Songbird Designs
November 18, 2022 at 11:08 AMThese are so cute, Claudia! They would be perfect for ornaments or tags on gifts!!
createwithclaudia_7j76hs
November 21, 2022 at 7:10 AMThank you! I’ll definitely be making lots of these and putting some goodies in them for people.
Anorina
November 25, 2022 at 1:42 AMThese are such fun. Love the colours you’ve chosen too.
createwithclaudia_7j76hs
November 25, 2022 at 4:21 PMThanks Anorina! I felt like going with some brighter colors!!!