
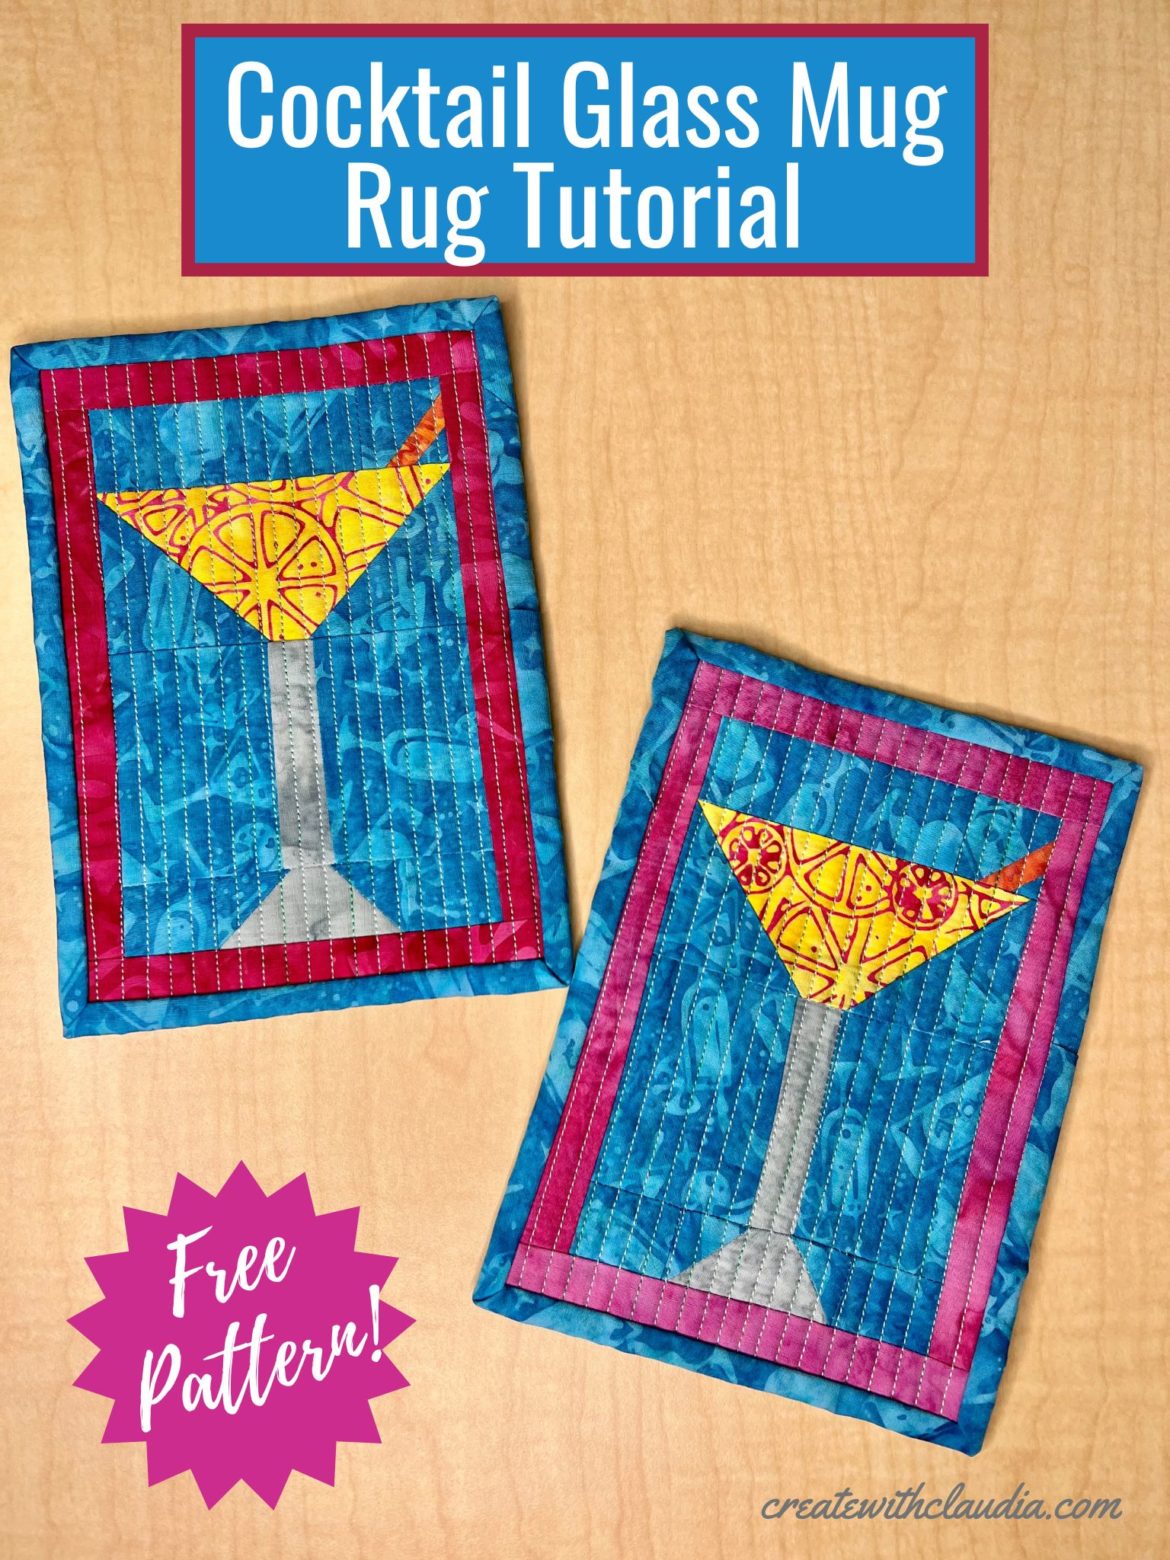
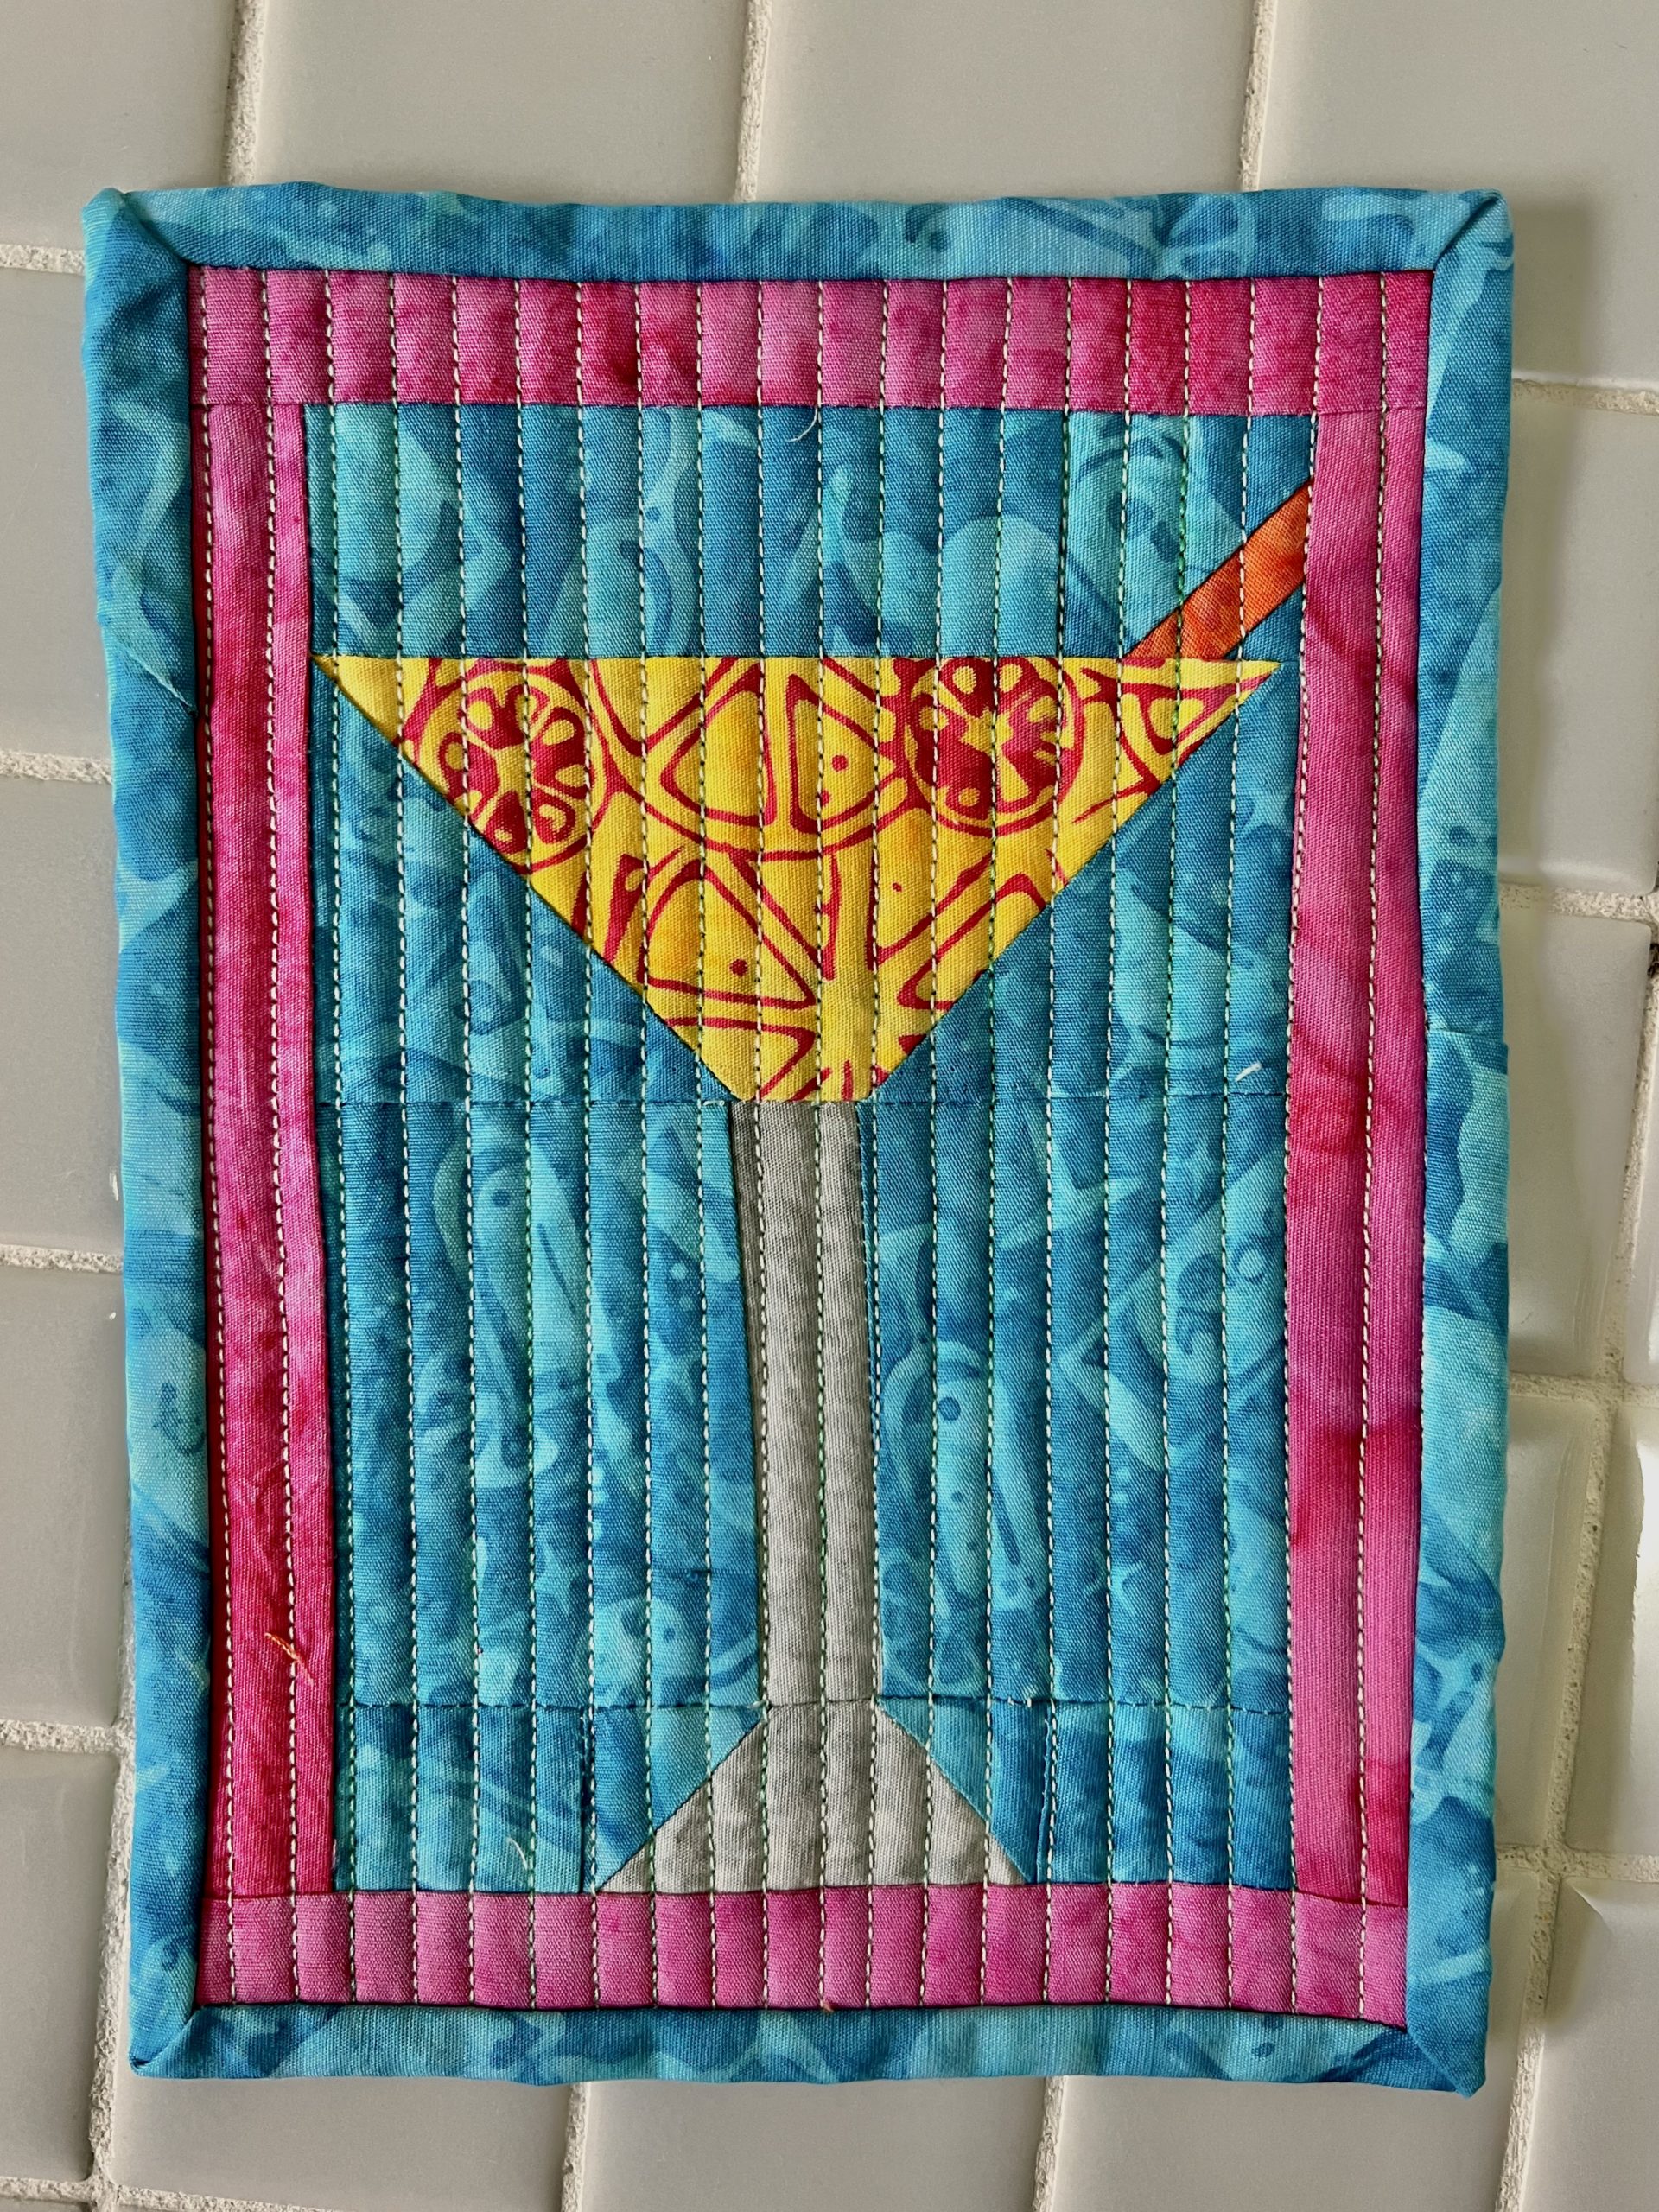
How to Make a Cocktail Glass Mug Rug
Are you in the mood for a tropical getaway? Do you like a fun and festive cocktail? I have a great project for you! Learn how to make a cocktail glass mug rug with my latest tutorial.
Make a few for your next party. Make a set and take them on your next vacation. Whatever you decide to do with your mug rug, you are going to love it.
This project is a great scrap buster since it doesn’t use much fabric. It does have a few tricky parts to it, but overall it comes together well and you should not have too many problems.
I did this video tutorial showing you how to assemble it (plus a little show & tell at the beginning).
Disclosure: The items used in this post were generously provided by Island Batik, By Annie Patterns and Hobbs Batting
The Inspiration for the Mug Rugs
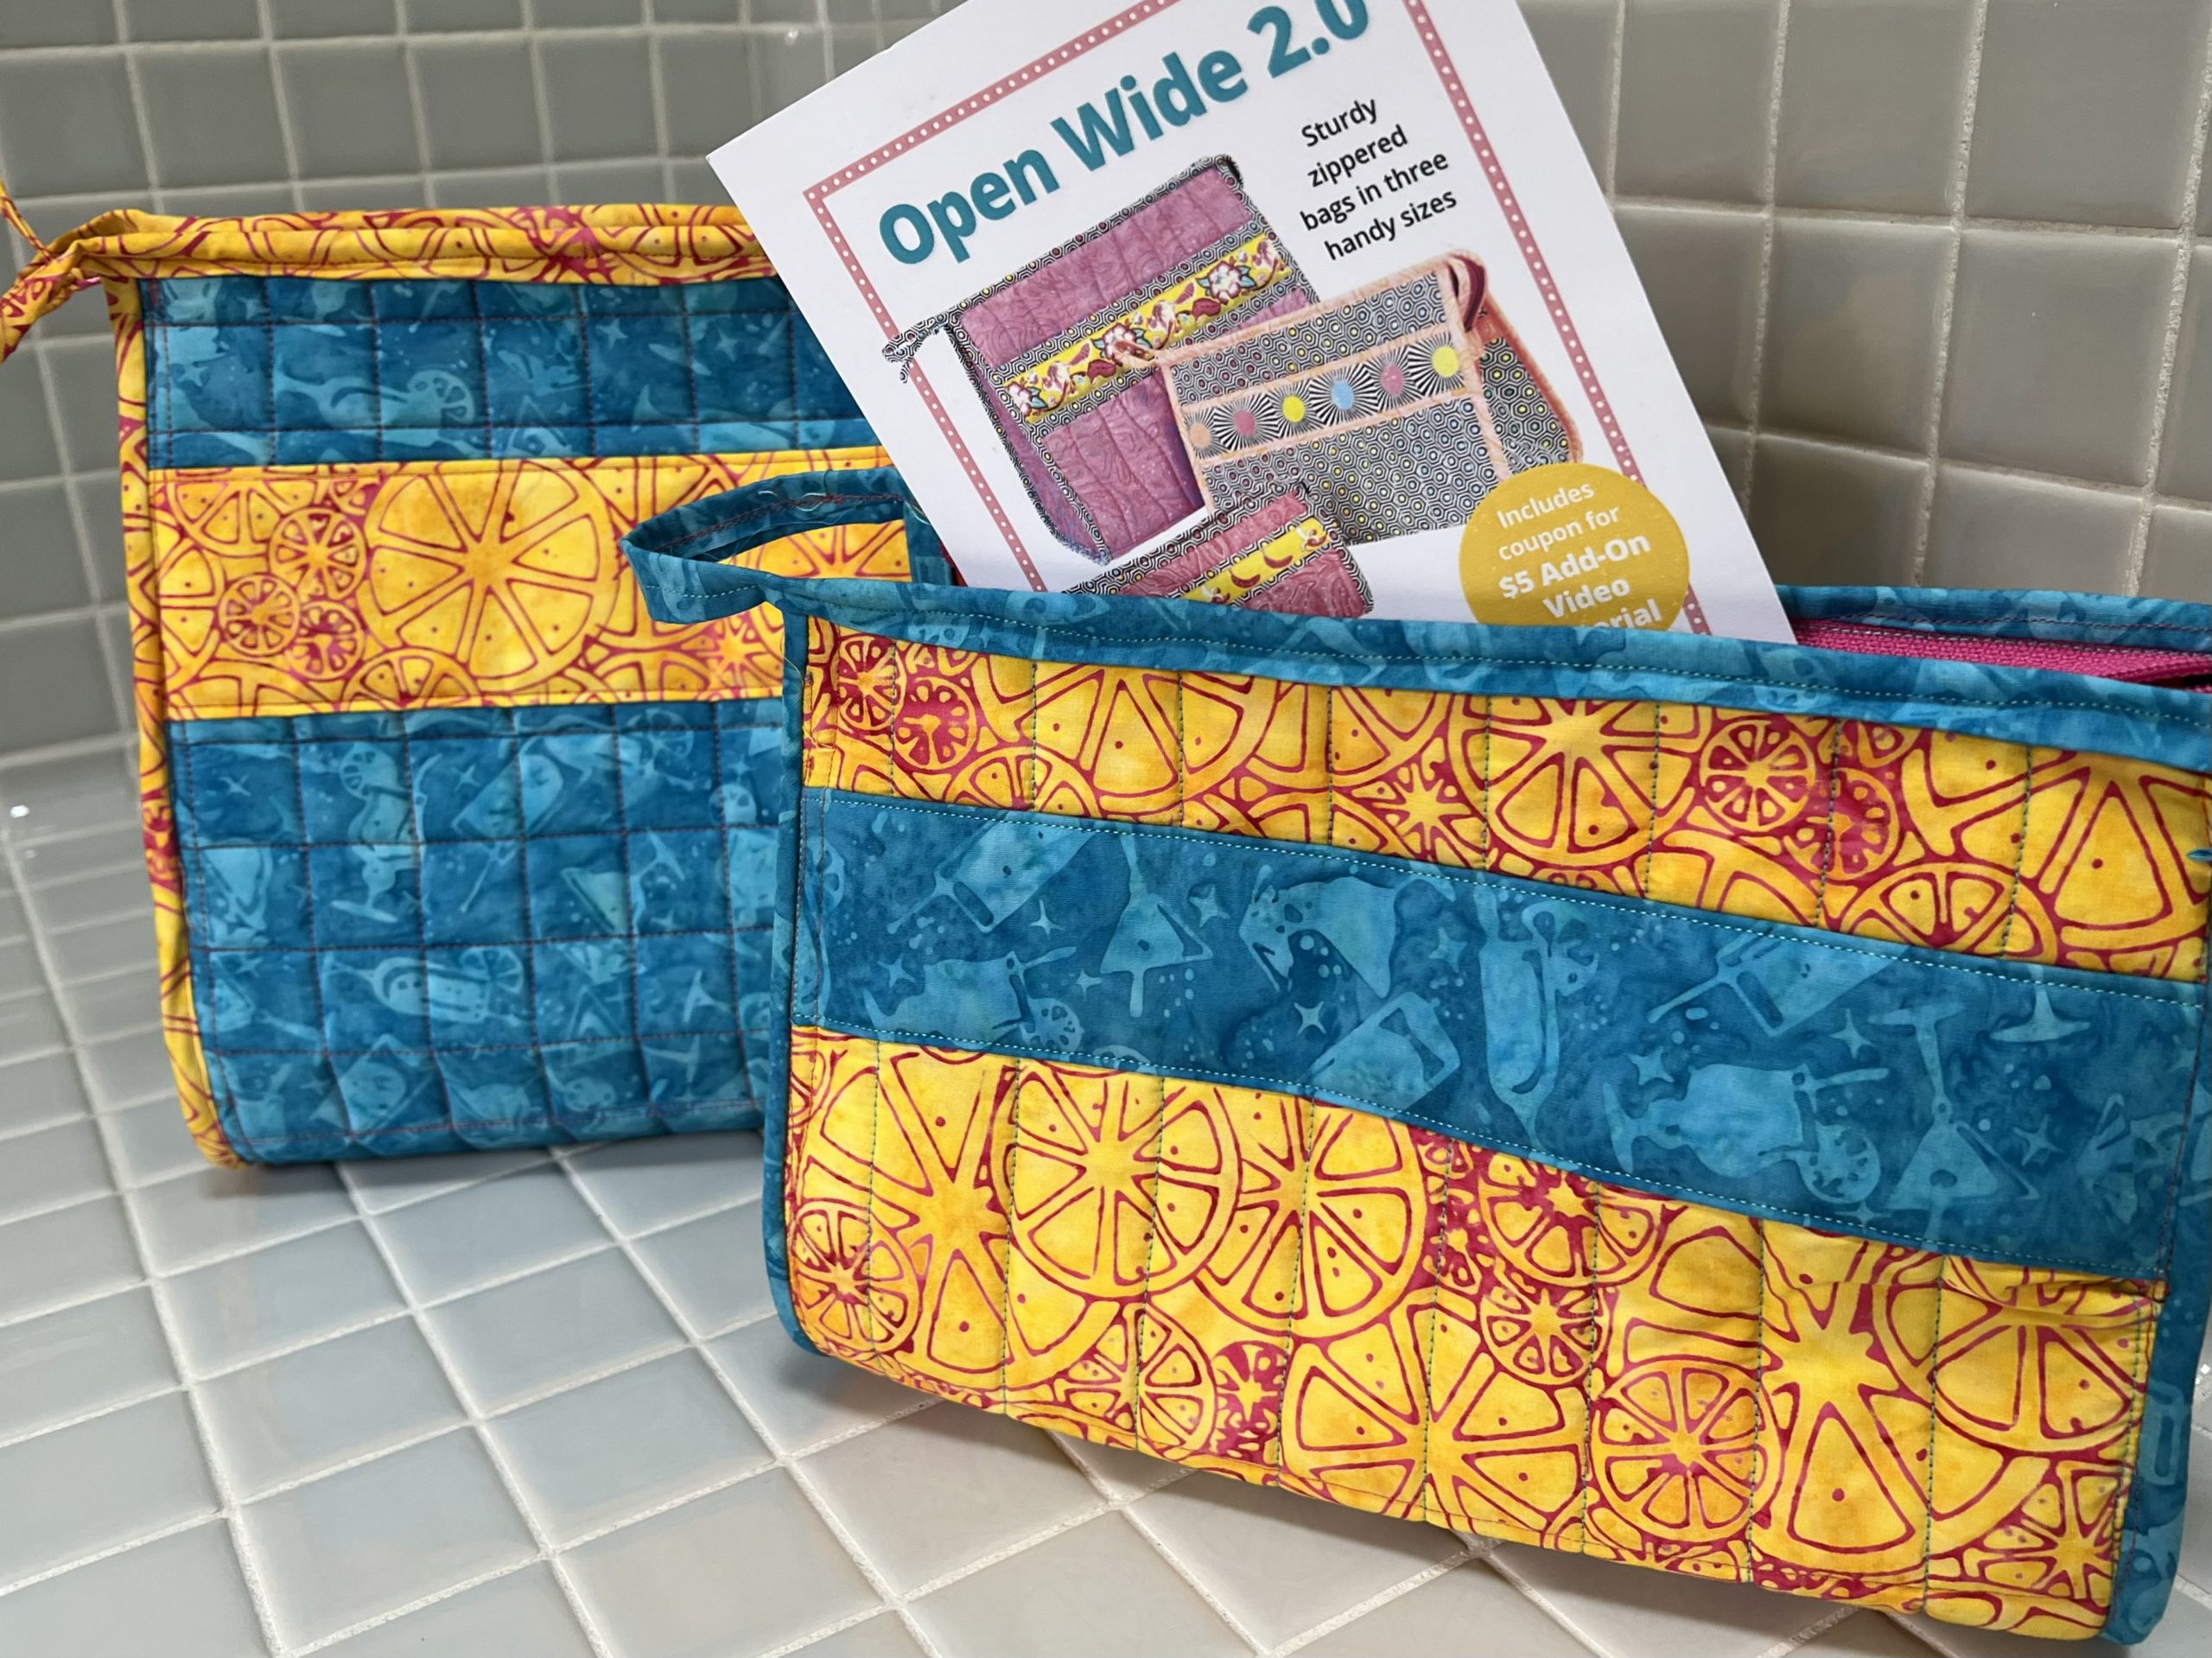
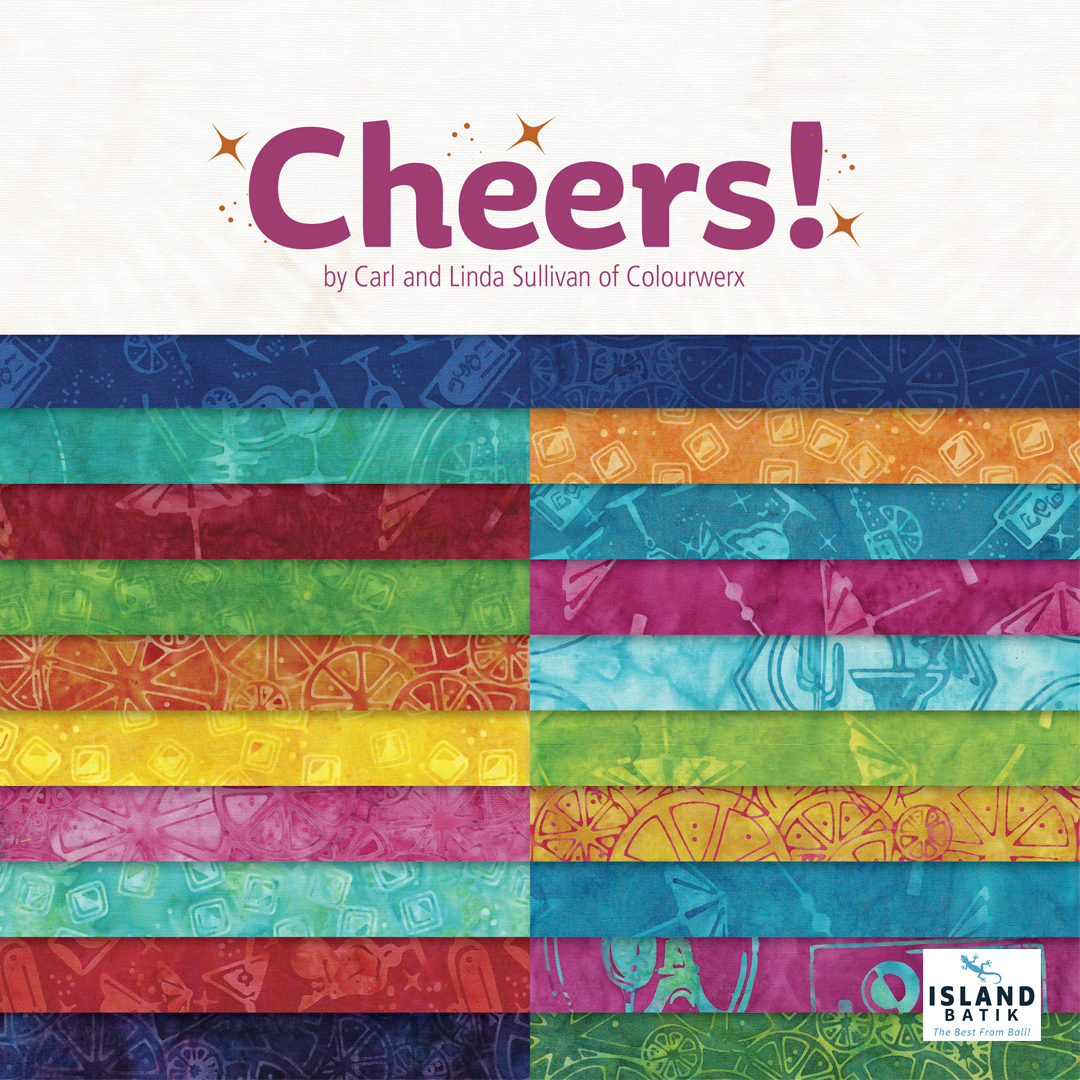
I am an Island Batik ambassador and each month we have a project to make. This month I made these awesome zip top bags using the Open Wide 2.0 By Annie pattern. I used two fabrics from the new Island Batik line called Cheers!. It was designed by Carl & Linda Sullivan of Colourwerx.
You can read all about my gorgeous new bags in my blog post: Bag Making with Island Batik and By Annie Patterns.
With the leftover fabrics I came up with my mug rug pattern.
What You’ll Need
- 5 different fabrics
- Batting, Backing & Binding
- General Sewing & Quilting Supplies
I have curated a shop with some of my favorite quilting/crafting tools in my Amazon store. You can shop here.
As An Amazon Affiliate I Earn From Qualifying Purchases at No Extra Cost To You
Cutting Instructions
Background Fabrics – 4 squares cut 1 1/2″ x 1 1/2″, 2 strips cut 2 1/4″ x 3″, 3 squares cut 2 1/2″ x 2 1/2″, 1 strip cut 1 1/2″ x 3 1/2″
Borders – 2 strips cut 1″ x 6 1/2″, 2 strips cut 1″ x 5 1/2″
Liquid in the Cup – 1 strip cut 2 1/2″ x 4 1/2″
Glass – 1 strip cut 1 1/2″ x 2 1/2″, 1 strip cut 1″ x 3″
Straw – 1 strip cut 3/4″ x 4″
How to Make a Cocktail Mug Rug
Assemble the Glass
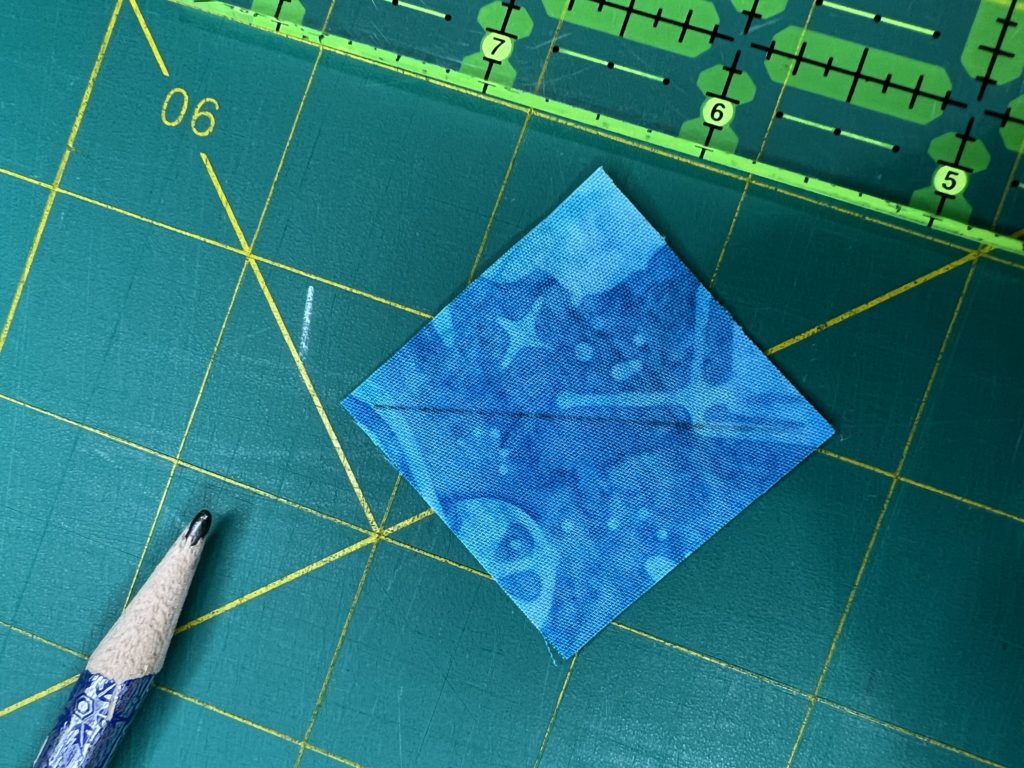
1 – Draw a diagonal line on the back sides of 2 of the 1 1/2″ squares and 2 of the 2 1/2″ squares of background fabric.
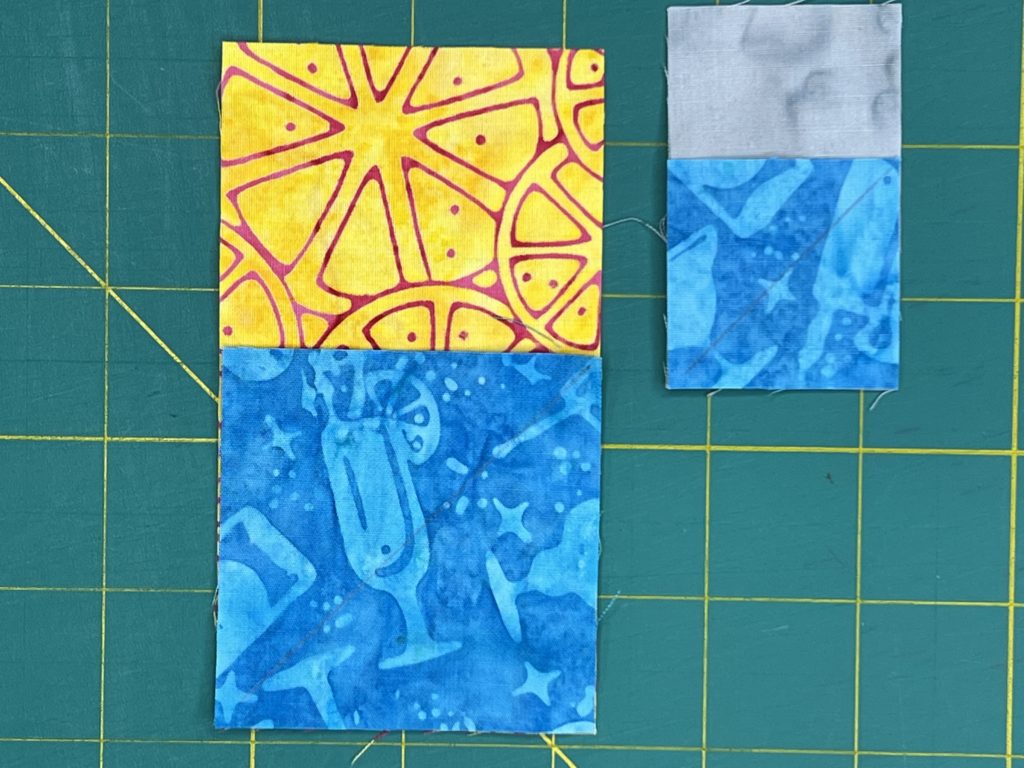
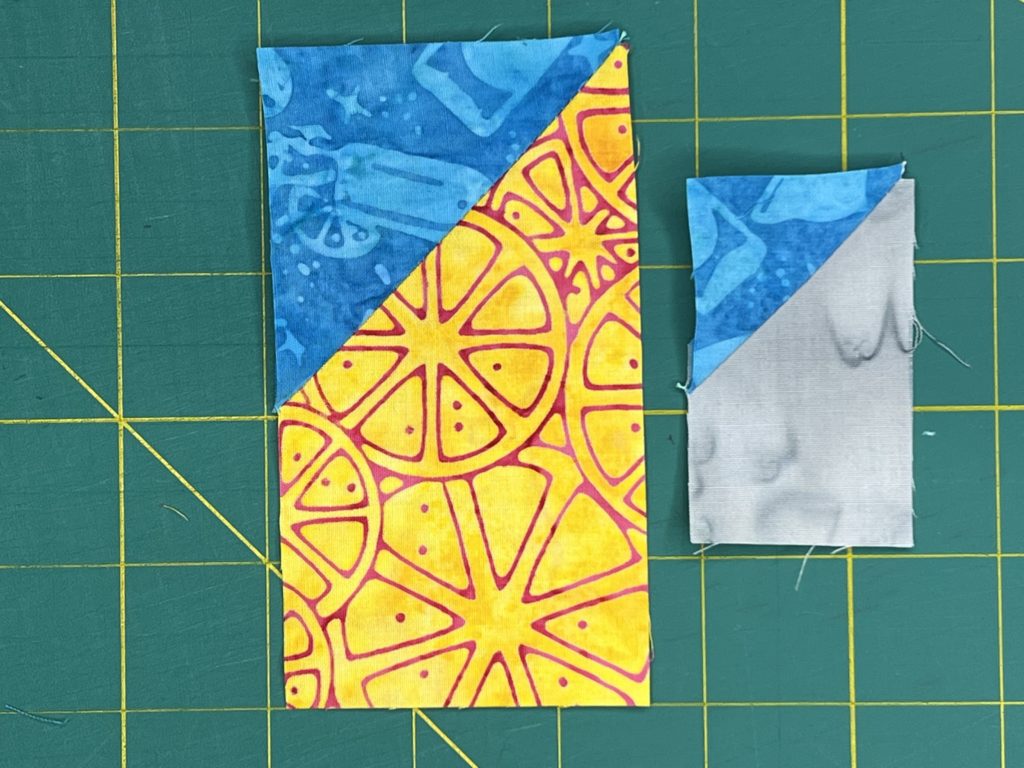
2 – With right sides together, line up one of the 2 1/2″ squares on one end of the liquid fabric strip. Repeat with the 1 1/2″ square lined up with the glass fabric strip that measures 1 1/2″ x 2 1/2″.
3 – Sew on the drawn line.
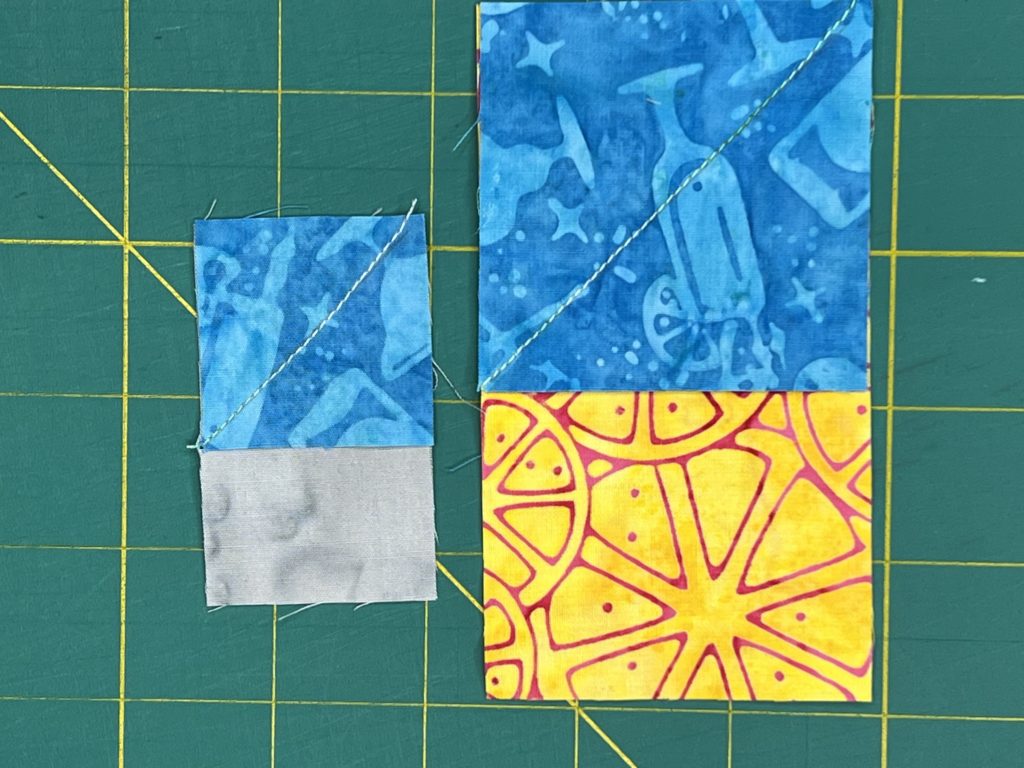
4 – Trim away excess.
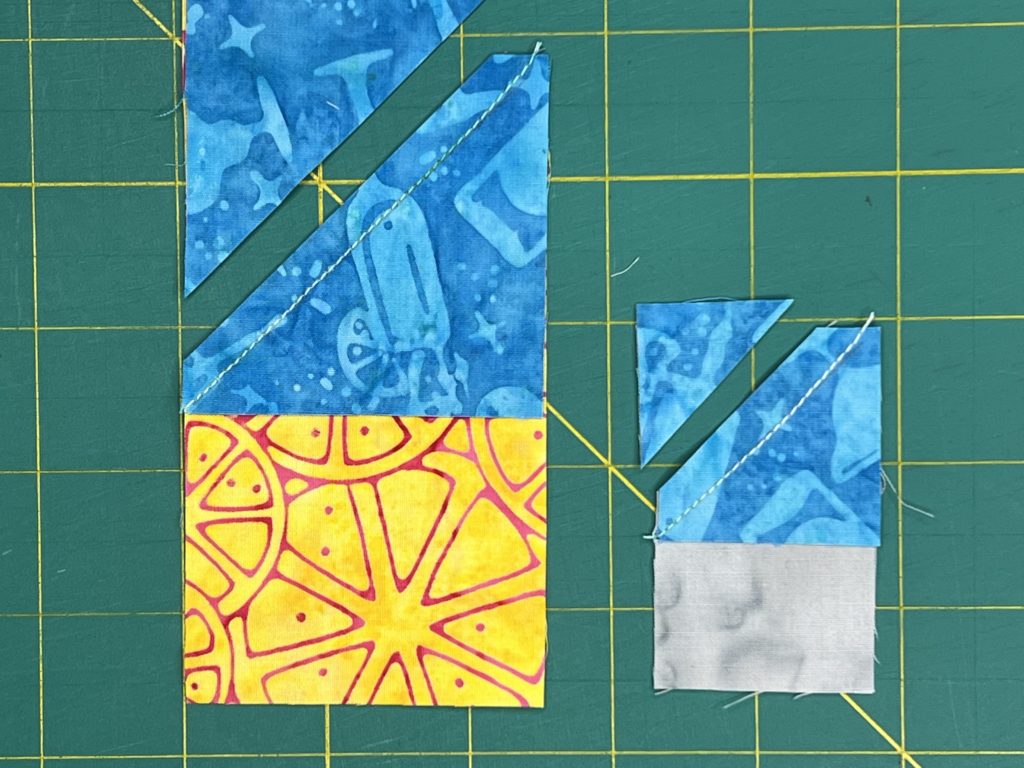
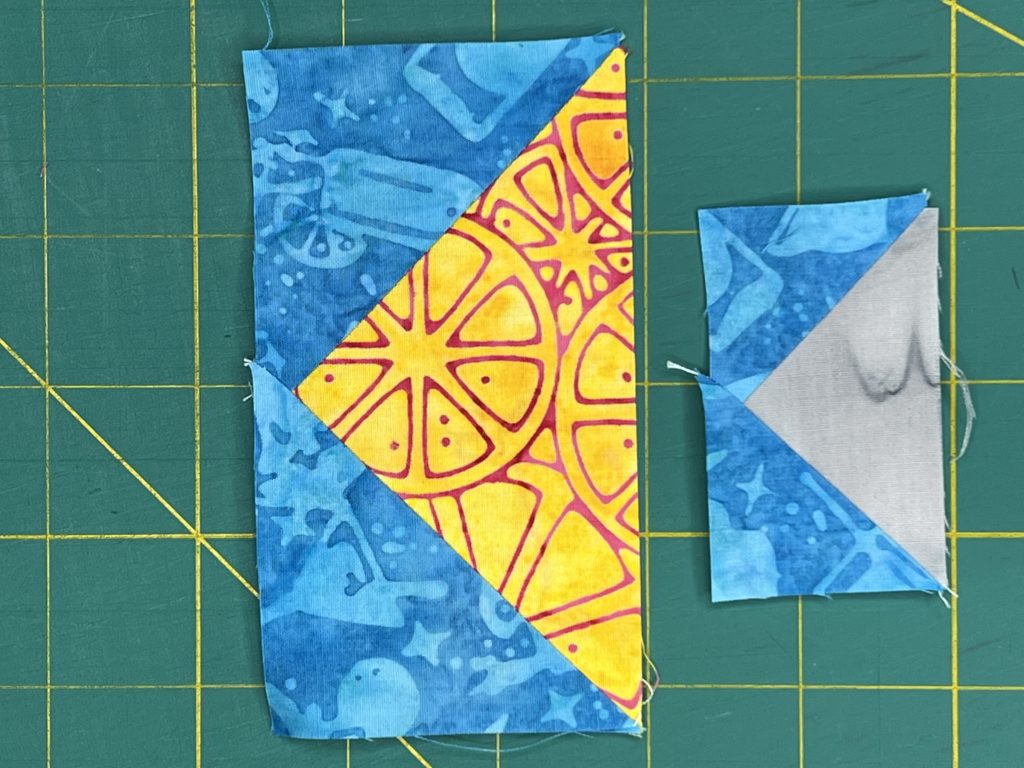
5 – Press the triangles back.
6 – Repeat with remaining squares on the opposite ends of the strips.
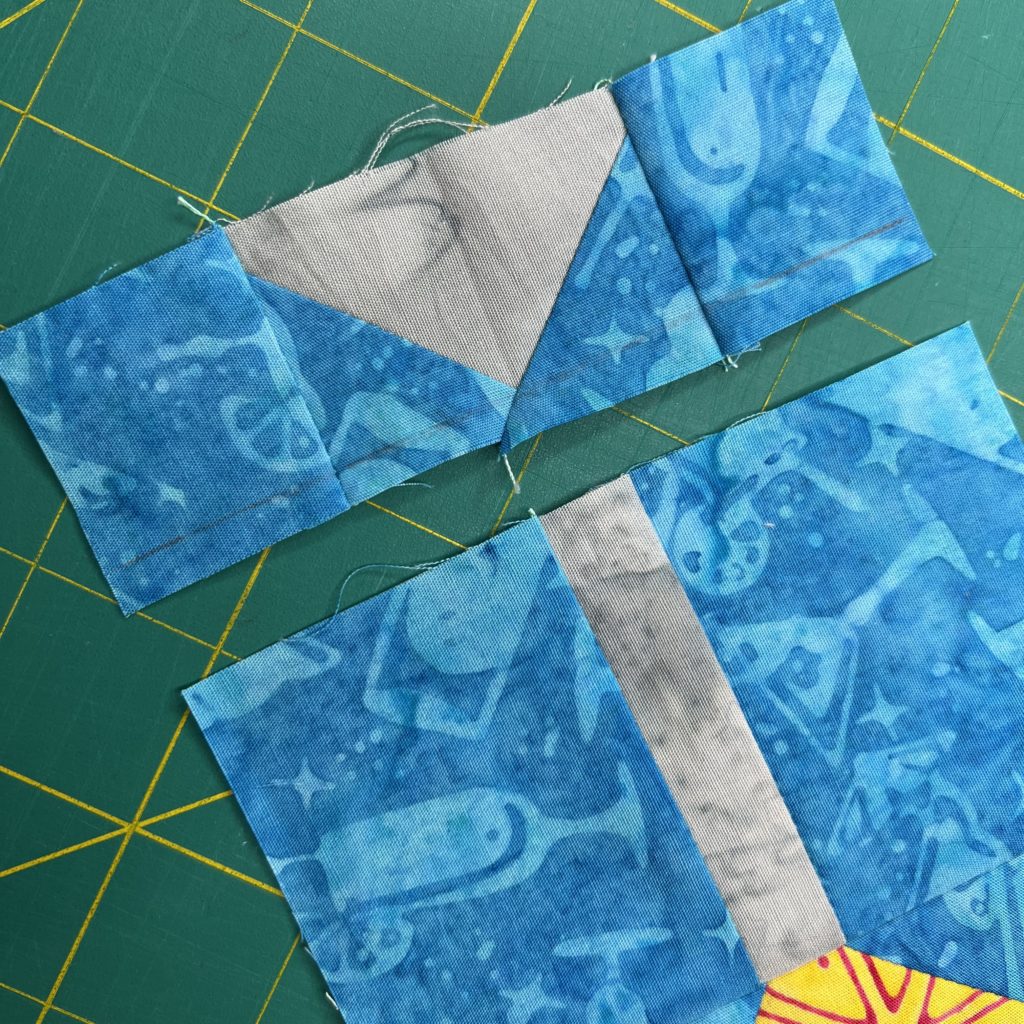
Assemble the Glass Stem

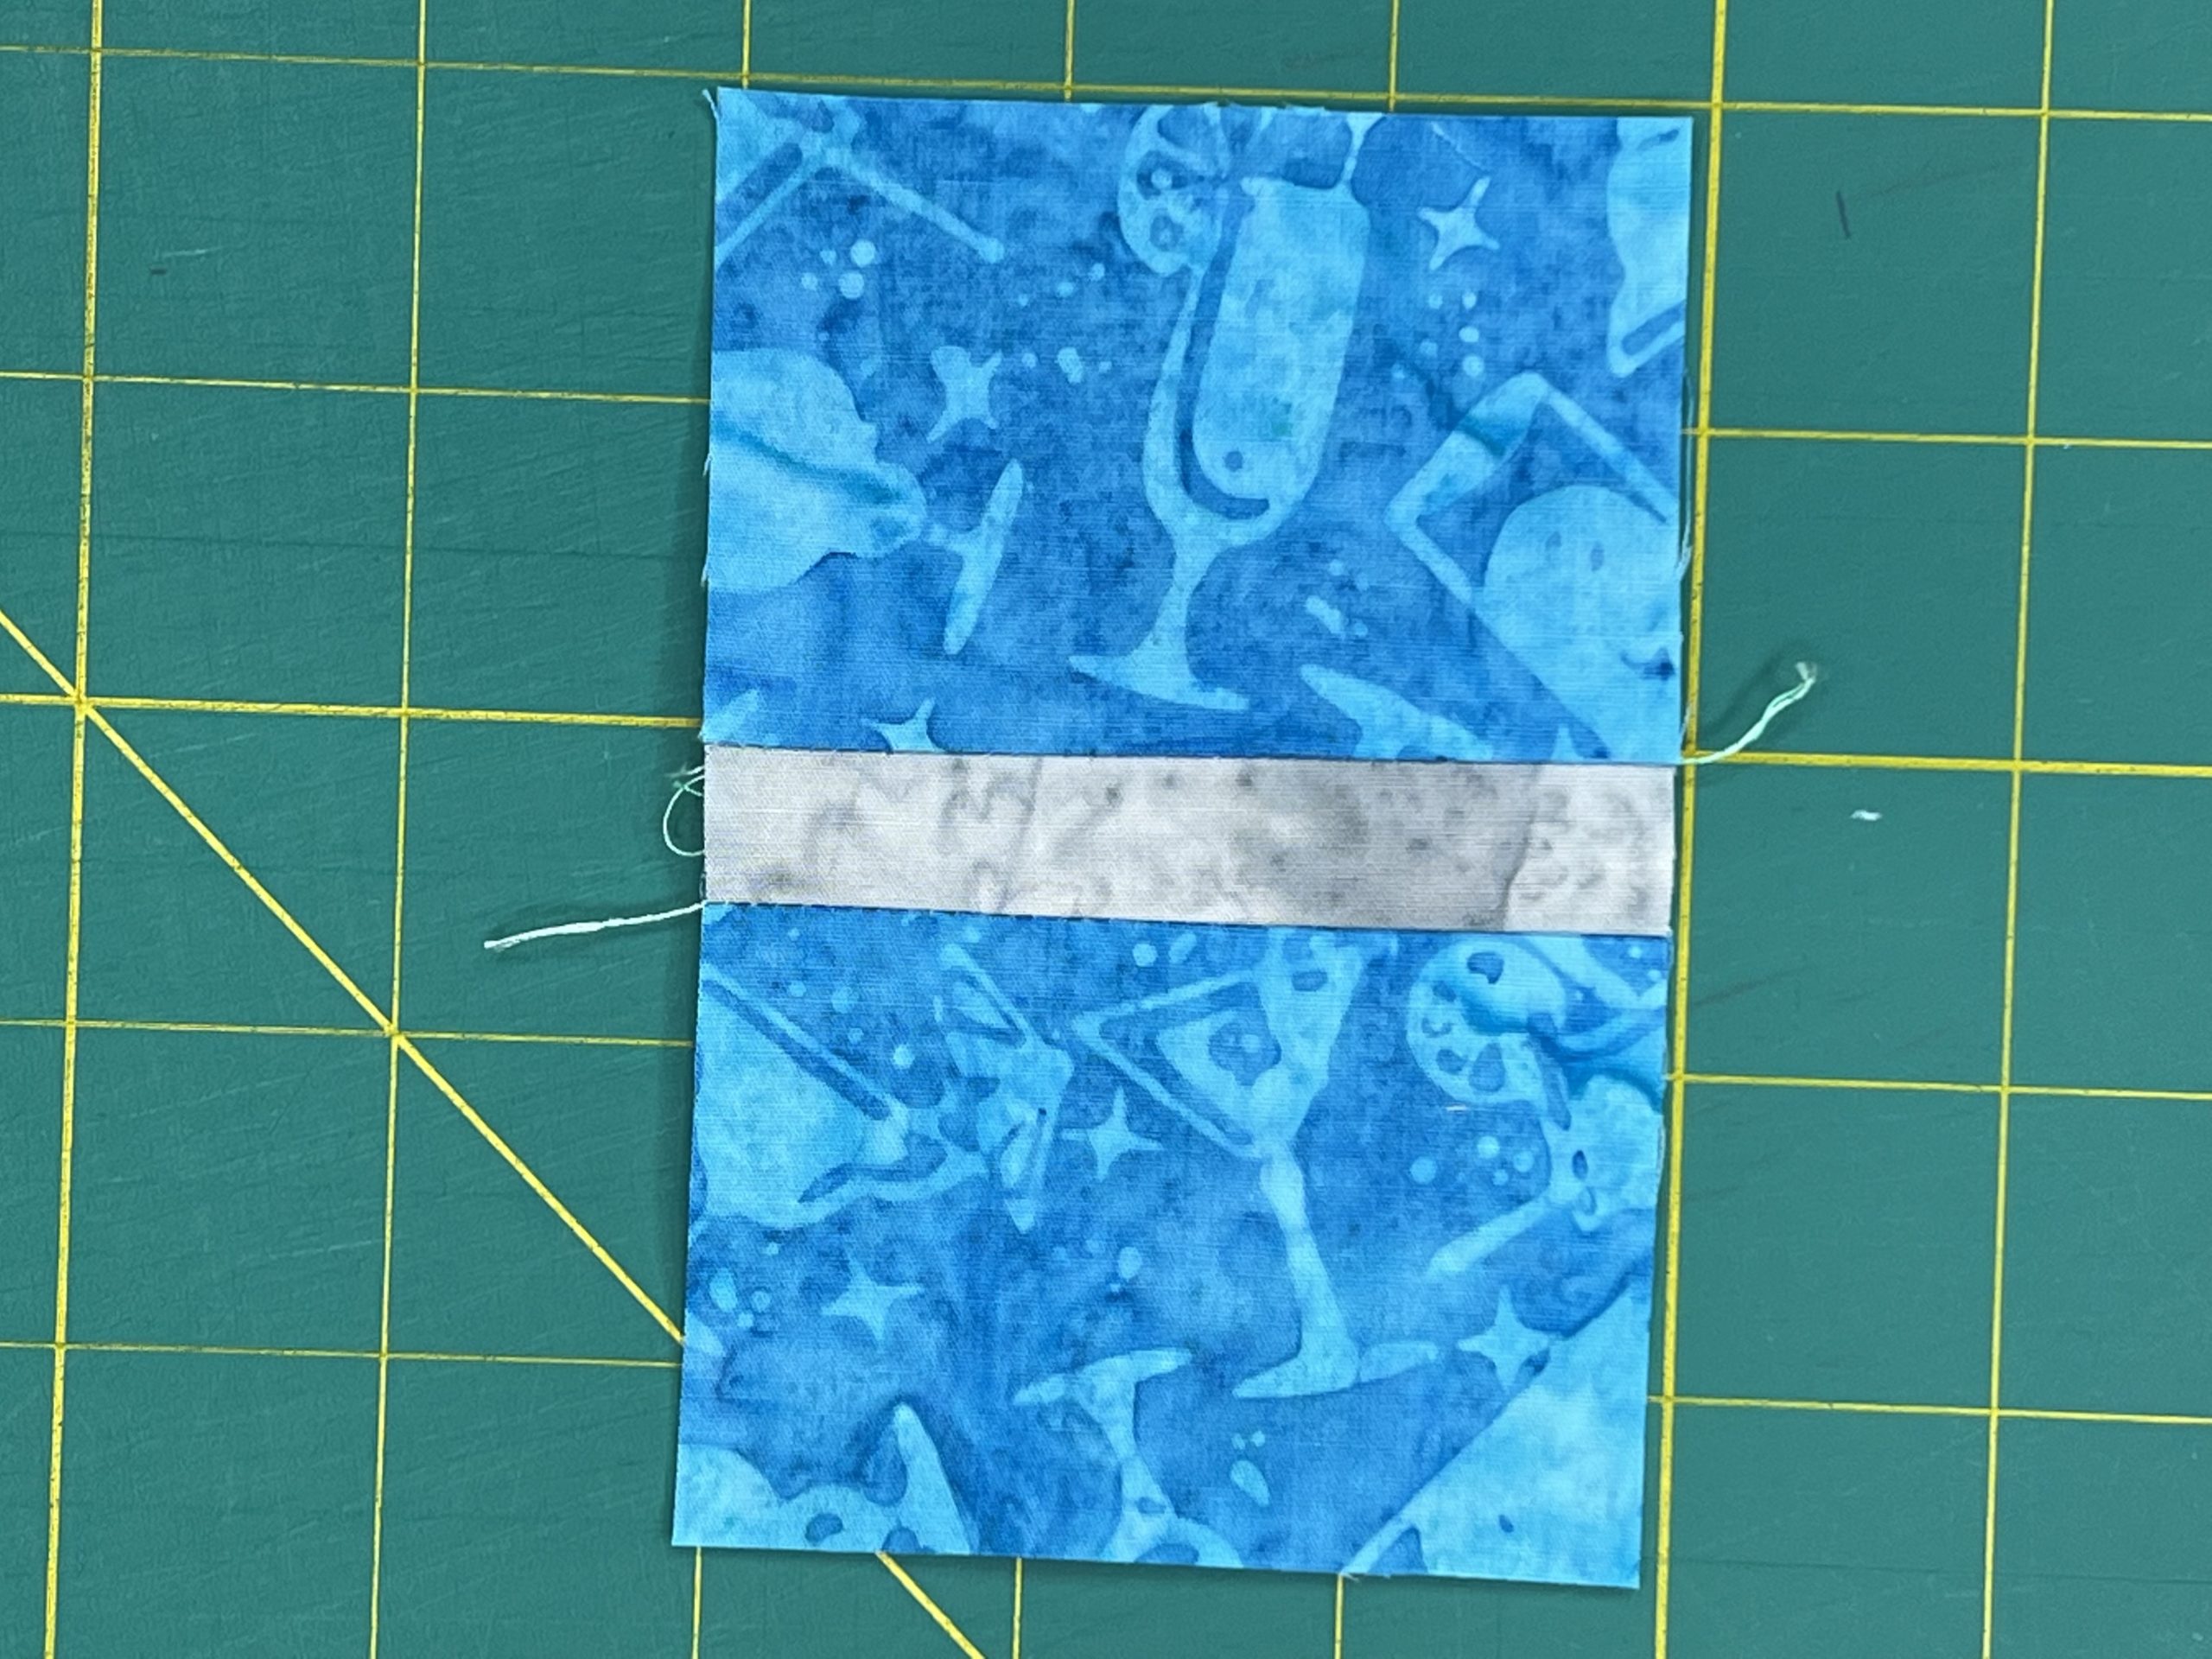
1 – Add a 1 1/2″ square of background fabric to each side of the base of the glass.
2 – Press towards the outside edges.
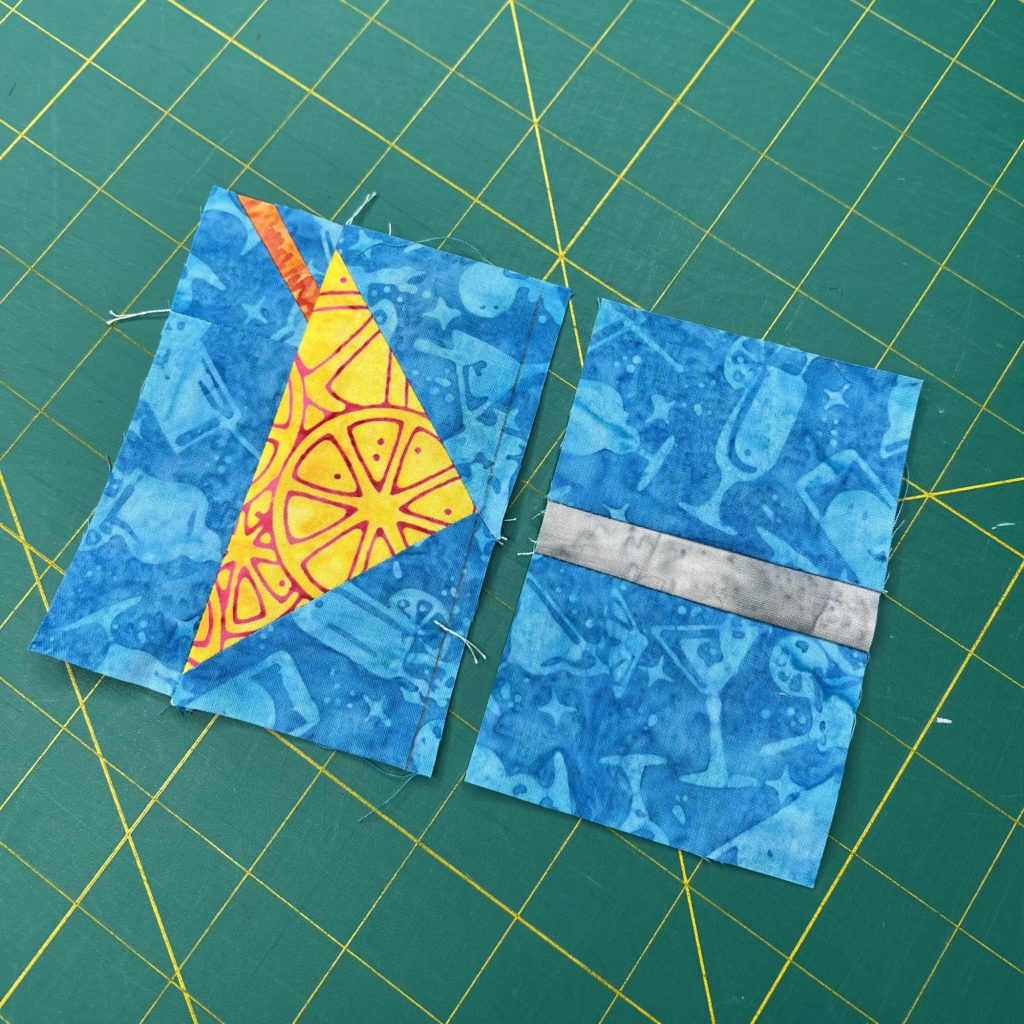
3 – Add a 2 1/4″ x 3″ strip of the background fabric to each side of the 1″ x 3″ strip of glass fabric.
4 – Press to the outside edges.
Assemble the Straw
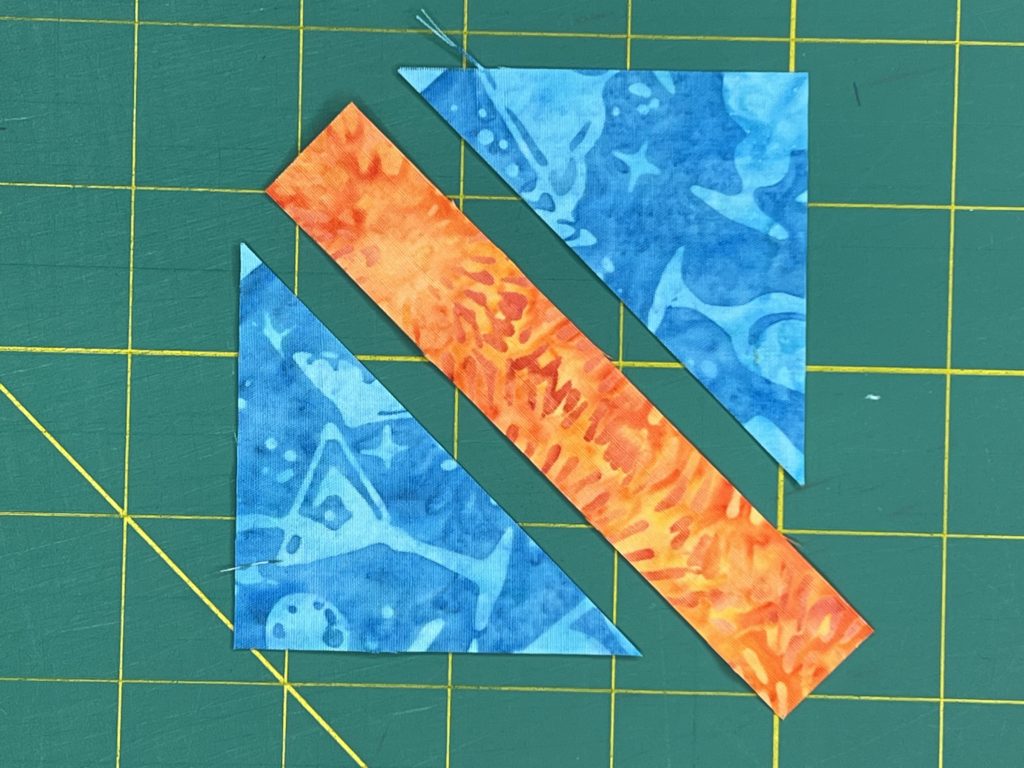

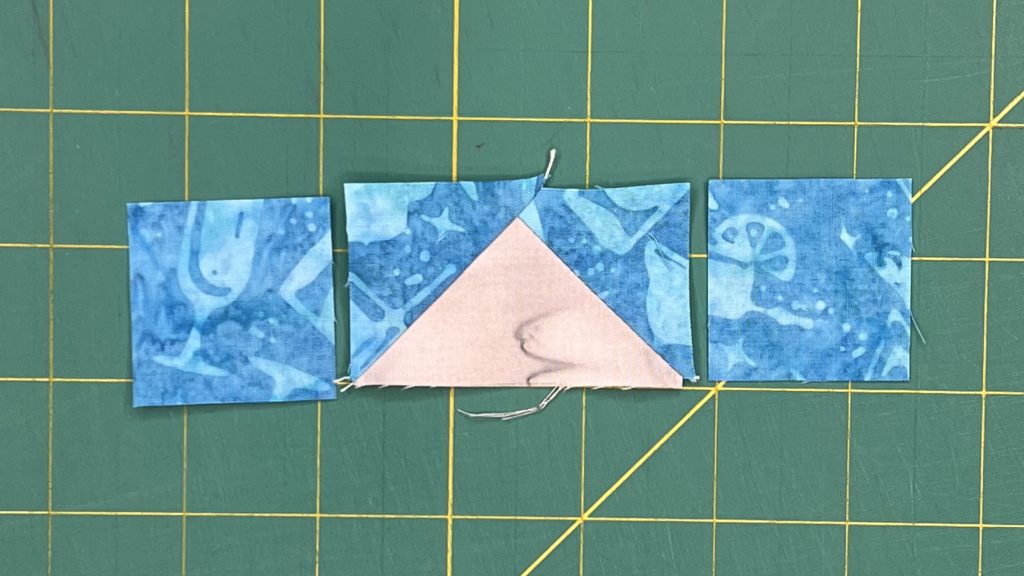
1 – Cut the remaining 2 1/2″ square of background fabric in two on the diagonal.
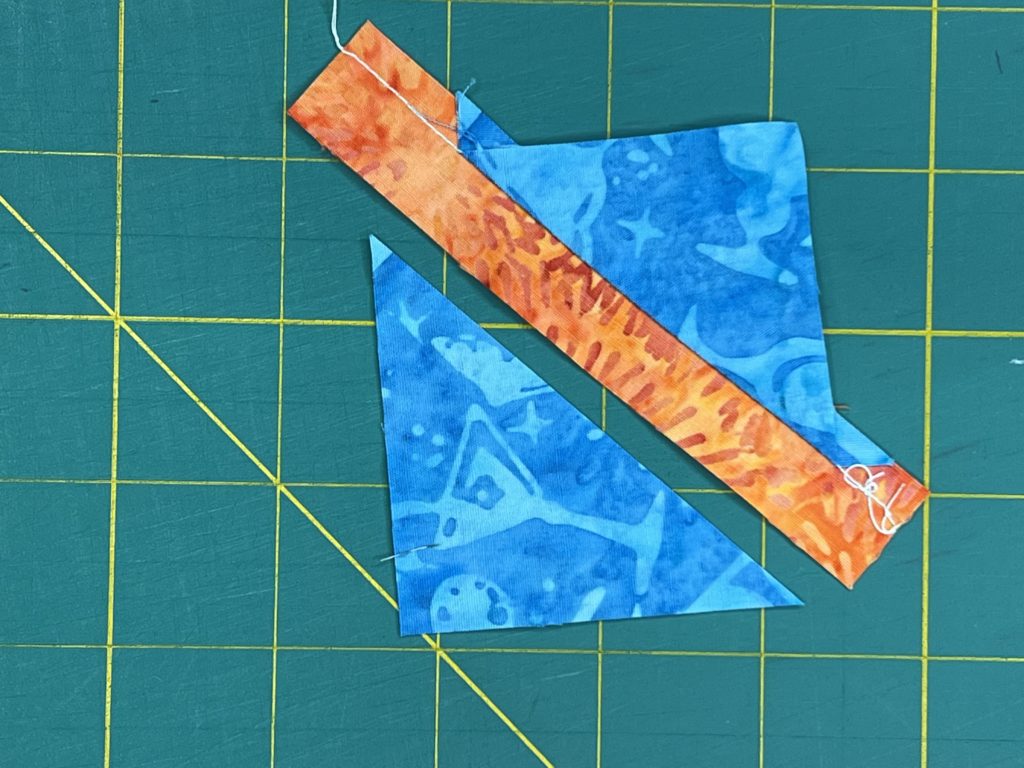
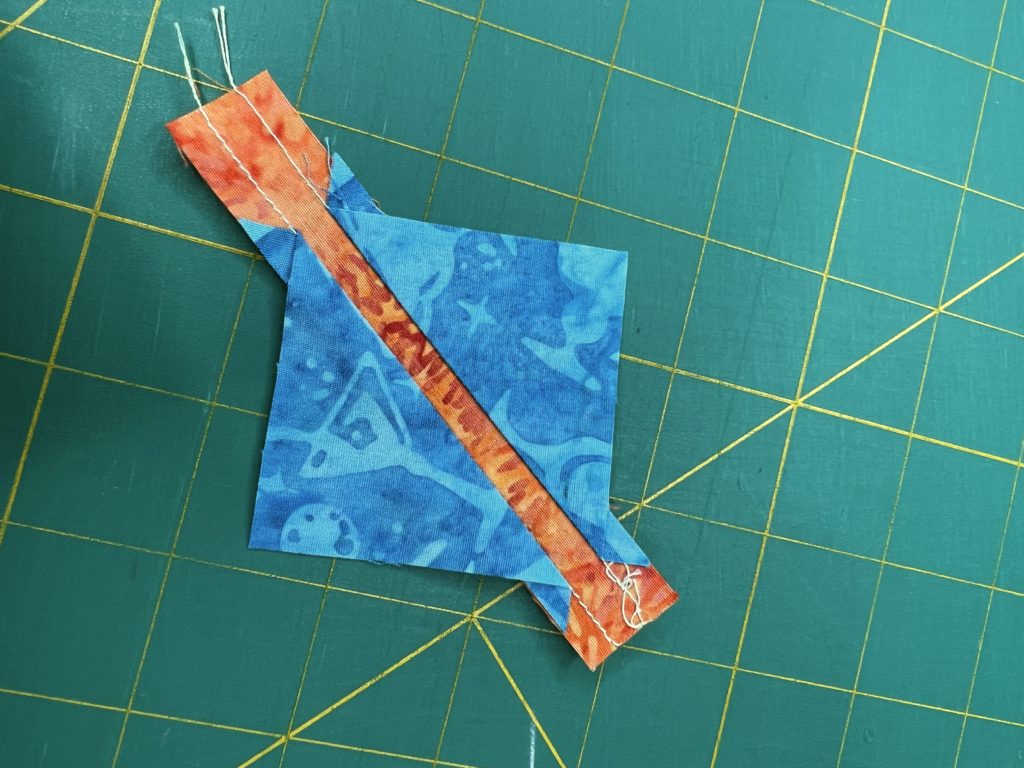
2 – Sew on half to one side of the straw fabric strip, centering as best as possible.
3 – Sew the other half of the triangle to the other side of the strip.
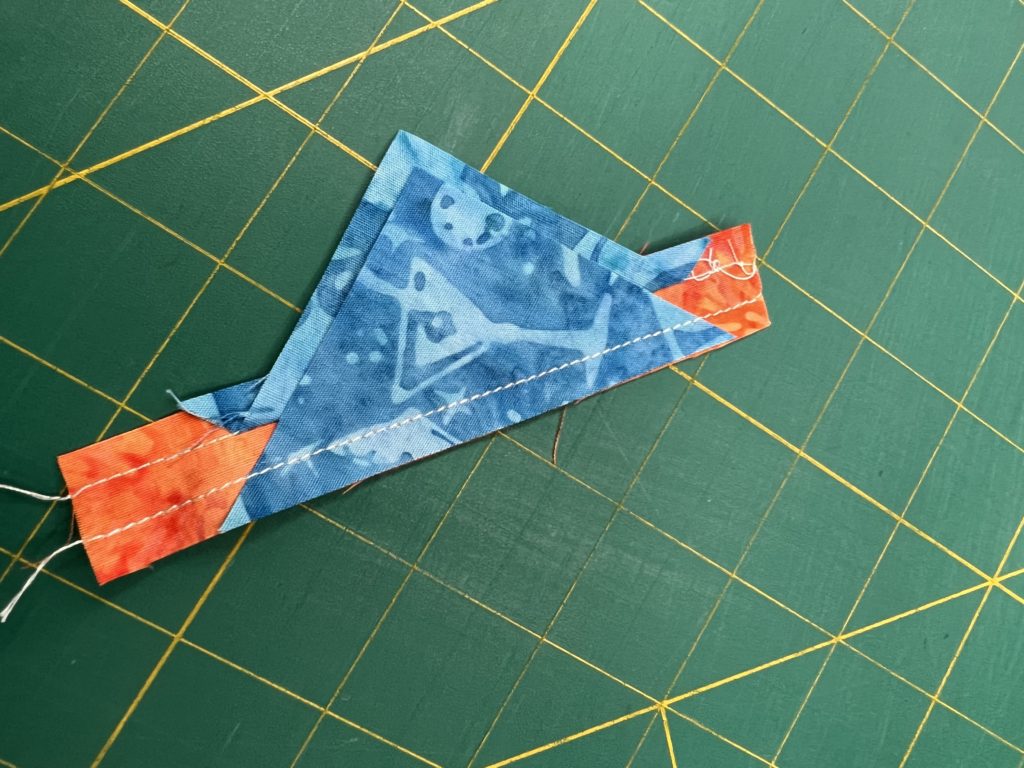
4 – Press to the triangles.
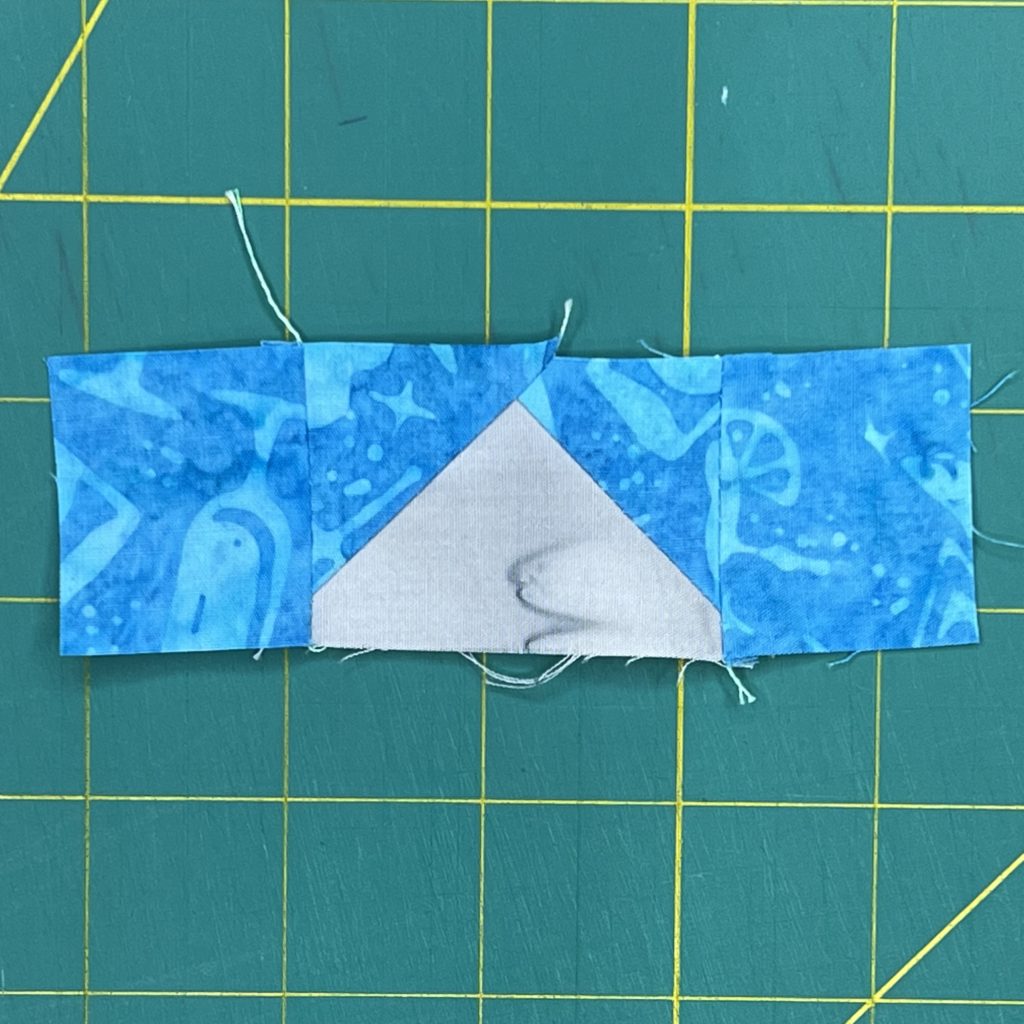
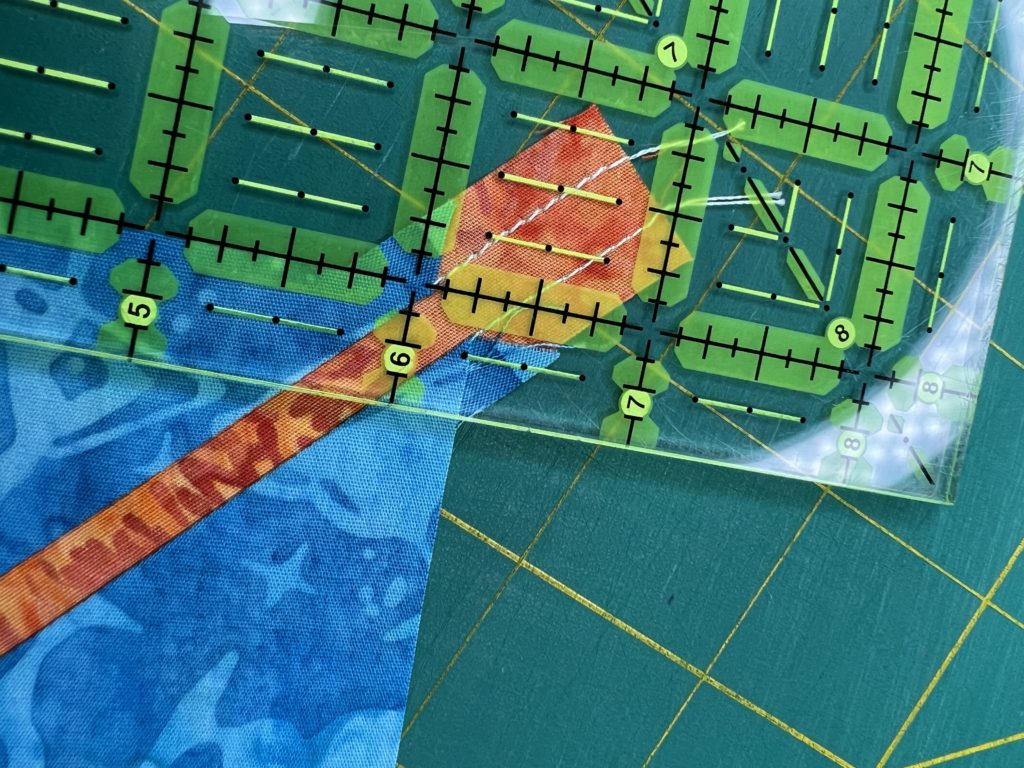
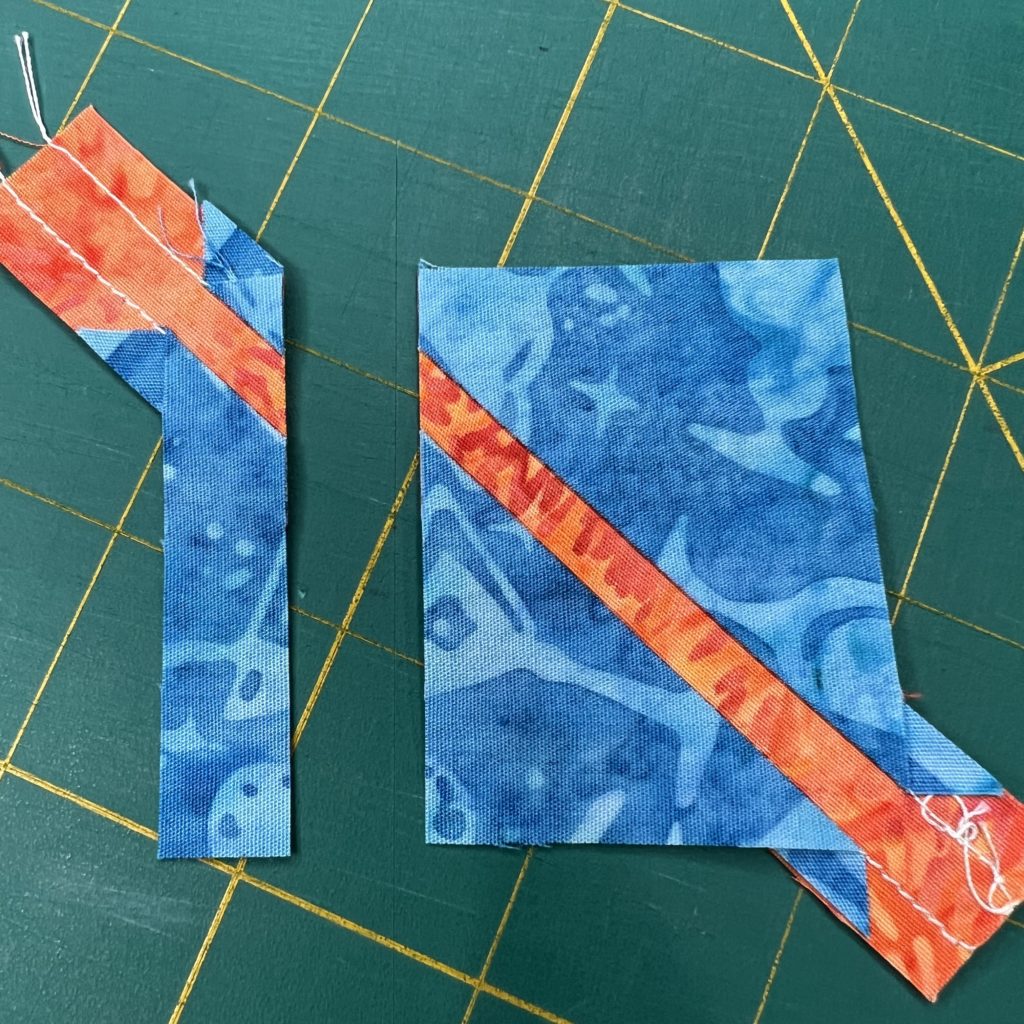
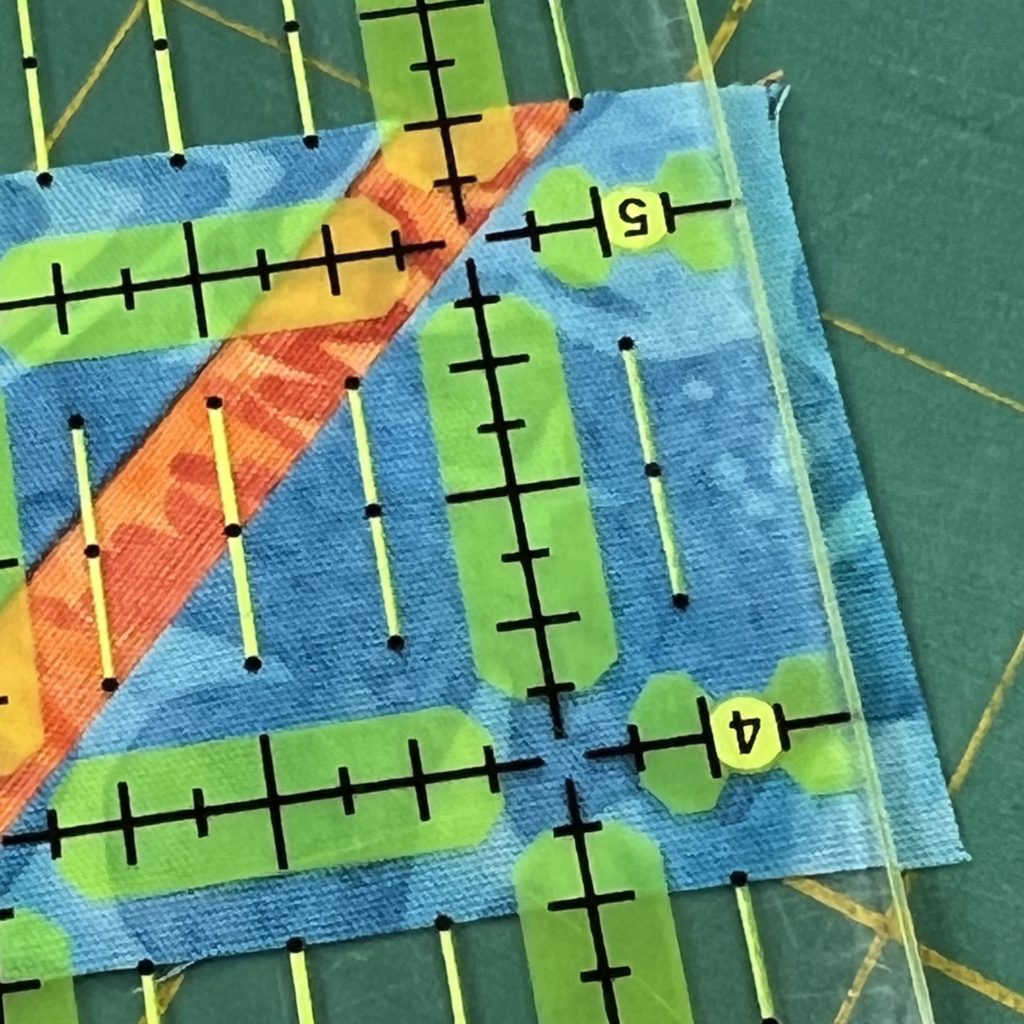
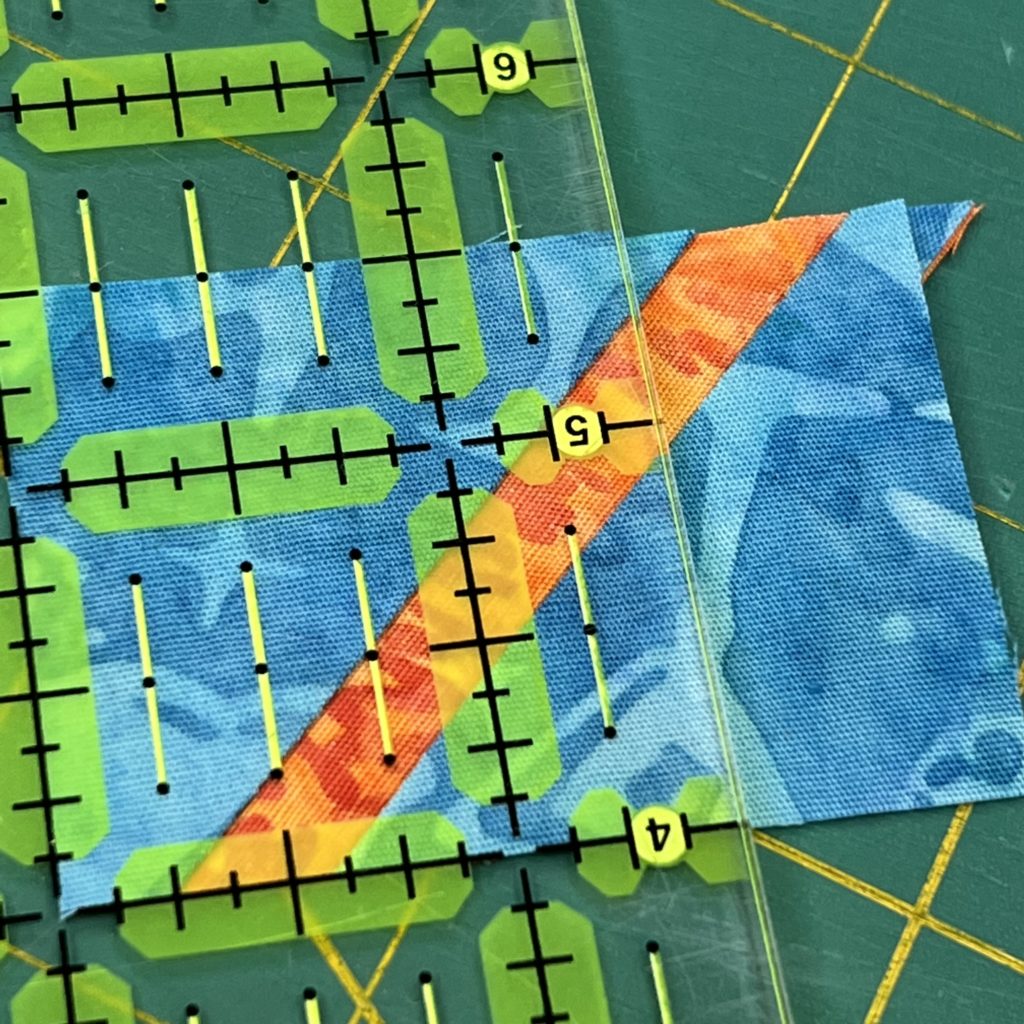
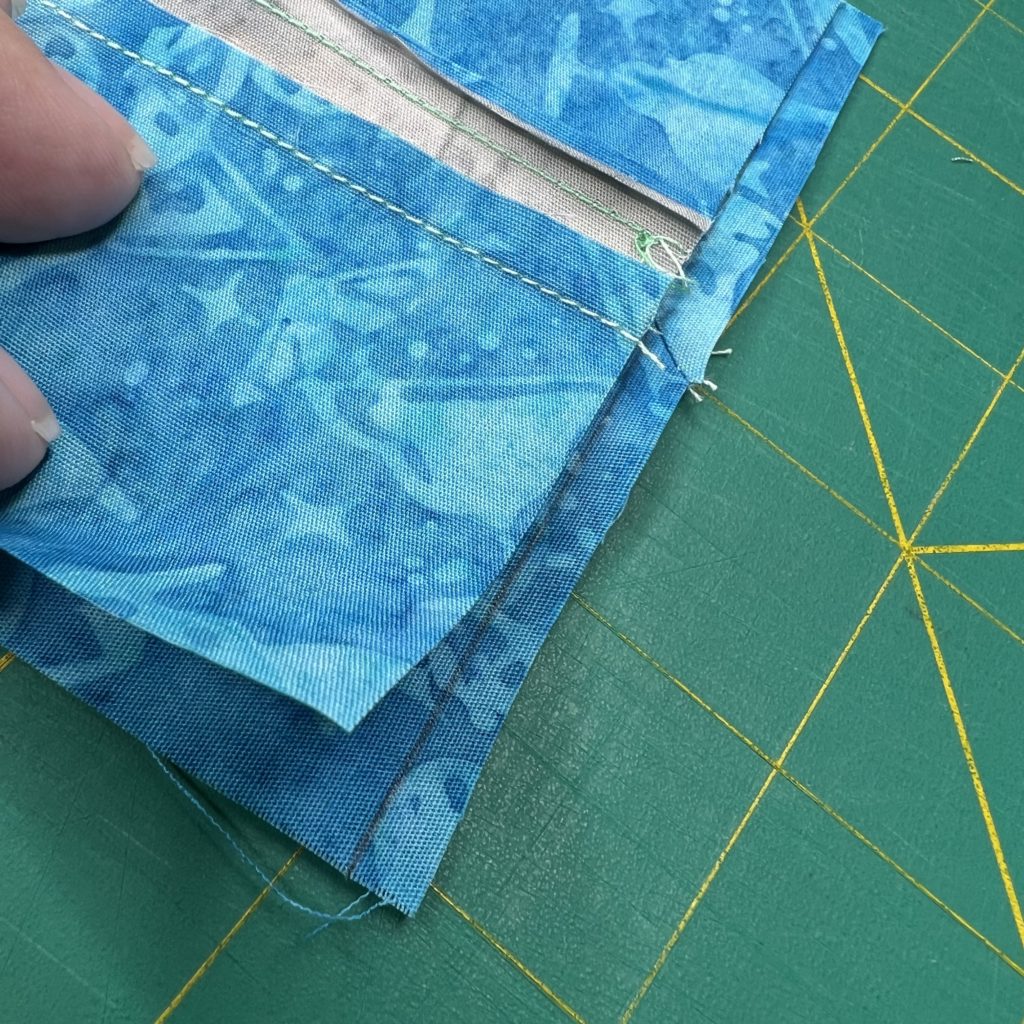
5 & 6 – From the corner where the strip ends, trim a 1/4 inch from the edge of the triangle.
7 & 8 – Measure 1 1/2″ from the edge you just cut and trim the opposite edge.
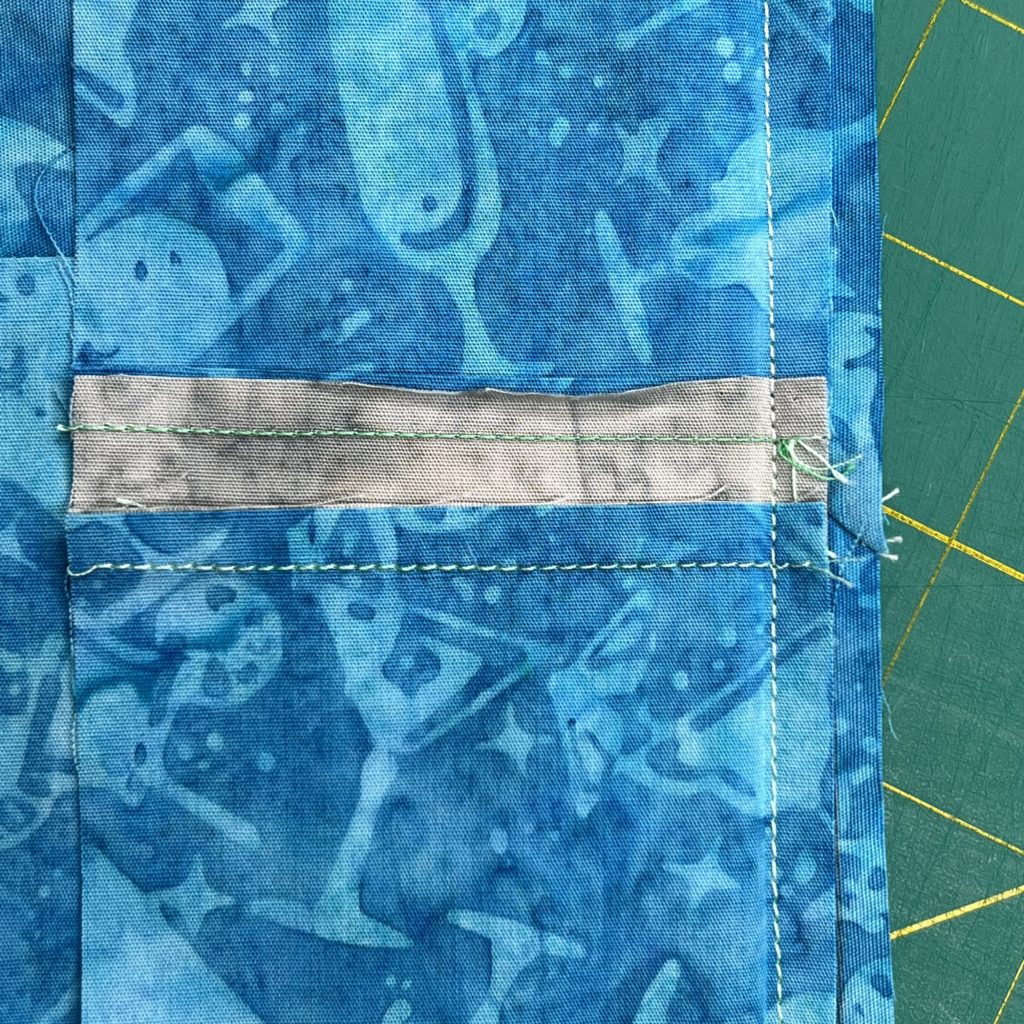
9 – From the first corner you cut, line up your ruler a 1/4″ from that point and trim the edge.
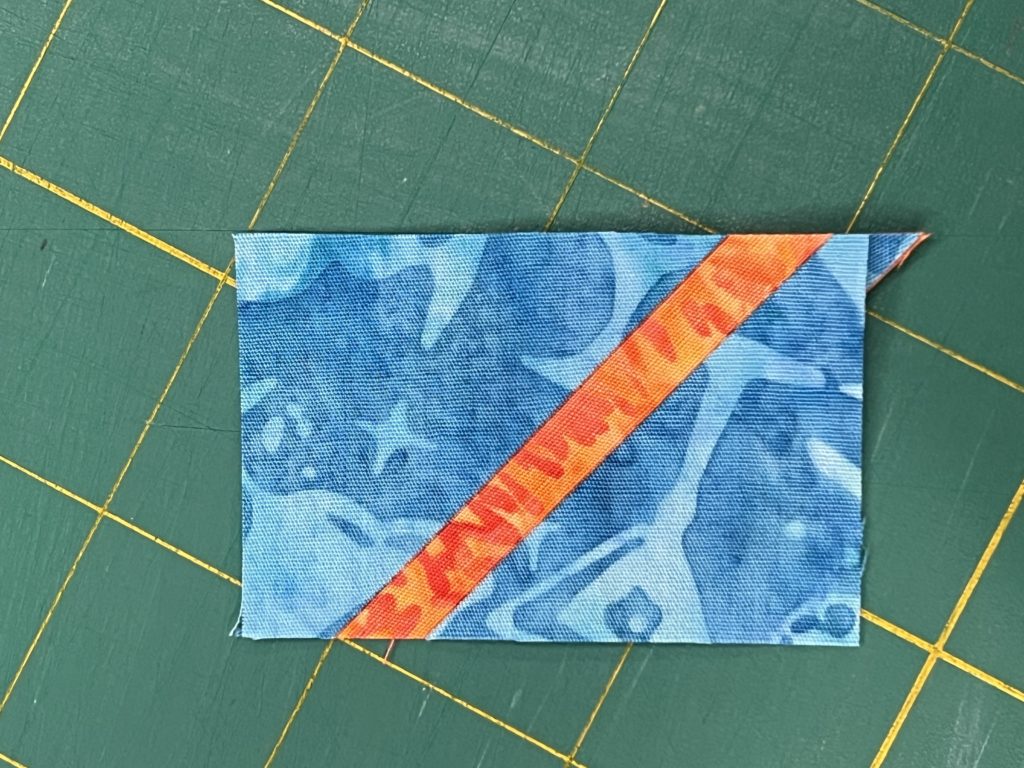
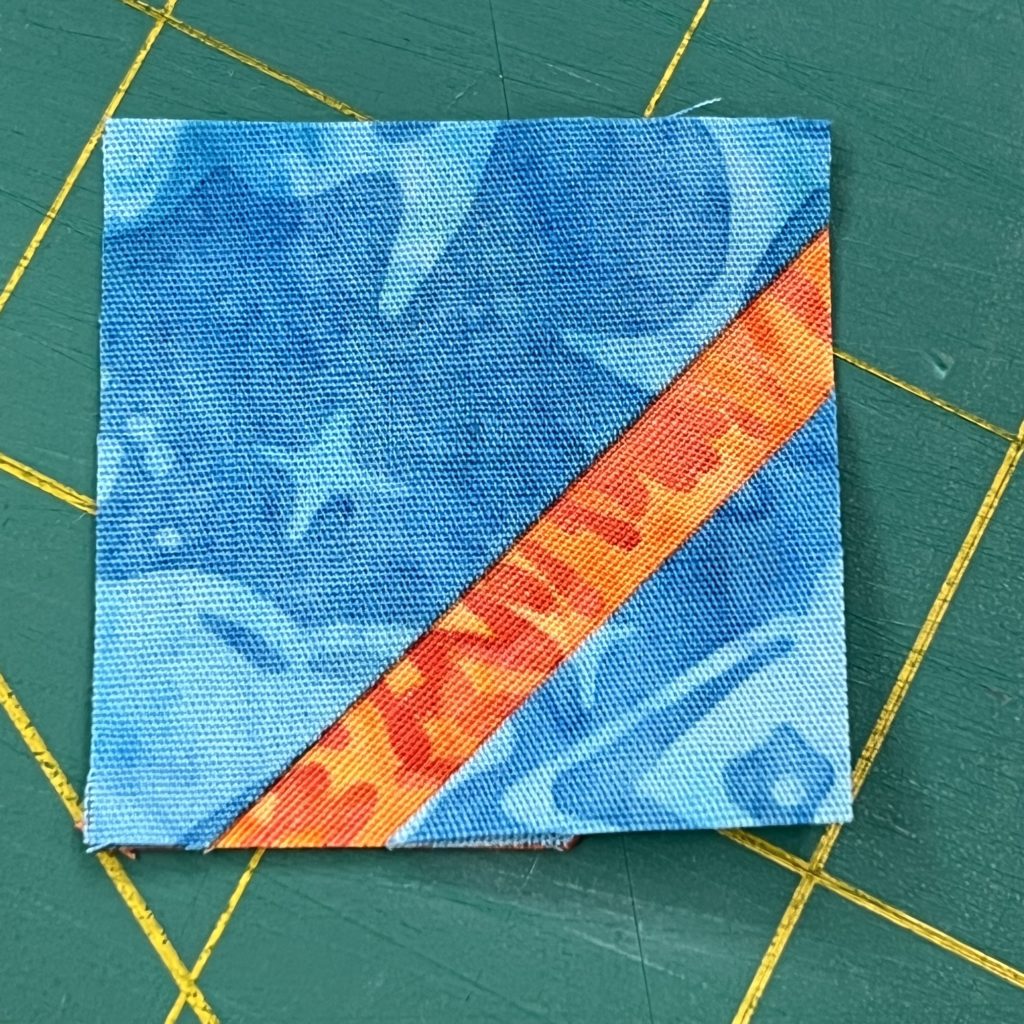
10 & 11 – Measure 1 1/2″ from the edge you just cut and trim the other edge. You end up with a 1 1/2″ square with the straw in it.
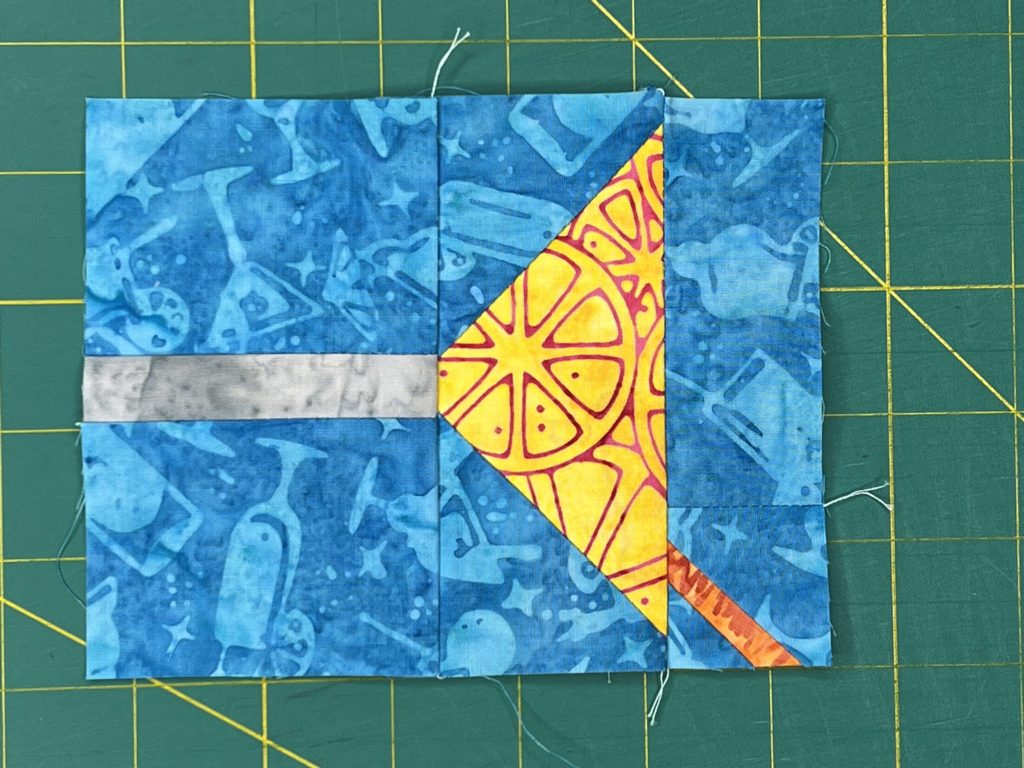
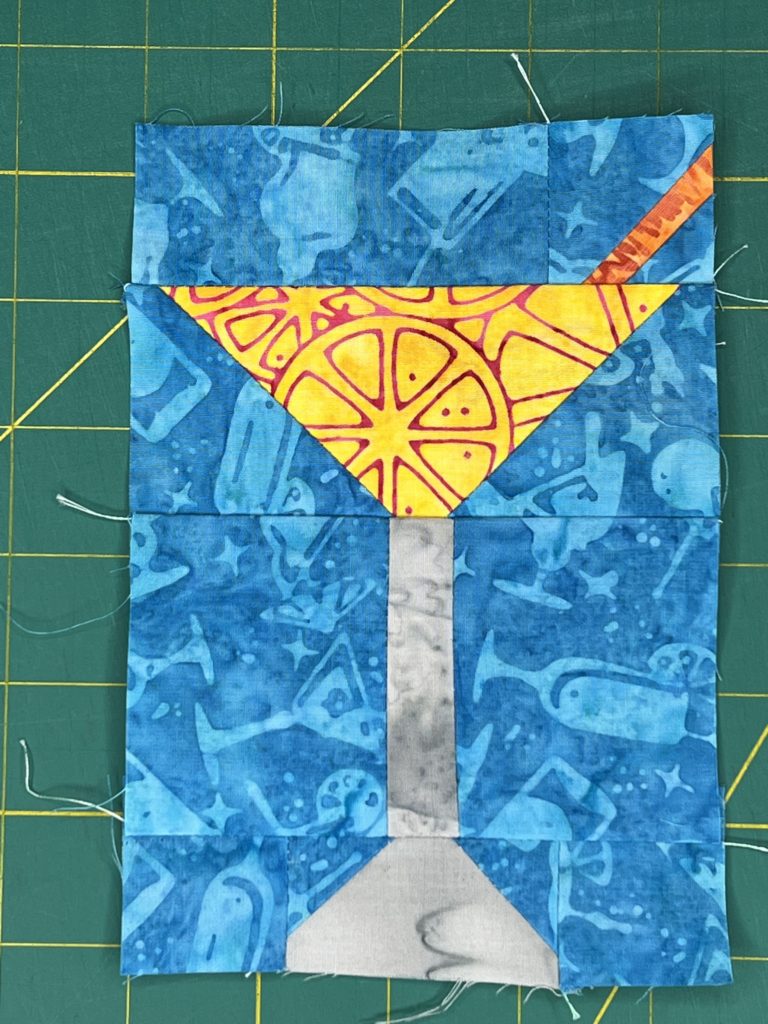
Assembling the Top Section of the Mug Rug
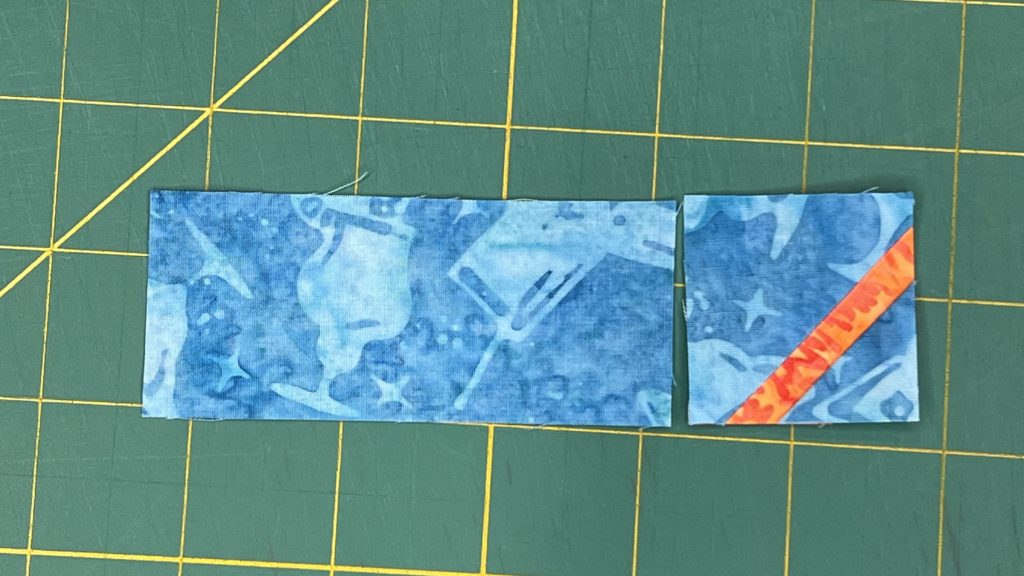
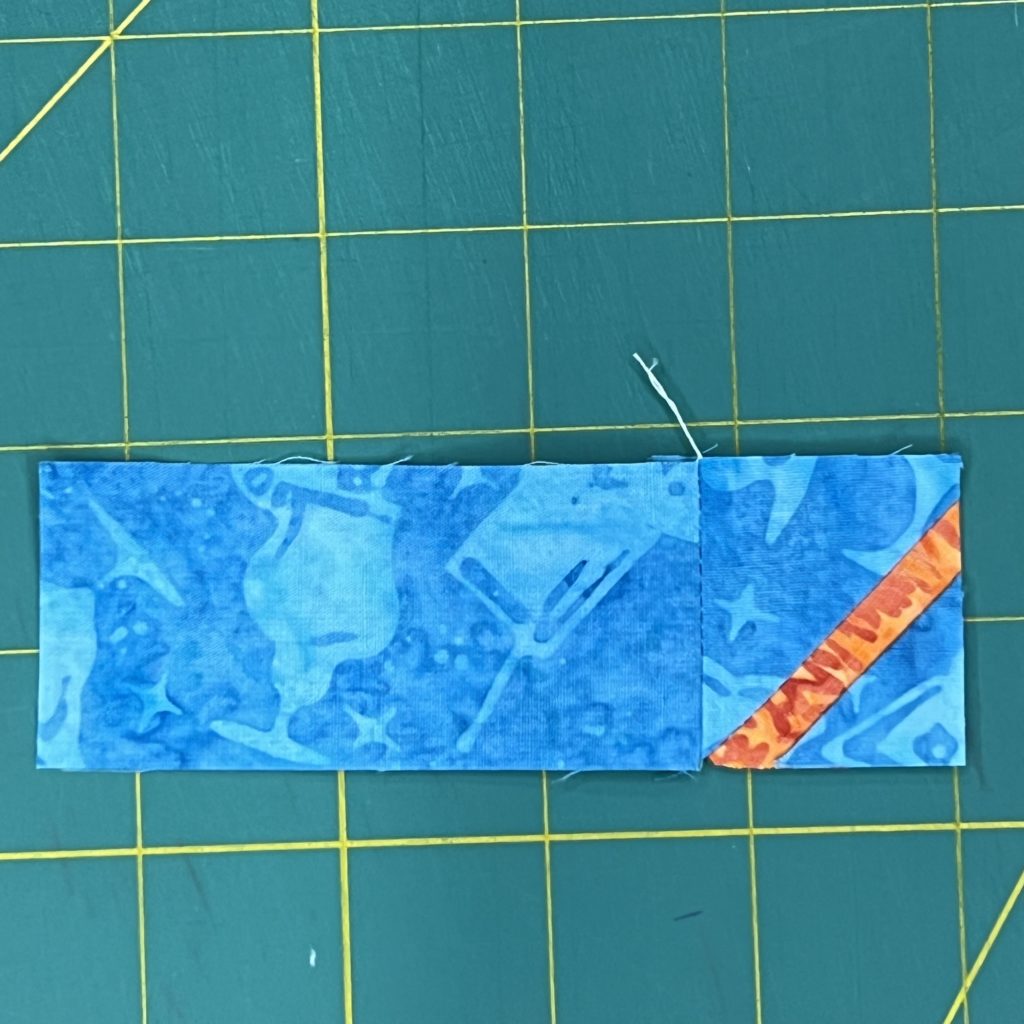
1 & 2 – Add the background strip that measures 1 1/2″ x 3 1/2″ to the left side of the straw square. Press to the strip.
3 & 4 – Add the strip with the straw to the top of the glass section. Press to the straw section.
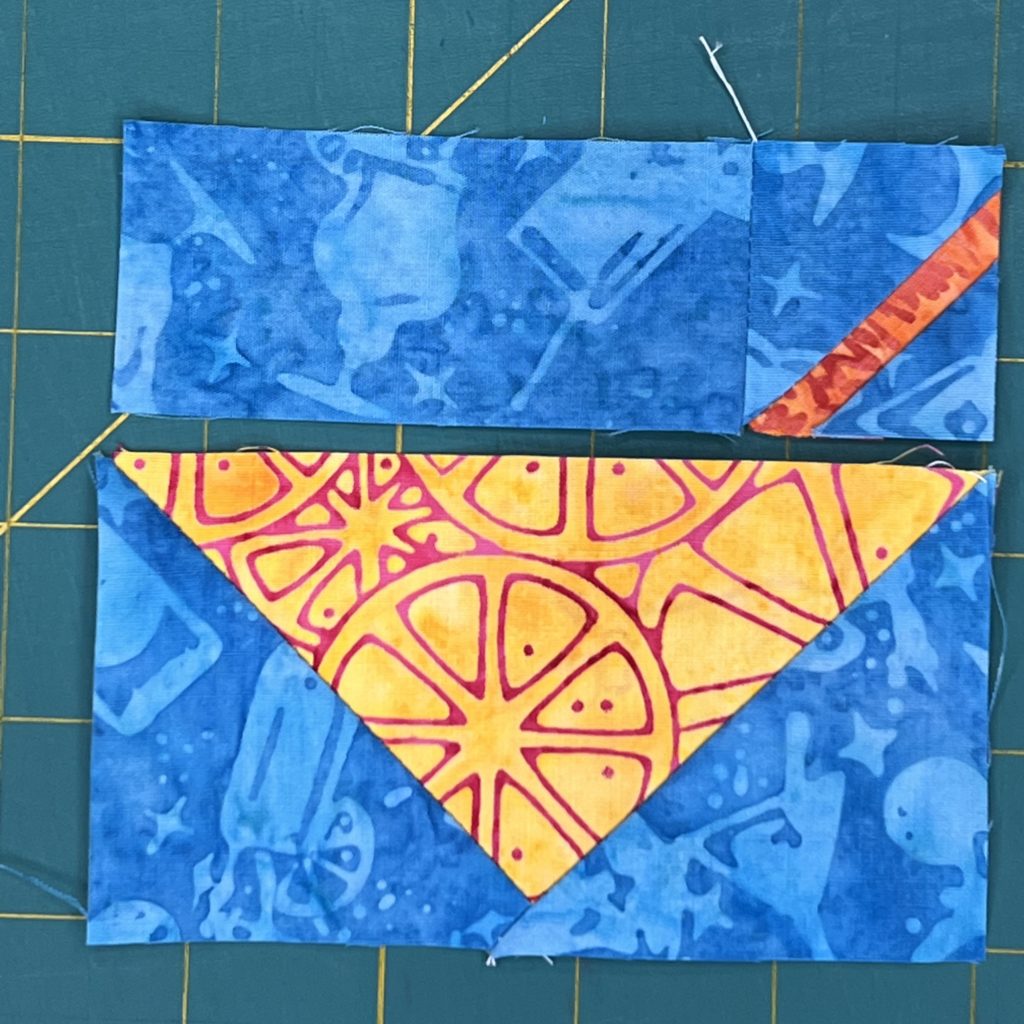
Assembling the Mug Rug Top
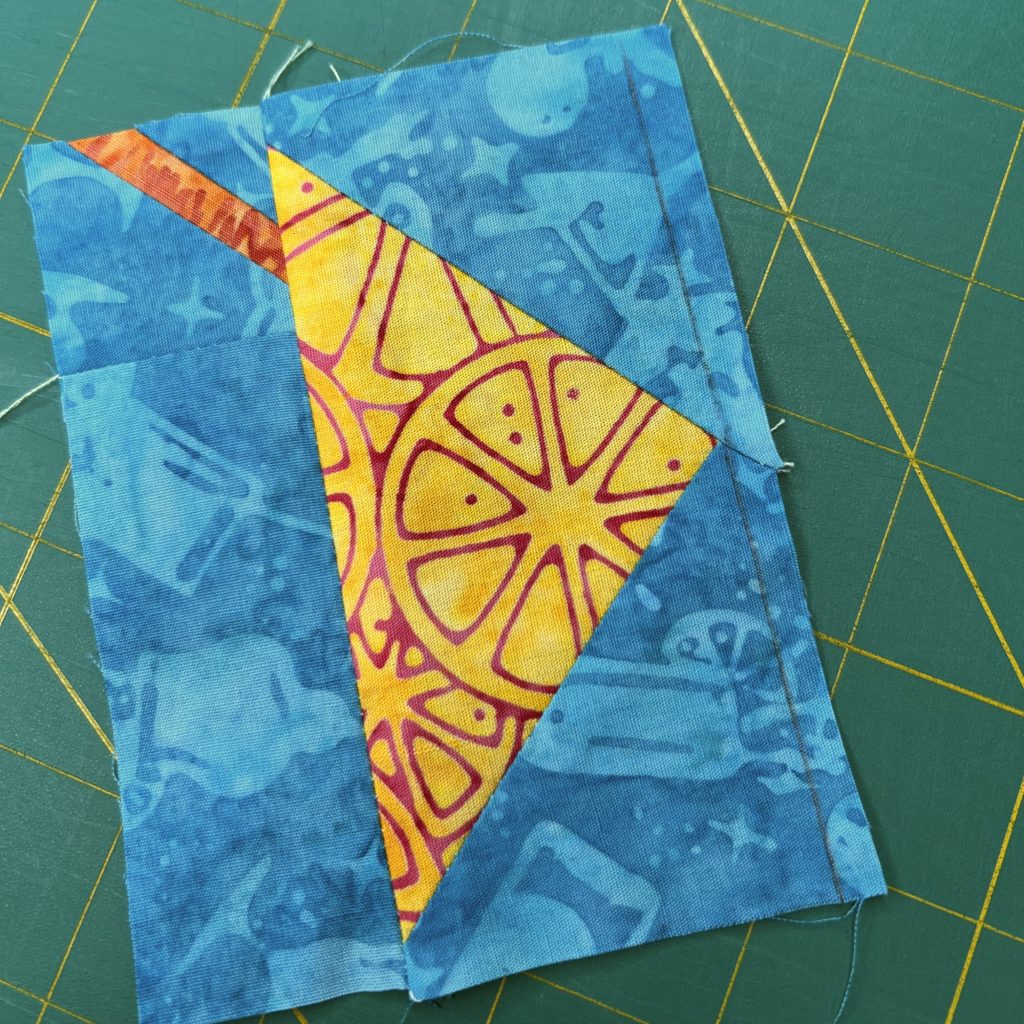

1 & 2 – On the front (right) side of the fabric, draw a faint line (I recommend a water soluble marking tool) along the bottom of the liquid section, 1/4″ above the edge. It should hit right at the point.
3 & 4 – Get the glass stem section. With right sides facing, line the edge of the stem section along the drawn line.
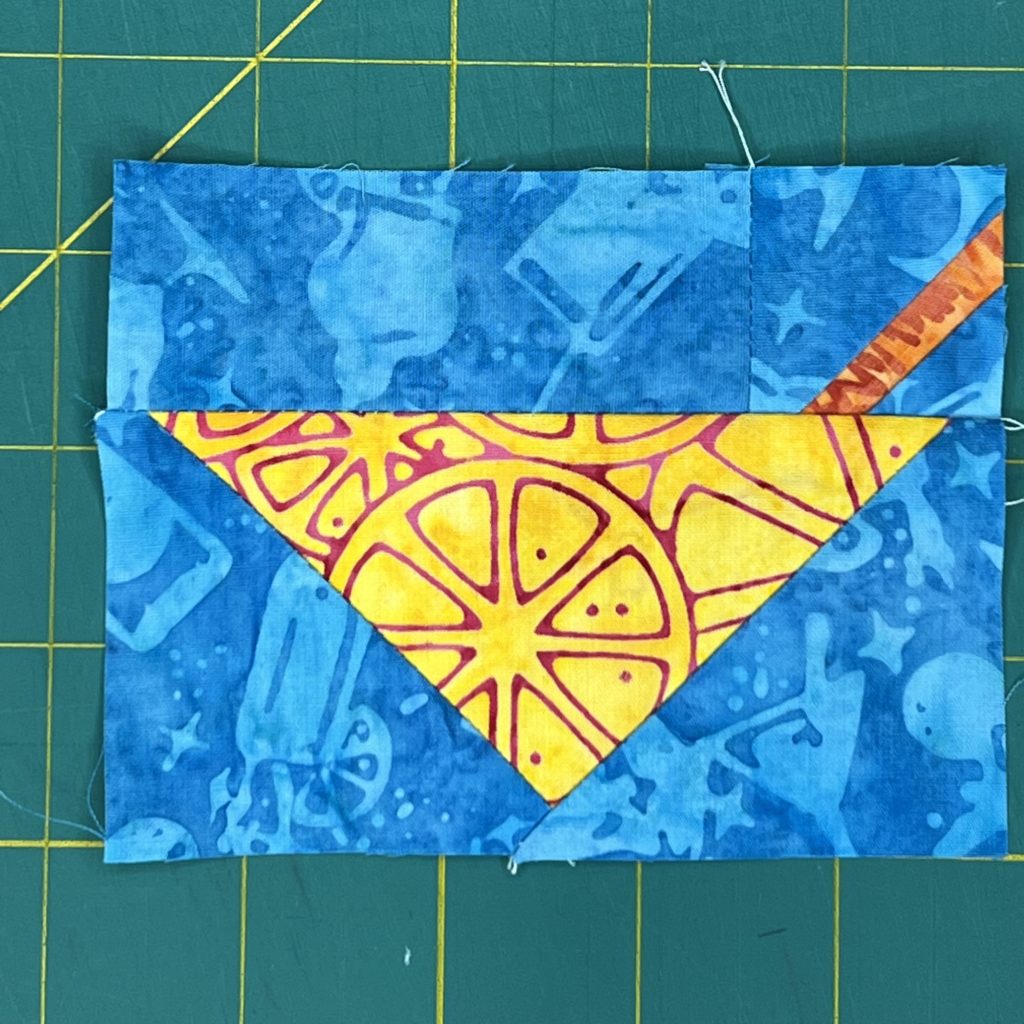
5 – Sew a 1/4″ seam allowance from the edge of the glass stem section.
6 – Press to the liquid section.
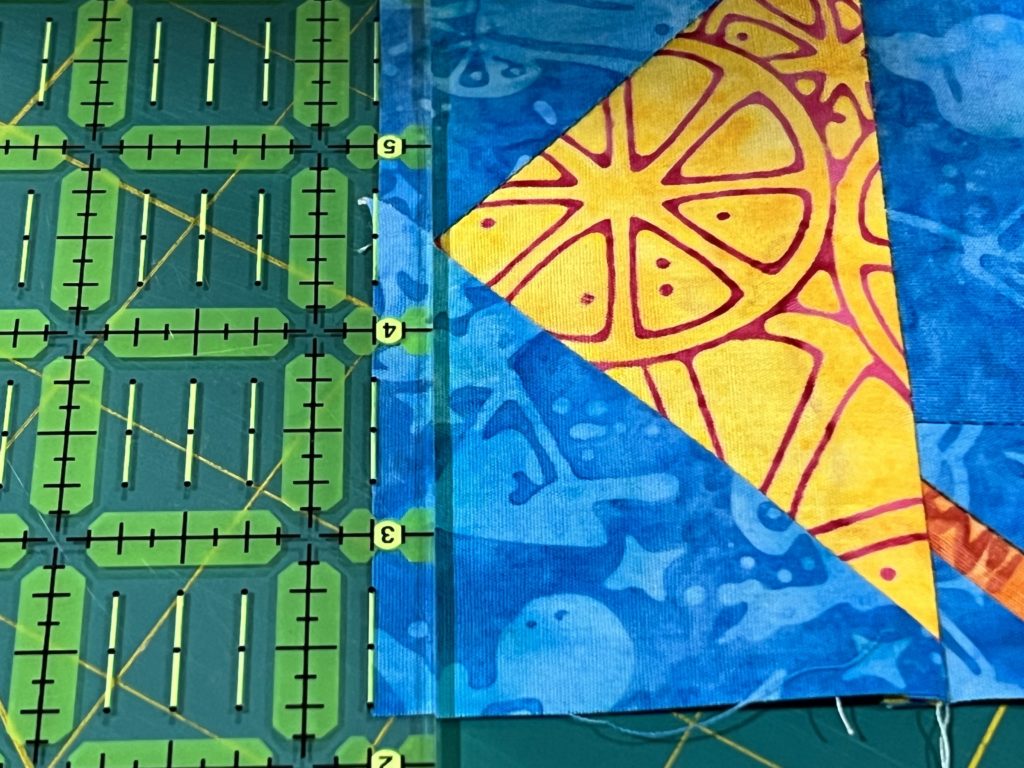
7 & 8 – Repeat on the bottom of the glass section, drawing a faint line 1/4″ from the edge at the point of the glass section.
9 – Line up the glass stem section with the bottom of the glass section along the drawn line.
10 & 11 – Sew a 1/4″ seam allowance from the edge of the glass stem section. Press to the stem section.
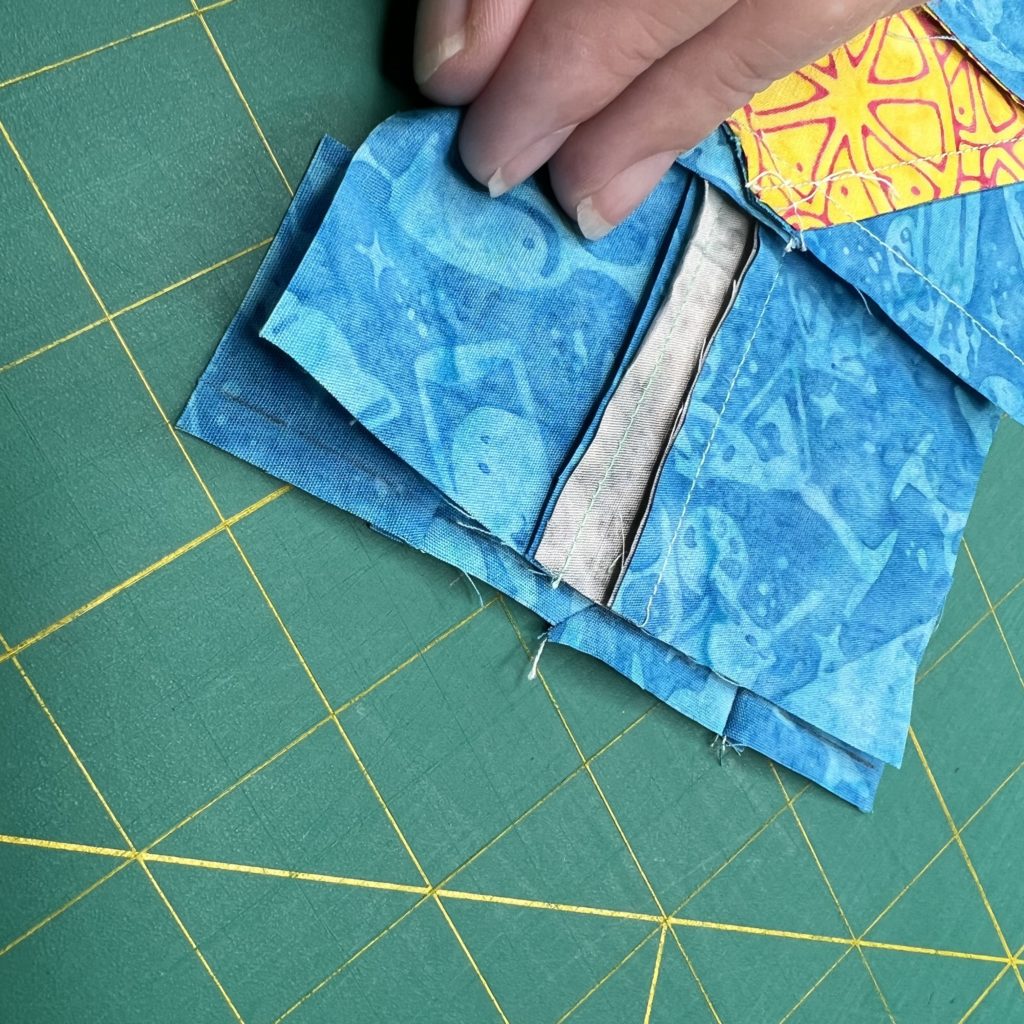
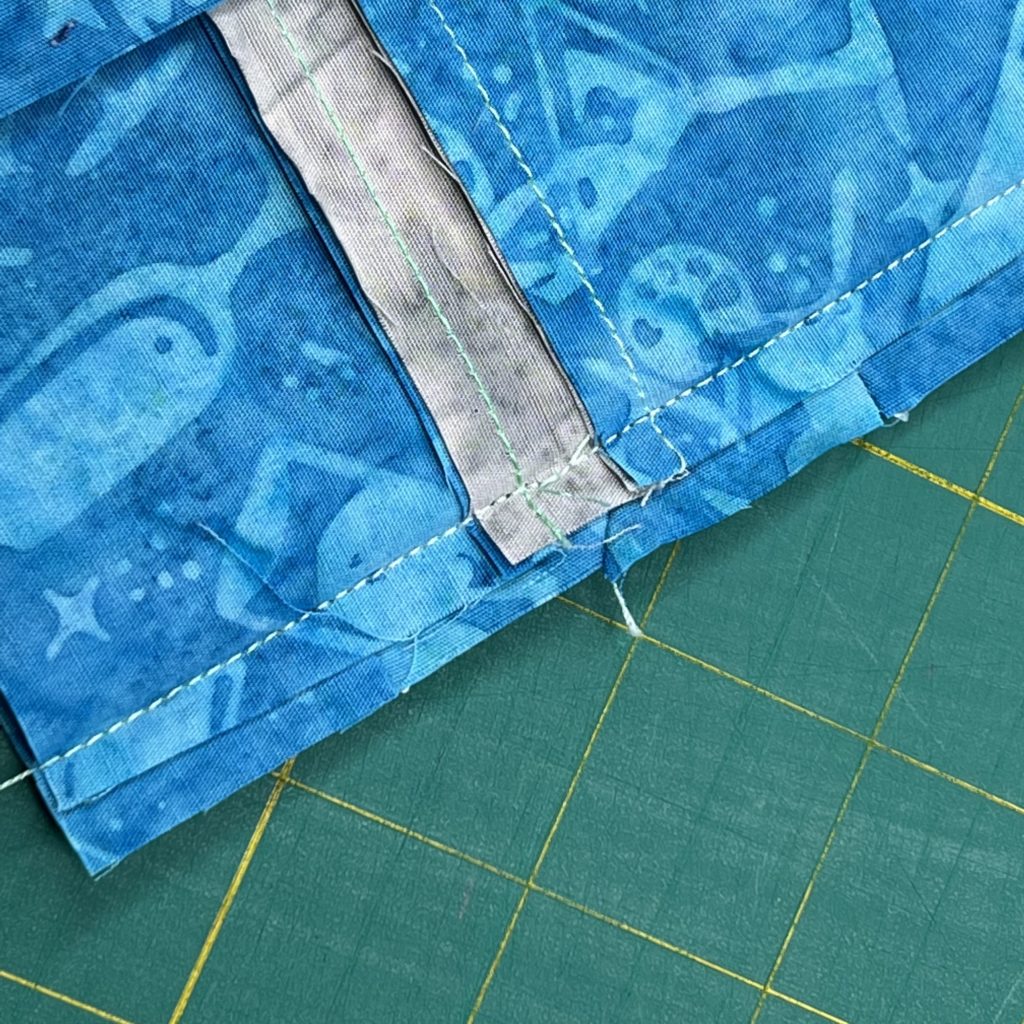
Adding the Borders

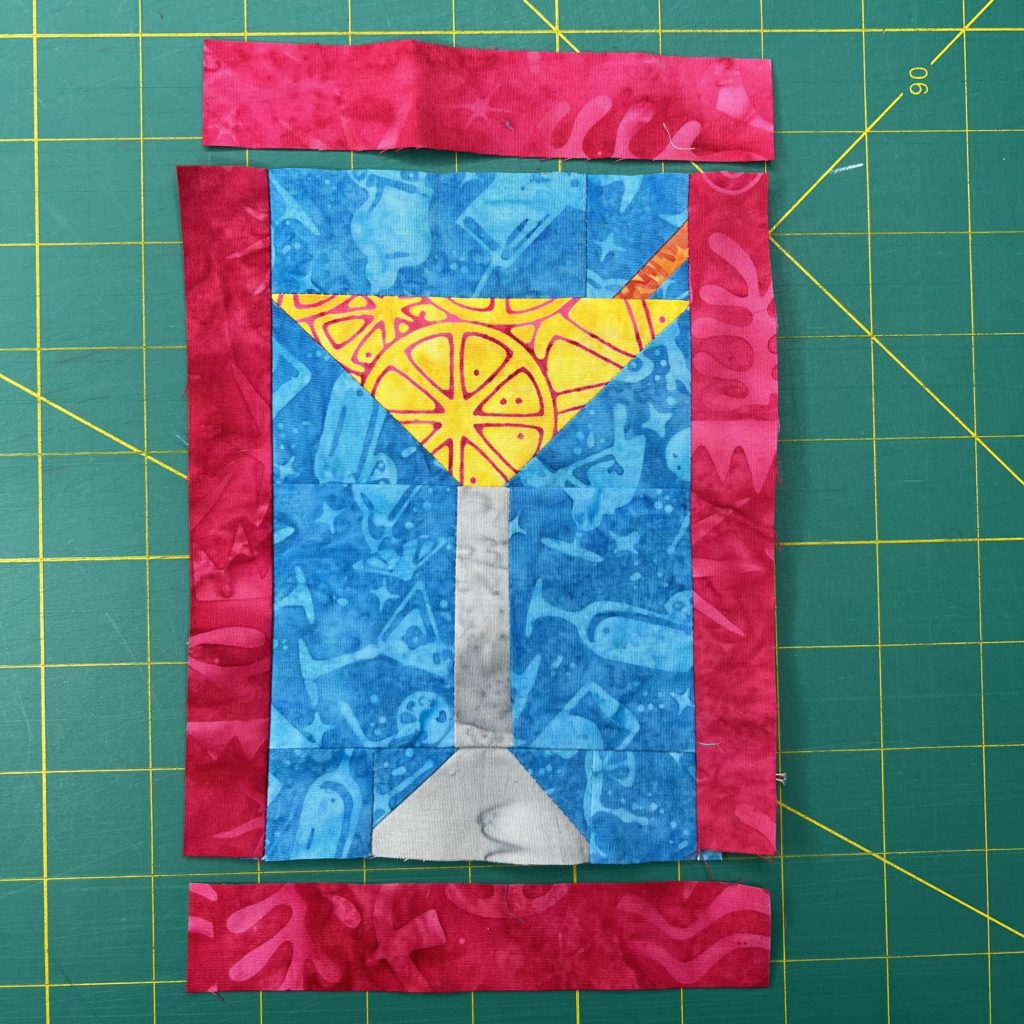
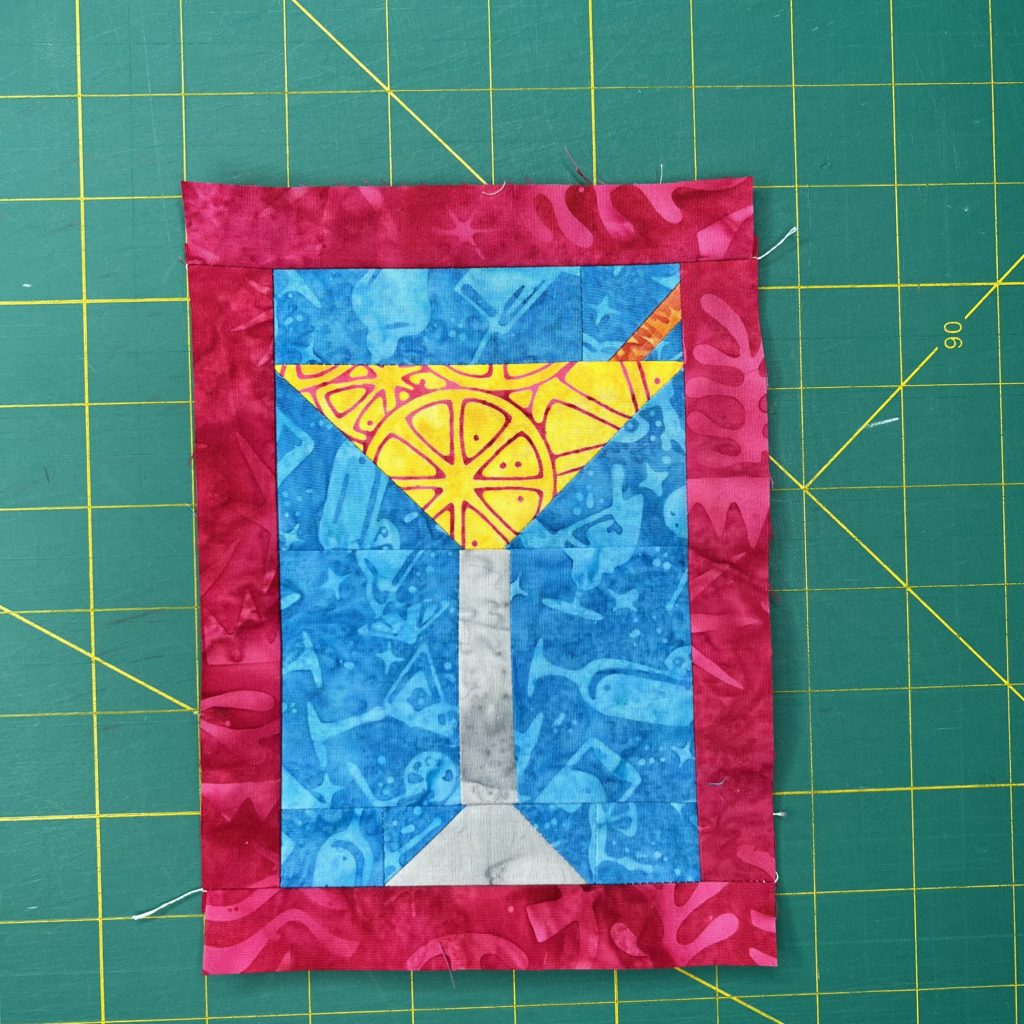
1 – Add the 1″ x 6 1/2″ strips to the left and the right of the glass. Press to the borders.
2 – Add the 1″ x 5 1/2″ strips to the top and bottom.
3 – Press to the borders.
Finishing the Mug Rug
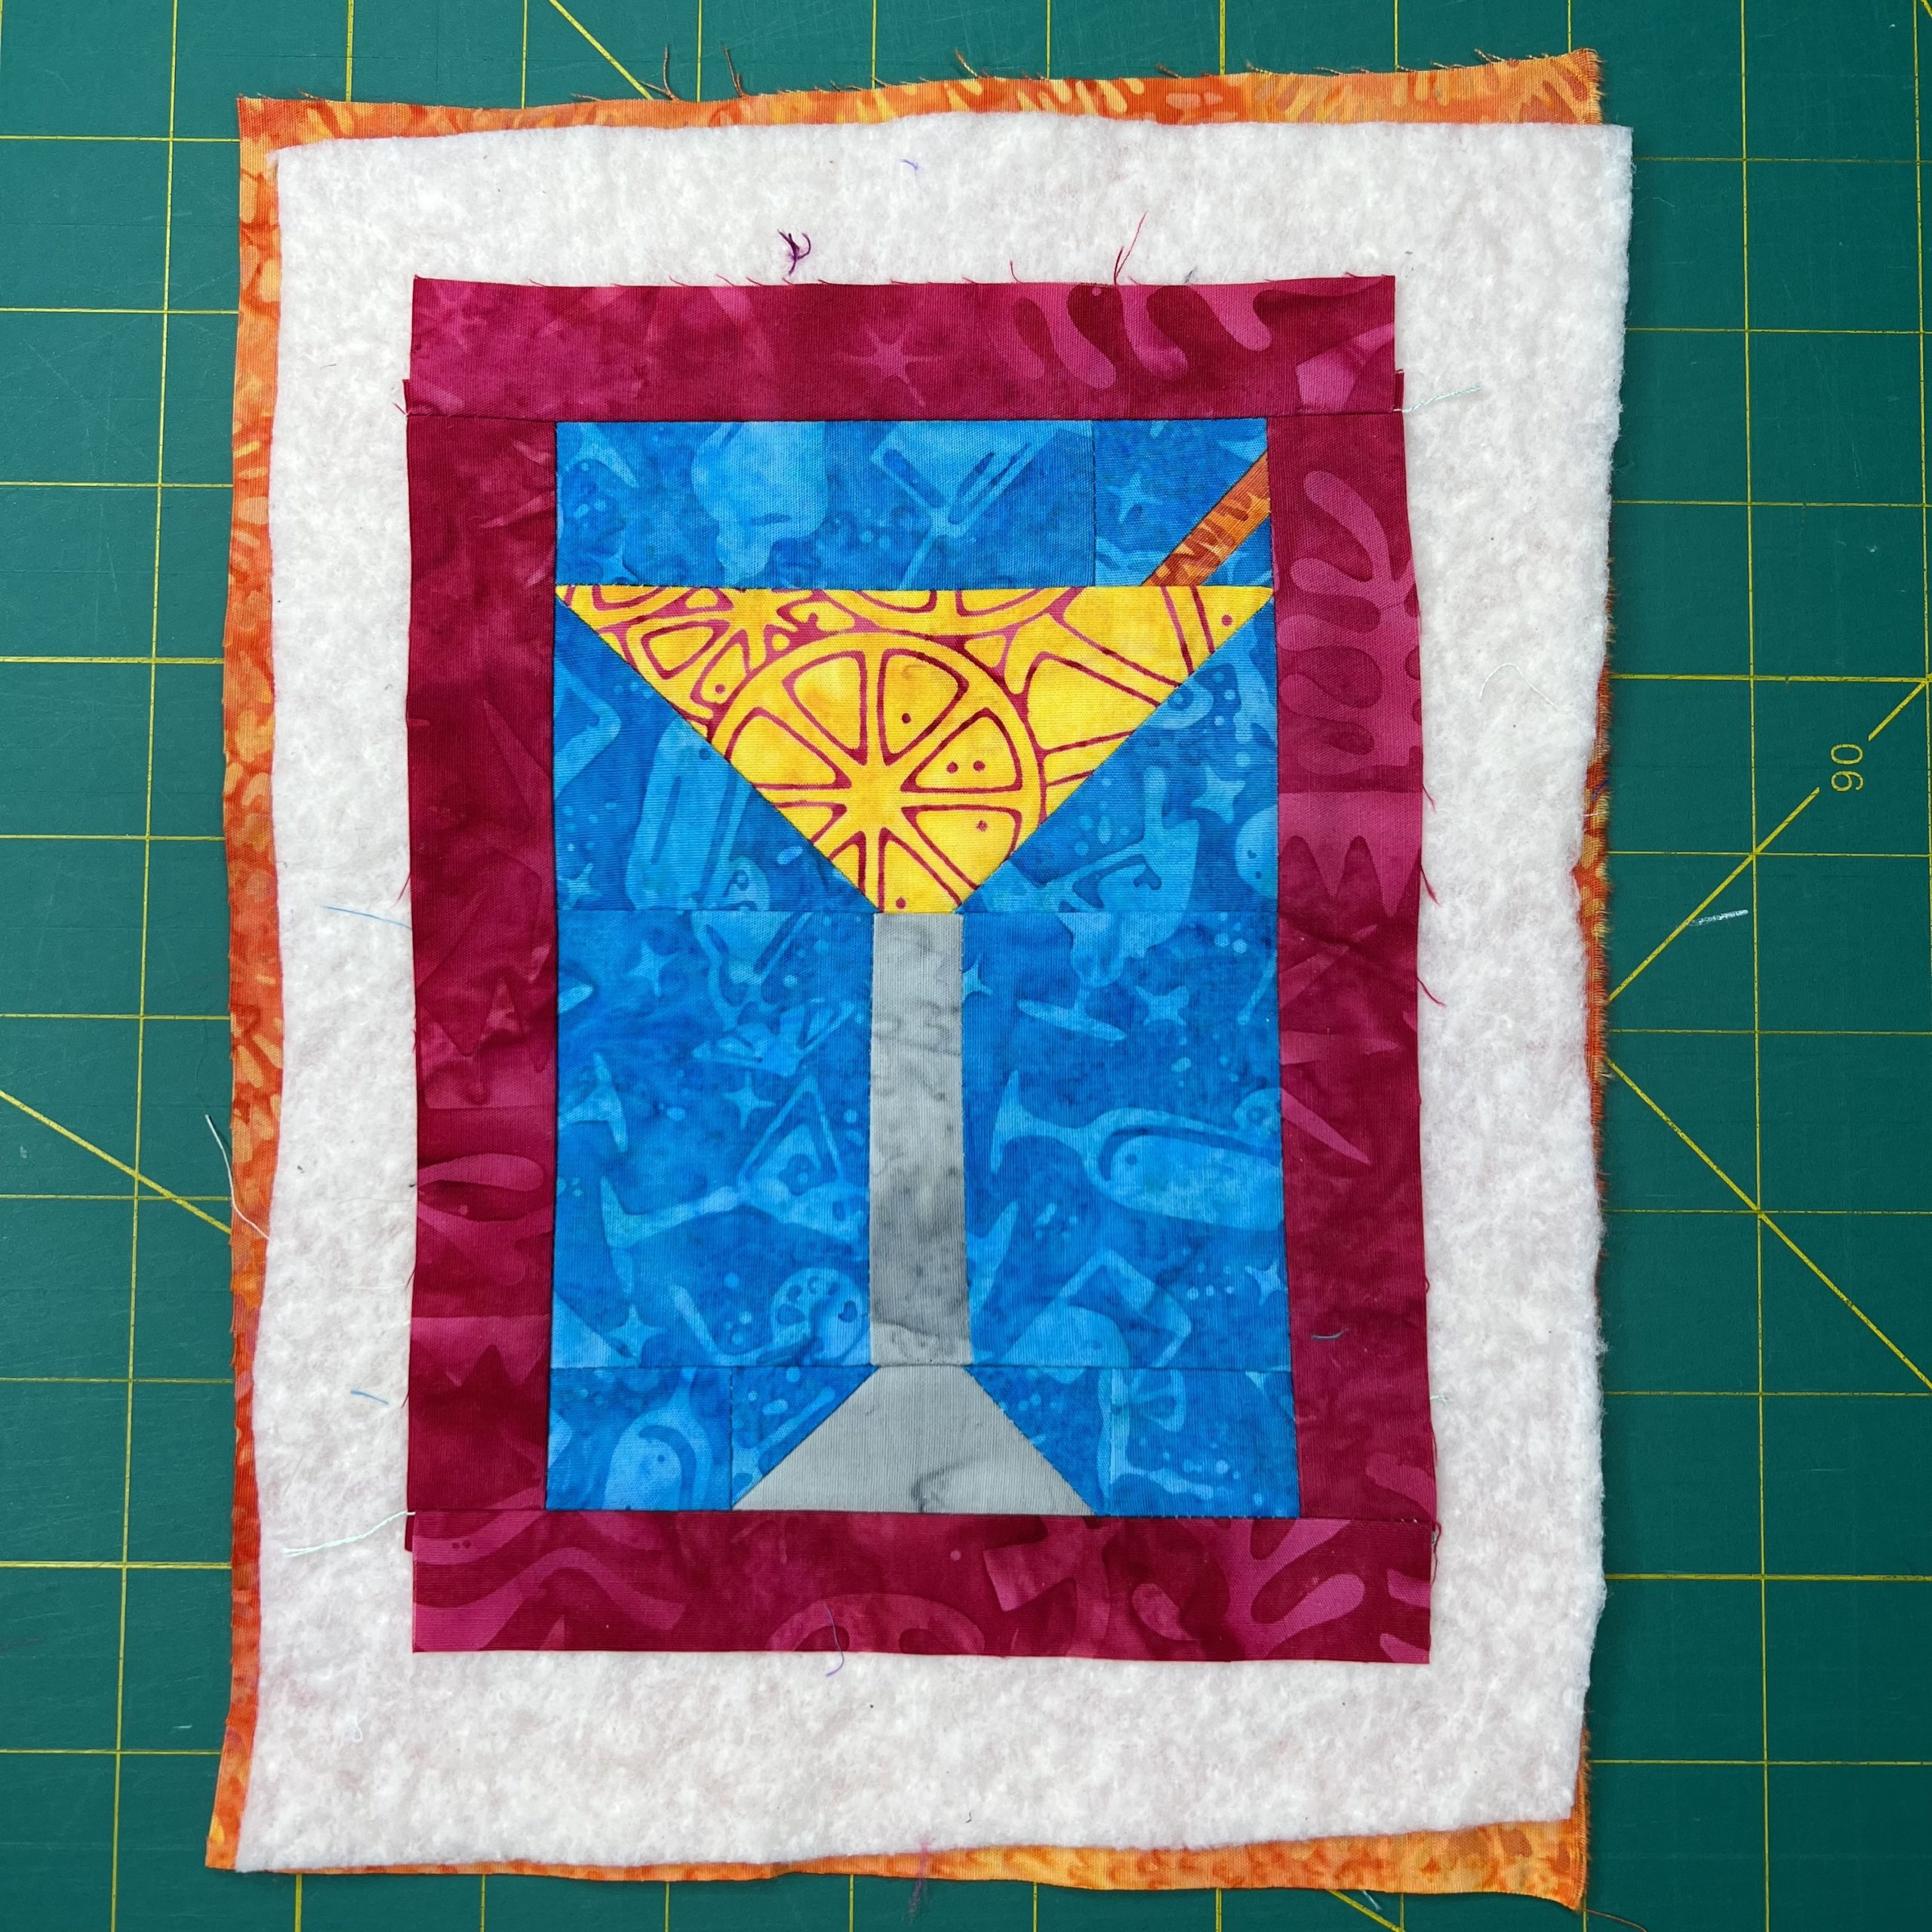
Layer the backing, batting and the top and quilt and bind as desired. I used Hobbs fusible because it is perfect for small projects like this!
That’s It!
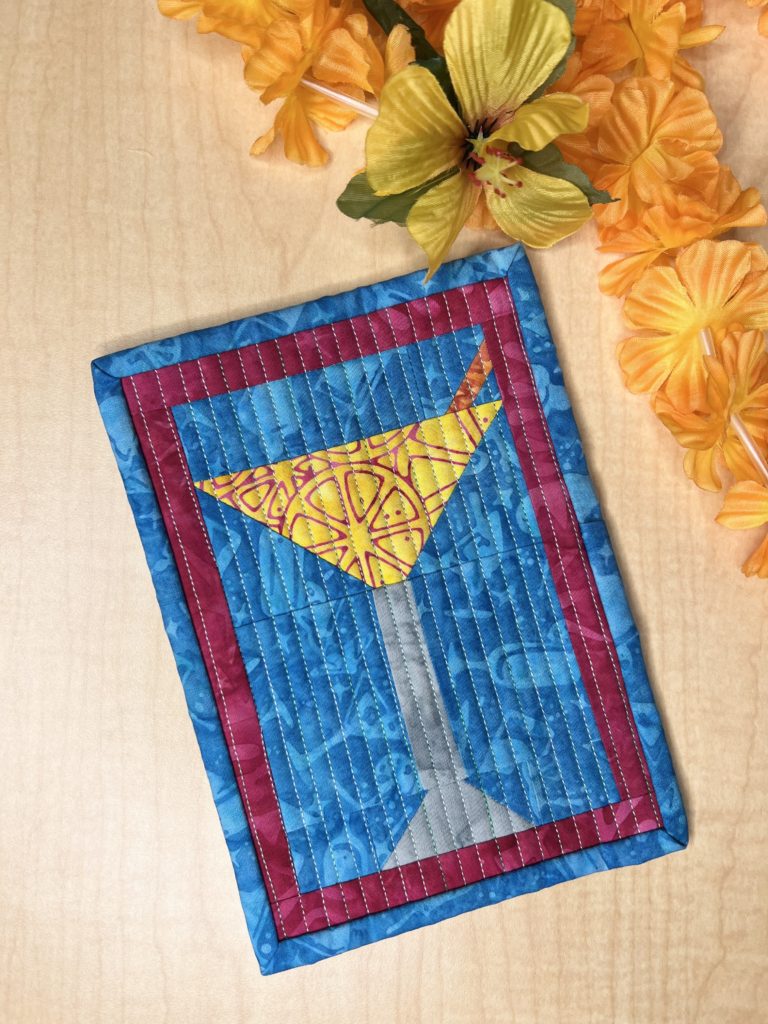
There you have it…how to make a cocktail glass mug rug. I don’t know about you, but I’m ready to take a vacation and bring my mug rugs along with me! However I think I’m going to end up having a staycation. With my new mug rugs I can make it extra fun. Now I just need to decide what sort of tropical beverage I want to have!
Happy Quilting! – Claudia

