
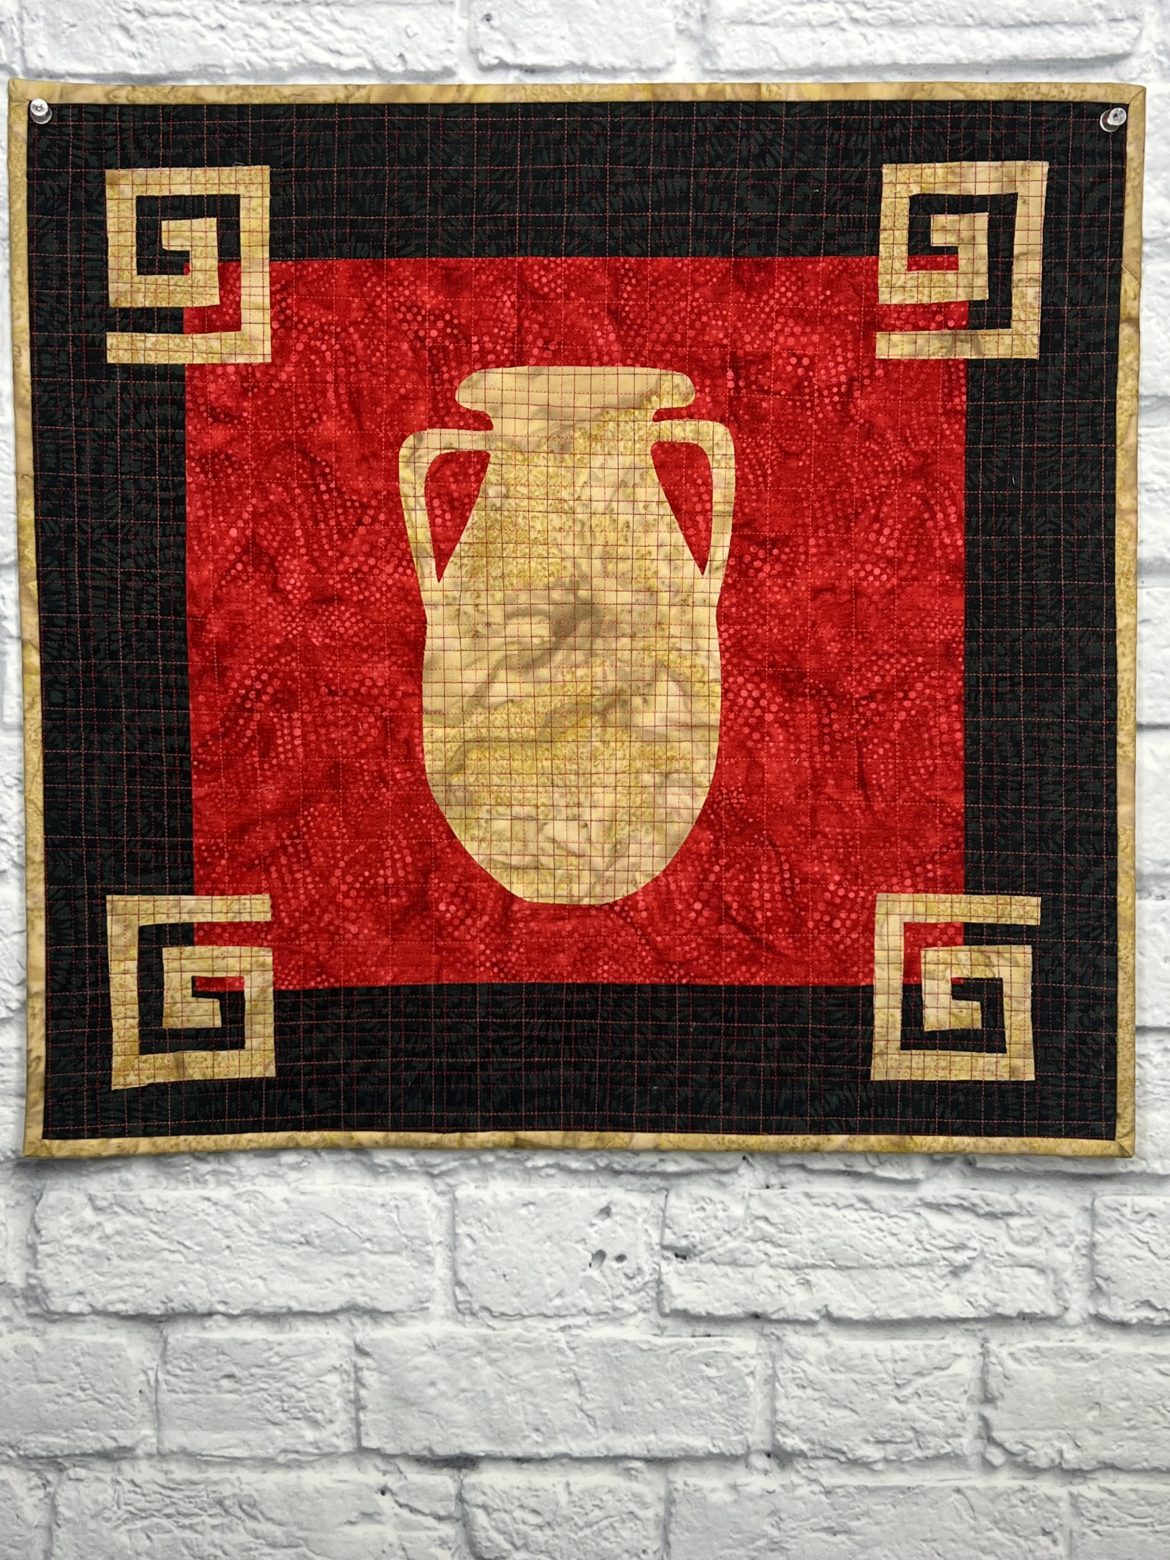
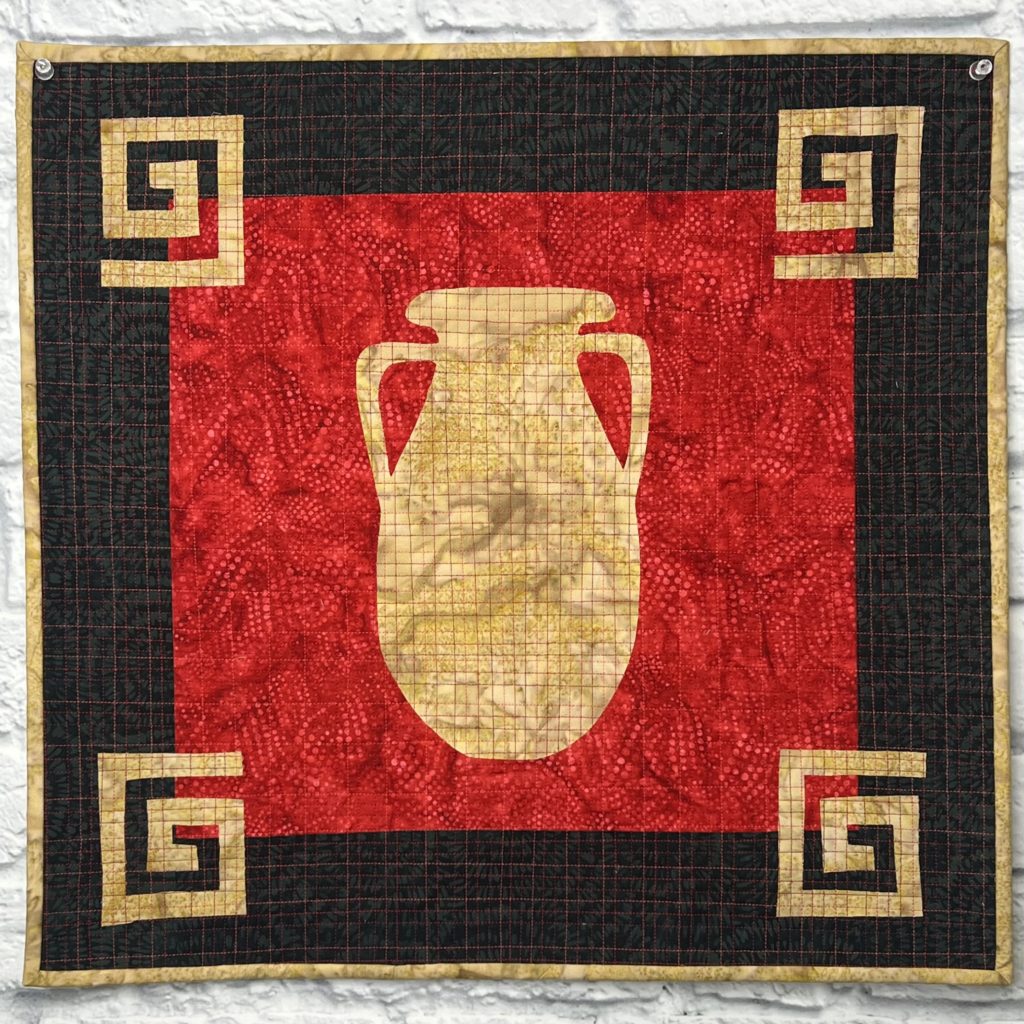
Roman Amphora Mosaic Using Aurifil Thread and Island Batiks
As an Island Batik ambassador I receive all sorts of wonderful goodies to work with during the year. This month we were all given Aurifil Thread color builder sets based on Italian cities. I was lucky enough to get Pompeii Red and I knew right away what I wanted to do with it. Our challenge for March was to make something that was 20″ x 20″ and that used all three threads in the color builder. As a result, I made this Roman Amphora mosiac.
The reason I knew what I wanted to do right away was because I had the opportunity to visit Italy while I was in high school (about 40 years ago). One of the things I remember most about that trip were the incredible mosaics at almost every historical site. Artists from the day had pieced together tiny pieces of stone and turned them into incredible pieces of art.
I also vividly remember visiting Pompeii and being amazed that some of the frescos on the walls still maintained some of their vivid colors. While faded and starting to brown, I still have some of my photos of the mosaics and frescos from that trip.
Disclosure: Items used in this tutorial were generously provided by Island Batik & Aurifil Thread.
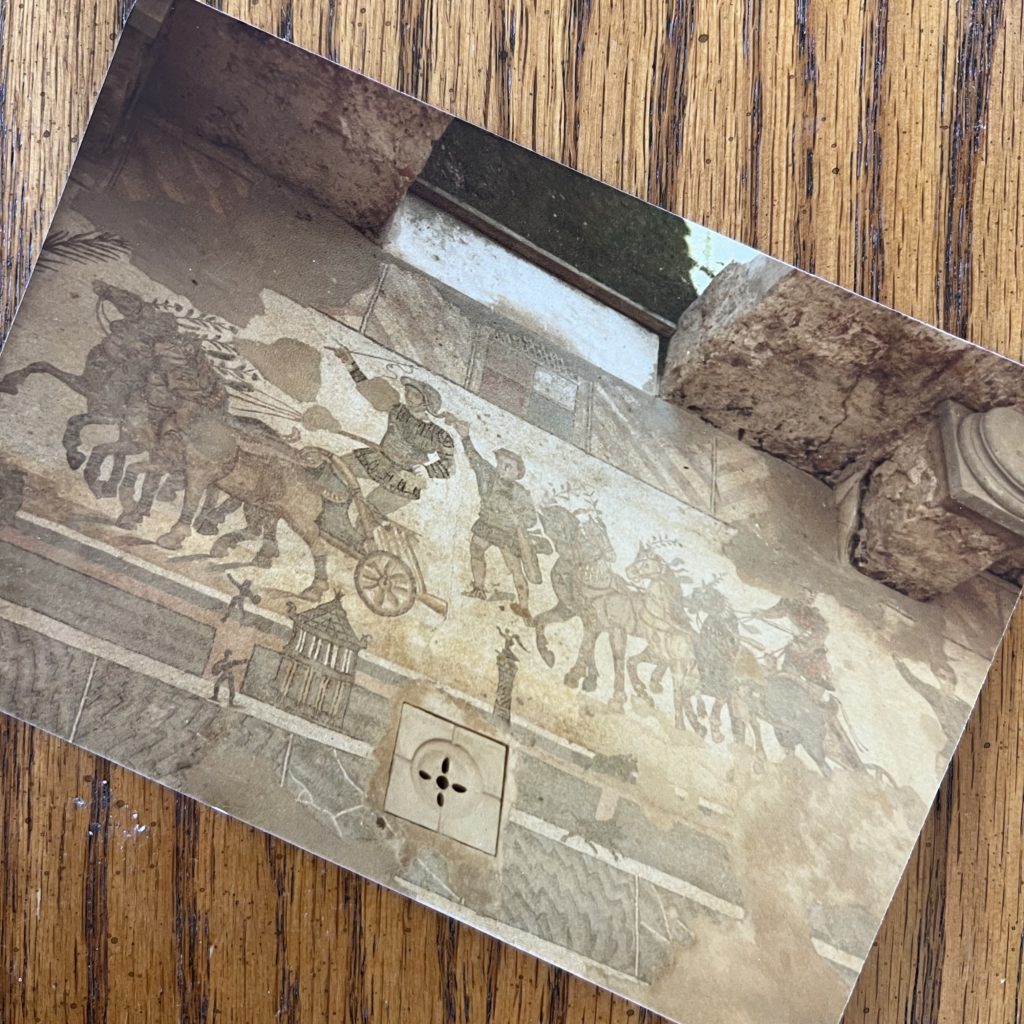
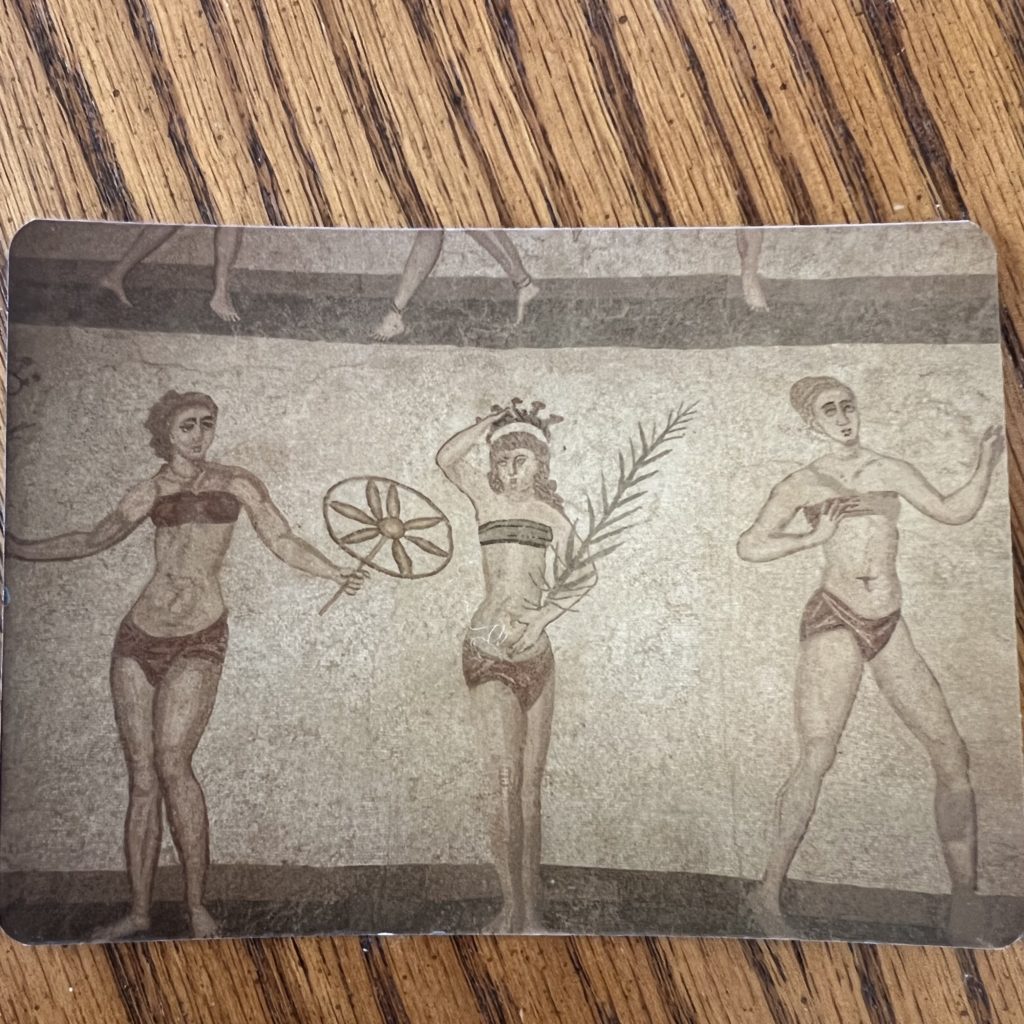
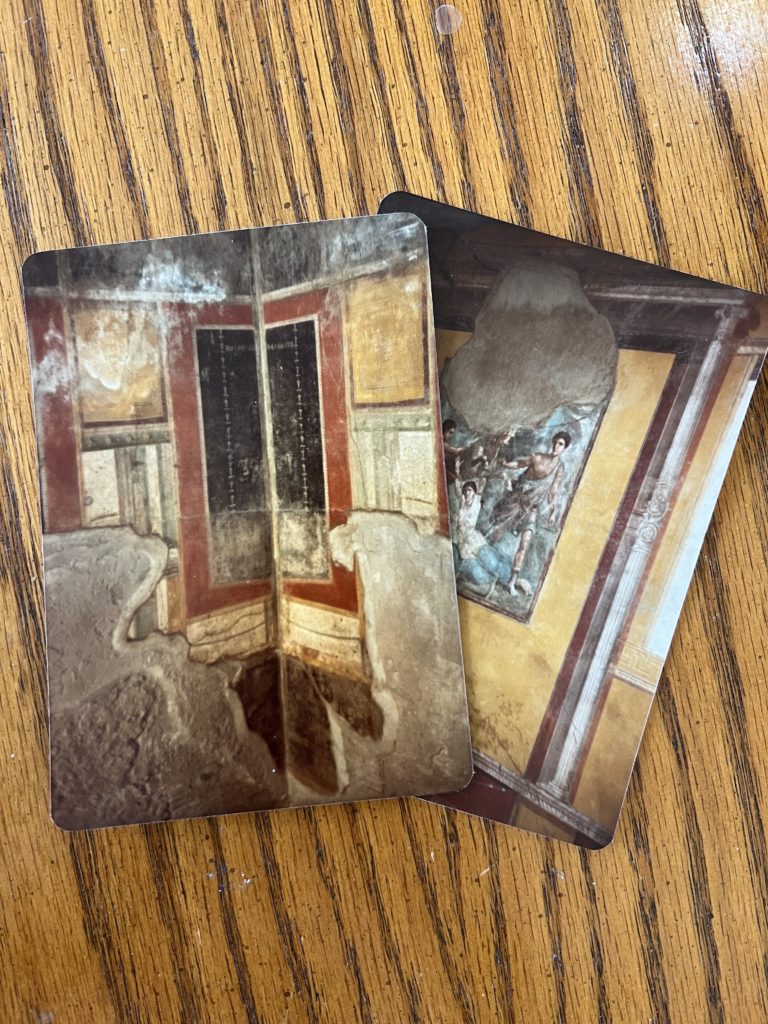
The two photos on the left are mosaics. While hard to see, they were made with tiny bits of stone. The photo on the right were of frescos that remained on the walls in Pompeii.
Video Show & Tell + Bonus Tutorial
About the Thread
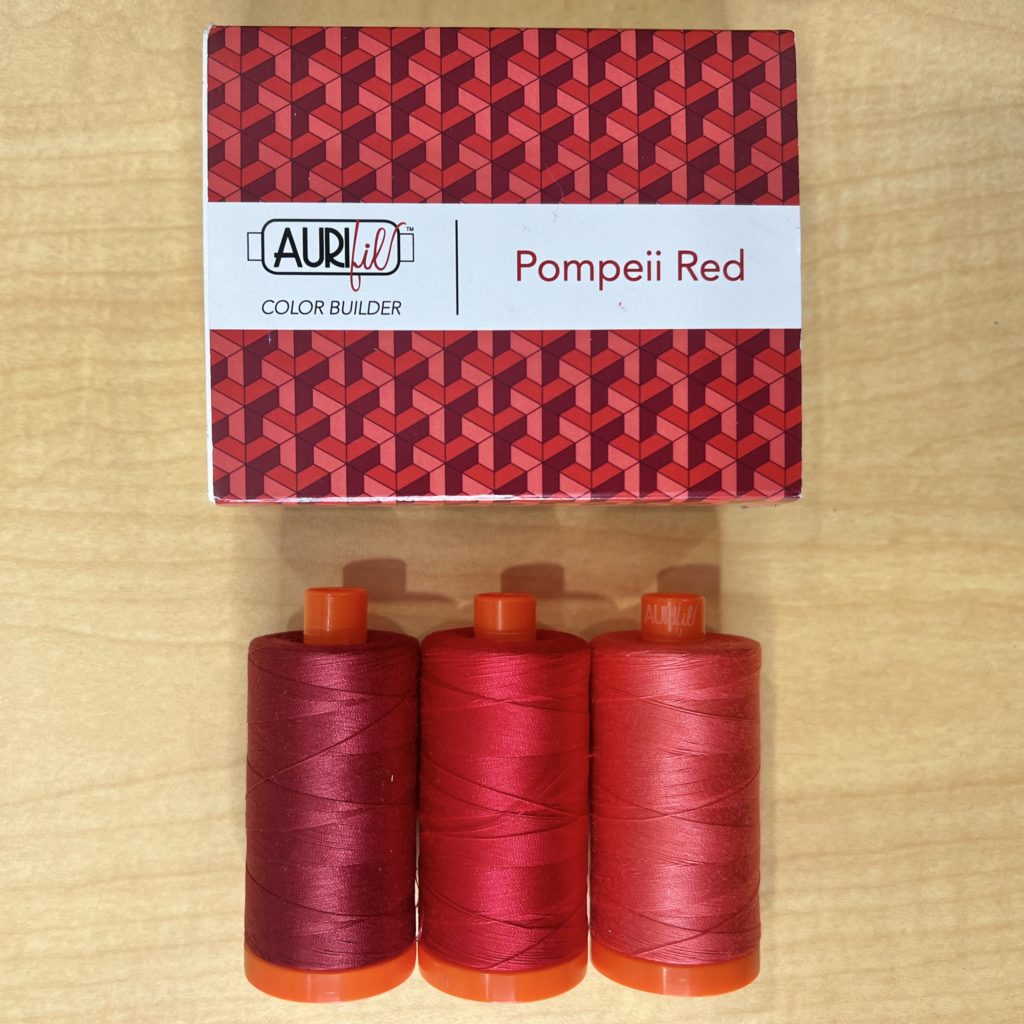
The Aurifil Pompeii Red color builder set has three gorgeous reds in it. It includes three large spools of 50 wt thread in the following colors: 5002 (Medium Red), 2250 (Red) and 1103 (Burgundy). These were all perfect for my project.
If you have never used Aurifil threads for your quilting, I urge you to give them a try. They are a dream to sew with.
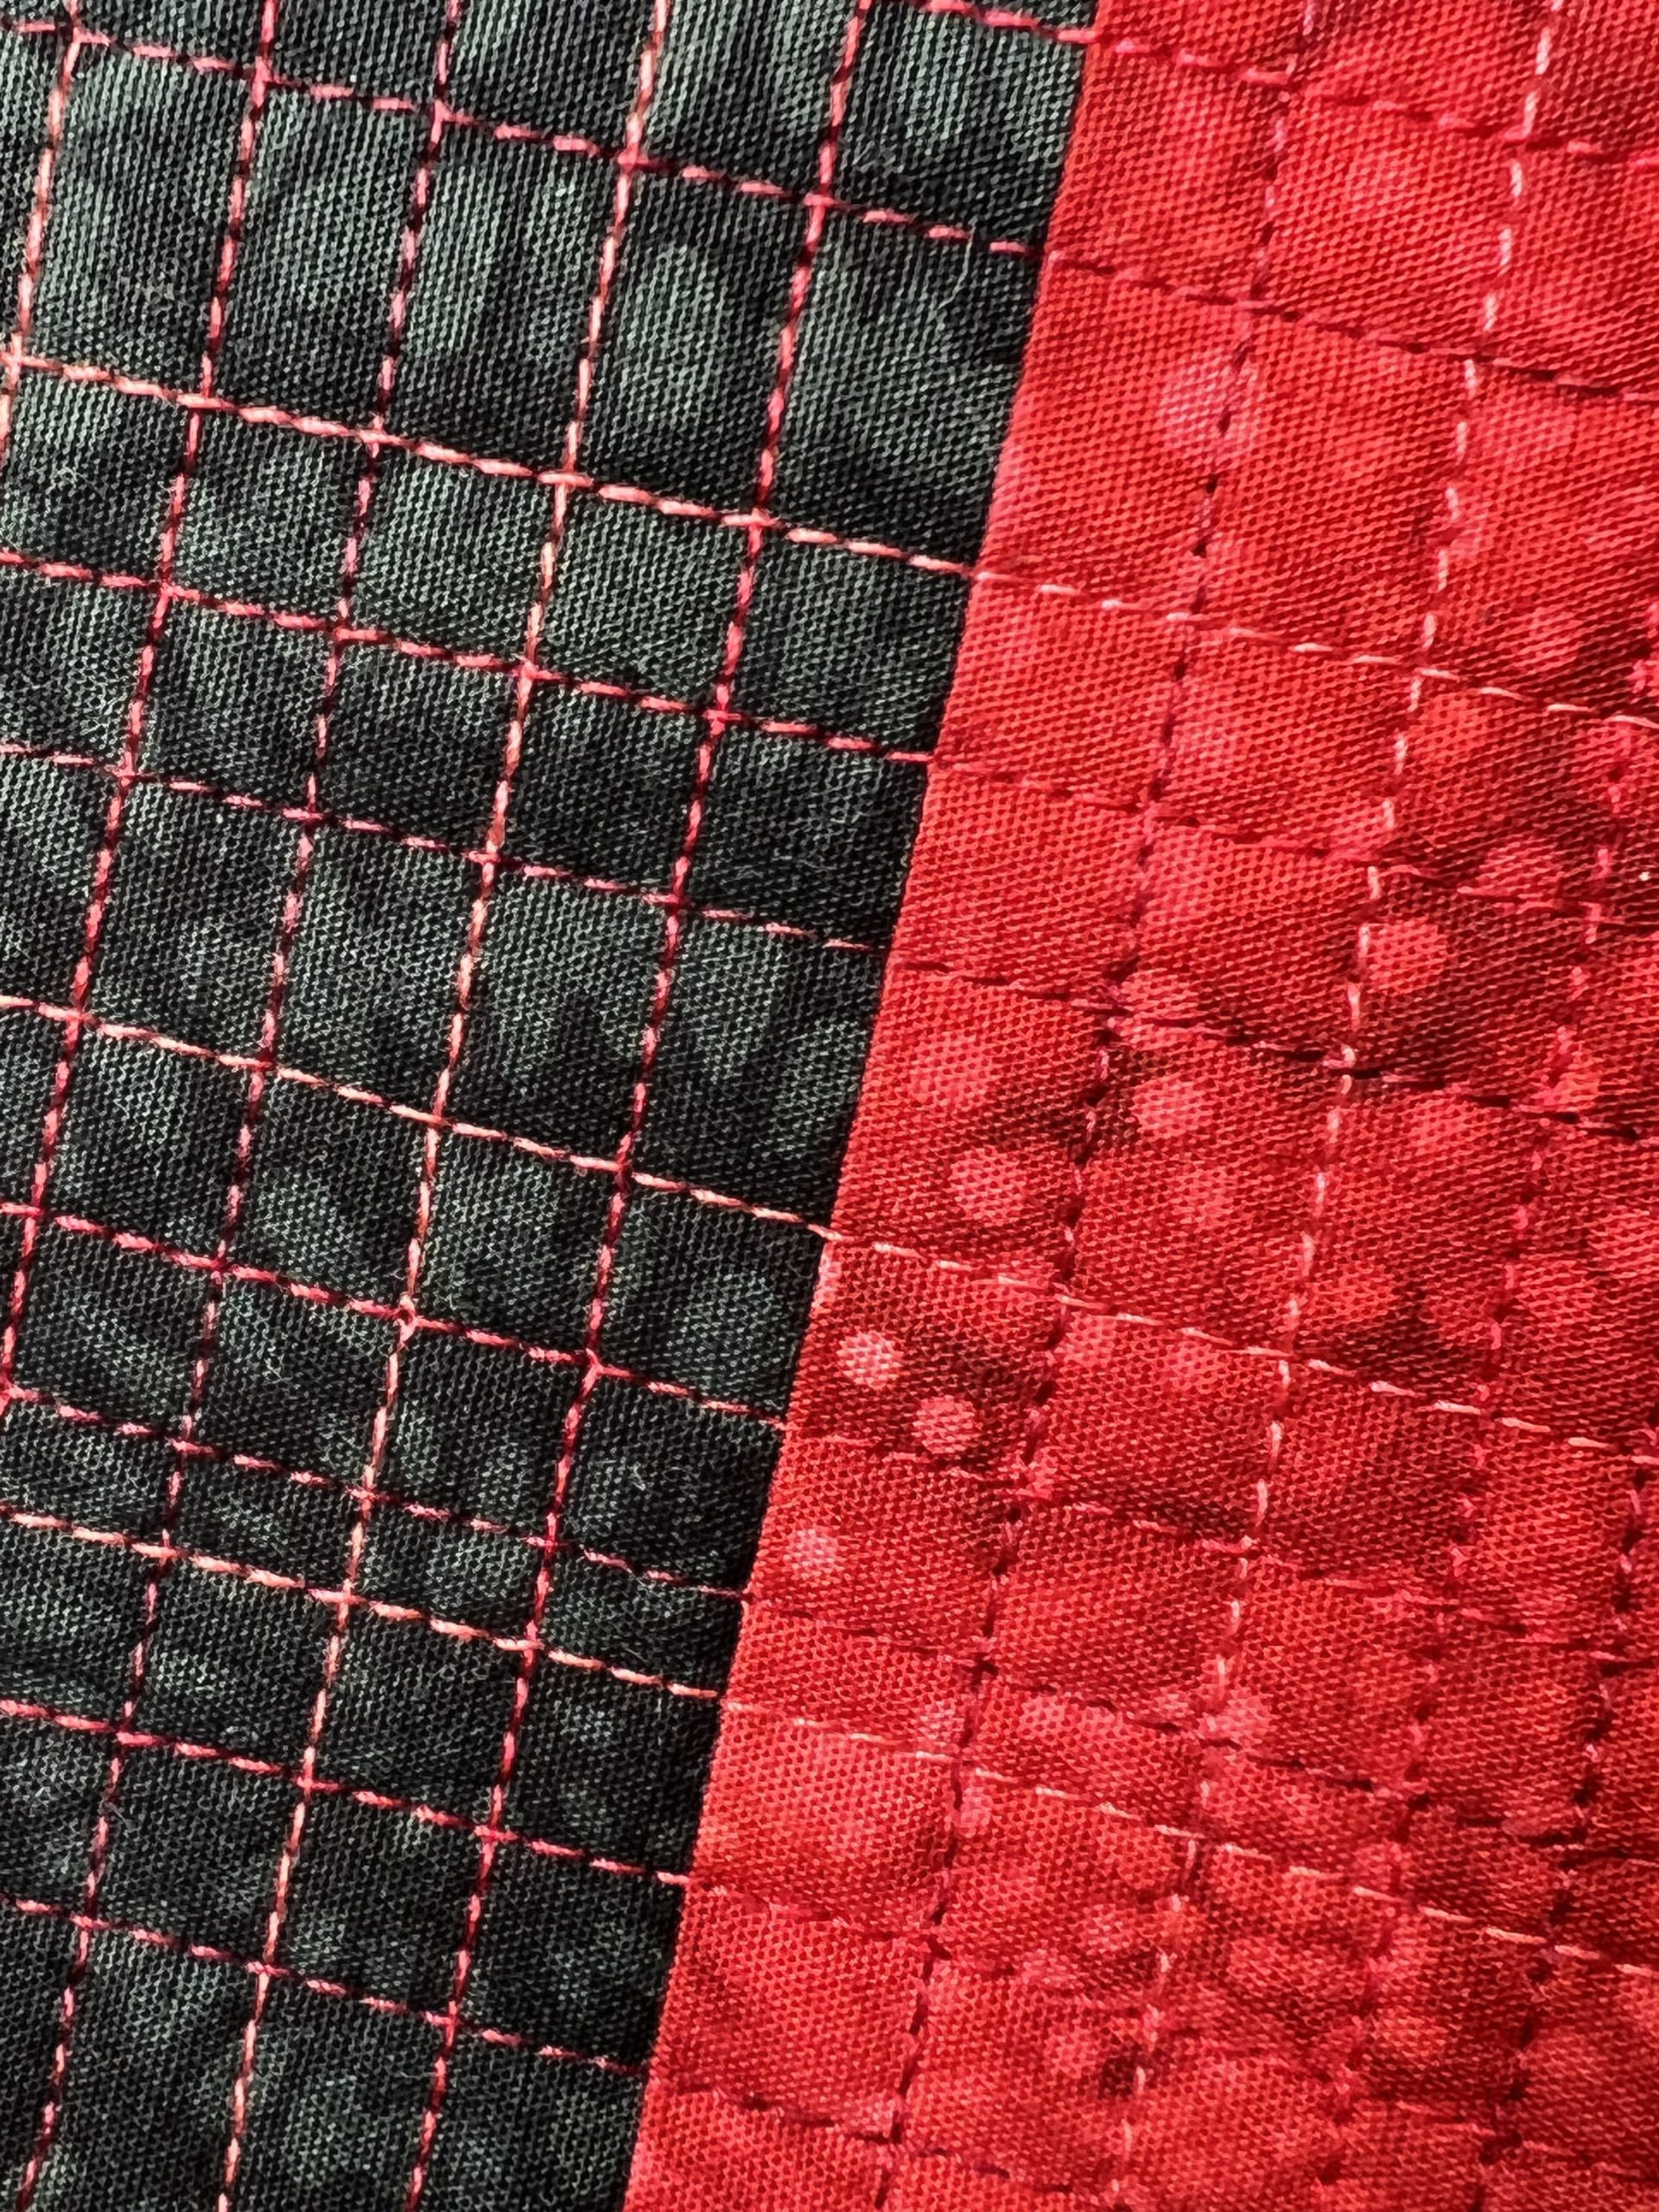
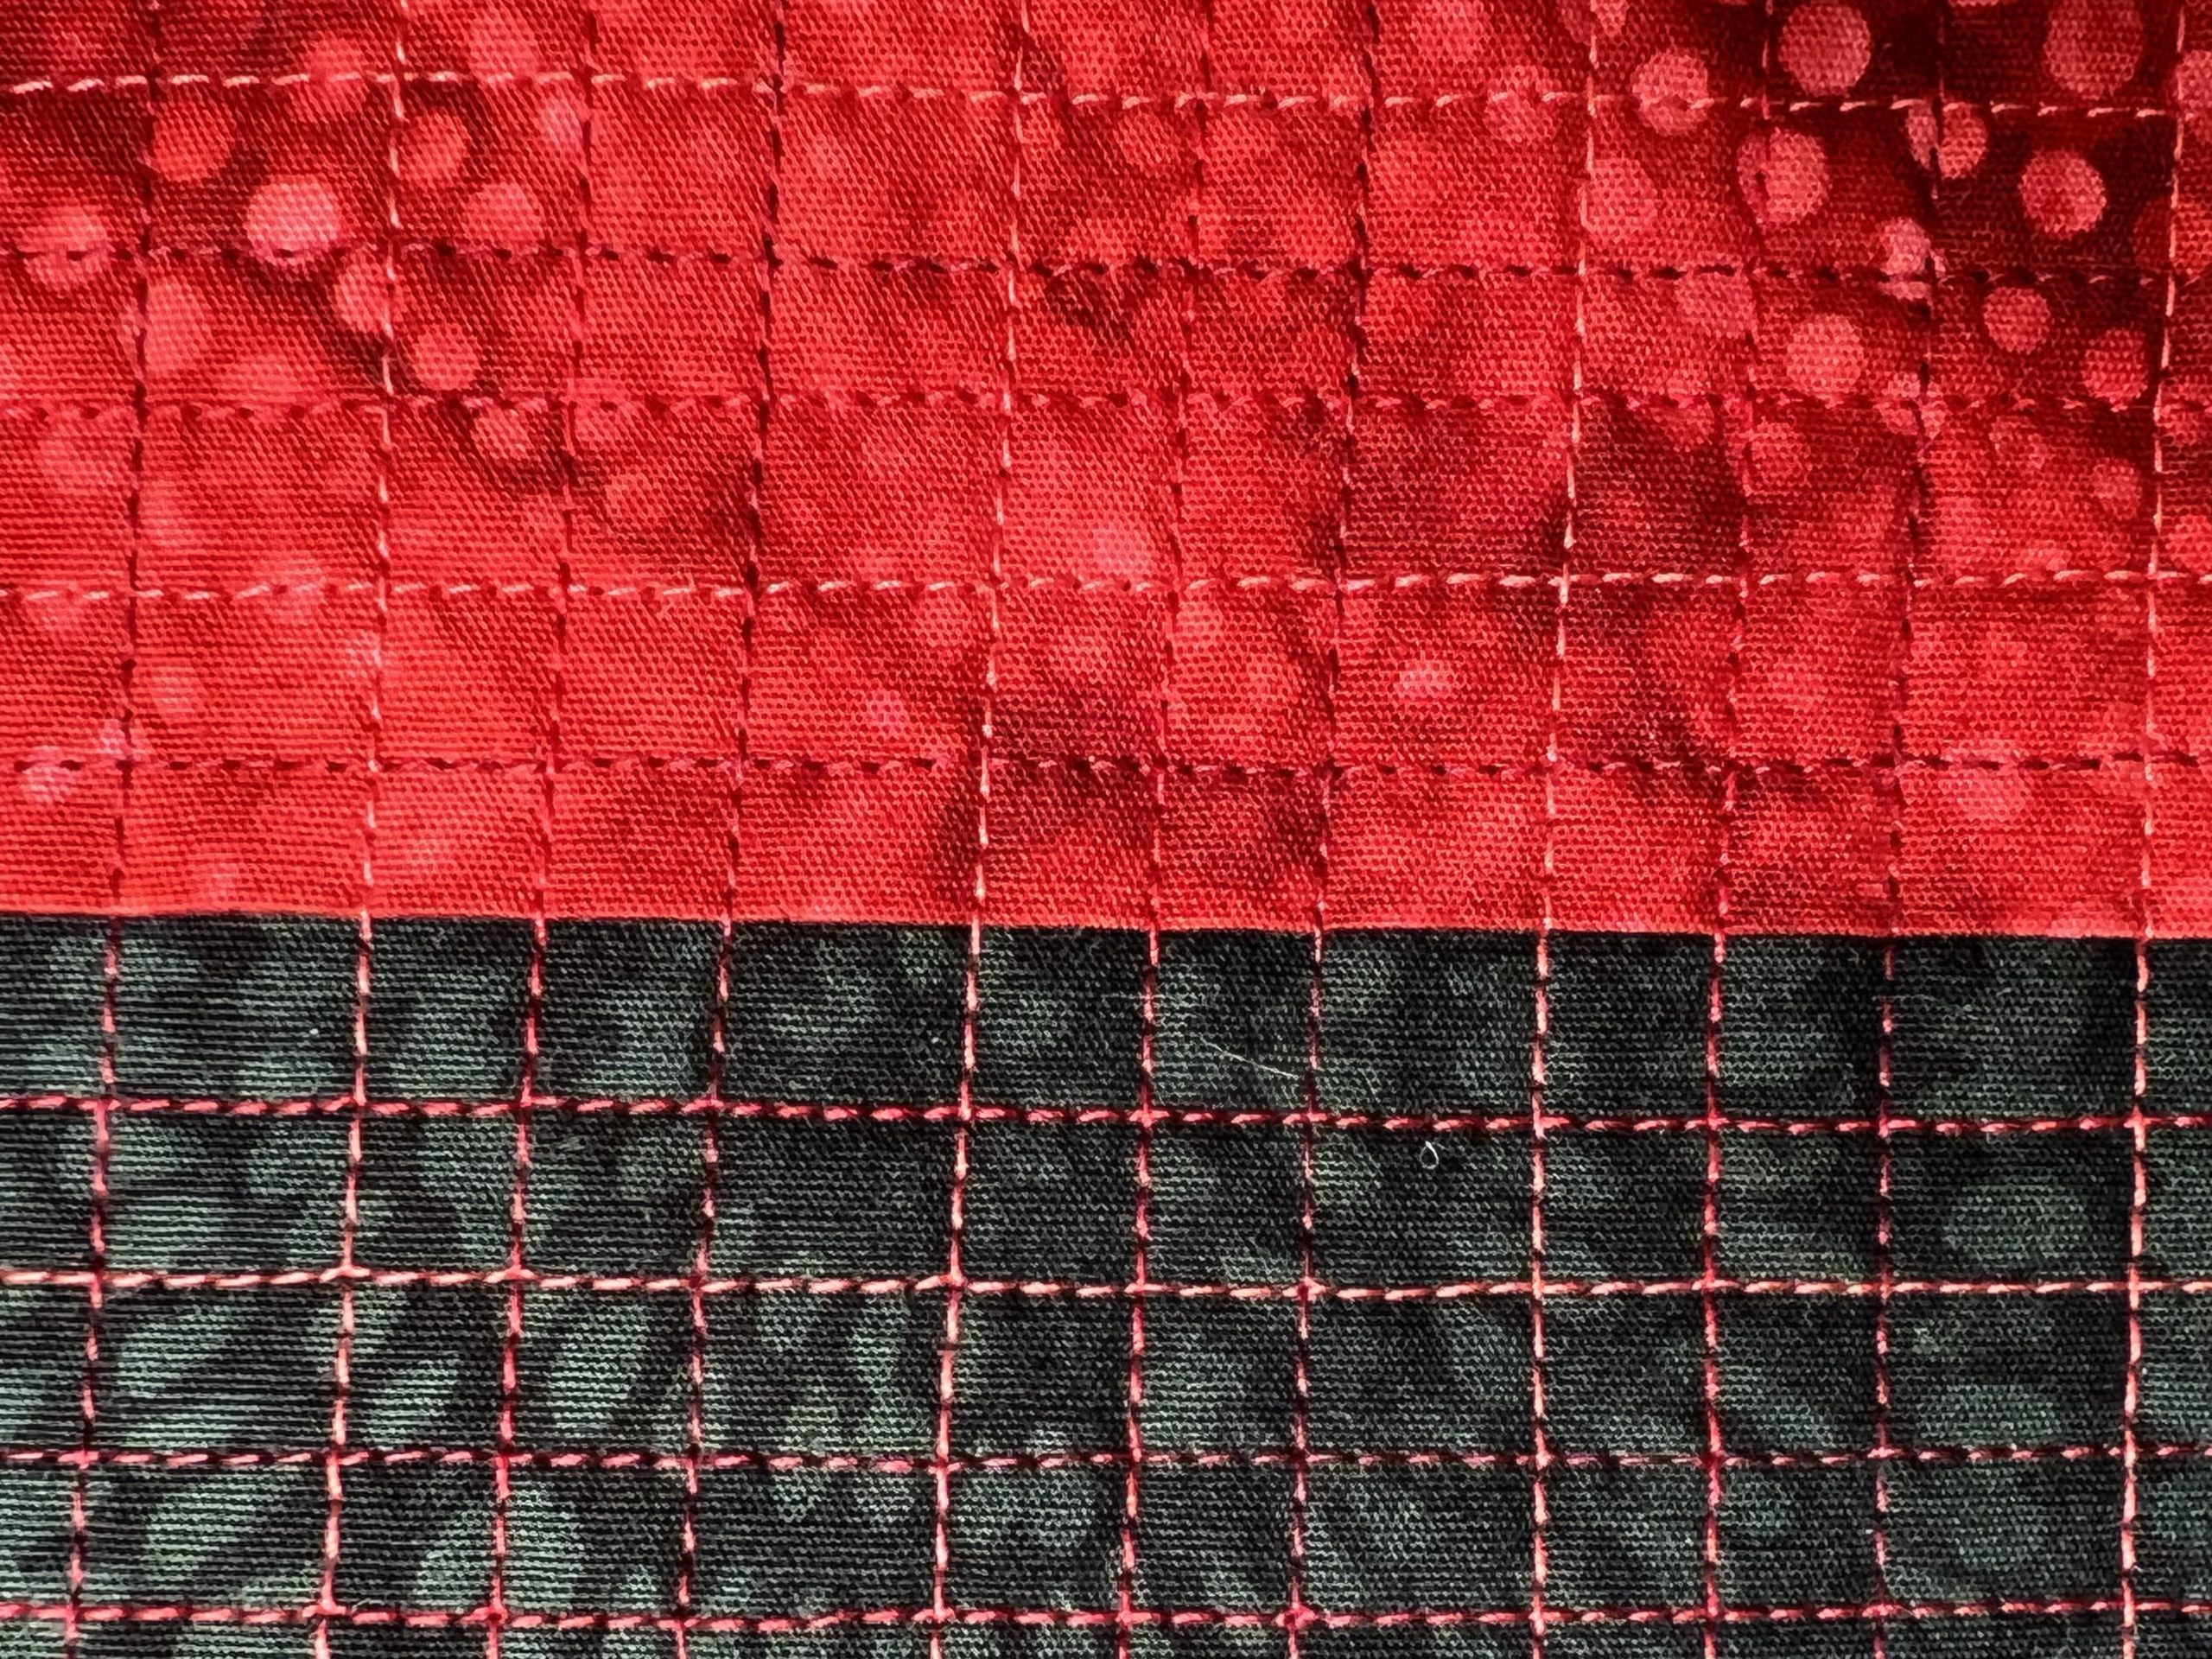
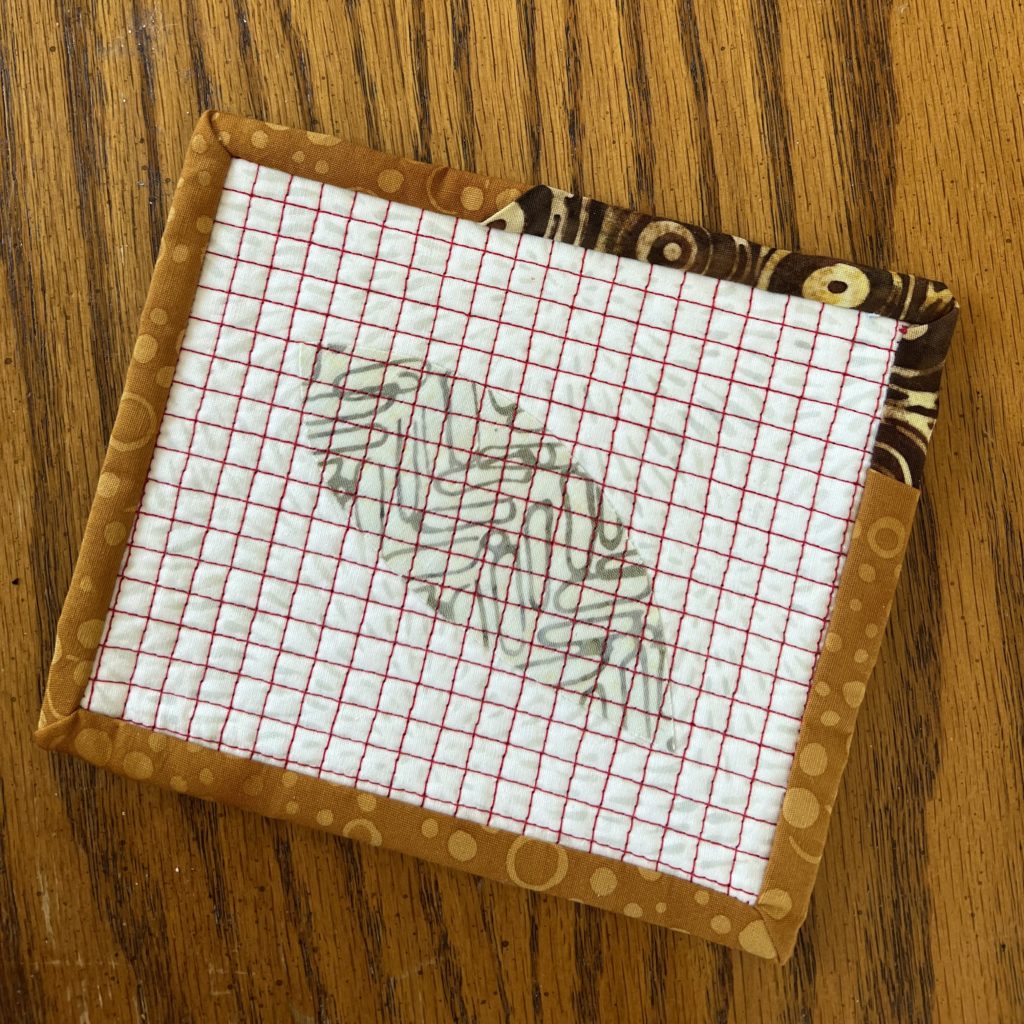
To get the mosaic look, I used all three of the reds in a grid pattern. I used my 1/4″ seam foot to help me space out the grid. As a result, the piece is full of quilting. If you want to learn more about it, my video above has a quick tutorial to show you how to make your own faux Roman mosaic.
About the Fabrics
For this project I dug around in my Island Batik fabric stash and found what I think are the ideal fabrics for it.
I went with a pieced red and black top to represent the vivid frescos that I had seen. Both of these fabrics are available at your local quilt shop. The black is called Dandelion Black and is from their Foundations Blenders line. The red is called Wavy Dots-Cherry and is also from their Foundations Blenders line.
For the amphora, the corner design, and the binding, I used Island Batik’s Jute from their Foundations Breathtaking Browns line.
About the Design
Along with the mosaics in Italy, I was intrigued by the amphoras. I love the organic shape of these ancient handmade terra cotta containers. Not only were they depicted in art, there were still plenty of examples of them in museums.
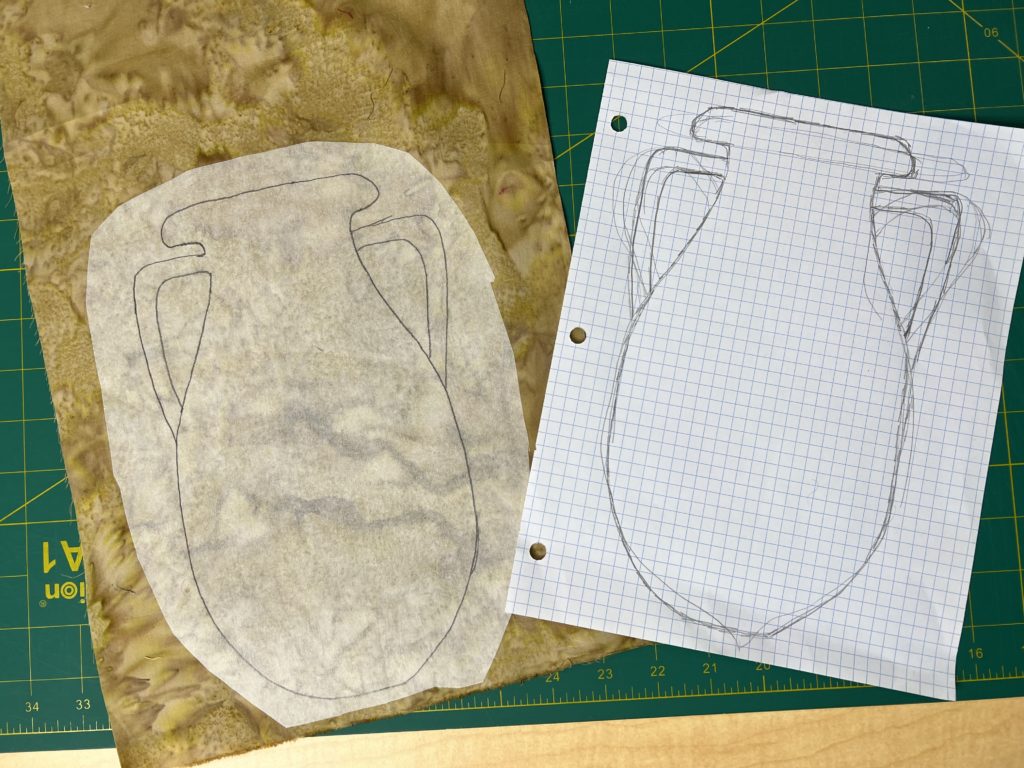
I sketched out my vase based on various ones I have seen and then transferred it to paper backed fusible web.
For the geometric corner shapes I went with something that looks a lot like a Greek key design. However I did see the shape in Roman art as well so I decided to use my design.
My Roman Amphora Mosaic
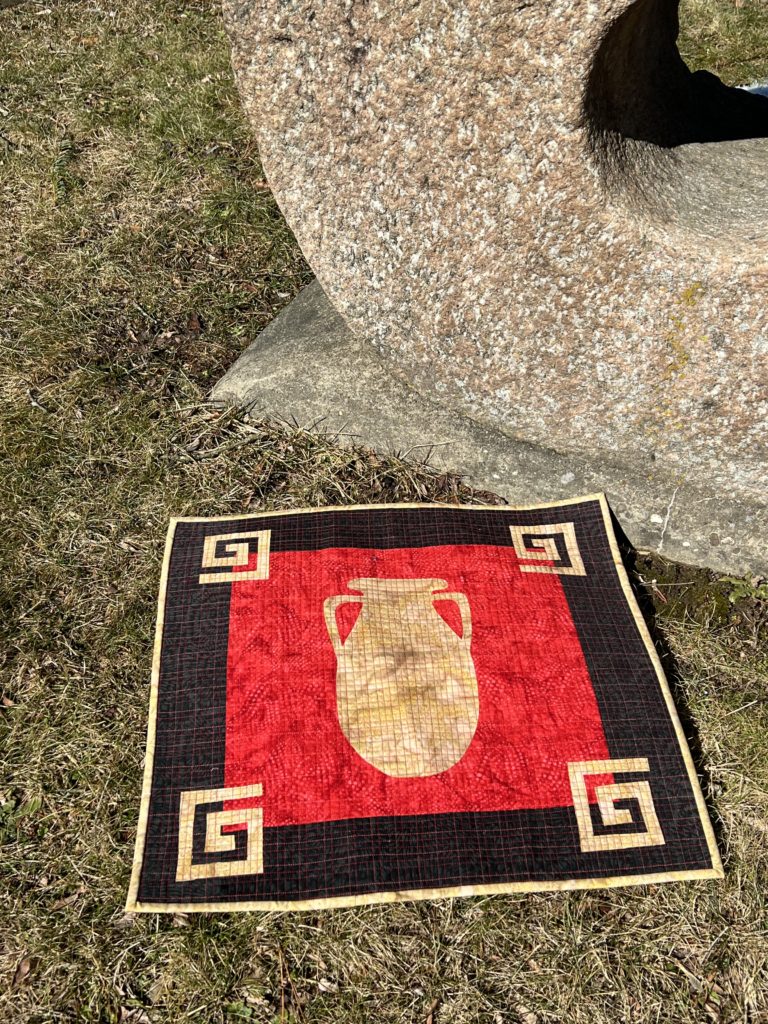
I am really happy with the way my Roman amphora mosaic turned out. It’s a bright, bold and happy reminder of my trip many years ago.
Also, a big thank you to Island Batik and Aurifil Thread for supplying the materials to make this project.
Make Your Own Faux Roman Mosaic
If you want to try your hand at making a mosaic, here is my tutorial for it. It is very easy to do, and a great way to highlight your own design in fabric.

5 Comments
Gail Sheppard
March 1, 2022 at 7:17 PMVery cool, Claudia! I love your Roman amphora mosaic! And, an awesome reminder of when you were in Italy! 🙂
createwithclaudia_7j76hs
March 2, 2022 at 6:32 AMThanks so much Gail!
Maryellen McAuliffe
March 2, 2022 at 12:46 AMGreat project to remember your trip!
createwithclaudia_7j76hs
March 2, 2022 at 6:31 AMThanks Maryellen!
Brenda @ Songbird Designs
March 3, 2022 at 9:04 AMThat is such an awesome way to share your memory and your project.