
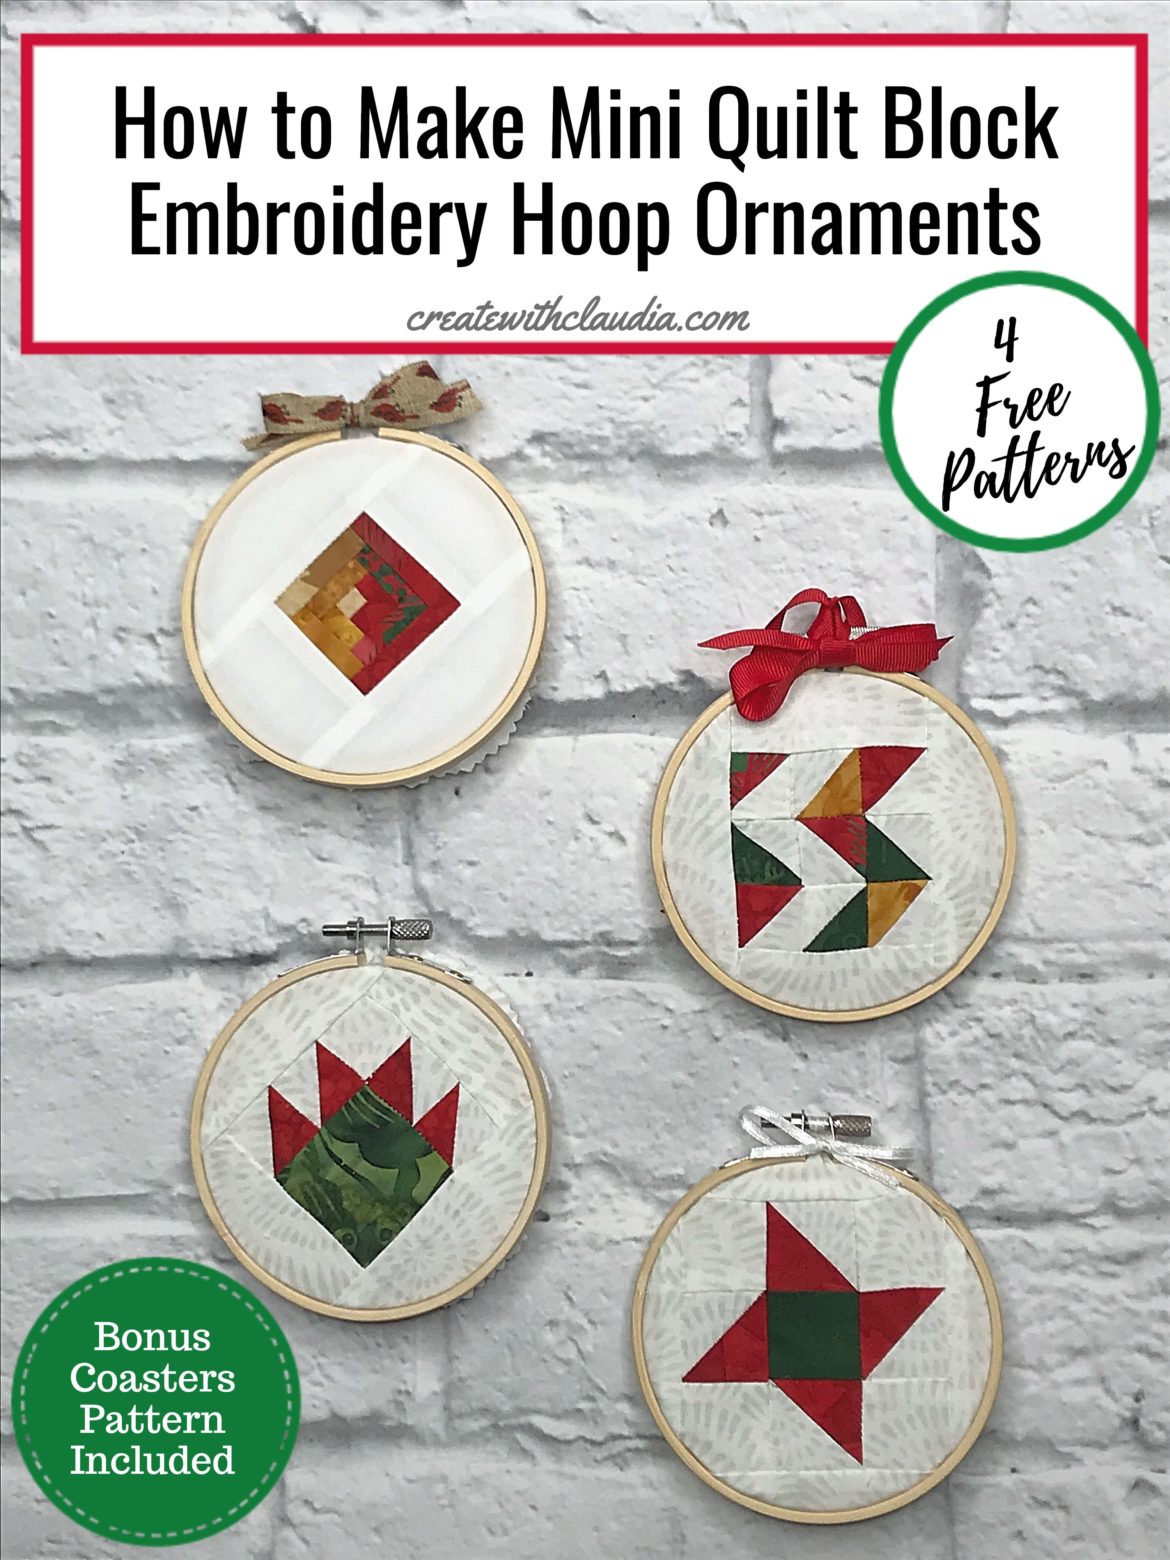
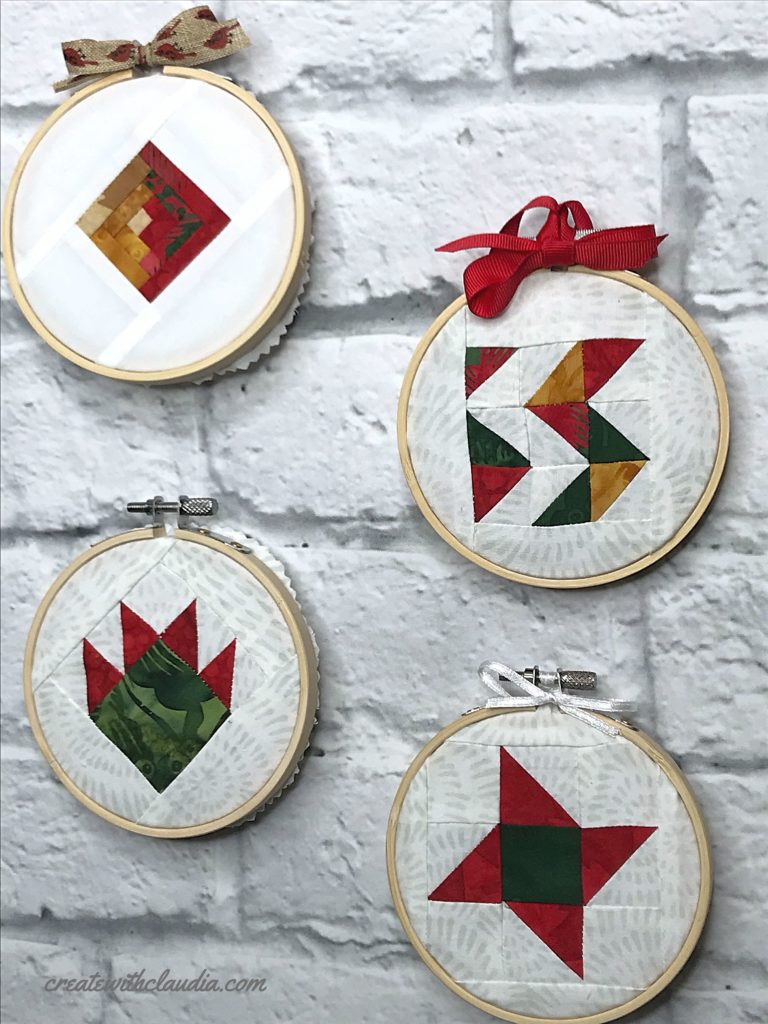
Mini Quilt Block Embroidery Hoop Ornaments Tutorial
I always love bringing out all of my Christmas quilts around the holidays, but I have quite a few now and I am starting to run out of room. That presents a dilemma for me because I still love making new quilty things for that time of the year. I decided to solve that problem by making some fun mini quilt block embroidery hoop ornaments. These festive hand crafted blocks would look great on a tree or hung on the wall.
These ornaments are also my project for the July Island Batik Ambassador program. Each month we are given a different challenge. July was “Never Too Early” and we were asked to make something for a holiday. I’ve always had these ornaments in the back of my mind, but never got around to doing them so I thought this would be the perfect time.

There are four different blocks to choose from. Make one or all of them. They make great gifts. I could also see these being sold at all of those holiday craft shows that start popping up in the fall.
The only special supply item that you need is the 4″ embroidery hoop. The patterns are designed to fit that size only. If you are a quilter, you probably have everything else on hand already. Of course a new project is always a good excuse for some new fabric. Honestly though, this is a great scrap buster because you don’t need much fabric for one of them.
Disclosure: The products in this post were generously provided by Island Batik, Accuquilt, Aurifil, Schmetz Needles, and Hobbs Batting.
The Fabric and Other Items Used to Make The Ornaments & Coasters
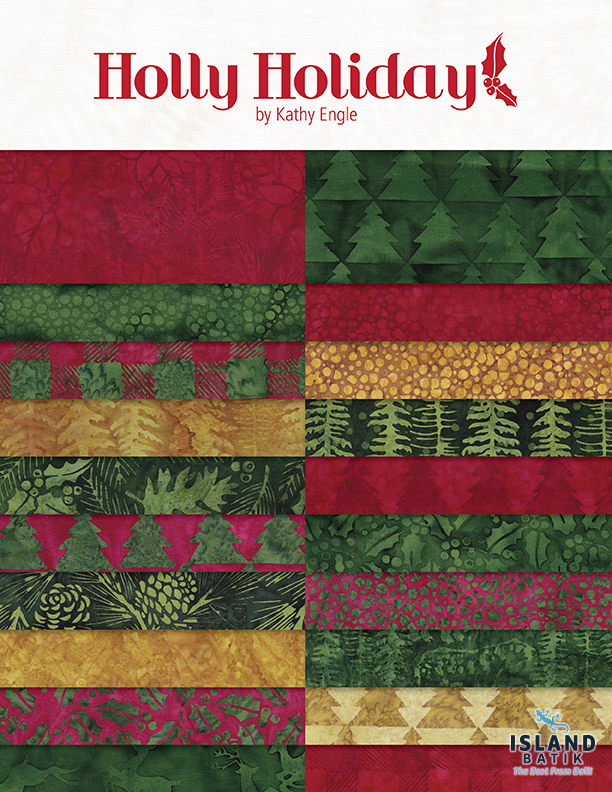
As an Island Batik Ambassador, we are given all sorts of goodies to make our creations. For the May 2021 challenge project I was given the gorgeous Holly Holiday line designed by Kathy Engle. It was the ideal fabric for these Christmas ornaments, and, since these are minis, I did not need a lot of fabric. Perfect!
The background fabric in most of them is called Coconut from Island Batik’s foundations blenders line. In one of them (the log cabin) I used their solid white.
To piece the blocks I used Aurifil thread and the batting in the coasters was Hobbs Heirloom Premium. In my machine I used Schmetz needles.
Video Tutorial
What You Will Need for the Mini Quilt Block Embroidery Hoops
- 4″ Embroidery Hoops
- Fabric Scraps
- Ribbon
- Felt
- 3 1/2″ Template
- Glue
- Scissors or Pinking Shears
- General quilt making supplies including a cutting mat, rotary cutter and small square ruler
You can find many of the items that I used to make this project in my Amazon Store.
As an Amazon Associate I earn from qualifying purchases.
How to Make the Mini Quilt Block Embroidery Hoop Ornament
Before You Begin:
- Read through all instructions carefully
- Because of their small size, it is important to maintain an accurate scant 1/4″ seam allowance
- Trim as needed during assembly, especially with the log cabin version
- These are all designed to fit a 4″ embroidery hoop
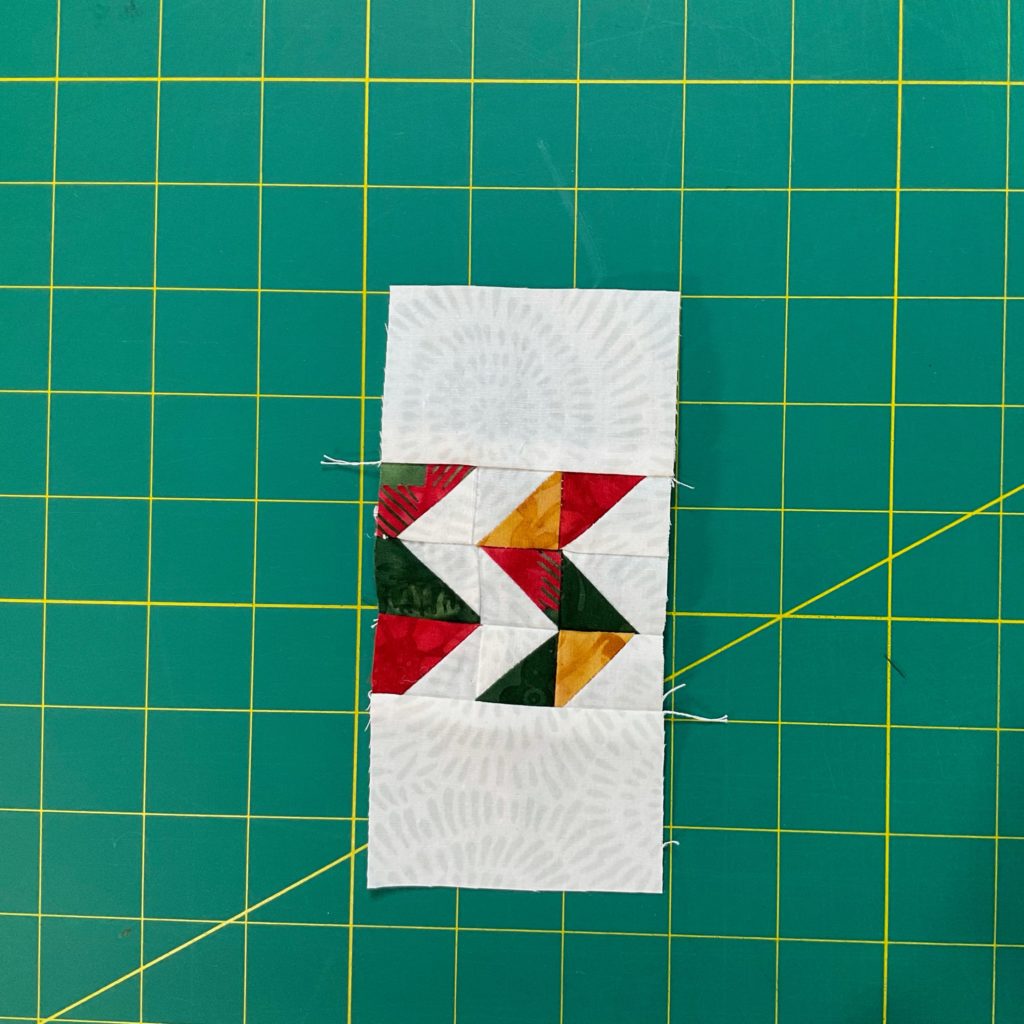
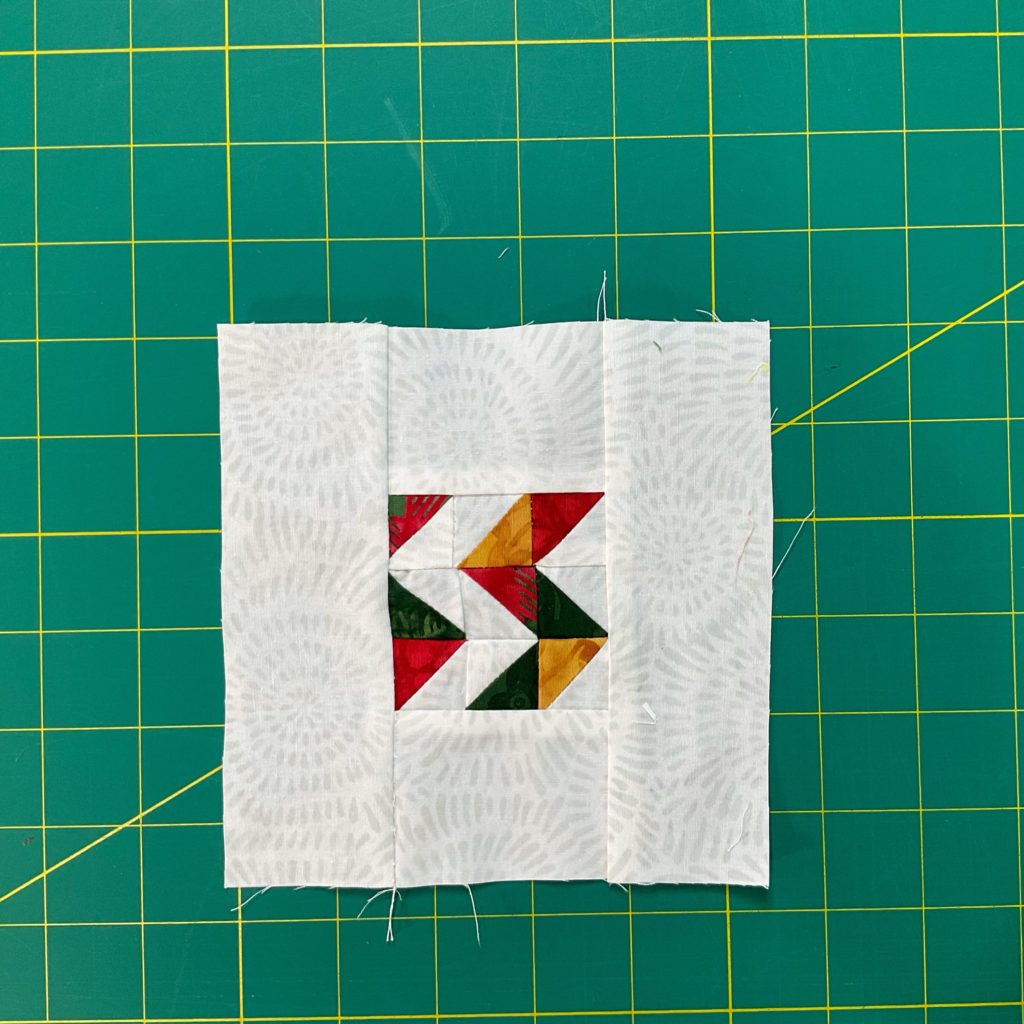
How to Make a Mini Chevron Quilt Block Embroidery Hoop Ornament
For reference, the inside block (not including the white outside border measures about 2 1/4″ when finished.
Cutting:
For the Background ( In my case the white fabric):
- 5 squares cut 2″ x 2″
- 2 strips cut 2″ x 2 3/4″ (For the large border that will make it fit into the embroidery hoop)
- 2 strips cut 2″ x 5 3/4″ (For the large border that will make it fit into the embroidery hoop)
For the Colored Triangles (I used various scraps):
- 5 squares cut 2″ x 2″
Assembly:
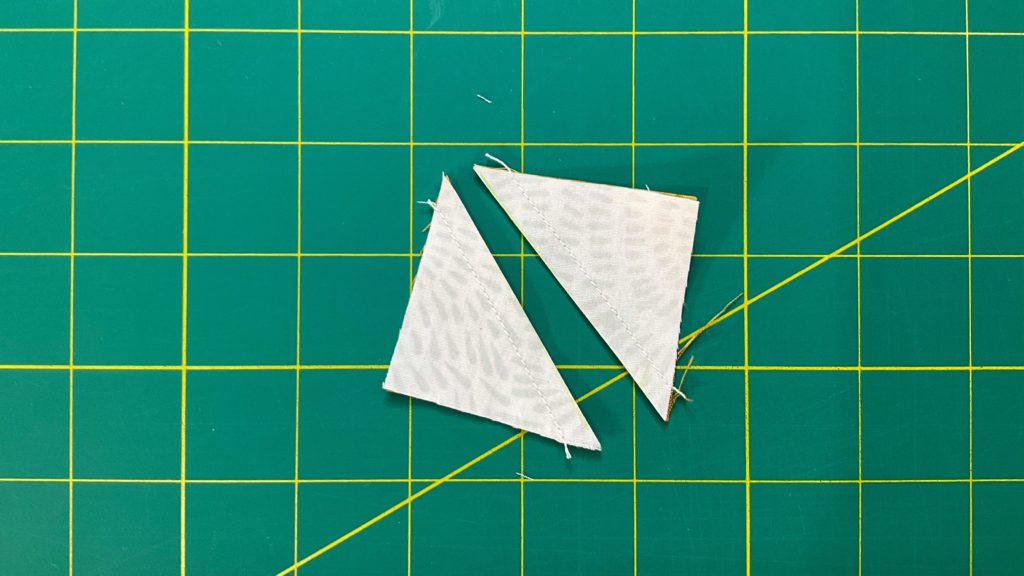
First make the half square triangles. I use the two at a time method. If you are unfamiliar with that method, I wrote this tutorial on it.
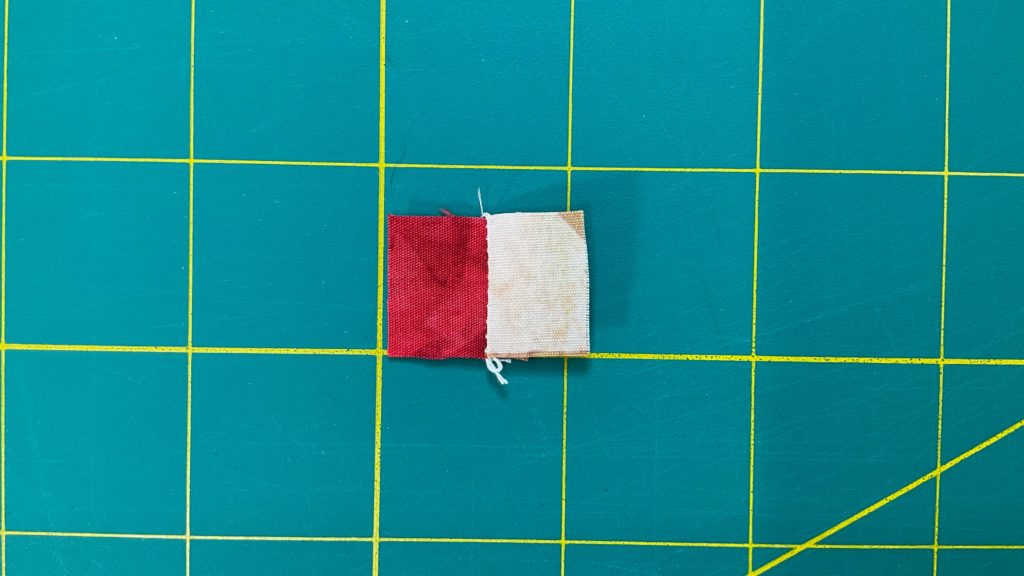
Pair up the 2″ squares, with one background fabric and one colored square pairing up. Place them right sides facing each other.
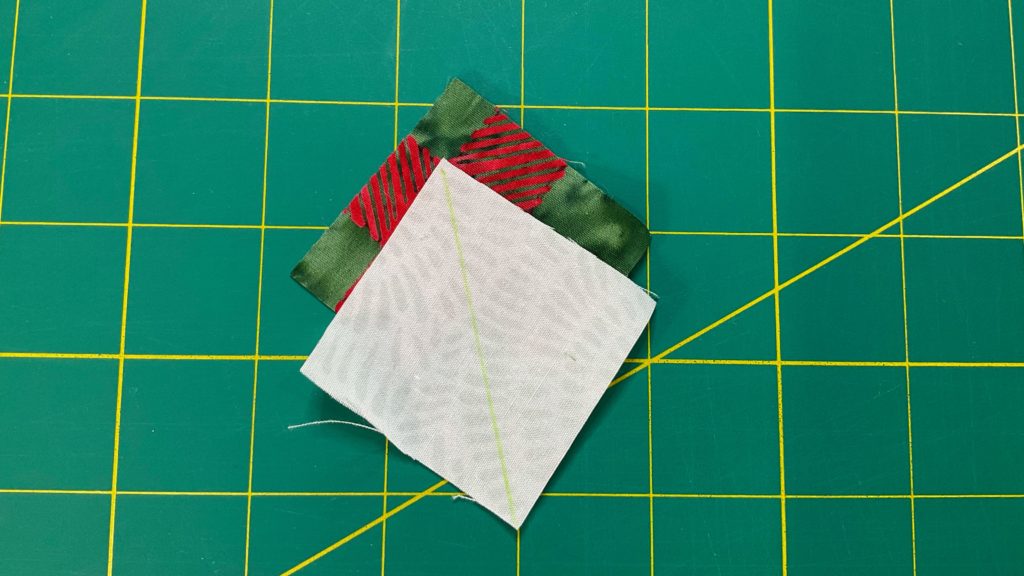
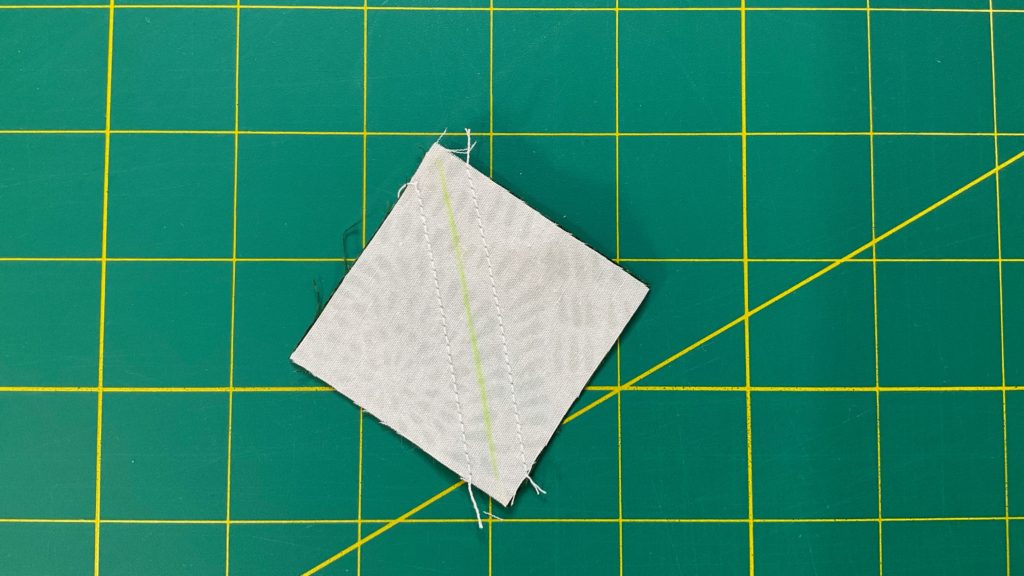
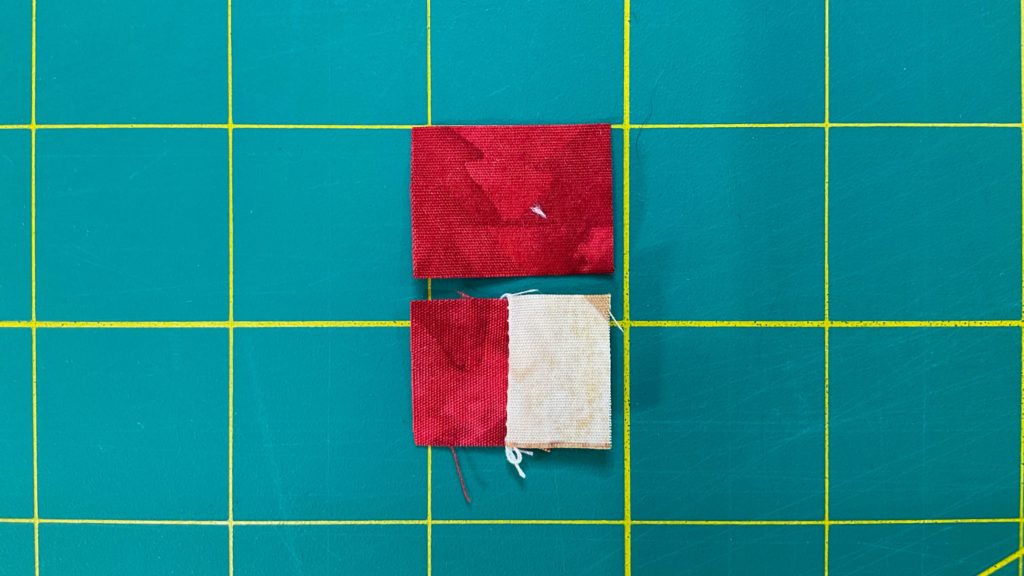
Then draw a diagonal line down the back of the lighter square. Sew a 1/4″ along both sides of the drawn line. Next, cut the square in half, cutting on the drawn line.
Press open.

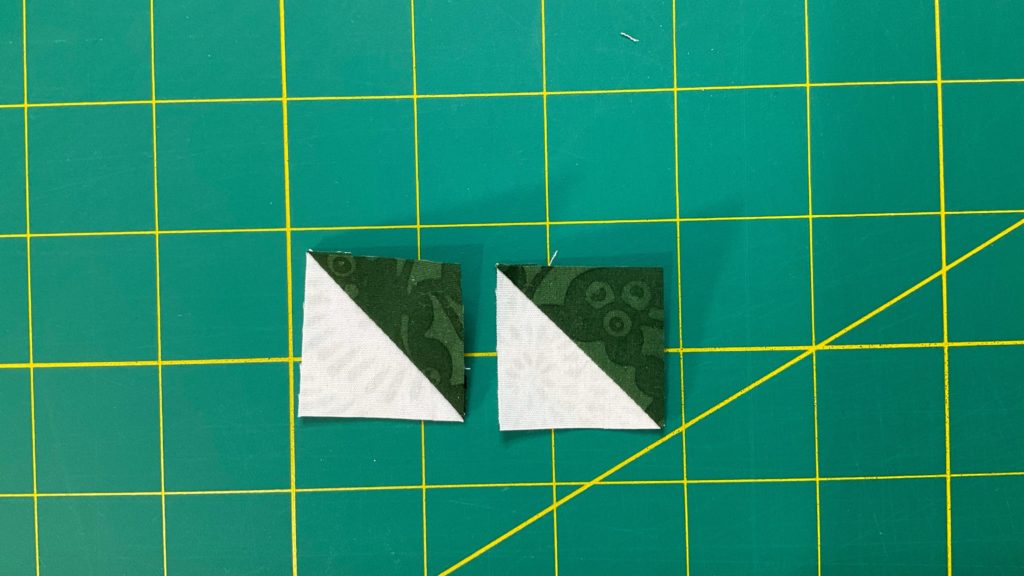
Trim the half square triangles down to 1 1/4″ square.
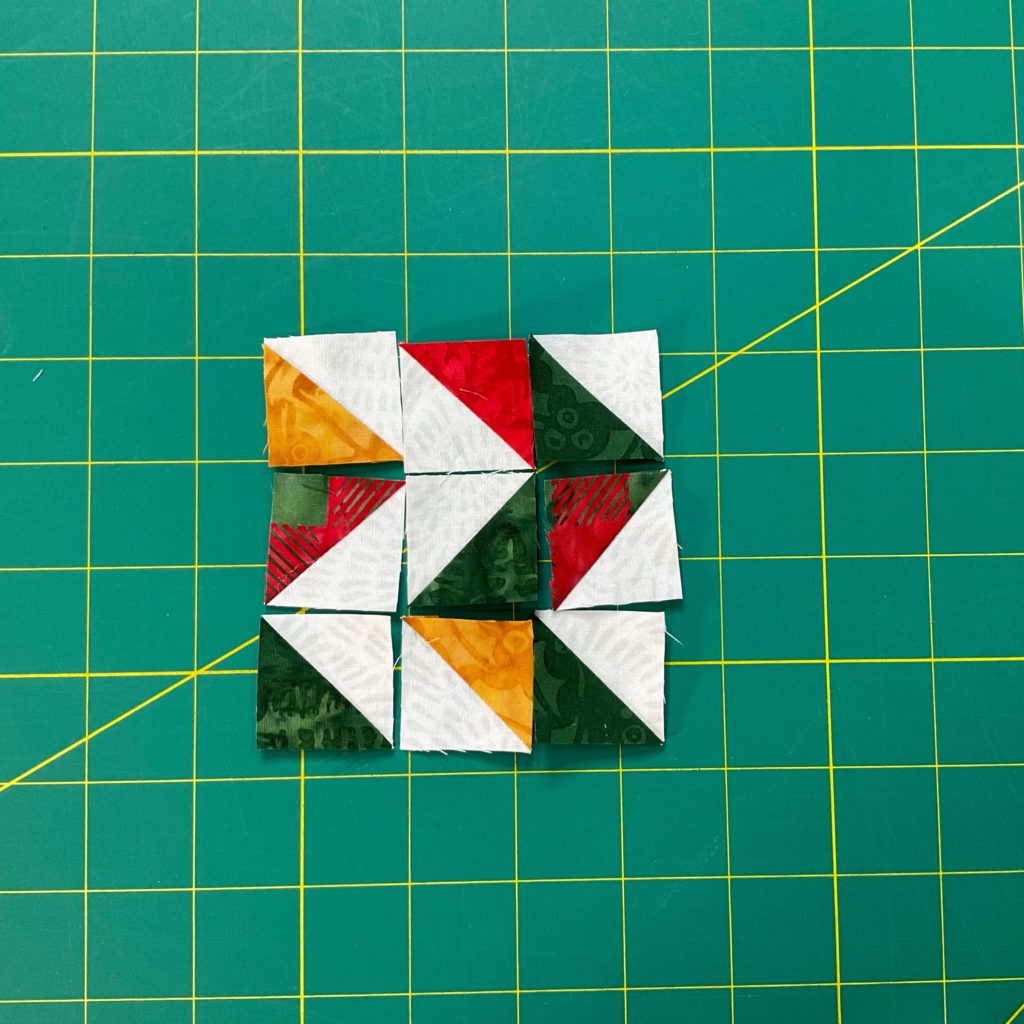
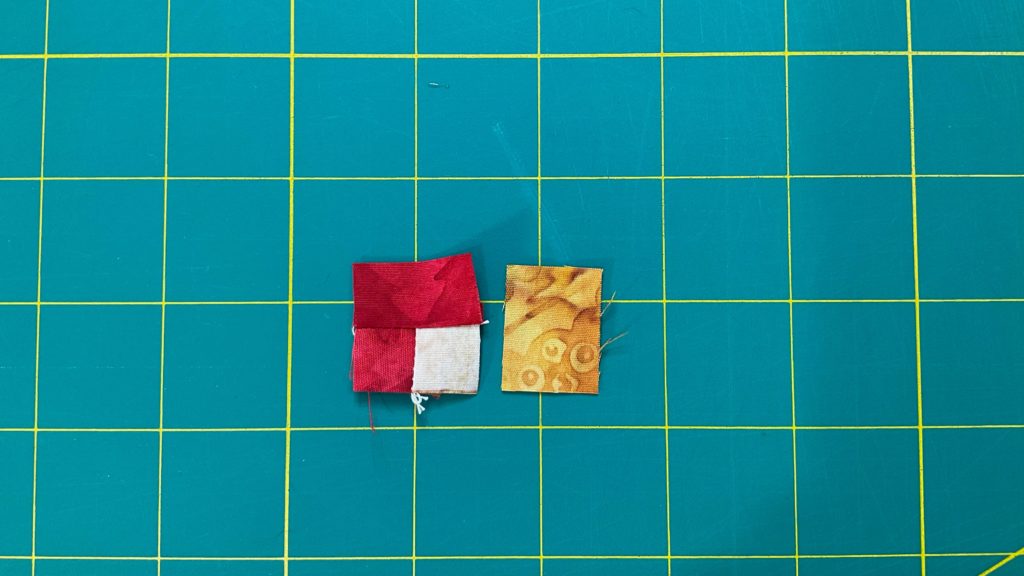
Lay them out in the chevron pattern and piece the block together.
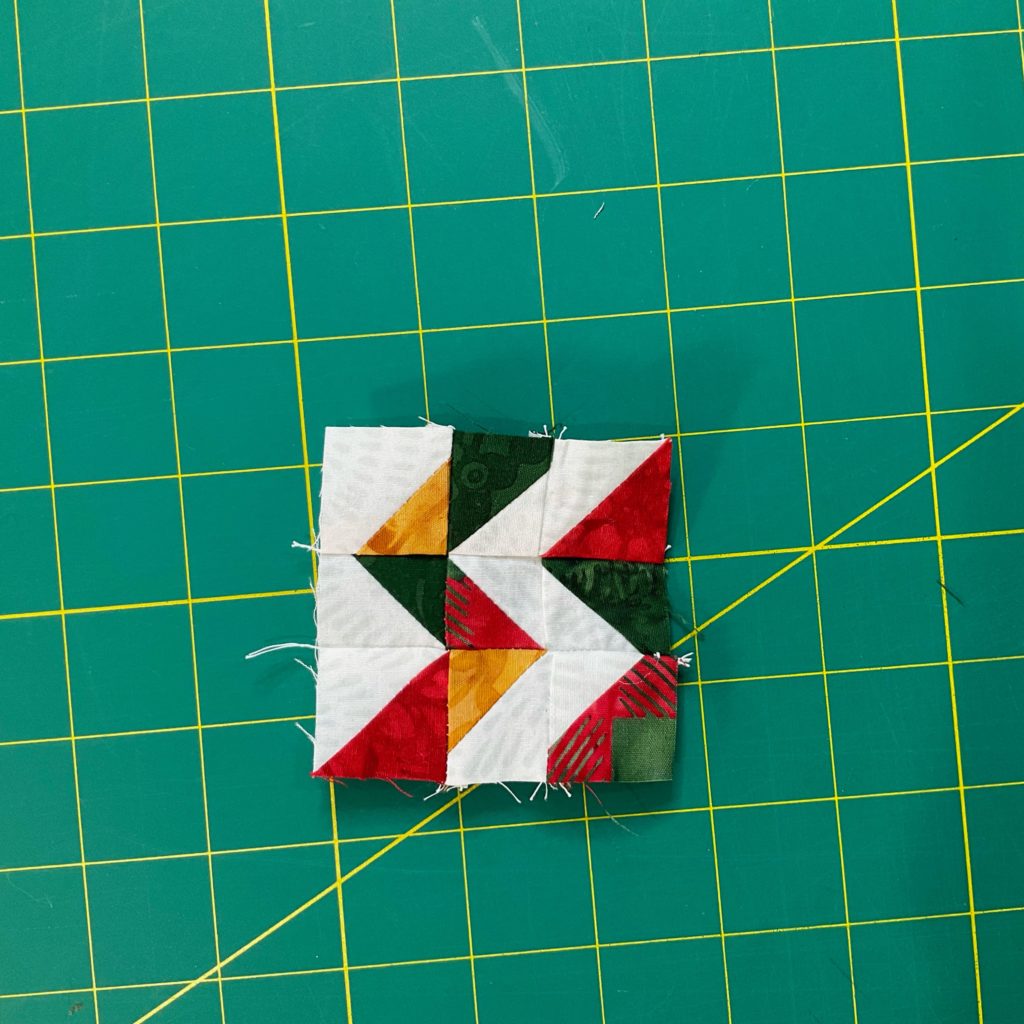
Then add the background fabric borders.
On opposite sides, add the shorter strips. Then, on the remaining opposite sides add the longer strips.
Follow the instructions at the end of the article to turn the block into an ornament.
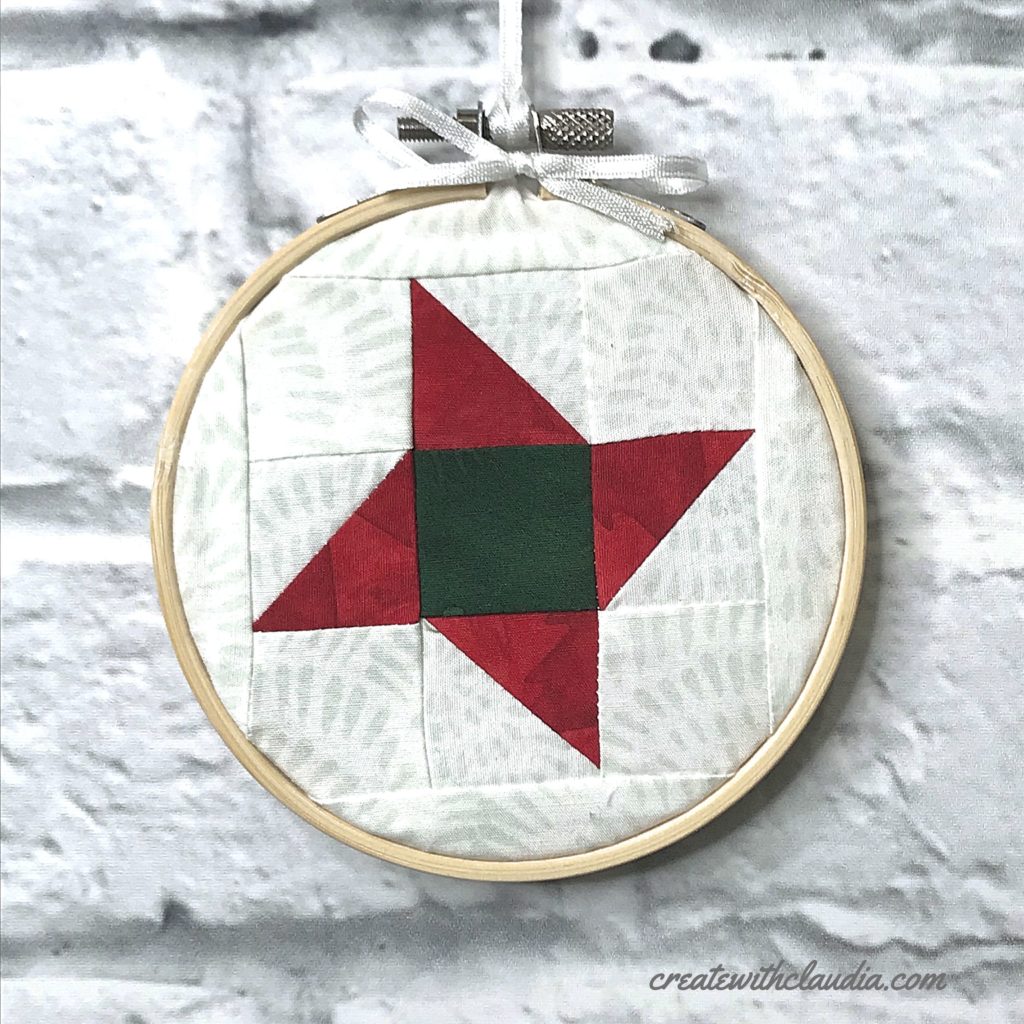
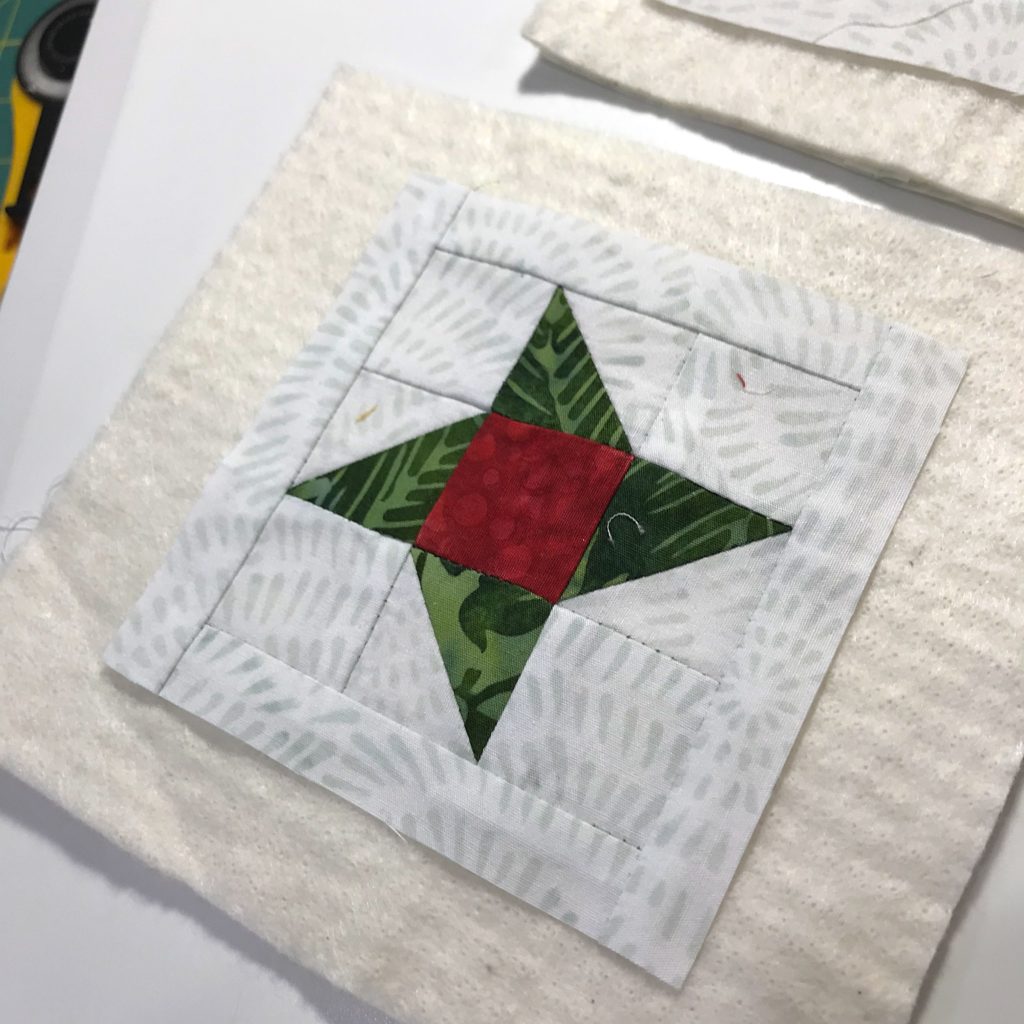
How to Make a Mini Friendship Star Quilt Block Embroidery Hoop Ornament
For reference, the inside block (not including the white outside border measures about 3″ when finished.
Cutting:
For the Background (In my case the white fabric)
- 4 squares cut 1 1/2″ x 1 1/2″
- 2 squares cut 2 1/4″ by 2 1/4″
- Two strips cut 2″ x 3 1/2″ (For the large border that will make it fit into the embroidery hoop)
- Two strips cut 2″ x 6 1/2″ (For the large border that will make it fit into the embroidery hoop)
For the Star
- 2 squares cut 2 1/4″ x 2 1/4″ (for the half square triangles)
- 1 square cut 1 1/2″ (for the center)
Assembly:
First make the half square triangles. I use the two at a time method. If you are unfamiliar with that, refer to the section in the Chevron pattern or my tutorial on it.
The half square triangles should be trimmed down to 1 1/2″ square.
Lay out the friendship star block as shown and sew together.
Then add the background fabric borders.
On opposite sides, add the shorter strips. Then, on the remaining opposite sides add the longer strips.
Follow the instructions at the end of the article to turn the block into an ornament.
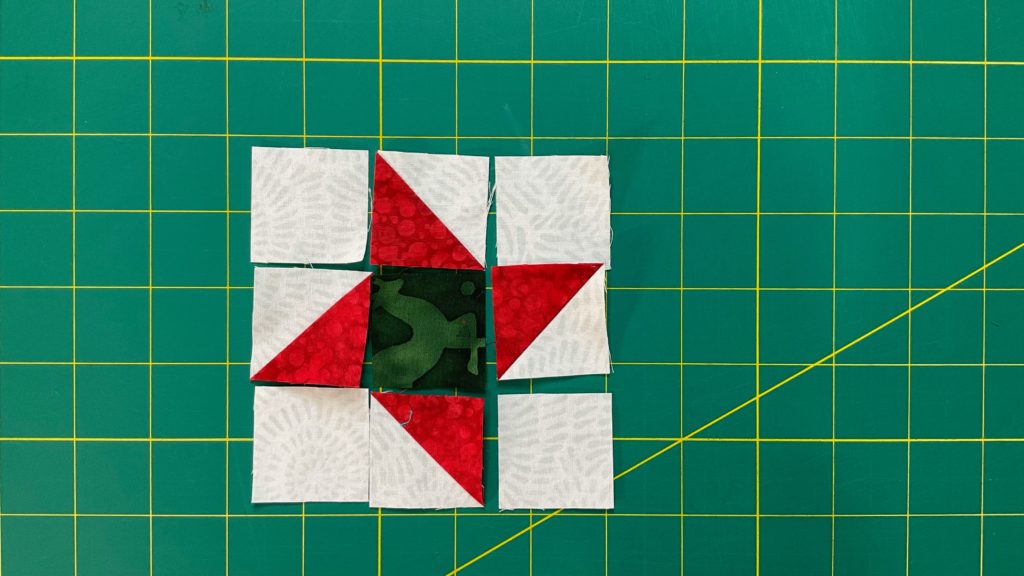
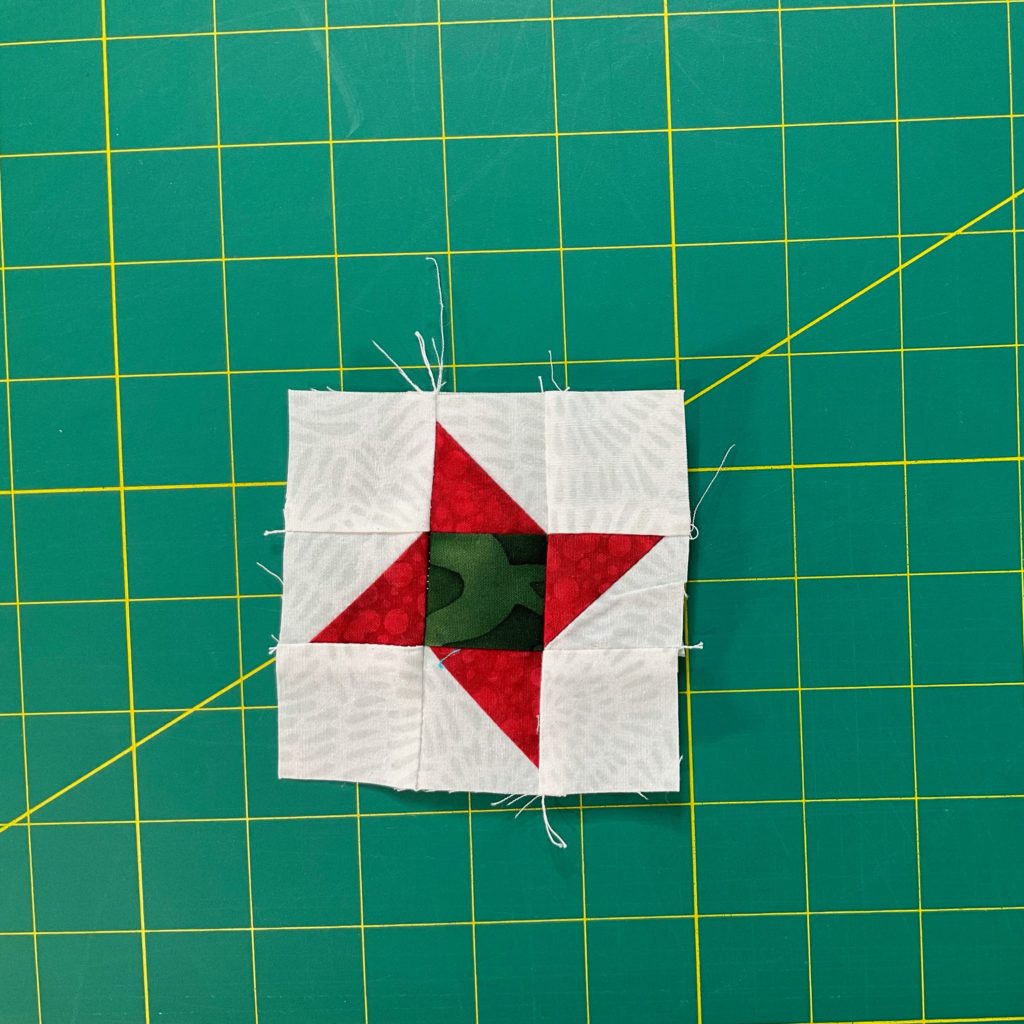
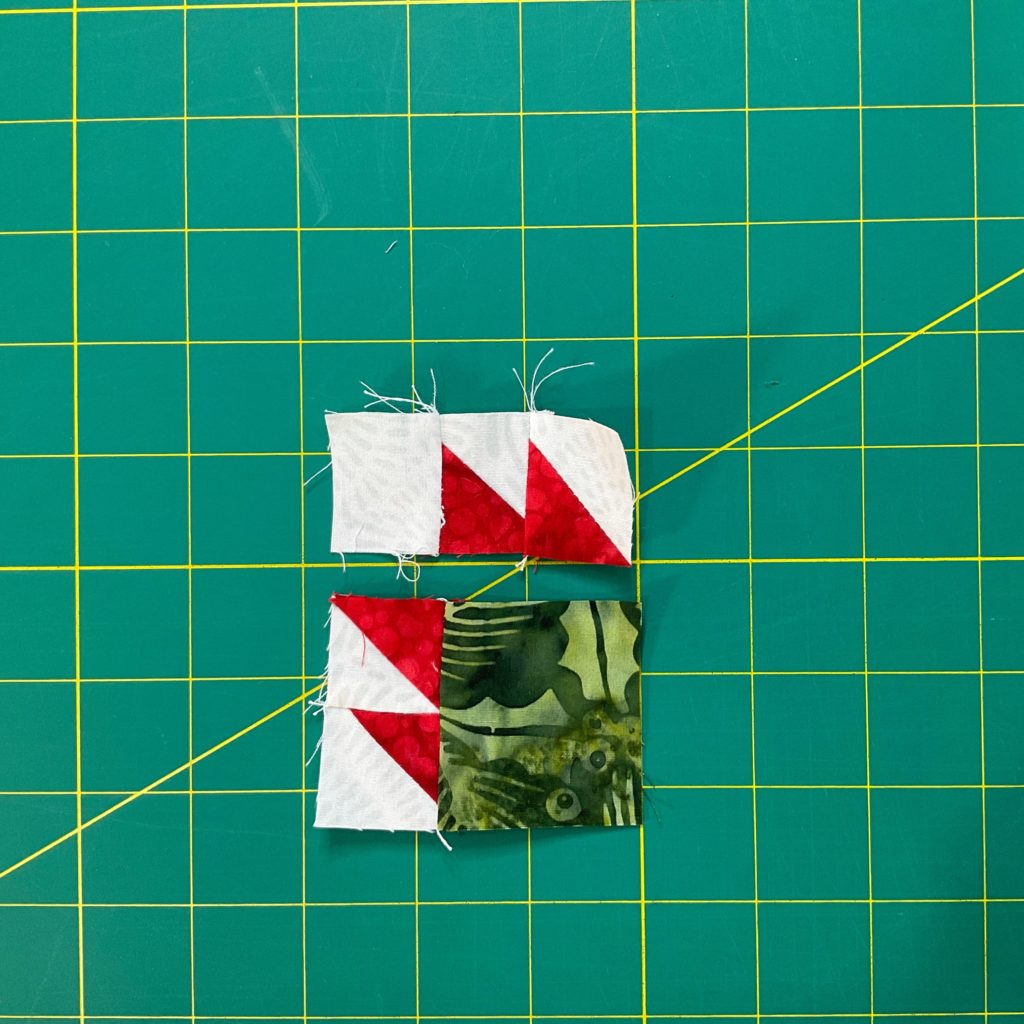
How to Make a Mini Bear’s Paw Quilt Block Embroidery Hoop Ornament
For reference, the inside block (not including the white outside border measures about 2 1/4″ when finished.

Cutting:
For the Background ( In my case the white fabric):
- 2 squares cut 2″ x 2″
- 1 square cut 1 1/4″
- 2 strips cut 2″ x 2 3/4″ (For the large border that will make it fit into the embroidery hoop)
- 2 strips cut 2″ x 5 3/4″ (For the large border that will make it fit into the embroidery hoop)
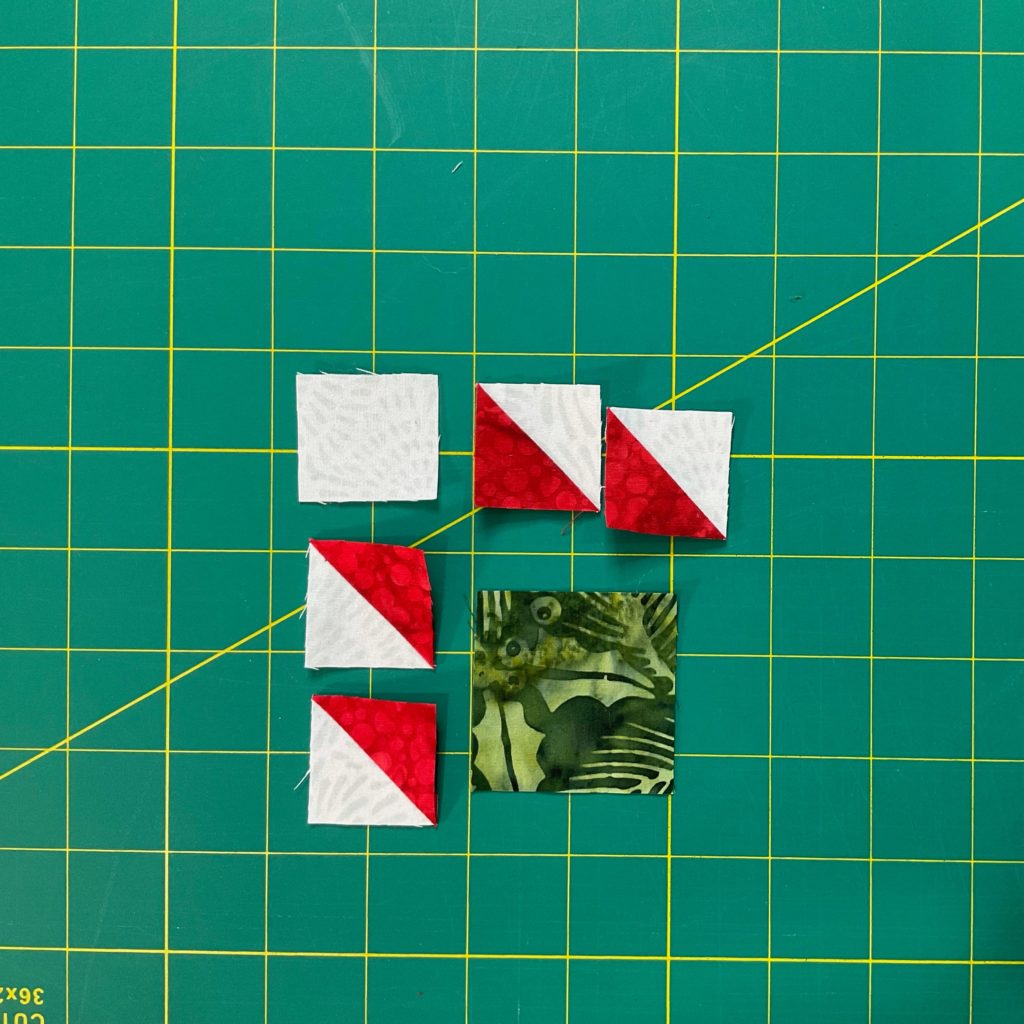
For the Bear’s Paw:
- 2 squares cut 2″ by 2″ (In my case the red fabric)
- 1 square cut 2″ x 2″ (In my case the green fabric)
Assembly:
First make the half square triangles. I use the two at a time method. If you are unfamiliar with that, refer to the section in the Chevron pattern or my tutorial on it.
Trim the half square triangles down to 1 1/4″ square.
Lay them out in the as shown and piece the block together.
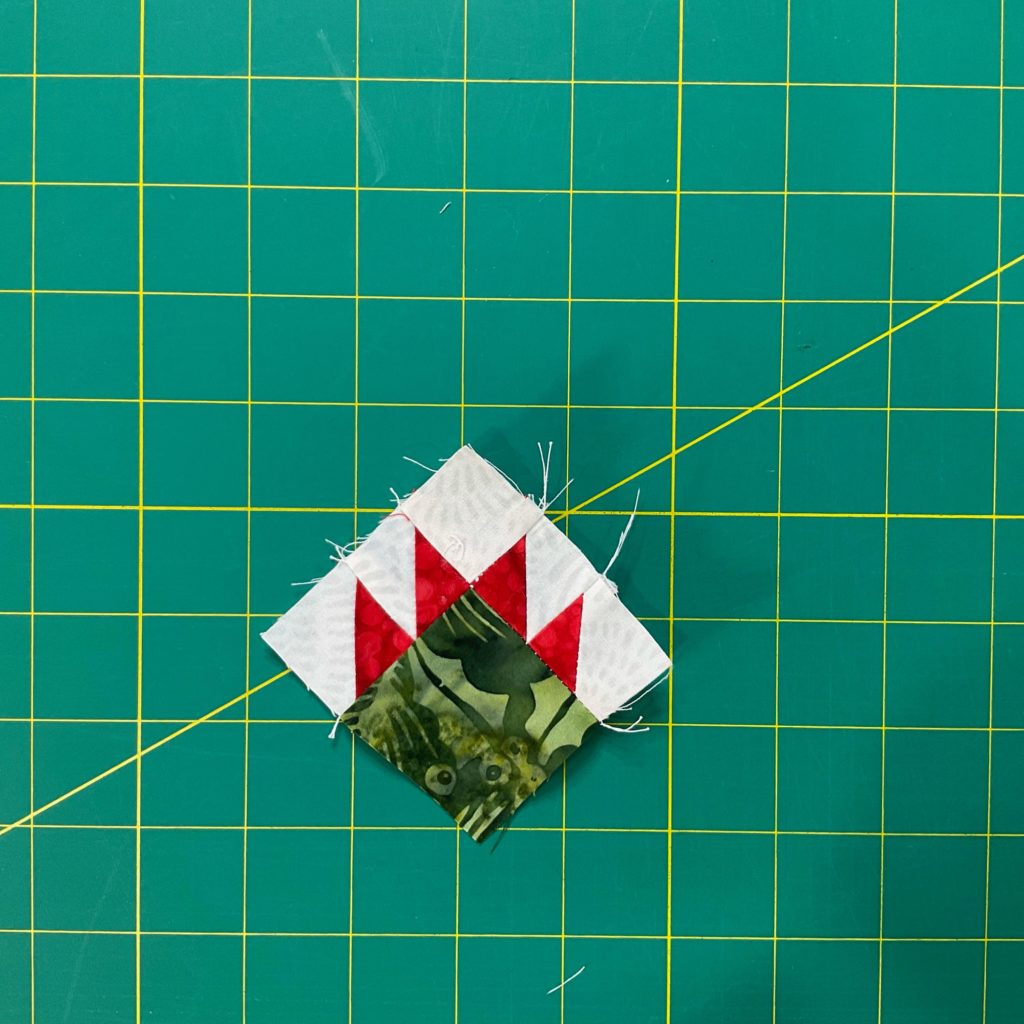
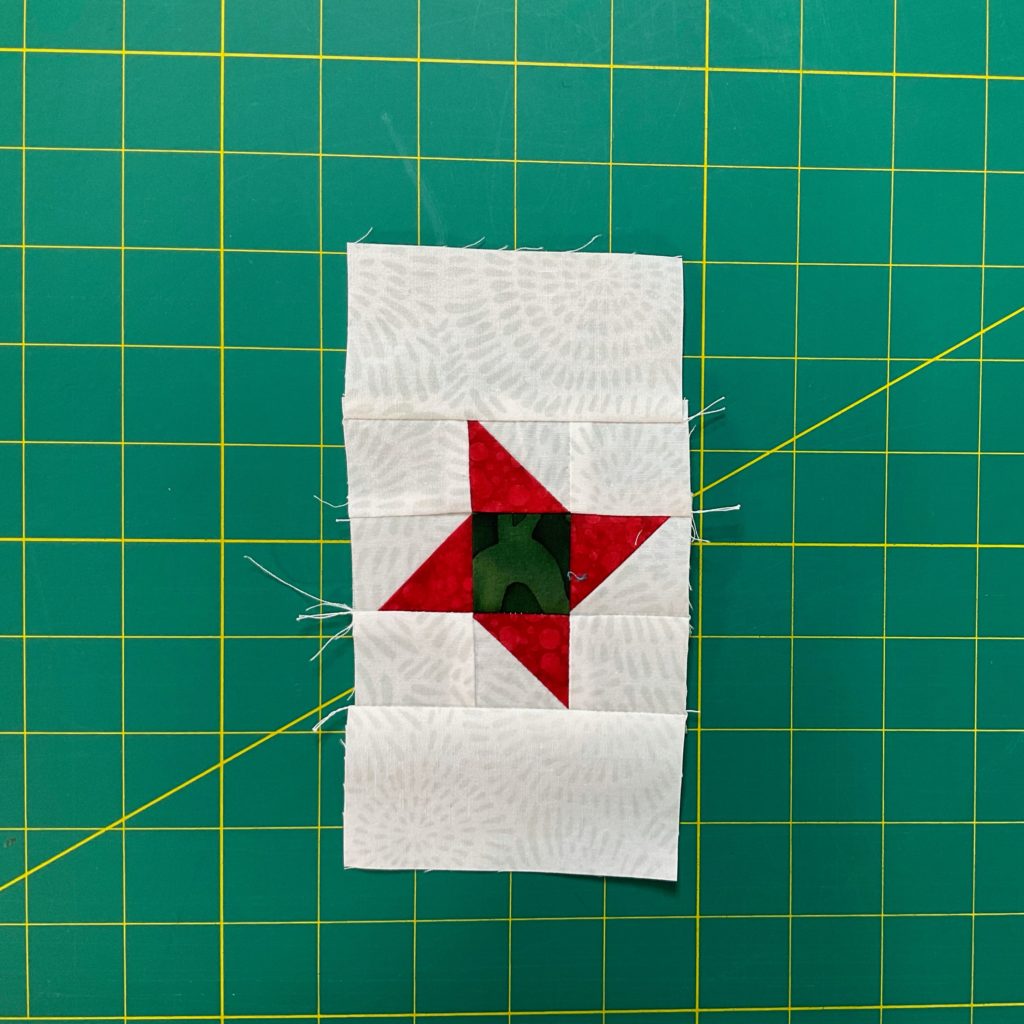
Then add the background fabric borders.
On opposite sides, add the shorter strips. Then, on the remaining opposite sides add the longer strips.

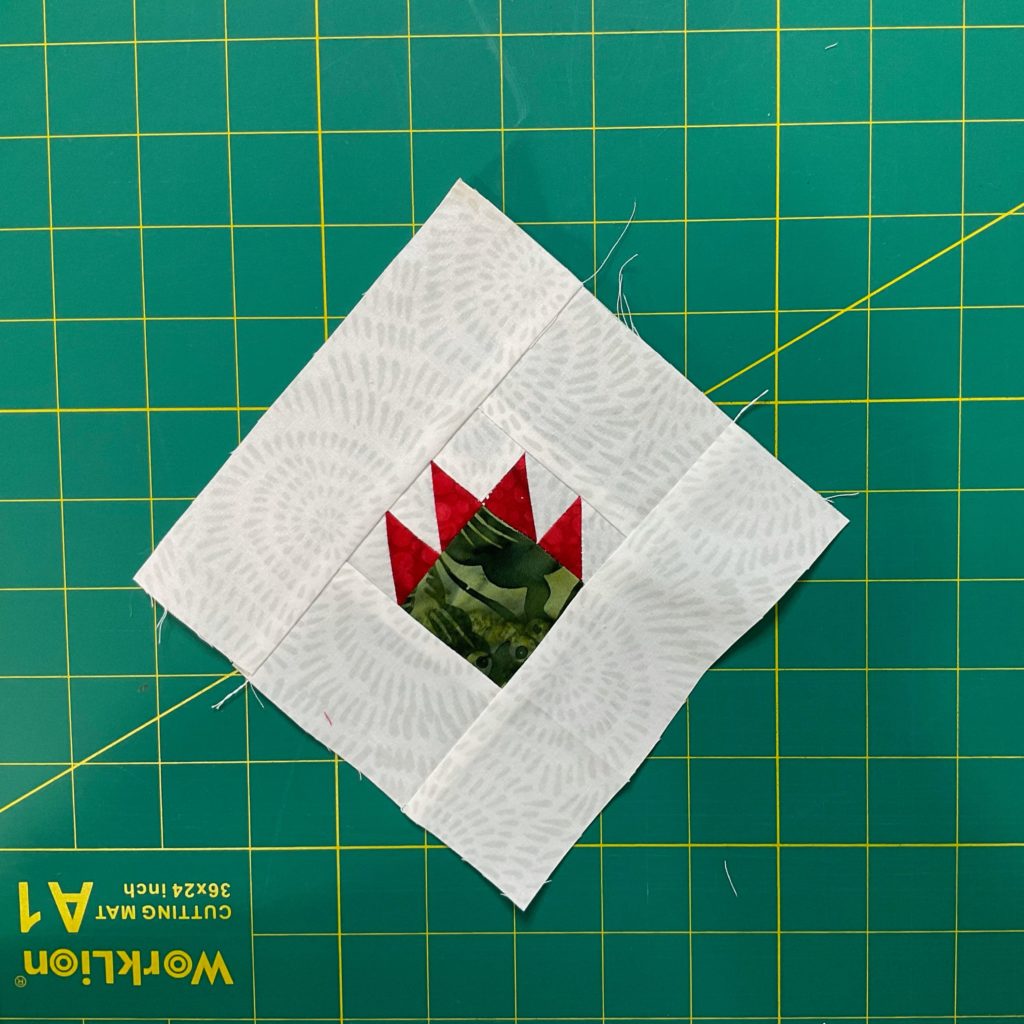
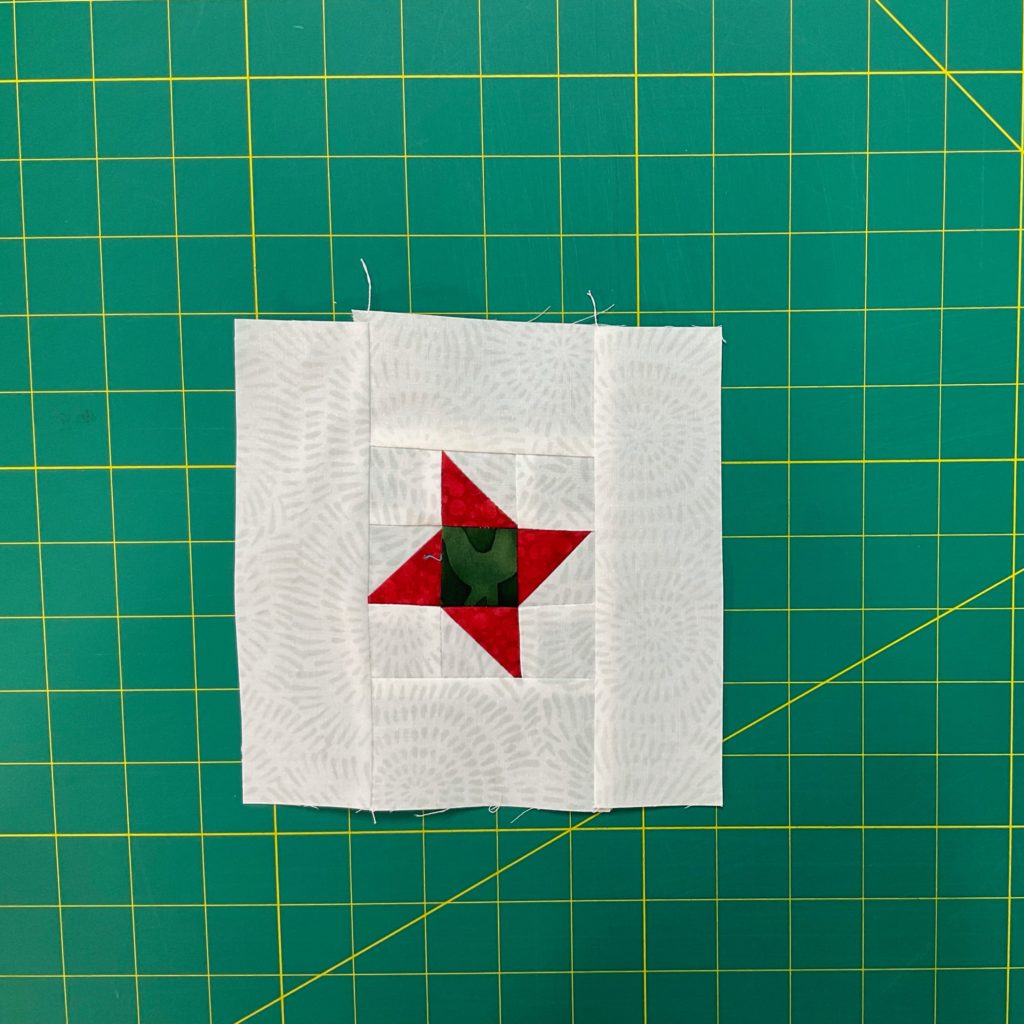
Follow the instructions at the end of the article to turn the block into an ornament.
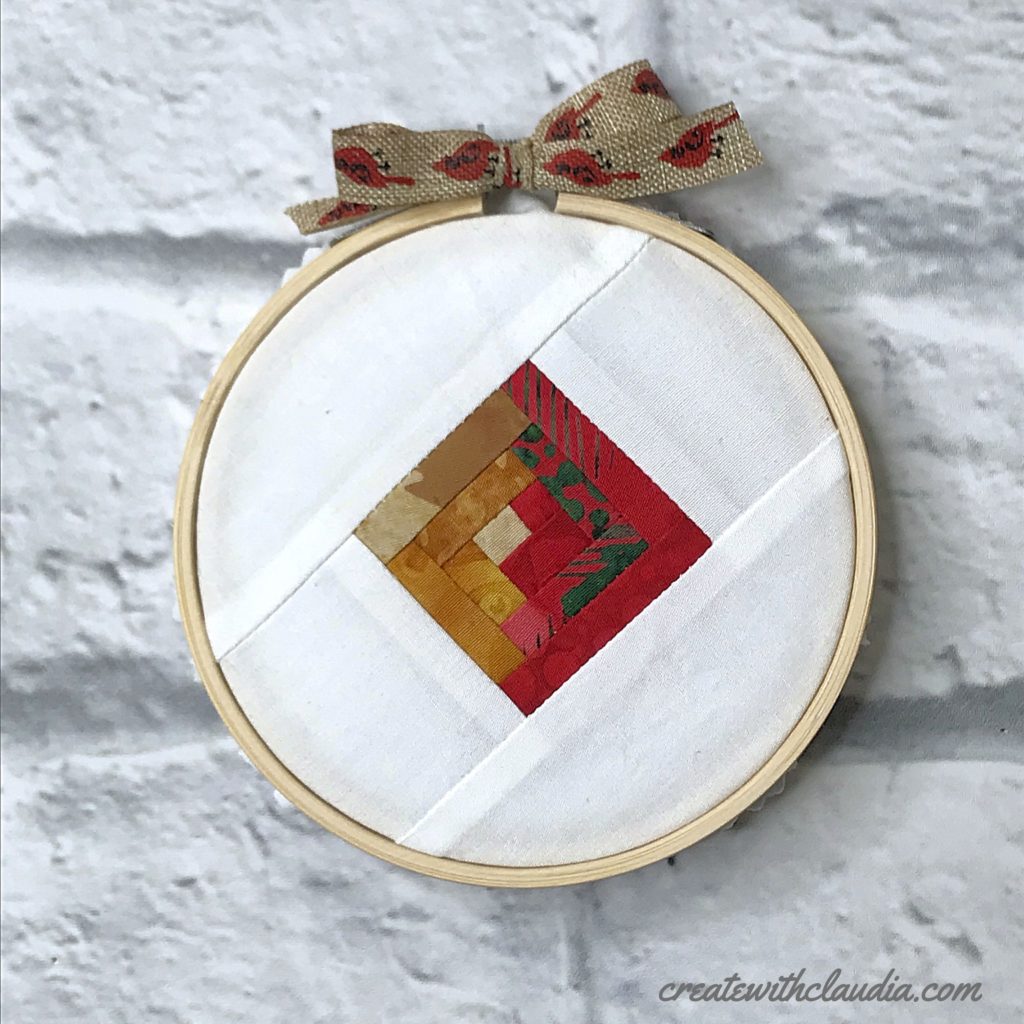
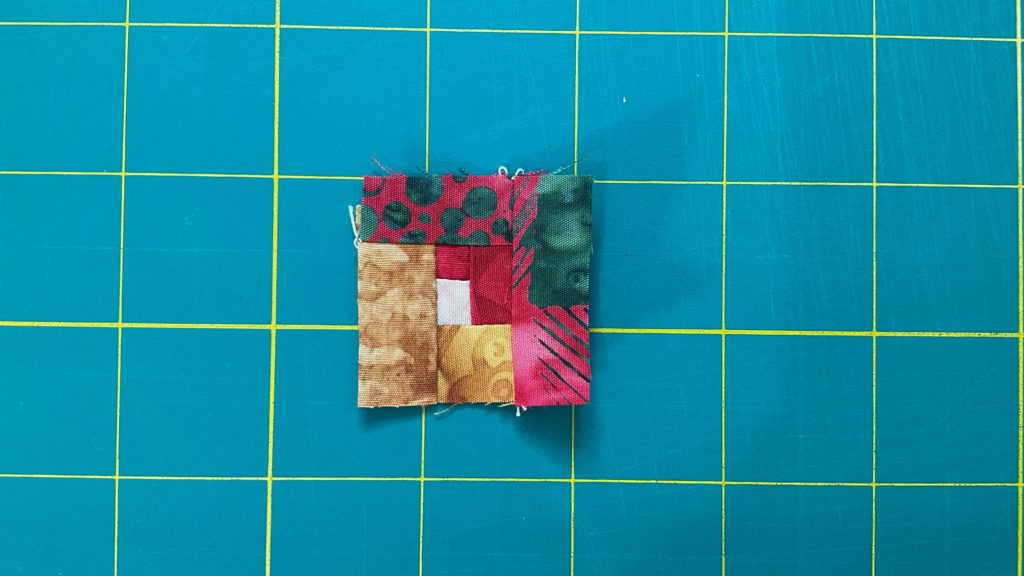
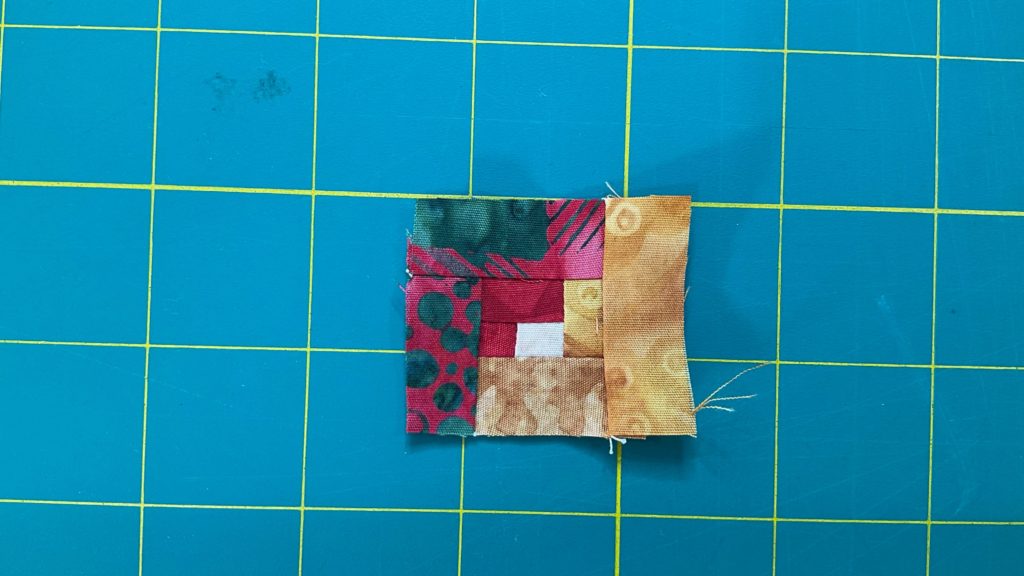
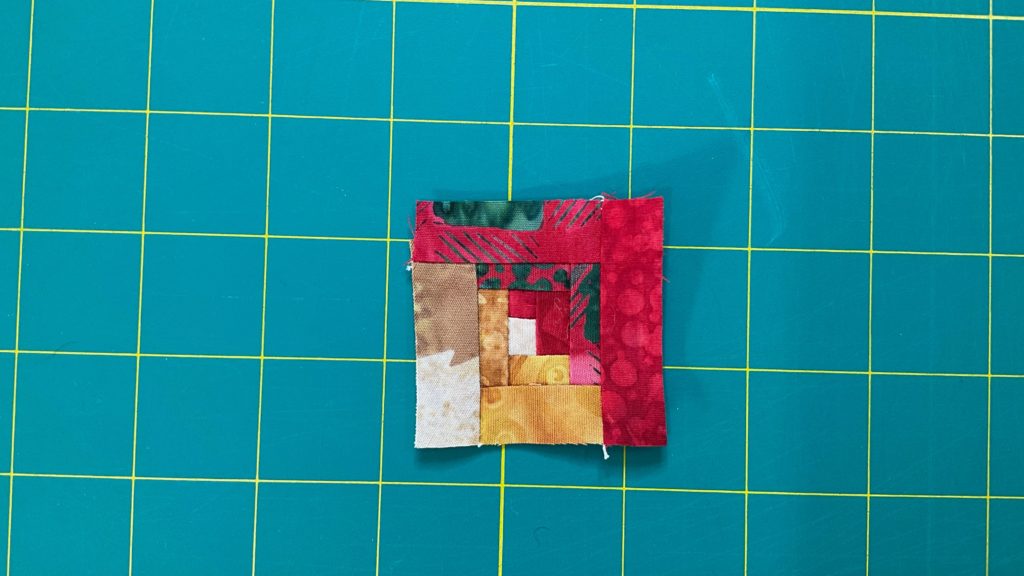
How to Make a Mini Log Cabin Quilt Block Embroidery Hoop Ornament
For reference, the inside block (not including the white outside border measures about 1 1/2″ when finished.
Cutting:
For the Background (In my case the white fabric):
- 2 strips cut 2″ x 2 1/4″
- 2 strips cut 2 1/4″ x 5 1/2″
For the Logs (In my case reds and golds):
From A (Red in my ornament) Cut 1 of Each:
- Square cut 3/4″ x 3/4″
- 1″ x 3/4″ Strip
- 1 1/4″ x 3/4″ Strip
- 1 1/2″ x 3/4″ Strip
- 1 3/4″ x 3/4″ Strip
- 2″ x 3/4″ Strip
From B (Gold in my ornament) Cut 1 of Each:
- Square cut 3/4″ x 3/4″
- 1″ x 3/4″ Strip
- 1 1/4″ x 3/4″ Strip
- 1 1/2″ x 3/4″ Strip
- 1 3/4″ x 3/4″ Strip
Assembly:
Assembly Tip: In order to make sure this block gets sewn together accurately, it is super important to maintain an accurate scant 1/4″ seam allowance with this block. In addition, I checked the measurements after every strip I added and trimmed if necessary before adding the next strip.
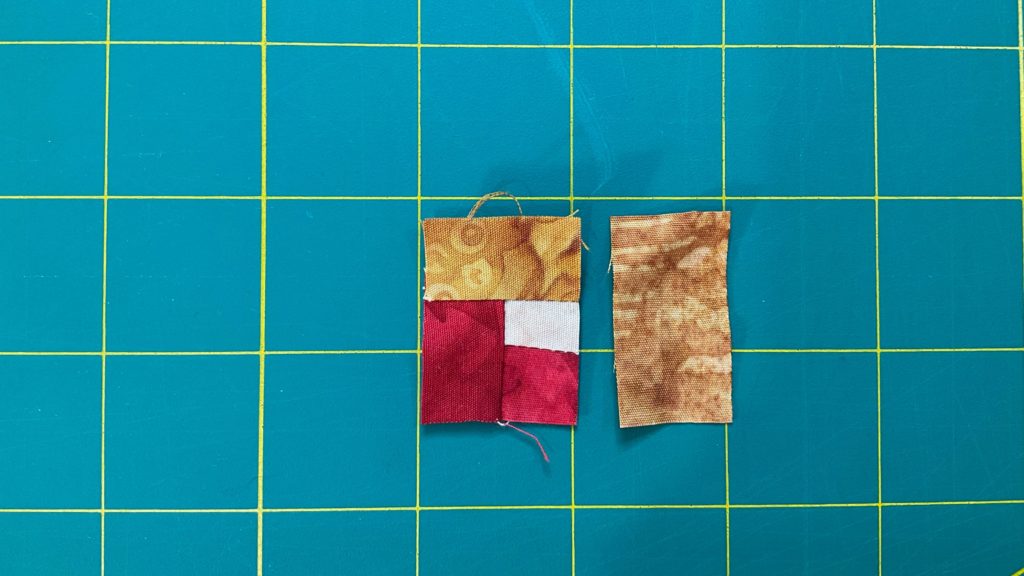
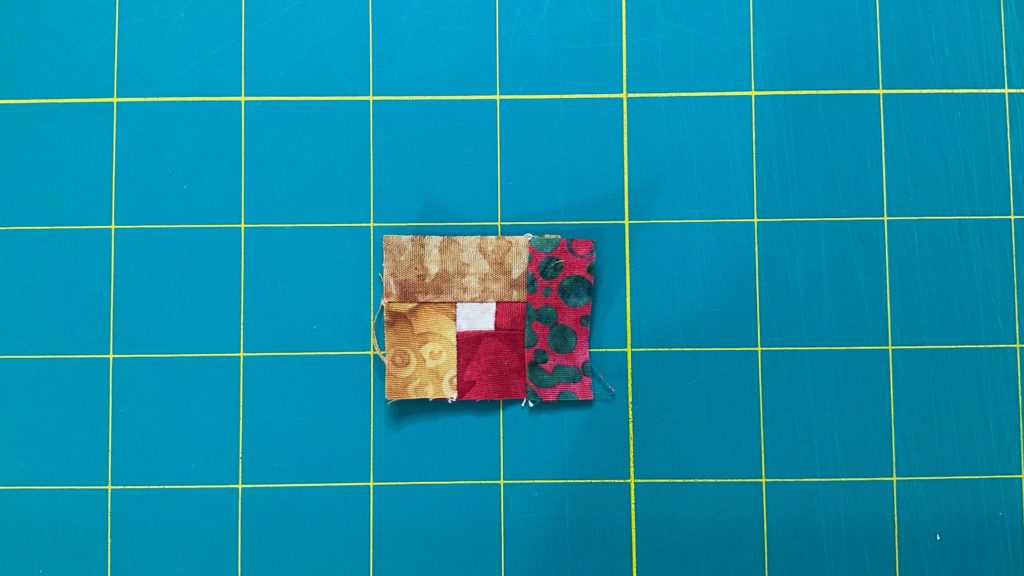

Sew together the two squares that measure 3/4″ each. Lay them out with the Fabric A square on the left side and press open.
Then, working your way clock wise add the following strips in order (as pictured)
- 1″ x 3/4″ strip from Fabric A to the top of that unit. Press open.
- 1″ x 3/4″ strip from Fabric B to the right side of the unit. Press open.
- 1 1/4″ x 3/4″strip of Fabric B to the next side. Press open.
- 1 1/4″ x 3/4″ strip of Fabric A to the next side. Press open.
- 1 1/2″ x 3/4 strip of Fabric A. Press open.
- 1 1/2″ x 3/4 strip of Fabric B. Press open.
- 1 3/4″ x 3/4 strip of Fabric B. Press open.
- 1 3/4″ x 3/4 strip of Fabric A. Press open.
- Lastly, add the 2″ x 3/4″ strip of Fabric A. Press open.
Then add the background fabric borders.
On opposite sides, add the shorter strips. Then, on the remaining opposite sides add the longer strips.
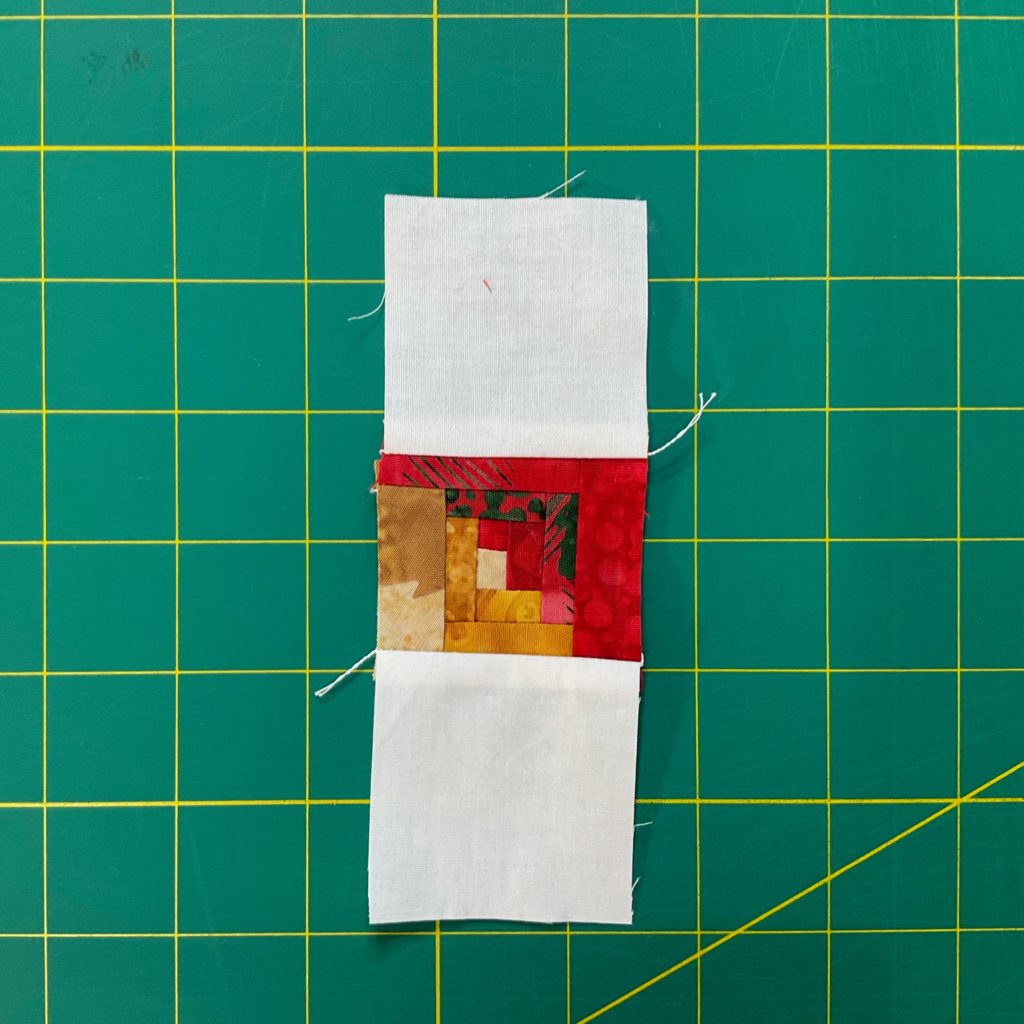
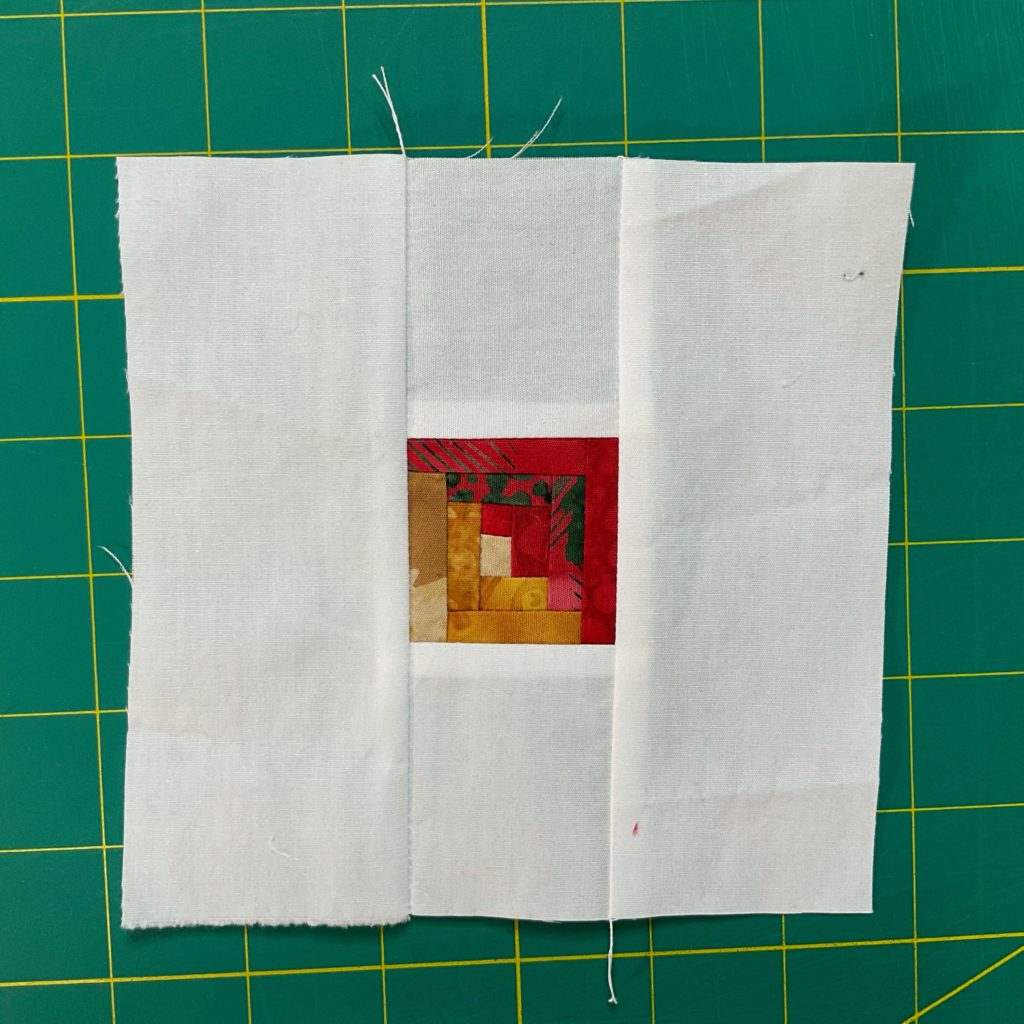
Follow the instructions at the end of the article to turn the block into an ornament.
How to Make a Mini Quilt Block Embroidery Hoop Ornament
These are the instructions for any of the blocks.
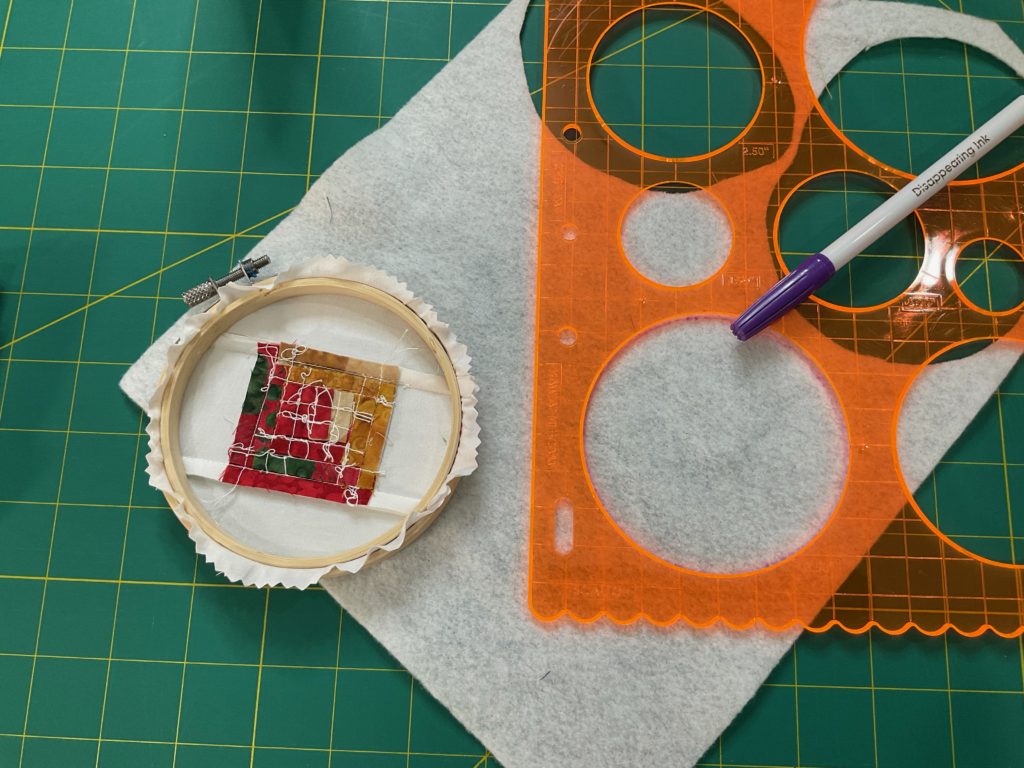
You will need the finished block, the embroidery hoop, the felt, a circle template, scissors, and the glue.
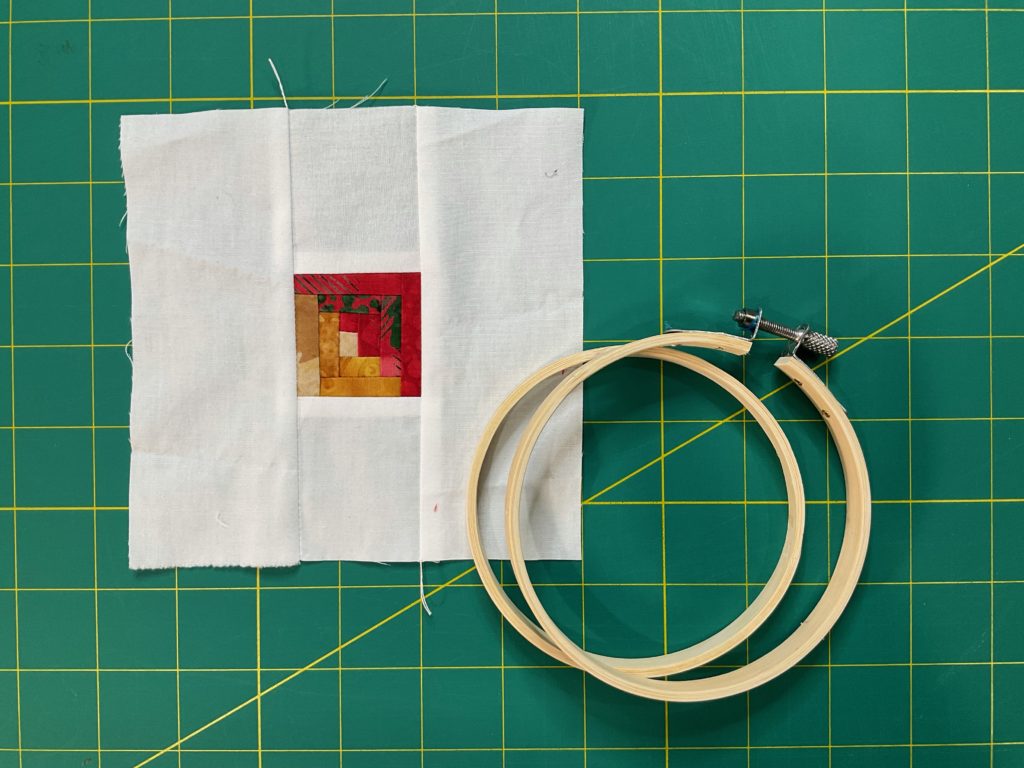
Remove the inside hoop from the outside one. Next, center your completed block on the hoop that does not have the hardware on it.
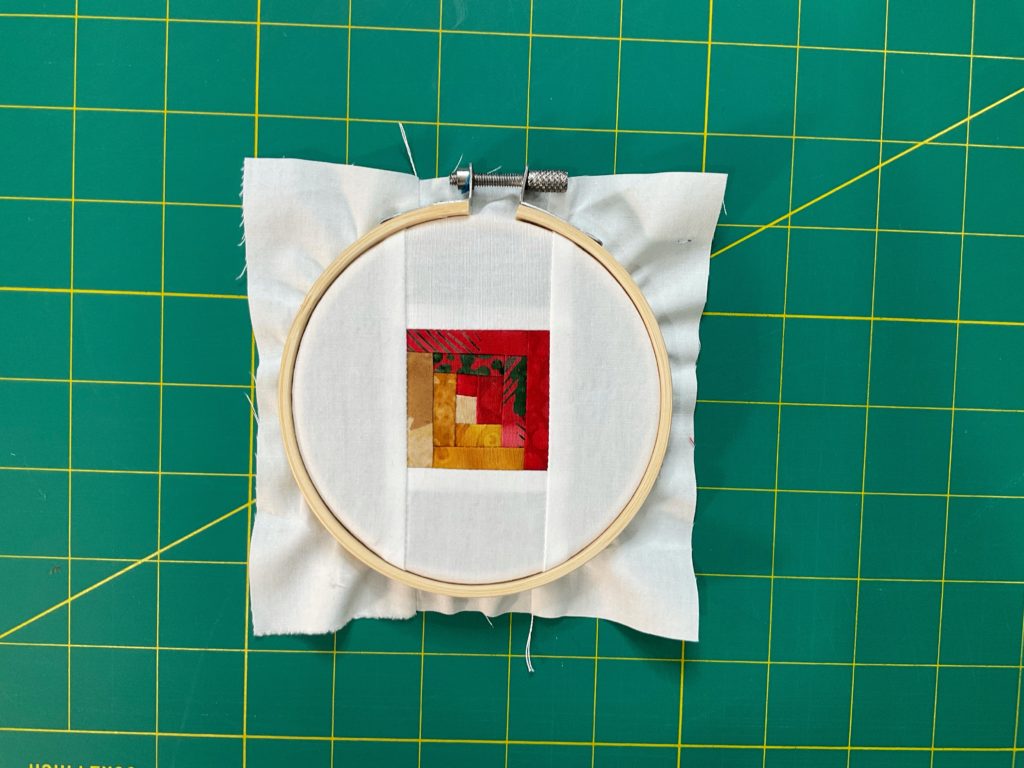
Carefully put the outer hoop onto the inner one and begin to tighten the screw. Make sure to pull the quilt block taut so it lays nice and flat. Once the screw is tight, give the quilt block a final pull to get it as flat as possible.
Using pinking shears or scissors, trim away the desired excess fabric from the back of the ornament. As a result, you get a nice finished look to your ornament.
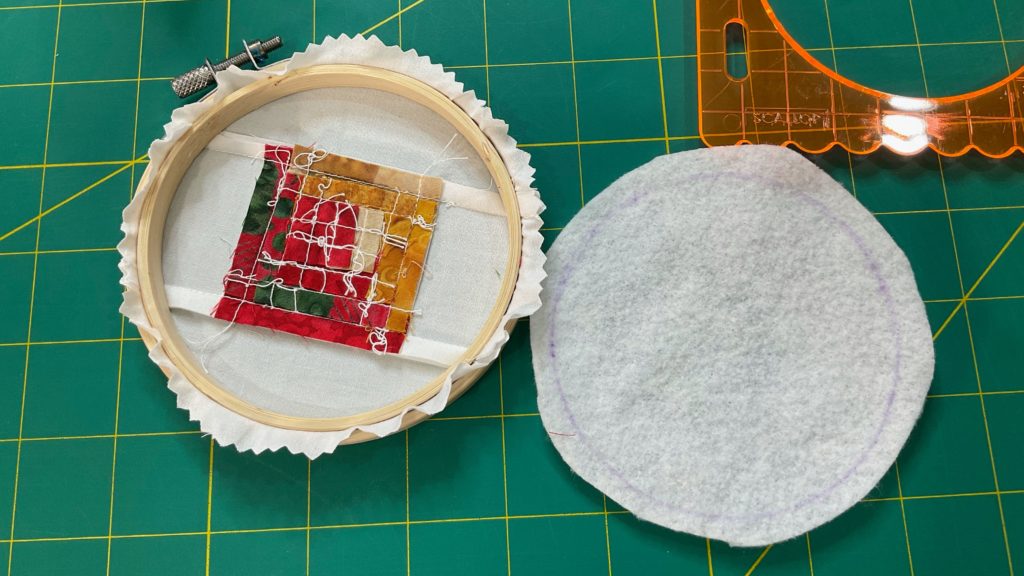
Trace around your template. The 3 1/2″ circle is the ideal fit for the 4″ embroidery hoop.
Then cut out the circle about 1/4″ outside of the tracing line.
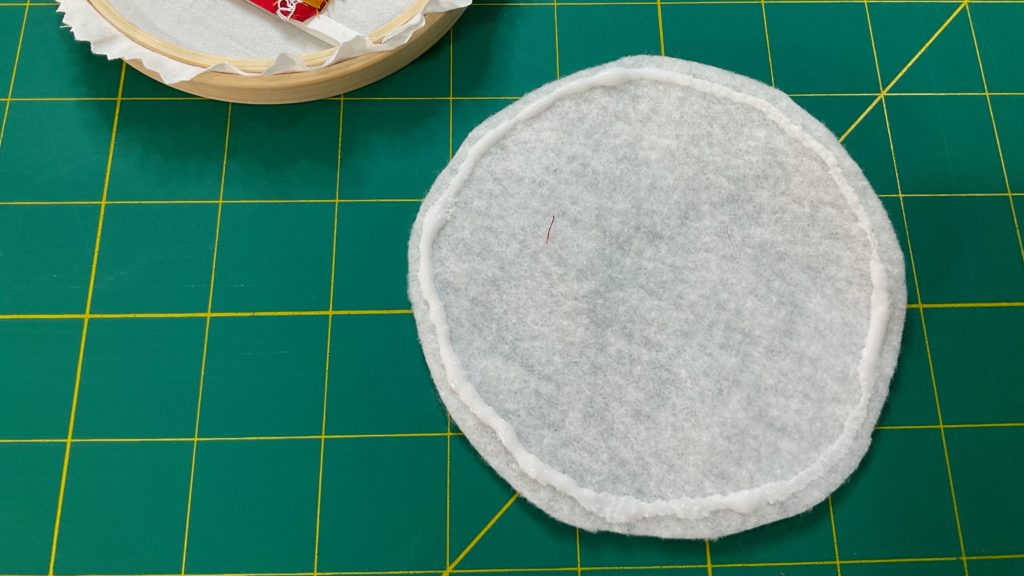
Once the circle is cut out, add a thin line of glue around the outside edge of it.
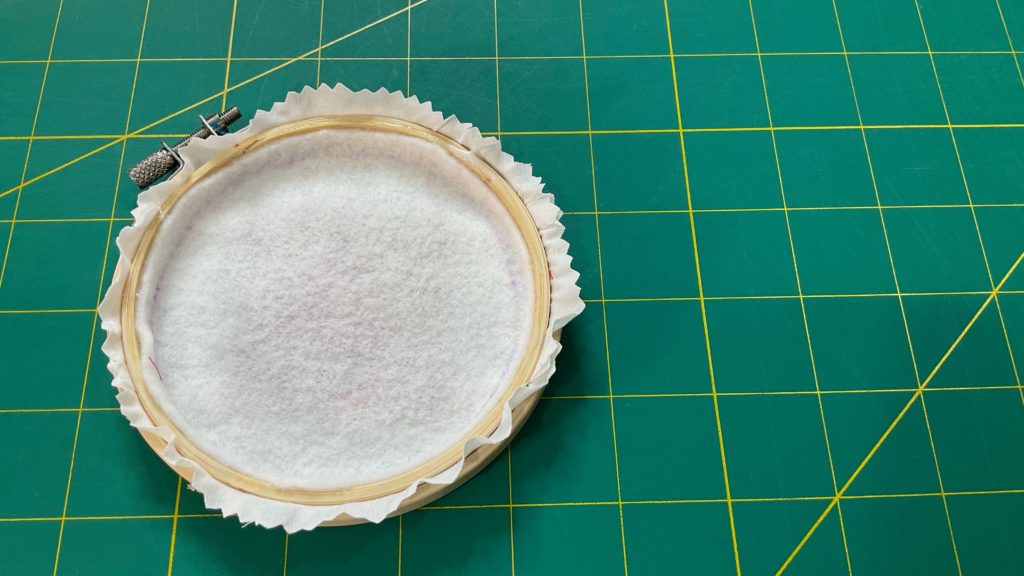
After you have added the glue, flip it over into the inside of the embroidery hoop (against the back side of the block) and gently smooth it around the inside of the hoop, getting it as close as possible to the block. As a result you will get a nice smooth finish and cover up the seams on the back of the block.
Set aside to dry. Lastly, add a bow or other hanger to finish the ornament.
Bonus Free Pattern!
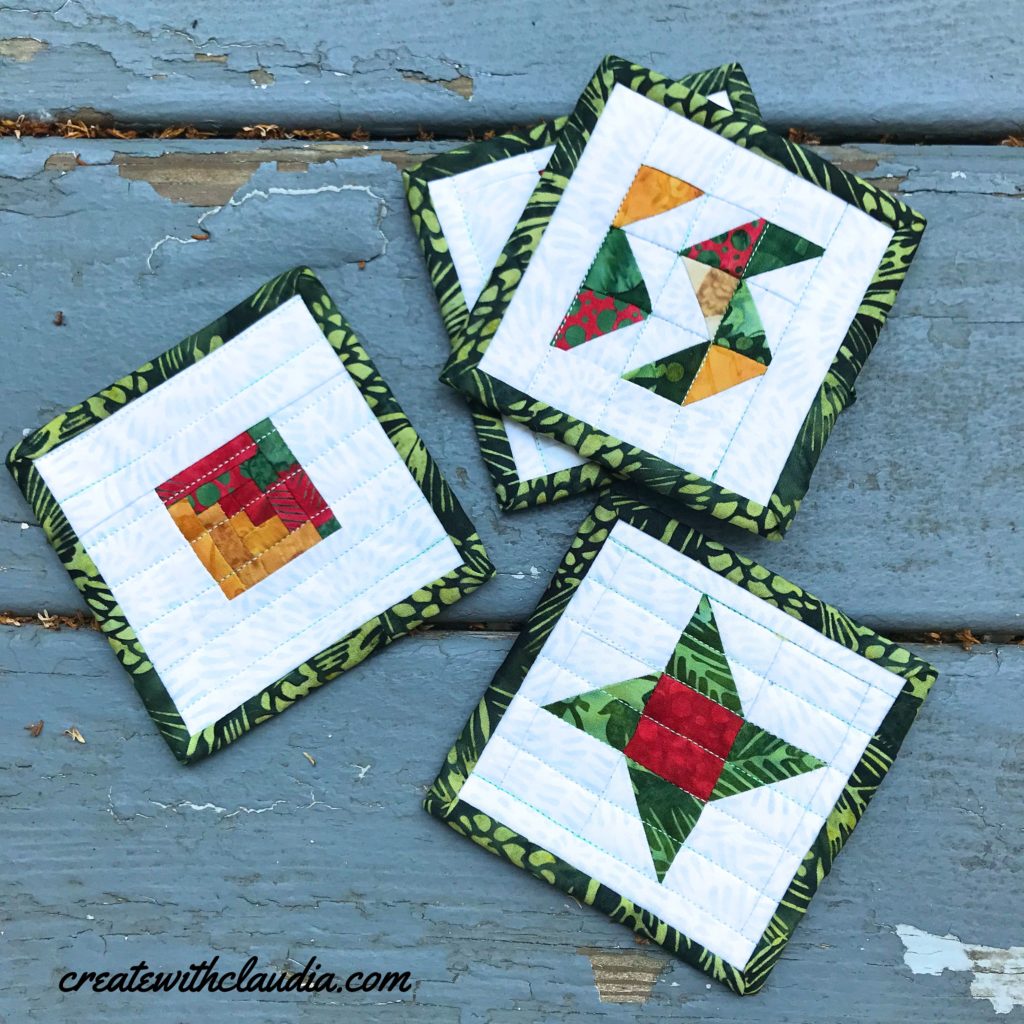
How to Make Mini Quilt Block Coasters
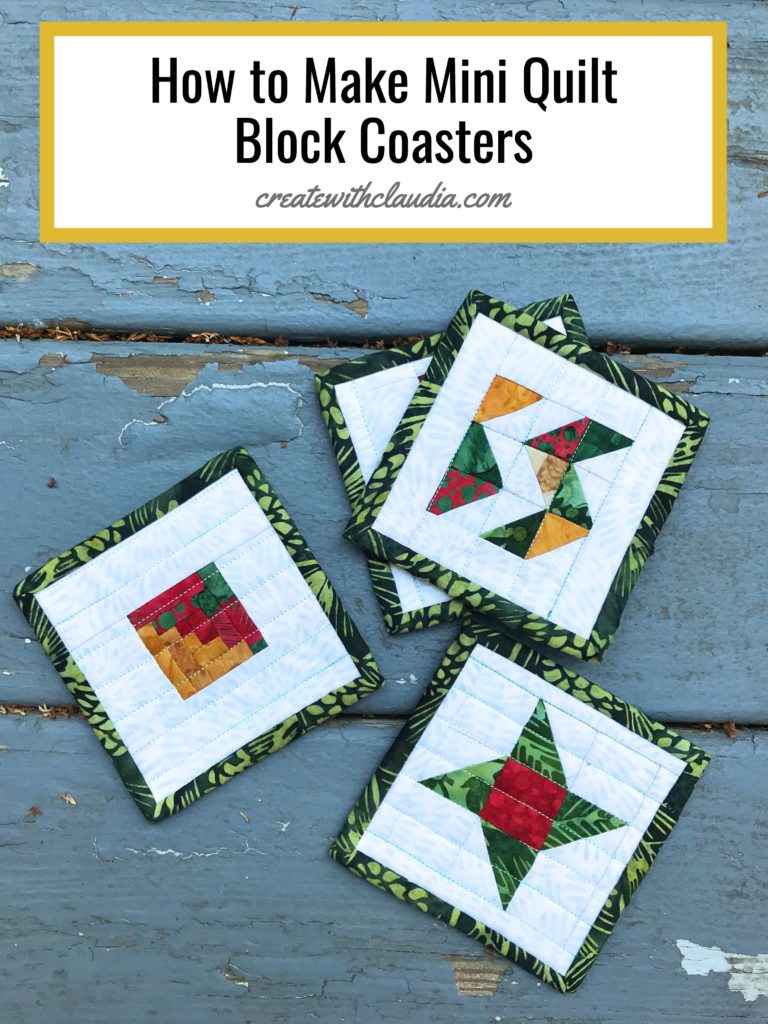
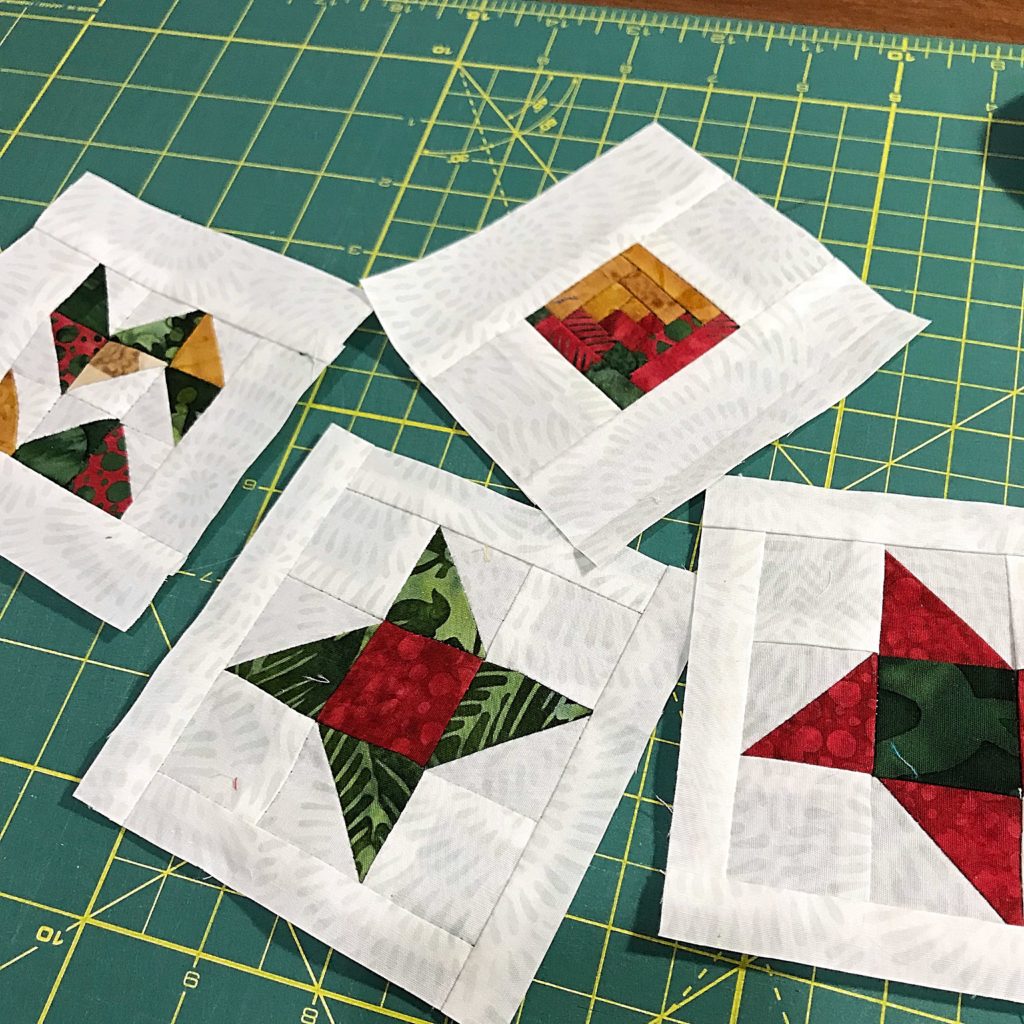
After recording the video tutorial for the ornaments I ended up with four extra blocks. Since I hate throwing anything out, I decided to turn them into coasters.
To ensure that the block would maintain the correct size, I trimmed each of the blocks down to 4″ square, making sure to center the mini block carefully before I cut them down.
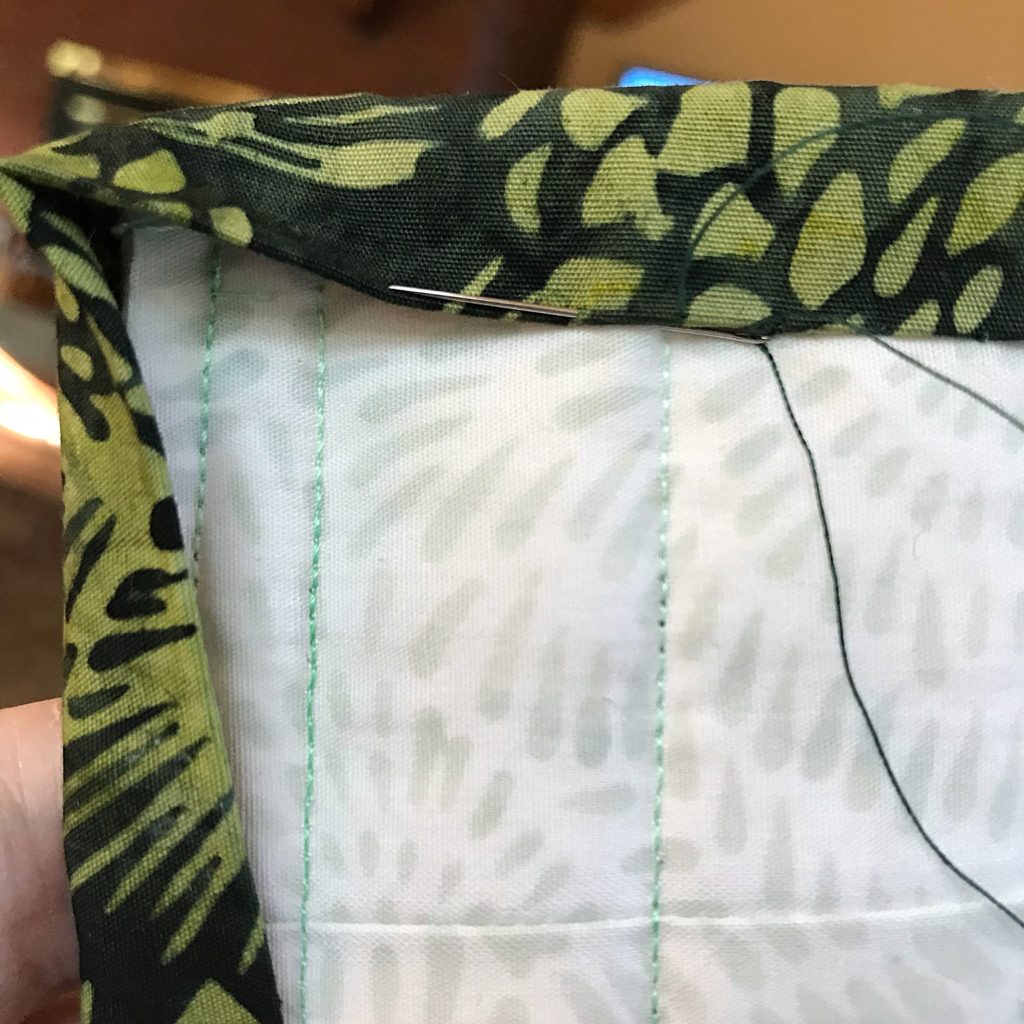
Then I added batting and backing fabric and quickly quilted them in a straight line. Finally, I bound them and now I have a lovely set of 4 quilted coasters. Perfect!
The Other Island Batik Ambassadors
Make sure to check out all of the other Ambassadors’ holiday projects this month. You can find their blogs here:
- Megan Best – Bestquilter
- Pamela Boatright – PamelaQuilts
- Elizabeth DeCroos – Epida Studio
- Jennifer Eubank – Archipelago Quilting
- Jennifer Fulton – The Inquiring Quilter
- Preeti Harris – Sew Preeti Quilts
- Joanne Hart – Unicornharts
- Mania Hatziioannidi – Mania for Quilts
- Jane Hauprich – Stitch by Stitch Custom Quilting
- Connie Kauffman – Kaufmann Designs
- Emily Leachman – The Darling Dogwood
- Denise Looney – For the Love of Geese
- Leah Malasky – Quilted Delights
- Sally Manke – Sally Manke Fiber Artist
- Maryellen McAuliffe – Mary Mack Made Mine
- Claudia Porter – Create with Claudia
- Gail Renna – Quilt Haven Threads
- Brianna Roberts – Sew Cute and Quirky
- Michelle Roberts – Creative Blonde
- Gail Sheppard – Quilting Gail
- Andi Stanfield – True Blue Quilts
- Jennifer Thomas – Curlicue Creations
- Suzy Webster – Websterquilt
- Janet Yamamoto – Whispers of Yore
Happy Quilting and don’t forget, if you make any of my patterns and post them to Instagram, I’d love it if you used the hashtag #createwithclaudia. That way I (and everyone else) can see your gorgeous creations!

4 Comments
Gail Sheppard
July 10, 2021 at 2:15 PMLove these, Claudia!!! So cute!!! And tutorials as well!!! Wonderful!
createwithclaudia_7j76hs
July 12, 2021 at 8:45 AMThanks so much Gail!
Jennifer Thomas
July 10, 2021 at 3:42 PMReally cute ornaments and coasters! I could see the ornaments made into a garland, or they would also look cute on a hanging from a stair handrail on the way up. Have a great day!
createwithclaudia_7j76hs
July 12, 2021 at 8:46 AMThanks Jennifer! I was thinking about lining mine up on the mantel somehow. Not sure how yet.