
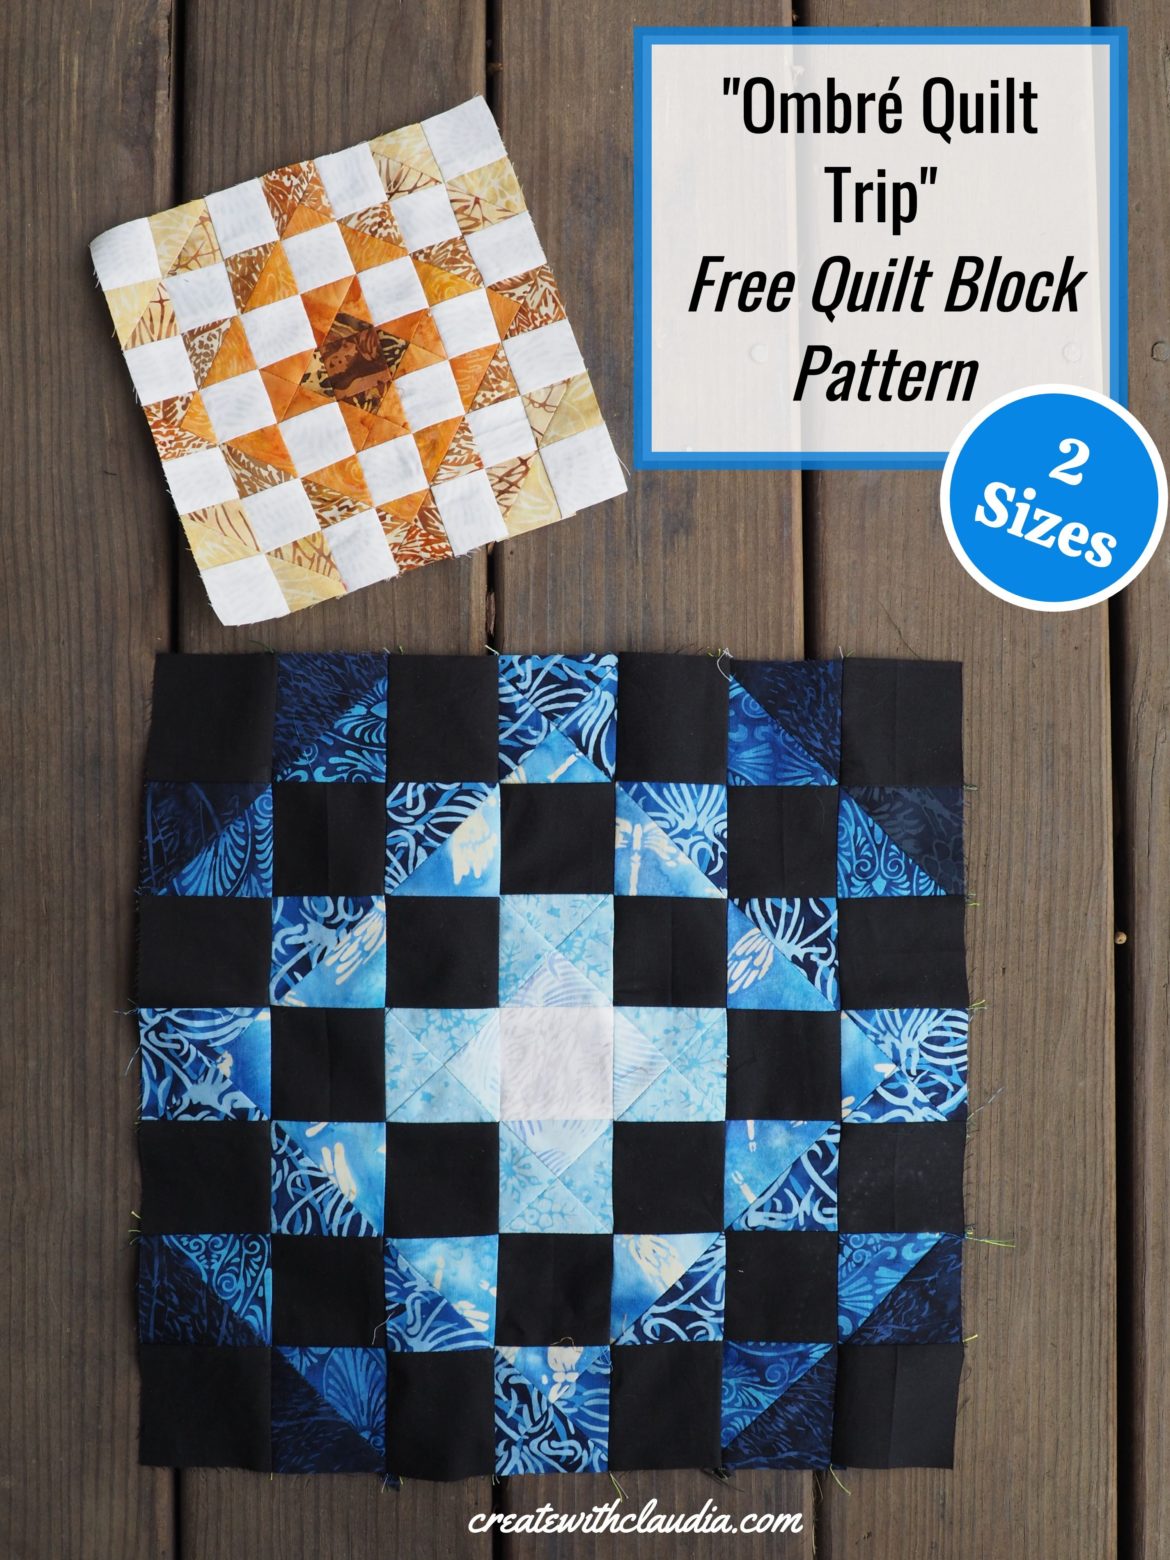
Ombré Quilt Trip Block Tutorial
It’s time to gather up all of your scraps in various hues of a color and make this fun and easy block. Like I always say, scrappy quilts and blocks are my favorite. I just love the play of the various fabrics against each other. If you like a scrappy look then give my Ombré Quilt Trip block tutorial a try.
I am a 2021 Island Batik Ambassador and every month we have a new challenge. This block was inspired by my “Roquefort” quilt that I made for our March scrap buster challenge. It uses shades of one color to achieve a unique look.

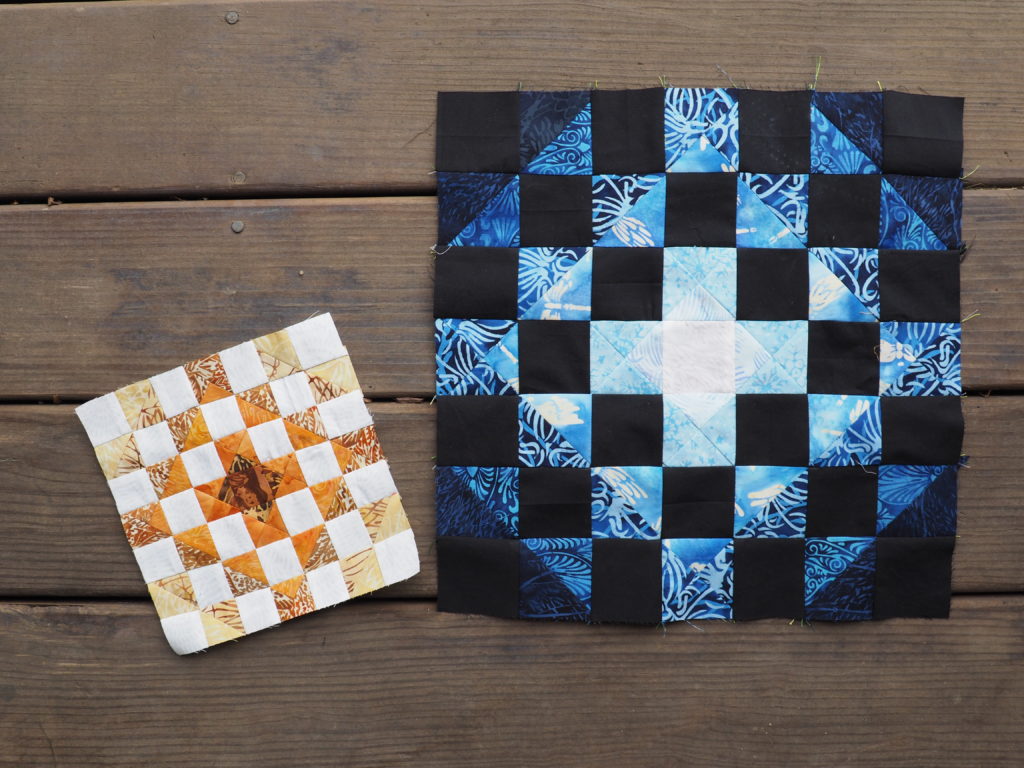
Look closely at the block and you will see that it is made up of squares, half square triangles and hourglass units. Cutting instructions are given for 2 sizes: 14 ½” and 7 ½”.
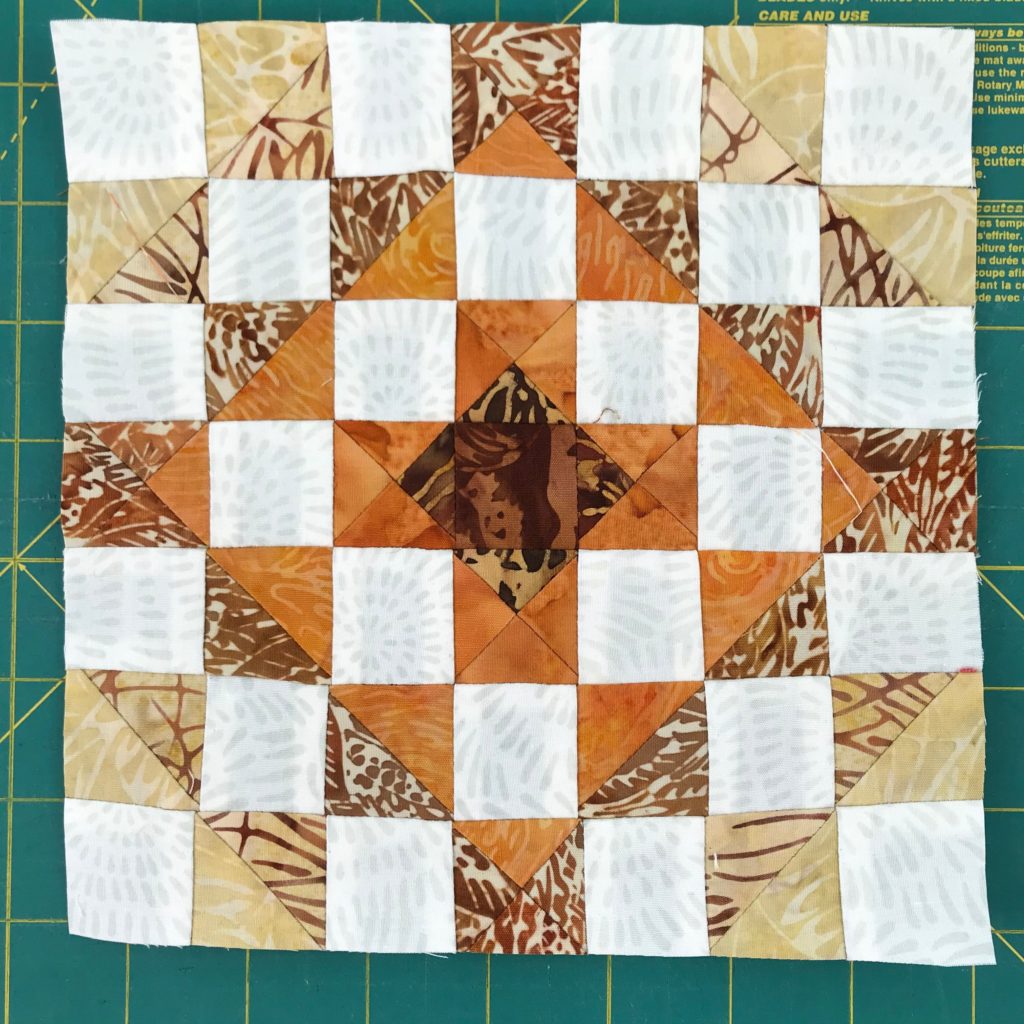
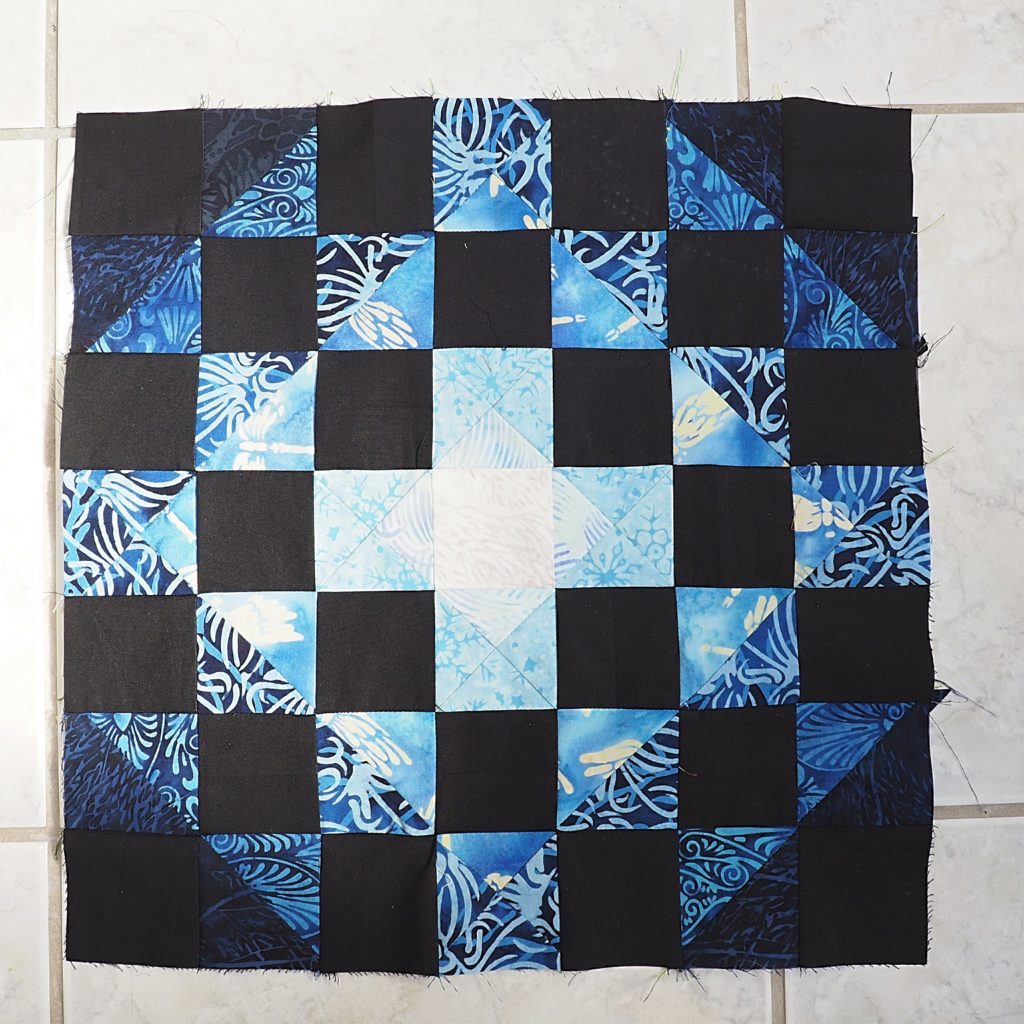
What color(s) do you think you will use in your block? In my blocks I used blues and browns from Island Batik. I’m considering making a green one too.
Disclosure: The products in this post were generously provided by Island Batik and Aurifil thread.

Get the Look
The following Island Batik fabrics were used when making these blocks.
Black and Blue Block
- Solid Black
- Various blues from the “Starry Night” line designed by Kathy Engle
- Various blues from stash builders
Brown and White Block
- “Coconut” from the Basics line
- Various browns from the “Autumn Sunset” line designed by Kathy Engle
*Download the Ombré Quilt Trip Quilt Block Pattern Here*
Ombré Quilt Trip Block Tutorial Video Tutorial
Pattern Notes
- Please read through all instructions carefully before beginning
- ¼” seam allowance used
You can find many of the items that I used to make this project in my Amazon Store.
As an Amazon Associate I earn from qualifying purchases.
Fabric Requirements
*Please note that the following instructions are for the 14 ½” block. If you are making the 7 ½” one, check the chart for the size squares you will need.
For one block you will need various scraps depending on the size of the block you make.
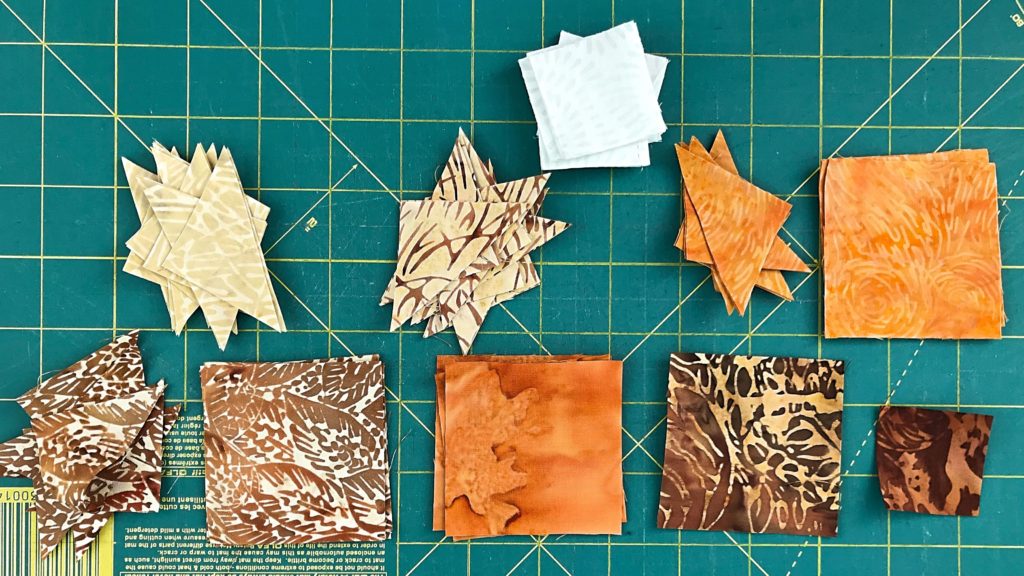
Cutting Instructions
| Fabric | 14 ½” Block | 7 ½” Block |
| Background | 24 squares cut 2 ½” | 24 squares cut 1 ½” |
| Fabric A (Center Square) | 1 square cut 2 ½” | 1 square cut 1 ½” |
| Fabric B | 1 square cut 3 ½” | 1 square cut 2 ½” |
| Fabric C | 3 squares cut 3 ½” | 3 squares cut 2 ½” |
| Fabric D | 4 squares cut 2 7/8” (cut in half on the diagonal) 1 square cut 3 ½” | 4 squares cut 1 7/8” (cut in half on the diagonal) 1 square cut 2 1/2” |
| Fabric E | 4 squares cut 2 7/8” (cut in half on the diagonal) 3 squares cut 3 ½” | 4 squares cut 1 7/8” (cut in half on the diagonal) 3 squares cut 2 ½” |
| Fabric F | 4 squares cut 2 7/8” (cut in half on the diagonal) | 4 squares cut 1 7/8” (cut in half on the diagonal) |
| Fabric G | 4 squares cut 2 7/8” (cut in half on the diagonal) | 4 squares cut 1 7/8” (cut in half on the diagonal) |
Step 1 – Making the Hourglass Units
To make the hourglass units you will need all of the squares cut 3 ½” *.
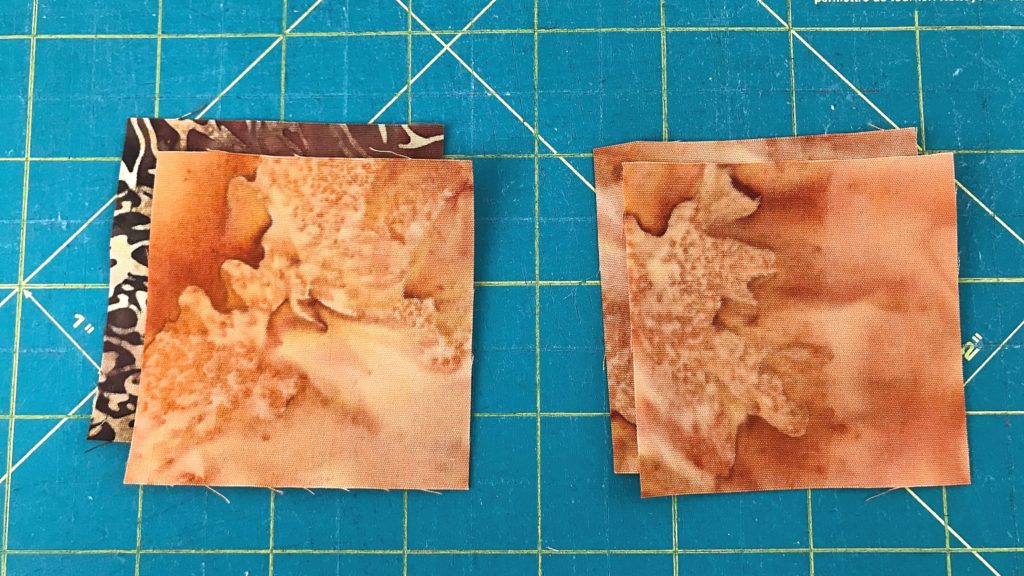
Make one pair of each with the following fabrics:
- Fabric B with Fabric C
- C with C (yes they should be the same fabric)
- D with E
- E with E (yes they should be the same fabric)
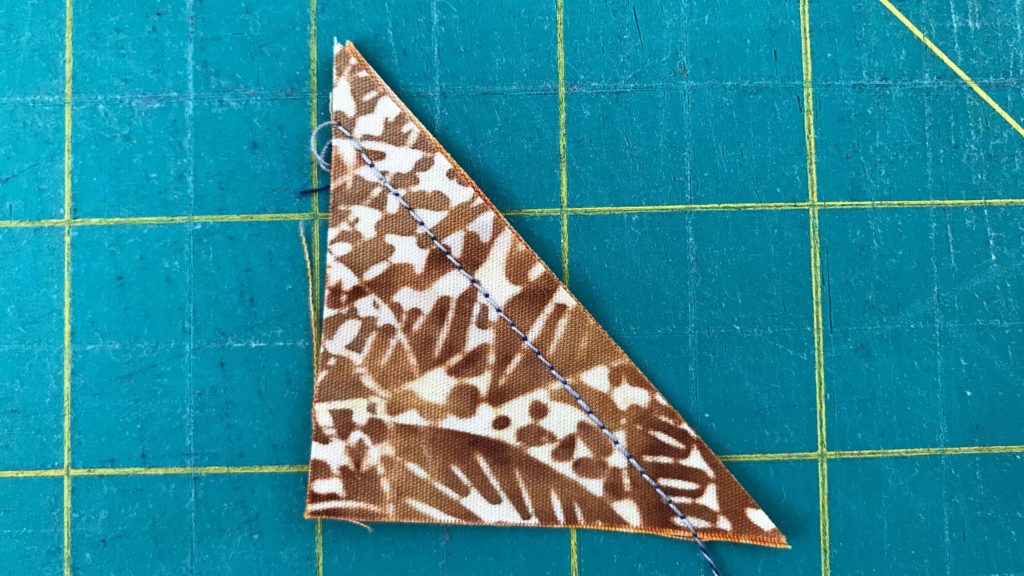
Draw a diagonal line on the back of the lighter fabric of each pair.
Line up the 2 squares in the pair, right sides together.
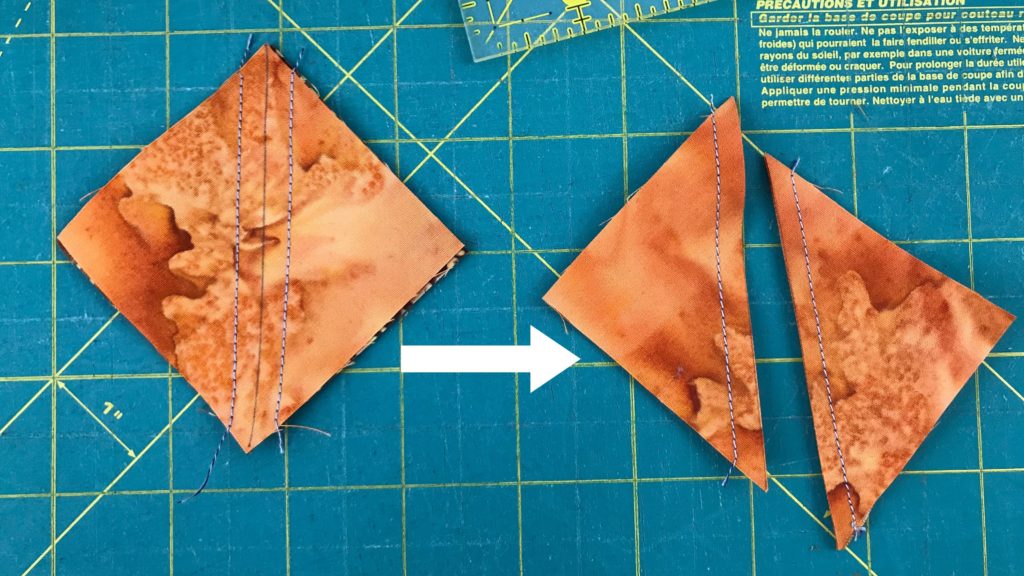
Sew a ¼” seam along each side of the drawn line.
Cut in half along the drawn line.
Press open, to the darker fabric. Repeat with remaining pairs.
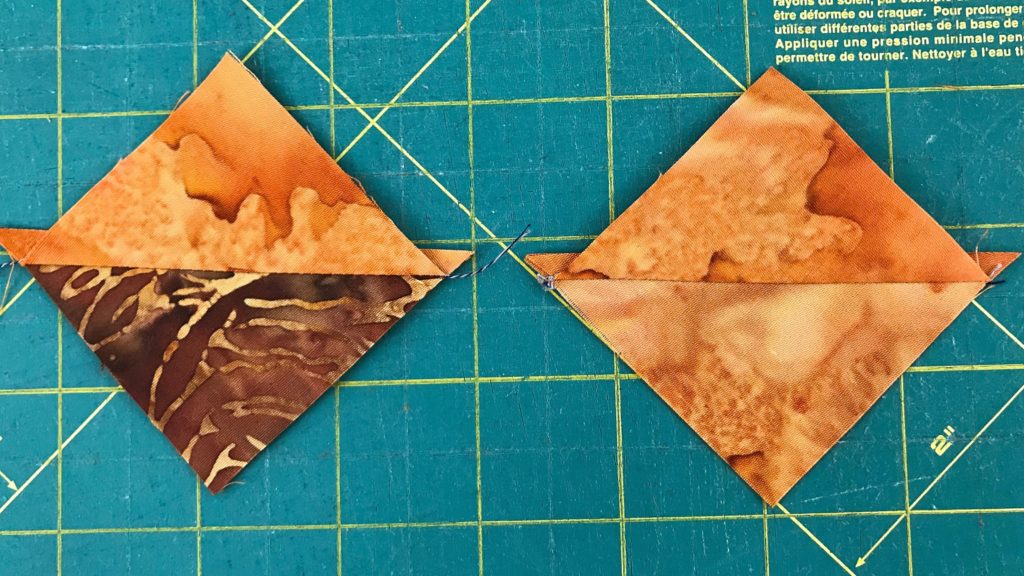
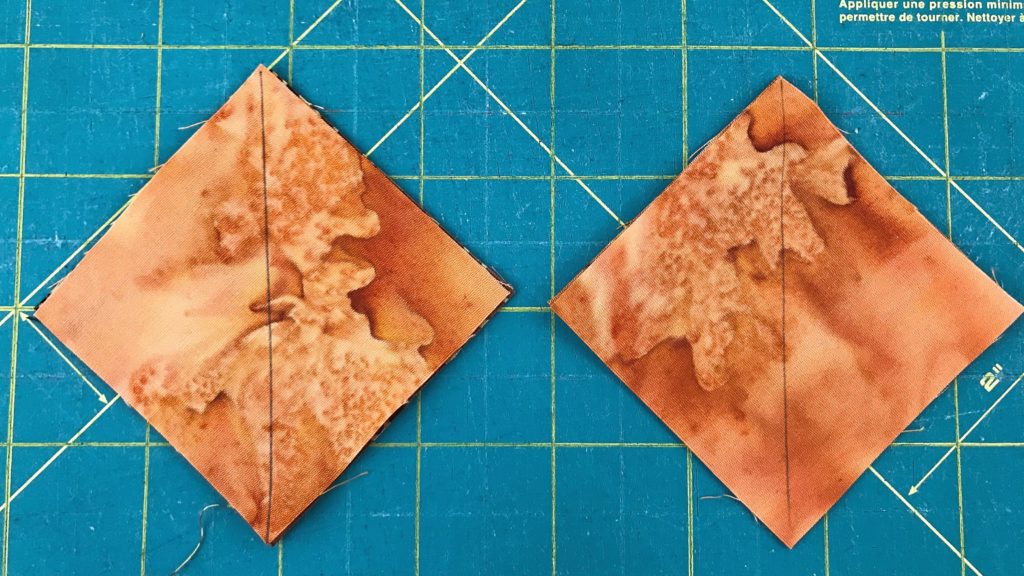
As a result, you will end up with 8 half square triangles, 2 made up of fabric B & fabric C, 2 made up of fabric C & fabric C, 2 made up of fabric D & fabric E, and 2 made up of fabric E & fabric E.
Pair up the half square triangles as follows:
- 2 pairs: Each made up of 1 half square triangle in fabrics B & C and 1 half square triangle in fabric C only.
- 2 pairs: Each made up of 1 half square triangle in fabrics D & E and 1 half square triangle in fabric E only.
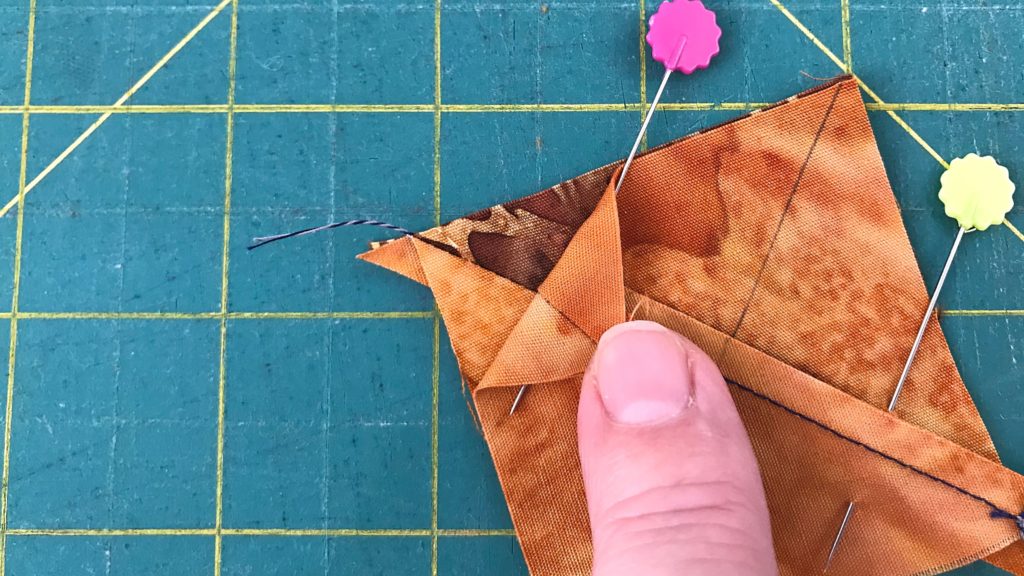
Take one pair and draw a diagonal line down the back of one of the half square triangles.
Line them up, right sides facing. Line up the seams and pin if desired.
Next, sew a ¼ inch along both sides of the drawn line.
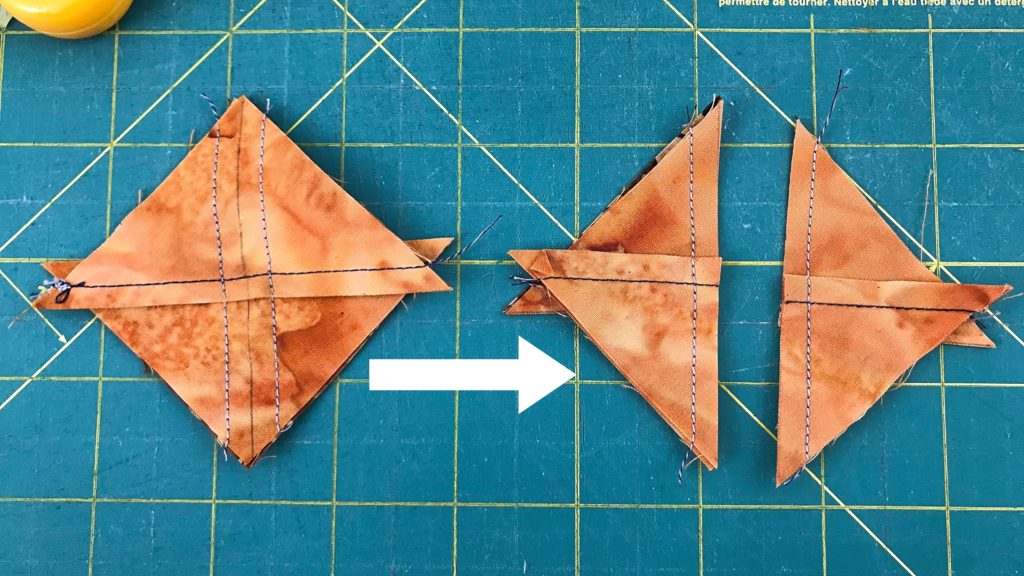
Cut along the drawn line.
Press open.
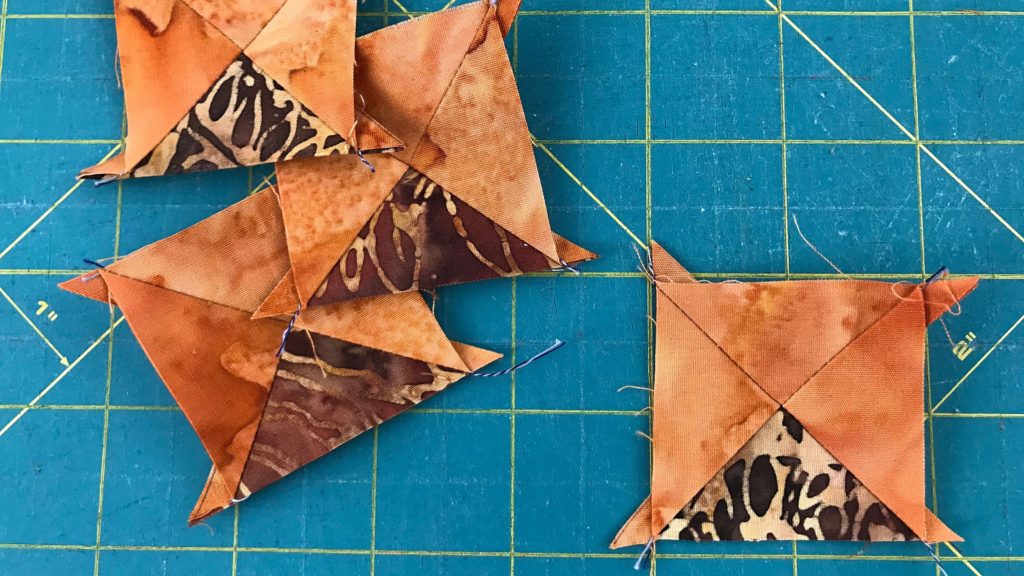
Repeat with the remaining pairs. You will have eight hourglass units in total, four made up of fabric B and fabric C and four made up of fabric D and fabric E.
Trim the hourglass units down to 2 1/2″ square.
Step 2 – Making the Half Square Triangles
To make the half square triangles you will need the triangles that were cut from the 2 7/8” squares.

Pair them up as follows:
- 8 pairs of fabric D and fabric E
- 8 pairs of fabric F and fabric G
Take one pair and line them up, right sides together. Then sew along the long side and press to the dark. Repeat with the rest of the triangle pairs.
You will end up with 16 half square triangles, 8 made up of fabrics D and E and 8 made up of fabrics F and G.
Trim down to 2 1/2″ square if needed.
Step 3 – Assembling the Block
Block Layout
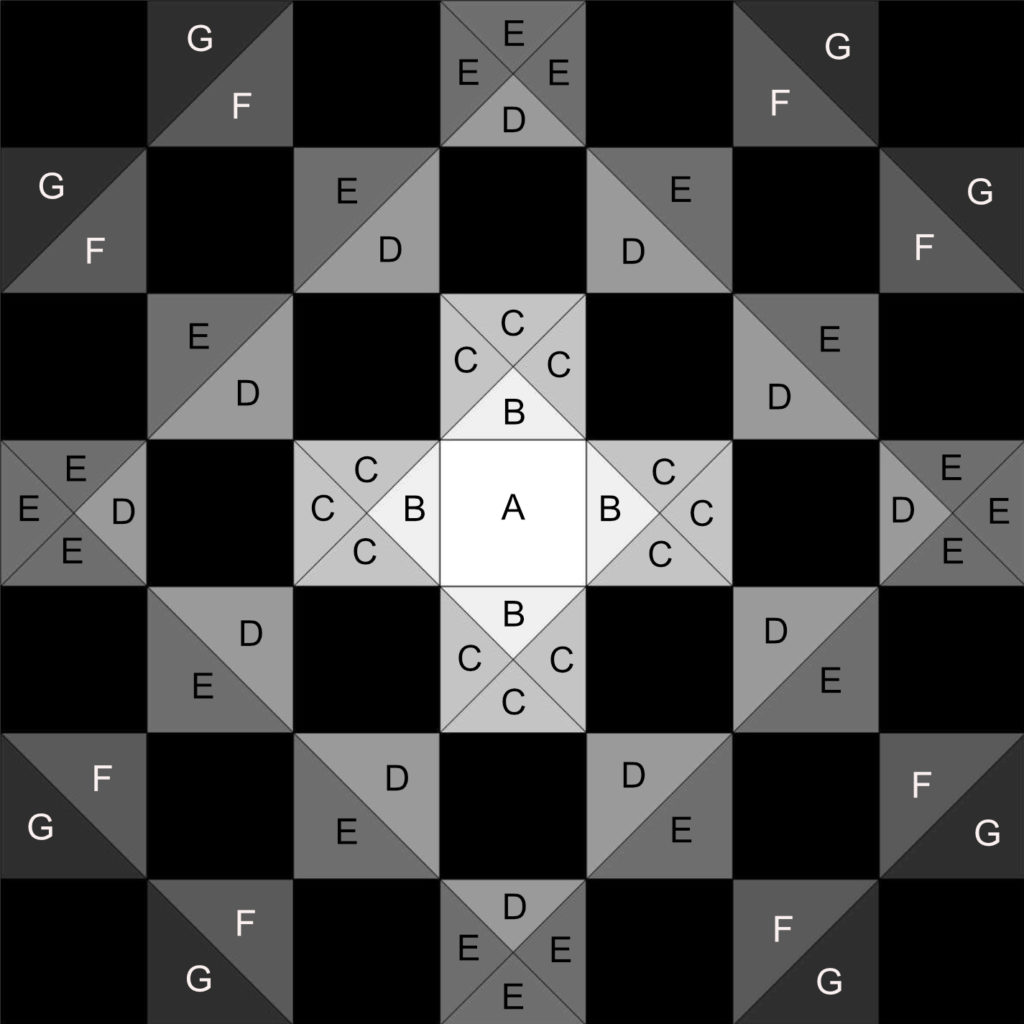
Lay out the units as shown:
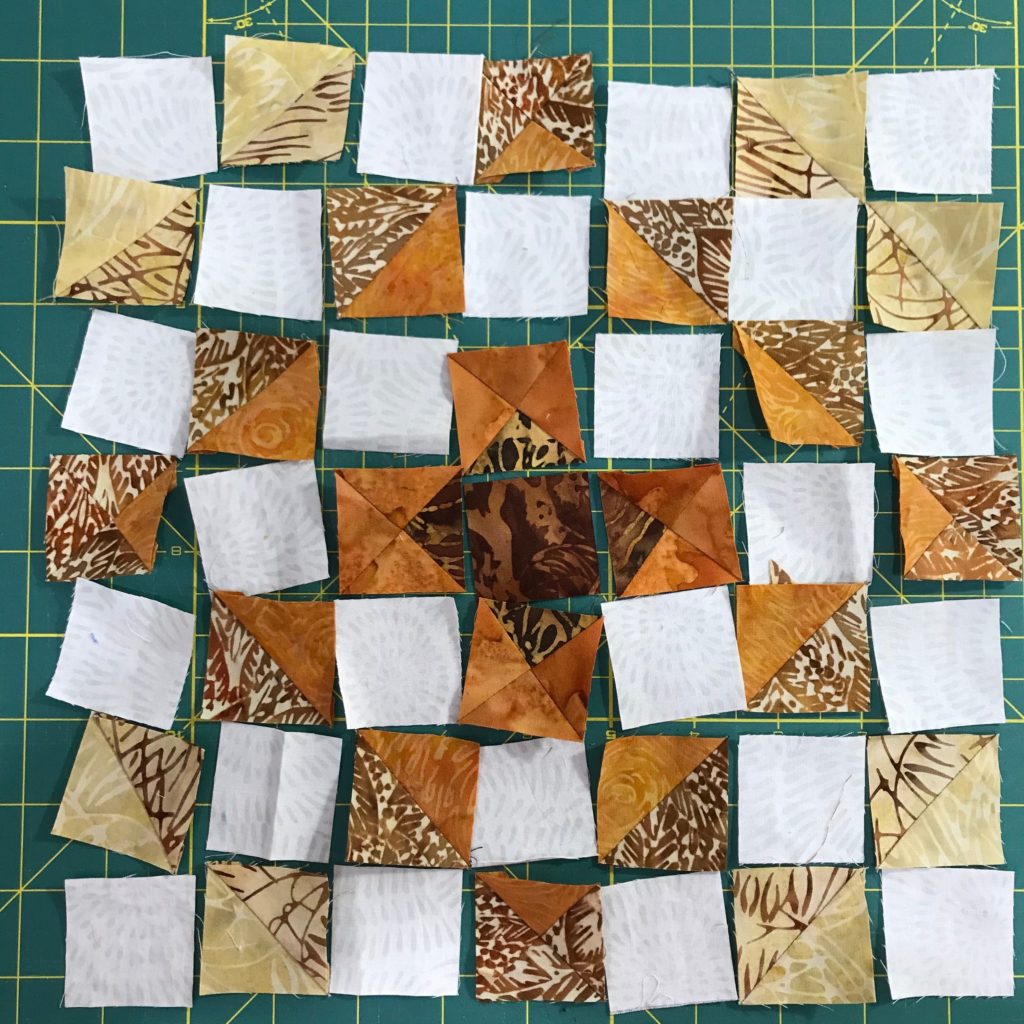
Once you have laid out all of the individual units, sew them together row by row. Then sew the rows together.
You will have a block that measures 14.5 inches square (7.5 inches if you chose the smaller version).
Dig through your scrap bins and pull out some of your favorite ombré colors and give this block a try.
Need Help Choosing An Ombré Look?
Here are some tips to help you out if you aren’t quite sure how to achieve the look for this Ombré Quilt Trip block tutorial.
Happy Quilting!

2 Comments
SUSAN Hoskinson
July 26, 2022 at 10:54 PMHi Claudia. Such a great block. Will you be putting the pattern for the quilt in your Etsy shop? I really enjoy your tutorials.
createwithclaudia_7j76hs
July 28, 2022 at 10:36 AMThank you so much. I hope to one day soon. I’m working on it, but have some other things coming up that bumped it out of the way.