

Easy Baby Quilt Tutorial
If you need a quick gift for a new baby then this is the quilt to make. The pattern is easy and quick. In fact, it can be made in one day. I love quick projects like this and people love receiving that homemade touch. When my daughter was born I received a few baby quilts and they came in so handy. I still have one in her baby box and it’s been about 24 years so that tells you how much it meant to us to get a quilt for her when she was born.
This easy baby quilt tutorial will show you all of the steps. From making the half square triangles using the 2-at-a-time method, to quilting it, you will find it all here.
Disclosure: Items in this post were generously provided by Benartex Fabrics.
Notes: Use a 1/4″ seam allowance. General sewing supplies are needed. Width of Fabric (WOF) is assumed to be 40″.
I have curated a shop with some of my favorite quilting/crafting tools in my Amazon store. You can shop here.
MY AMAZON STORE
As An Amazon Affiliate I Earn From Qualifying Purchases at No Extra Cost To You
See my full tutorial here of follow along in the step-by-step instructions below.
Fabric Needed
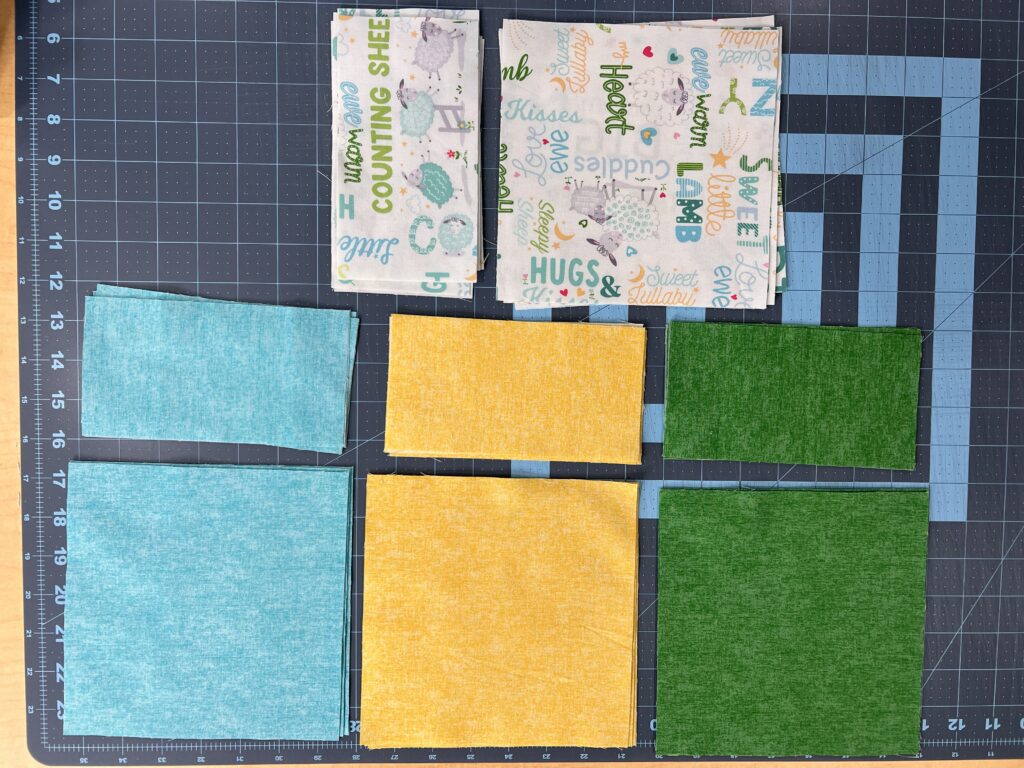
You need a 1/2 yard of each fabric for this quilt top. Note that this does not include backing and binding fabric.
I quilted mine on my domestic machine and was able to use 1 1/4 yards for the backing. I used four 2 1/2″x WOF strips for my binding. You may need more depending on how you quilt your quilt and bind it.
For each fabric: Cut two 7″ x WOF strips first. Then cut the 7″ squares out of the first strip. Cut any remaining 7″ squares out of the second strip. With the rest of the second 7″ strip cut some of the 3 1/2″ x 6 1/2″ strips. Cut a 3 1/2″ x WOF strip with the remaining fabric in the half yard, cut out the rest of the 3 1/2″ x 6 1/2″ strips.
You should be able to get five 7″ squares from the first 7″ x WOF strip and one from the second strip. From the remainder of the second strip you should be able to get nine 3 1/2″ x 6 1/2″ strips. The rest of the strips (if needed) can come from the third strip that is 3 1/2″ x WOF.
Pieces to Cut
Fabric 1 (Pattern fabric) – I used Benartex Sweet and Cozy Words in White from their Sweet Little Lambs line.
- A – 6 squares cut 7″ x 7″
- B – 12 strips cut 3 1/2″ x 6 1/2″
2 (Shown in green) – I used Benartex Cotton Shot in Meadow
- C – 6 squares cut 7″ x 7″
- D – 6 strips cut 3 1/2″ x 6 1/2″
3 (Shown in yellow) – I used Benartex Cotton Shot in Sunshine
- E – 6 squares cut 7″ x 7″
- F – 6 strips cut 3 1/2″ x 6 1/2″
4 (Shown in Turquoise) – I used Benartex Cotton Shot in Caribbean
- G – 6 squares cut 7″ x 7″
- H – 6 strips cut 3 1/2″ x 6 1/2″
Making the Half Square Triangles
Draw a diagonal line on the back of the 6 B pieces and 6 E pieces.
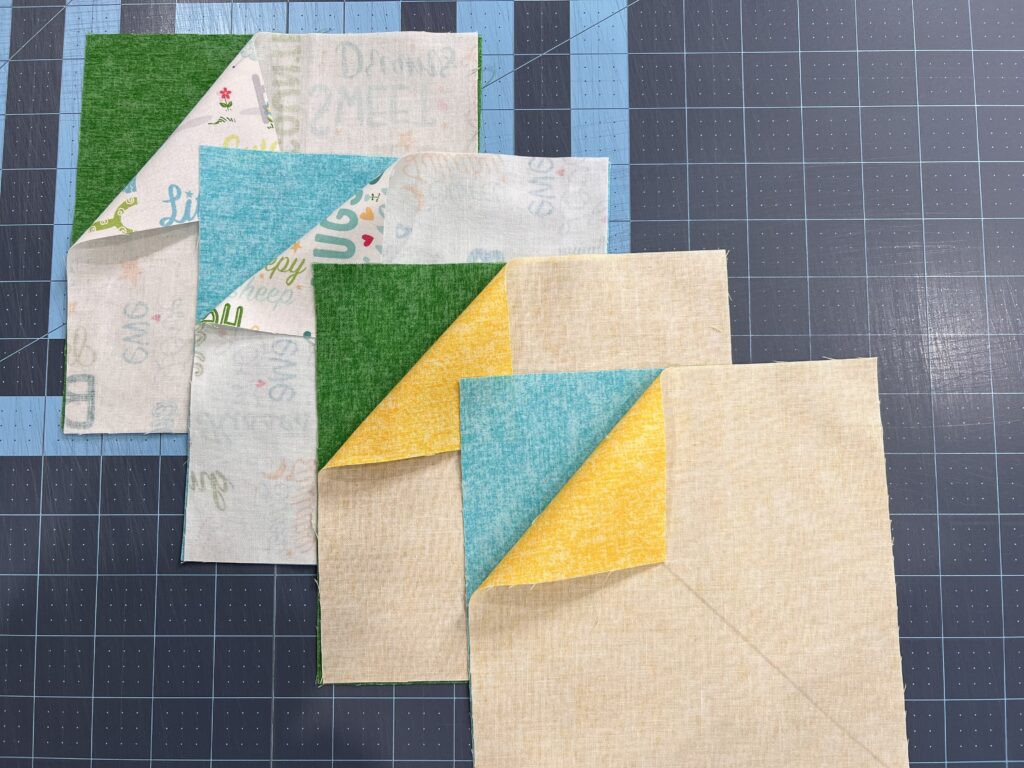
With right sides facing, line up the following:
- 3 piece A with 3 piece C
- 3 piece A with 3 piece G
- 3 piece E with 3 piece G
- 3 piece E with 3 piece C
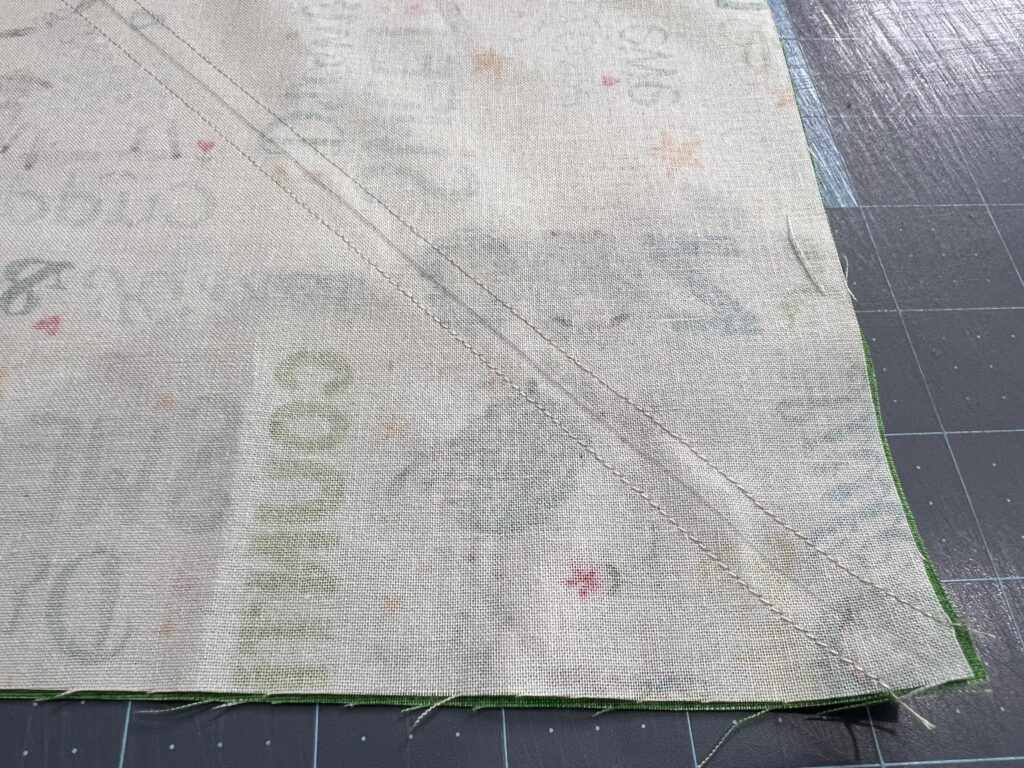
Sew a 1/4″ seam allowance down both sides of the drawn line.
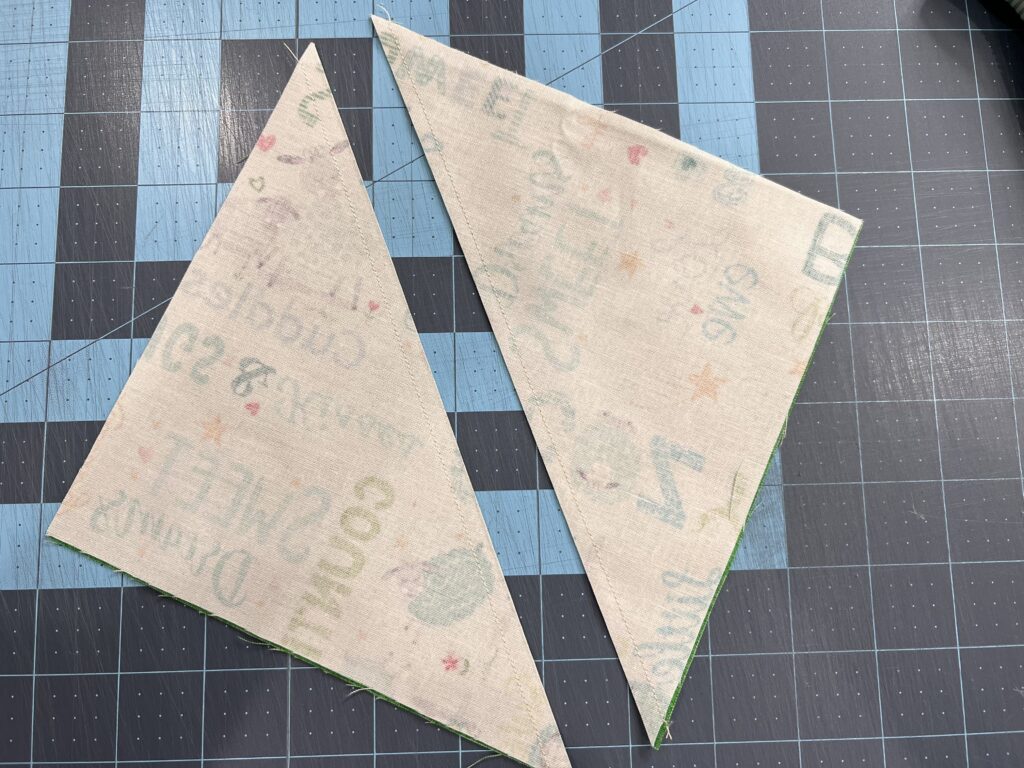
Cut the blocks in half on the drawn line. Press to the dark.
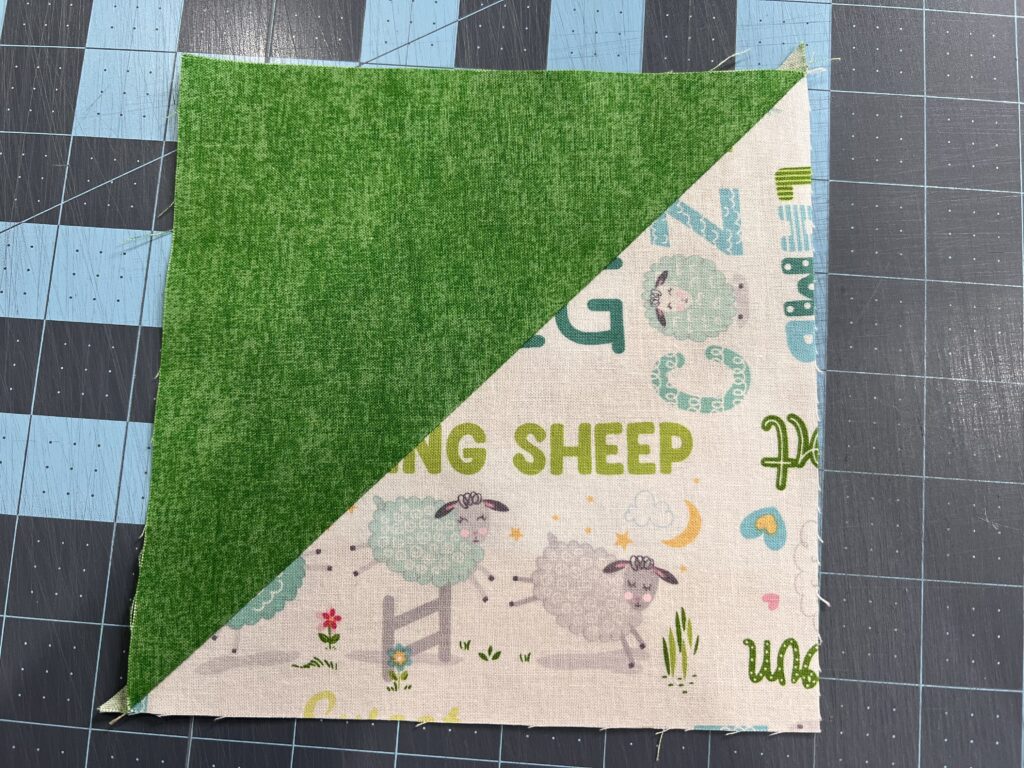
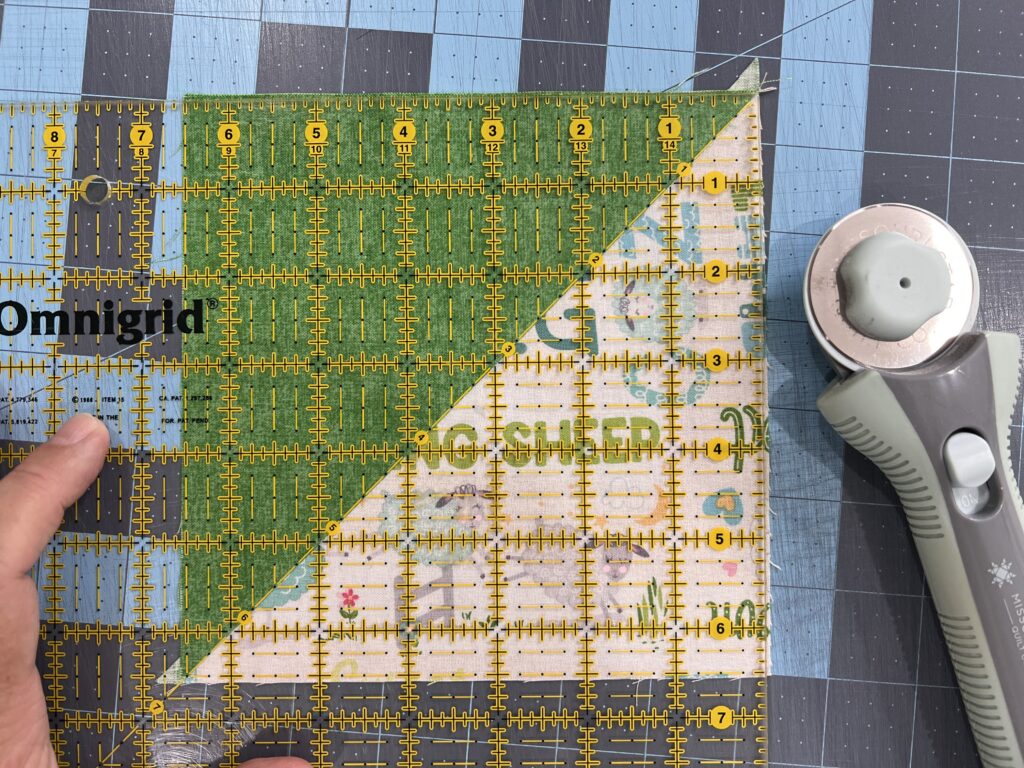
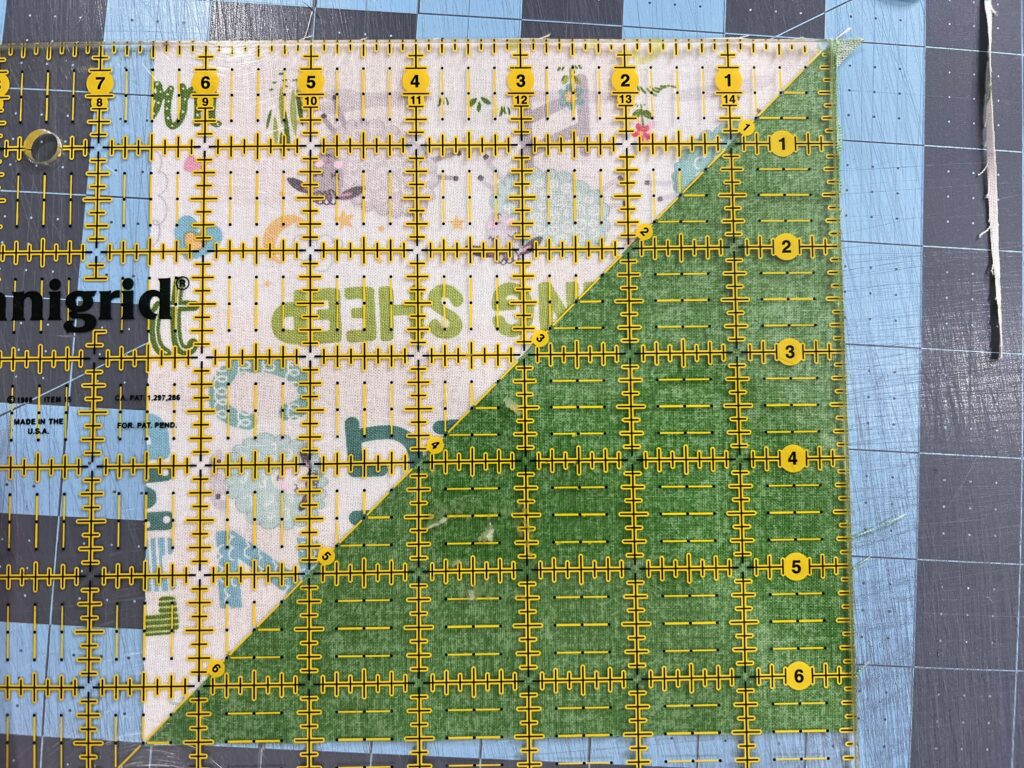
The half square triangles need to be trimmed to 6 1/2″ square. First, line up the ruler with the diagonal line along the seam. Getting as close as possible to the corner, trim off one corner. Then rotate the block. Find the 6 1/2″ point on the diagonal line of the ruler and line that up to the corner of the block. Lastly, making sure that the ruler is lined up on the left, bottom and seam, trim off the corner. Repeat with all of the half square triangles.
Piecing the Quilt Top
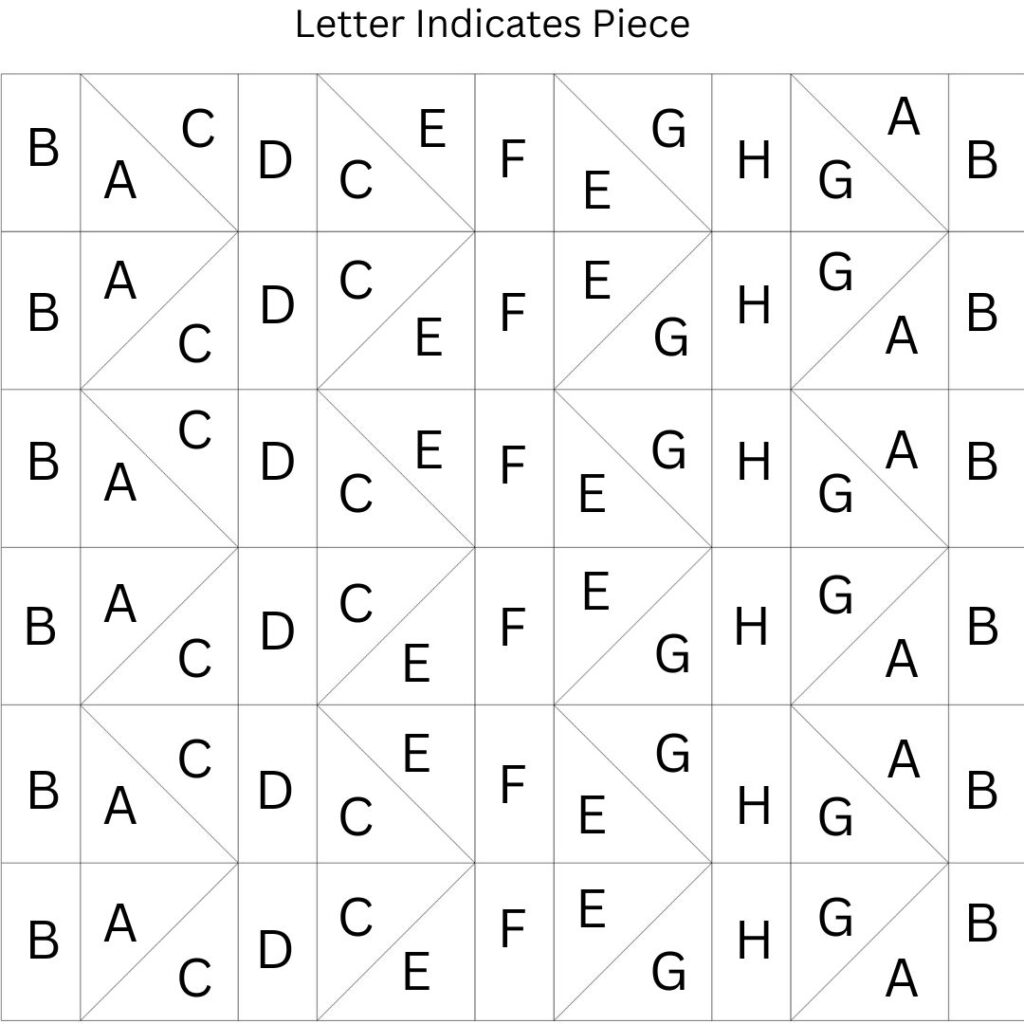
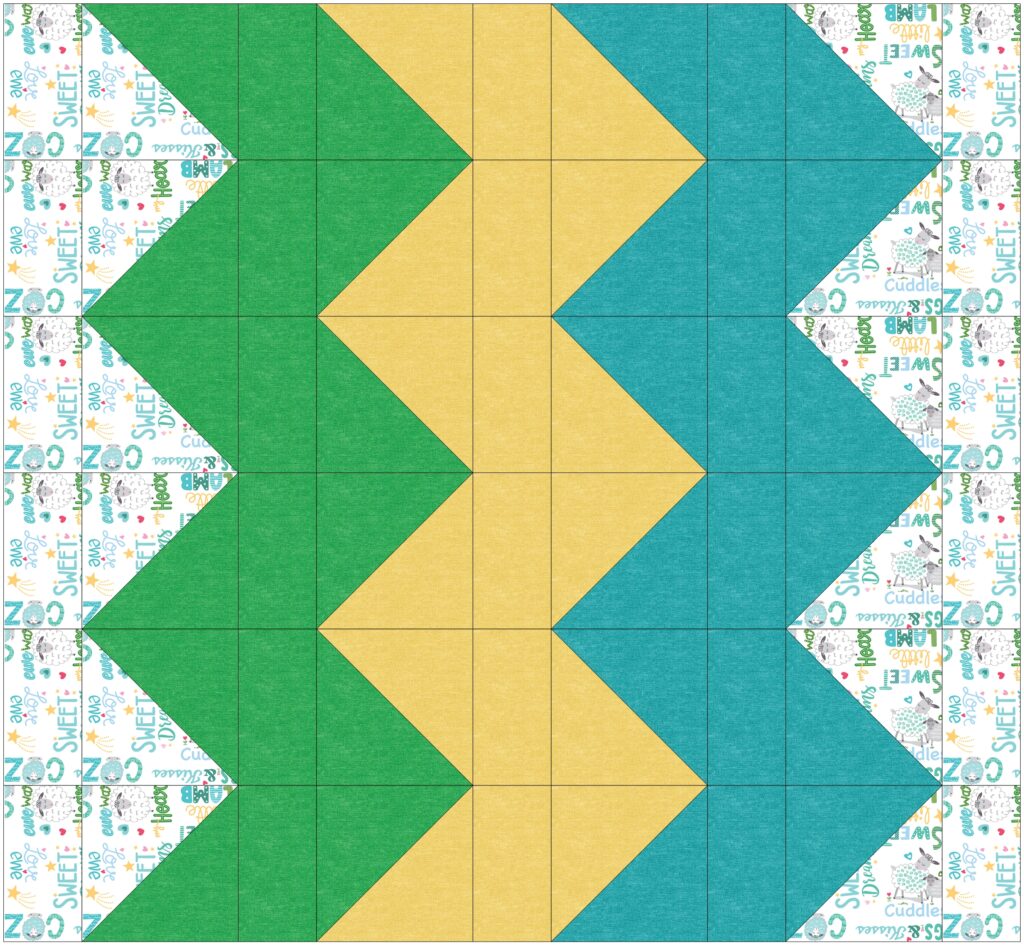
Lay out the quilt as shown in the diagram. Piece the individual rows together. Then sew the rows together.
Here you can see the quilt layout with the fabric placement.
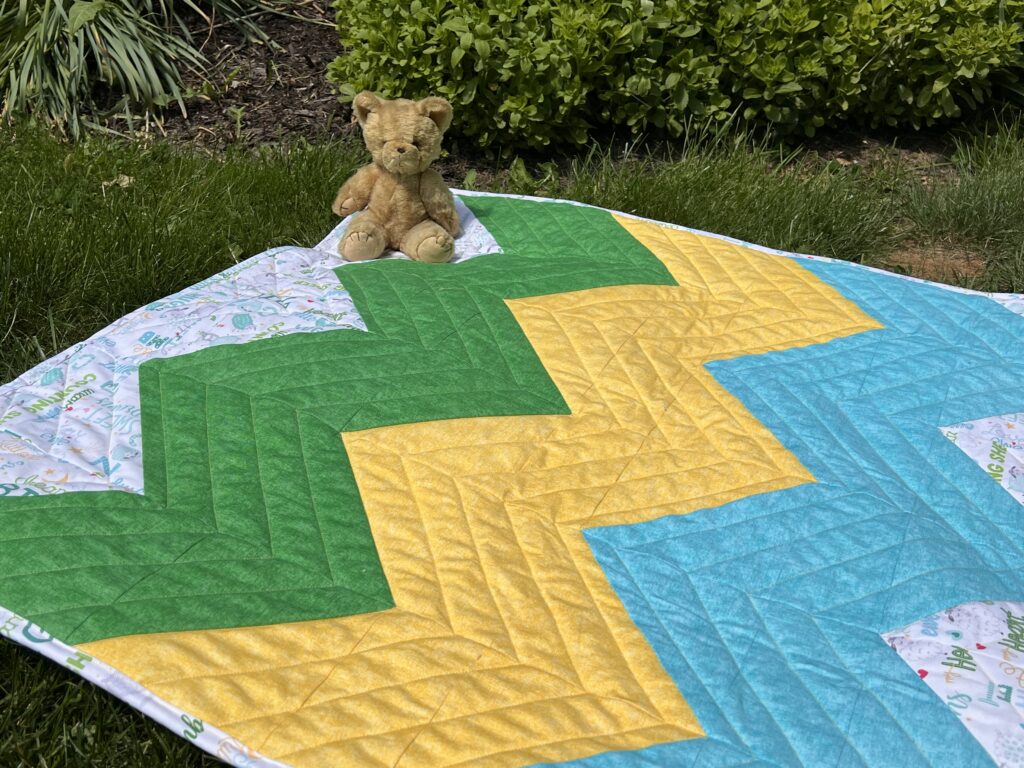
To quilt this I used my domestic machine and followed the diagonal lines formed by the half square triangles. I put the binding on by machine. My old friend Teddy seemed to like it!
I hope you give this easy baby quilt tutorial a try. This will definitely be my go-to when I need a baby quilt in a hurry!
Happy Quilting! – Claudia


2 Comments
Deb W
June 16, 2026 at 6:44 AMClever arrangement to enlarge the zigzag design. I’m going to try this using my accuquilt cutting system. The sizes of the pieces work with dies I already have.
Thank you for such a clear tutorial!
PJ
June 16, 2026 at 6:49 PMThank you for the pattern! I am definitely trying this one.