
Six Pointed Lone Star Quilt
Four times a year Island Batik ambassadors participate in a blog hop to show off their gorgeous new fabric lines. We are assigned one of the lines and asked to make a quilt of a certain style with the fabric. This time our challenge was to make a lone star quilt. Gulp! I’ve only ever made one before and it was before I even knew how to use a sewing machine. Believe me, the results were not the greatest! This time around I was determined to succeed and ended up making a six pointed lone star quilt. Here’s a bit about my process.
Disclosure: Items used in this post were generously provided by Island Batik, Accuquilt, Aurifil Thread, Schmetz Needles and Prairie Spirit Alpacas

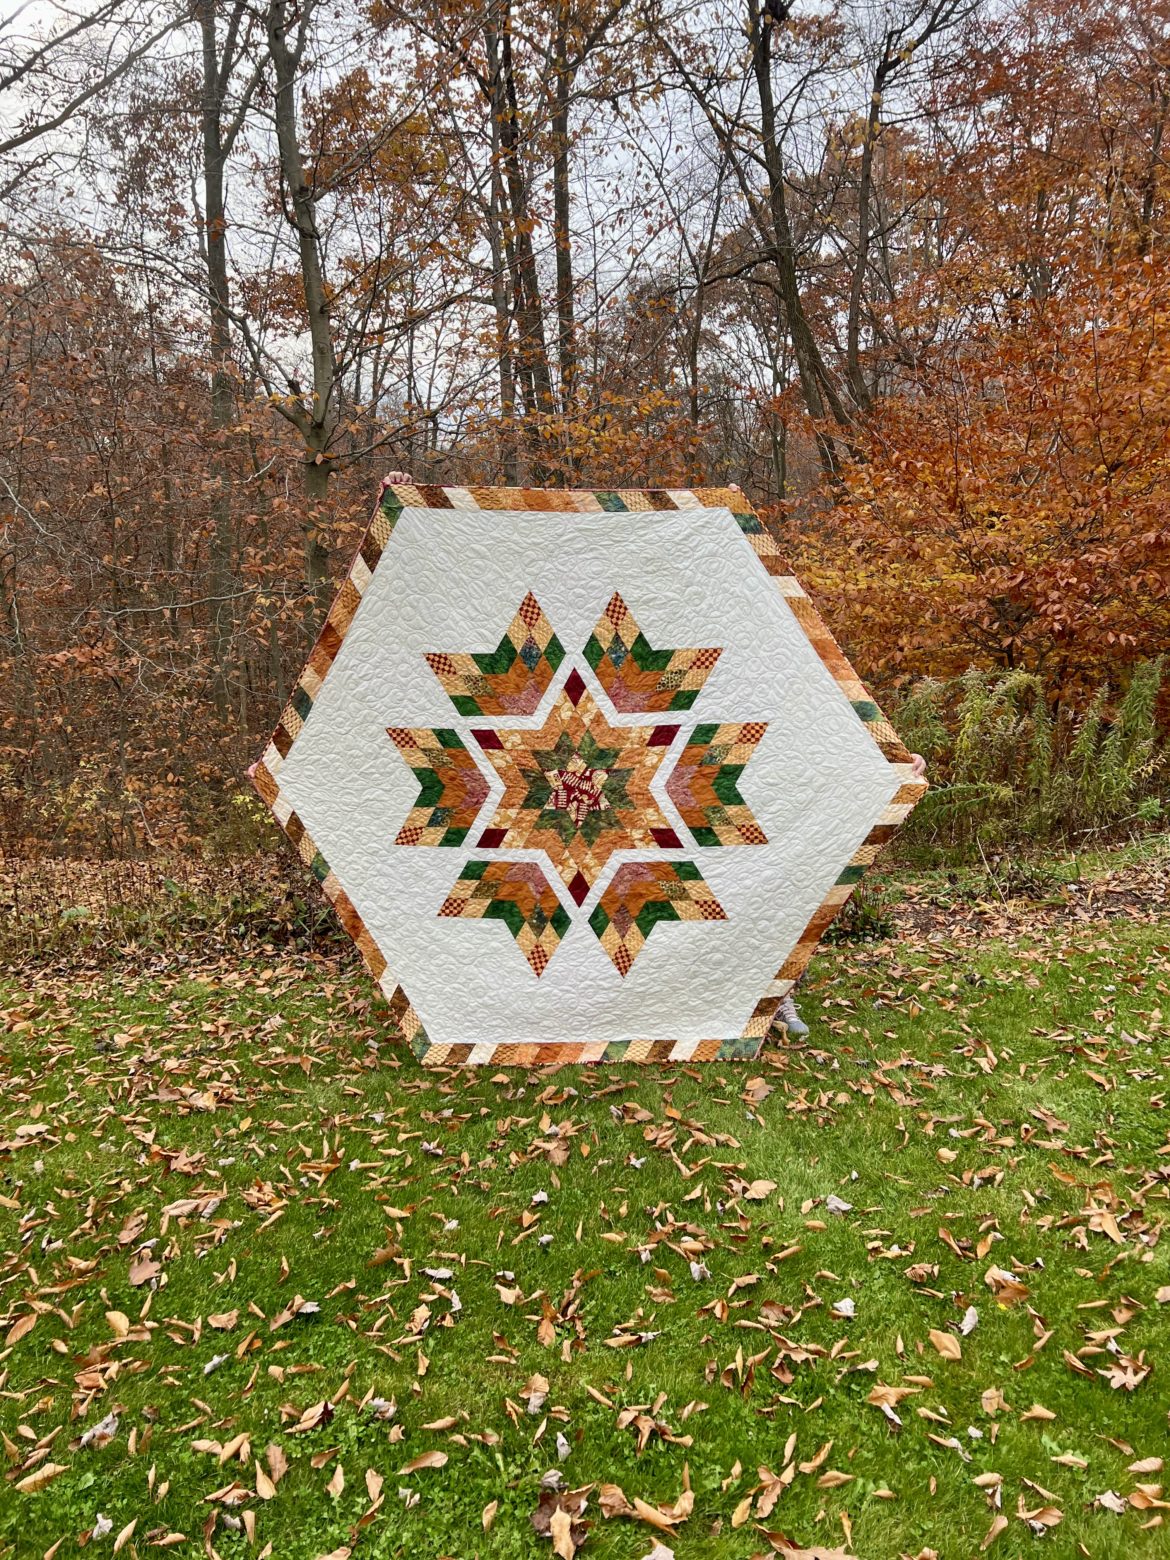
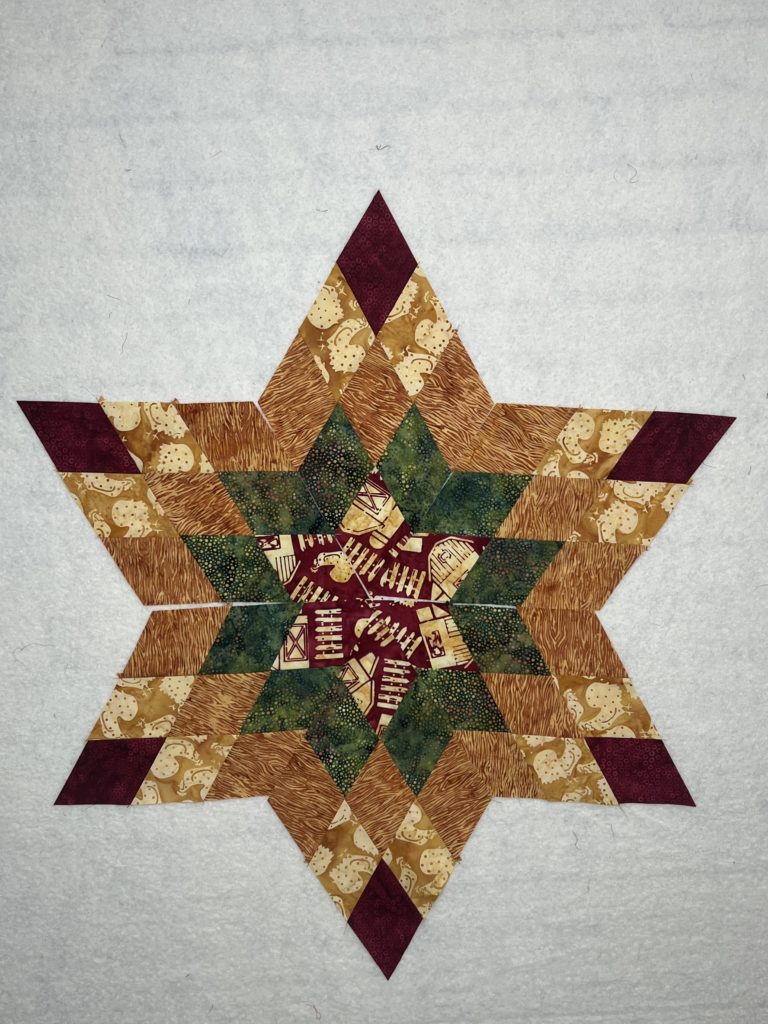
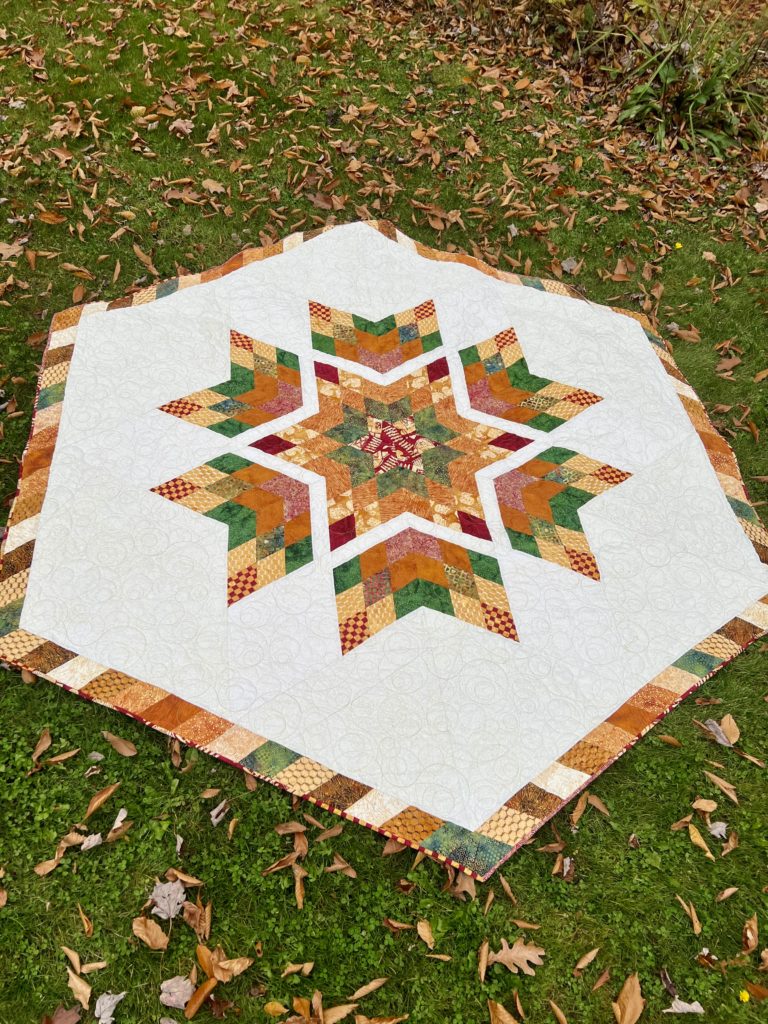
My Six Pointed Lone Star Quilt
Here is my finished quilt. I absolutely love the way it turned out but what a journey it was to get here. At the longest point across it measures about 110″ and at the shortest about 90″. I started out thinking I was going to make a double or queen size quilt, but, as you can see, that is not what happened.
When I make a quilt, I like to use my own design. Often, I write a pattern as I am making the quilt. I was going to do that with this quilt, but things did not go quite as planned. For one thing, I was hoping to making an eight pointed lone star but I ended up with 6.
The Fabric
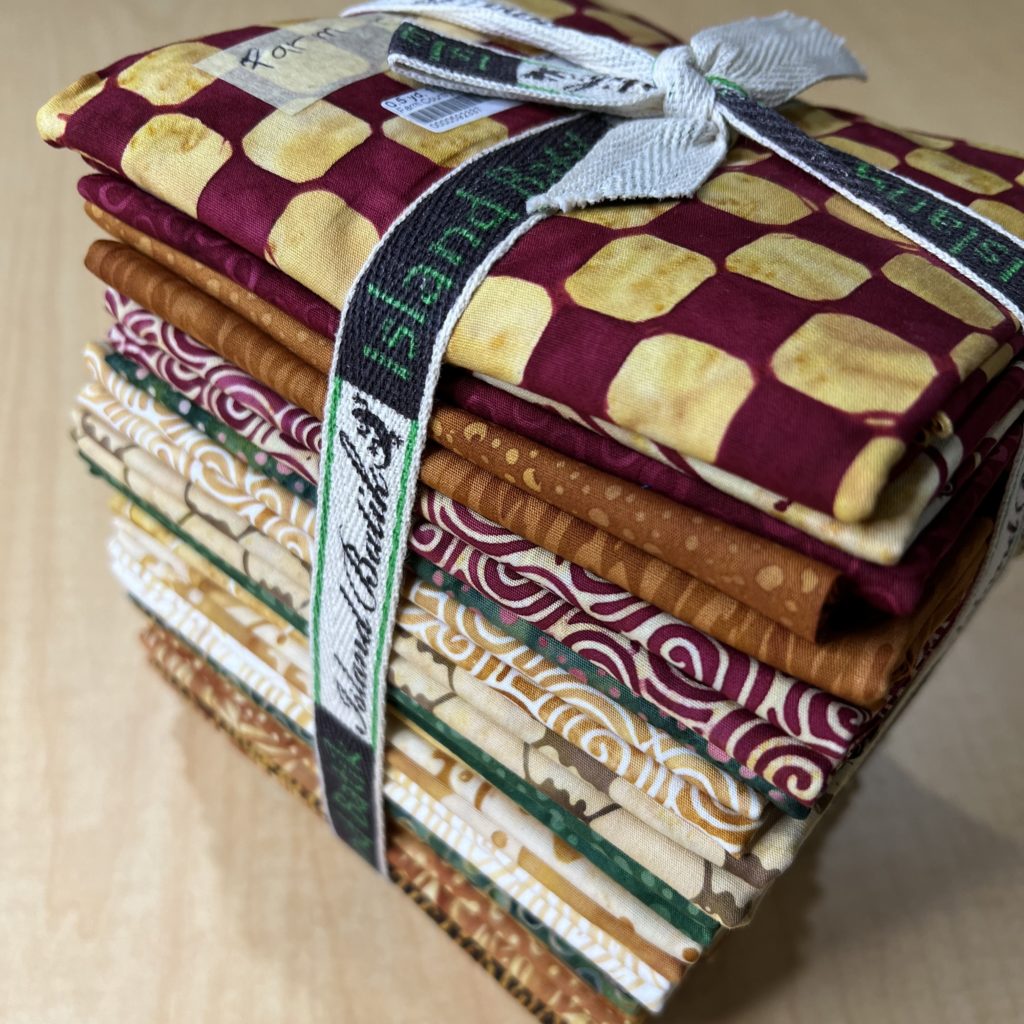
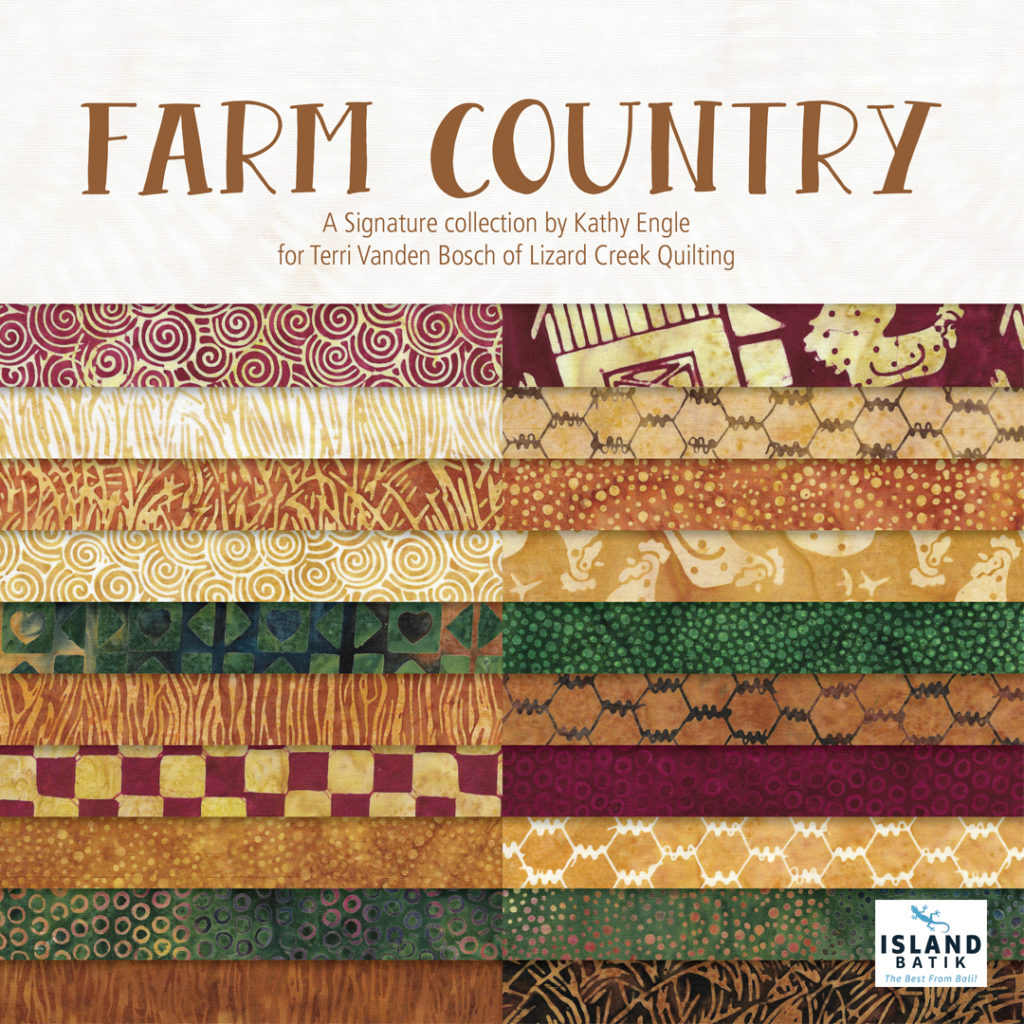
The star of most quilts is the fabric. I received the new Island Batik line called Farm Country. It was designed by Kathy Engle for Terri Vanden Bosch of Lizard Creek Quilting.
Look at all of those gorgeous earth tones! Before I became an ambassador for Island Batik I did not use a lot of golds in my work but I have completely fallen in love with their golds. They are rich, saturated and warm.
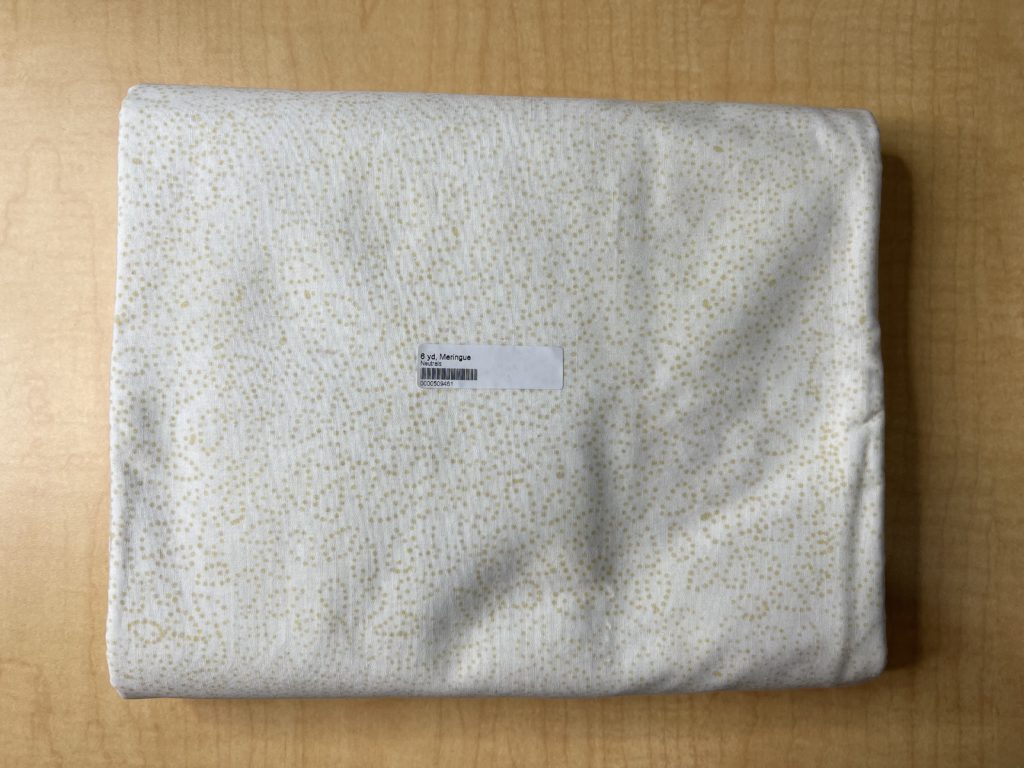
For the cream colored background I used their Meringue fabric from the Foundations – Neutrals line. It has a touch of gold in it which went perfectly with the fabrics in the line.
How I Cut the Pieces
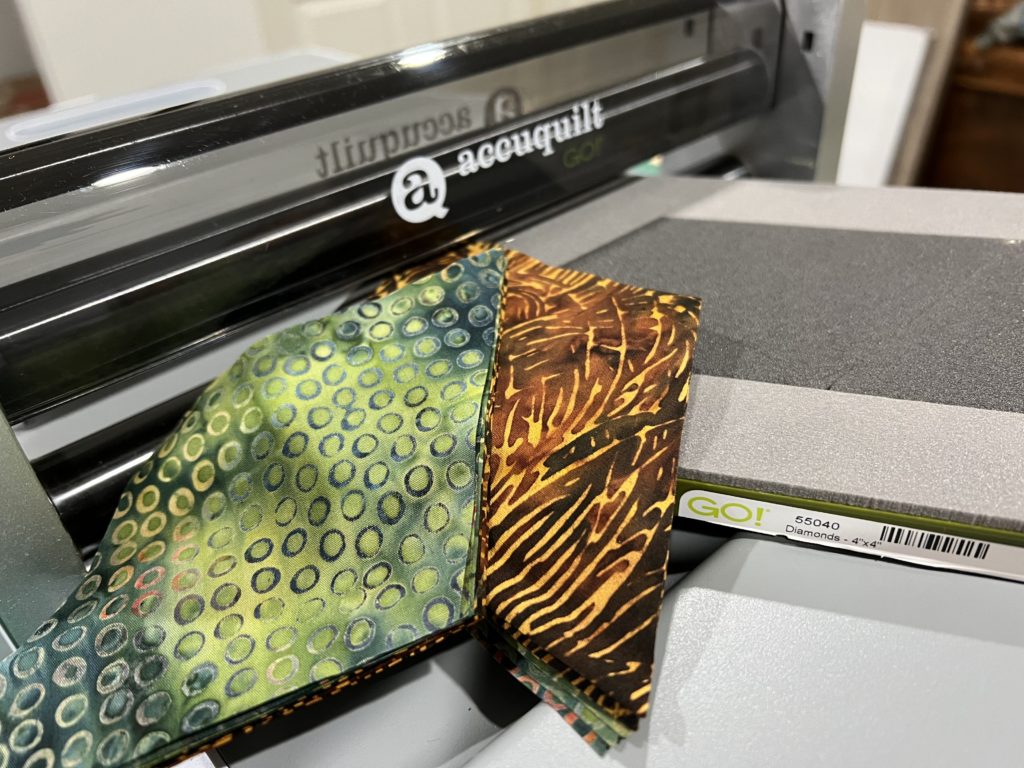
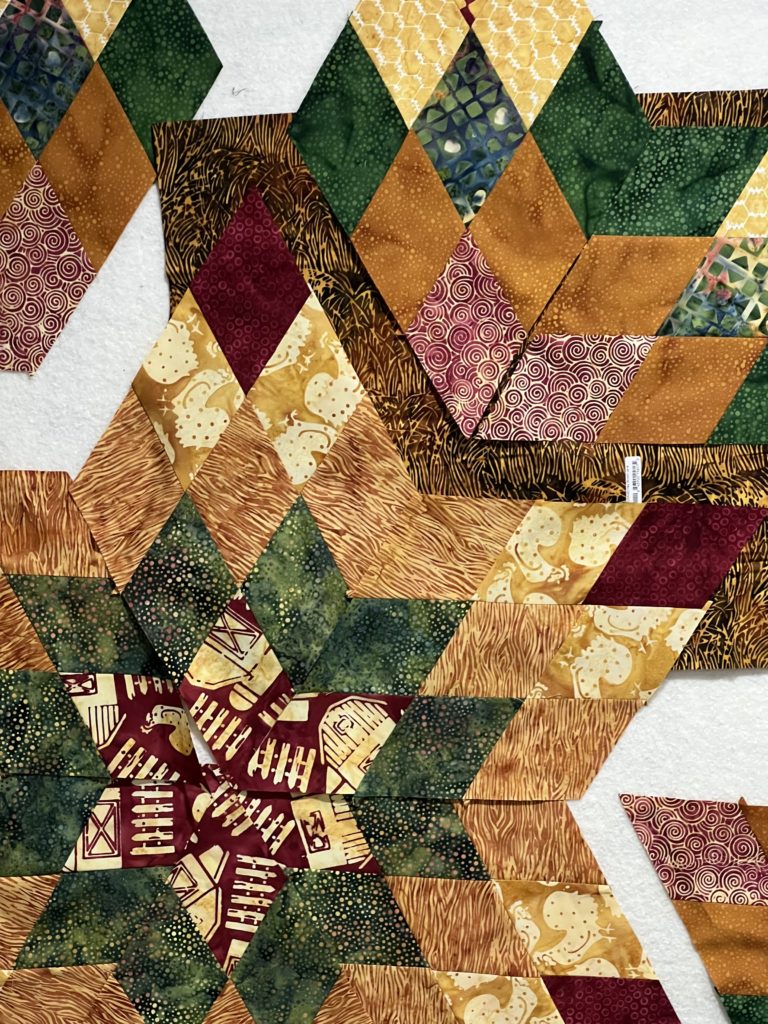
To cut all of my diamonds I used my Accuquilt Go! and their 4″ x 4″ diamond die. It worked out perfectly for a six pointed star although I was originally hoping for those eight points. Honestly I thought that all diamonds ended up with an eight-pointed star. I did a test using some other fabrics and liked the look of 6 points so that is the route I decided to take.
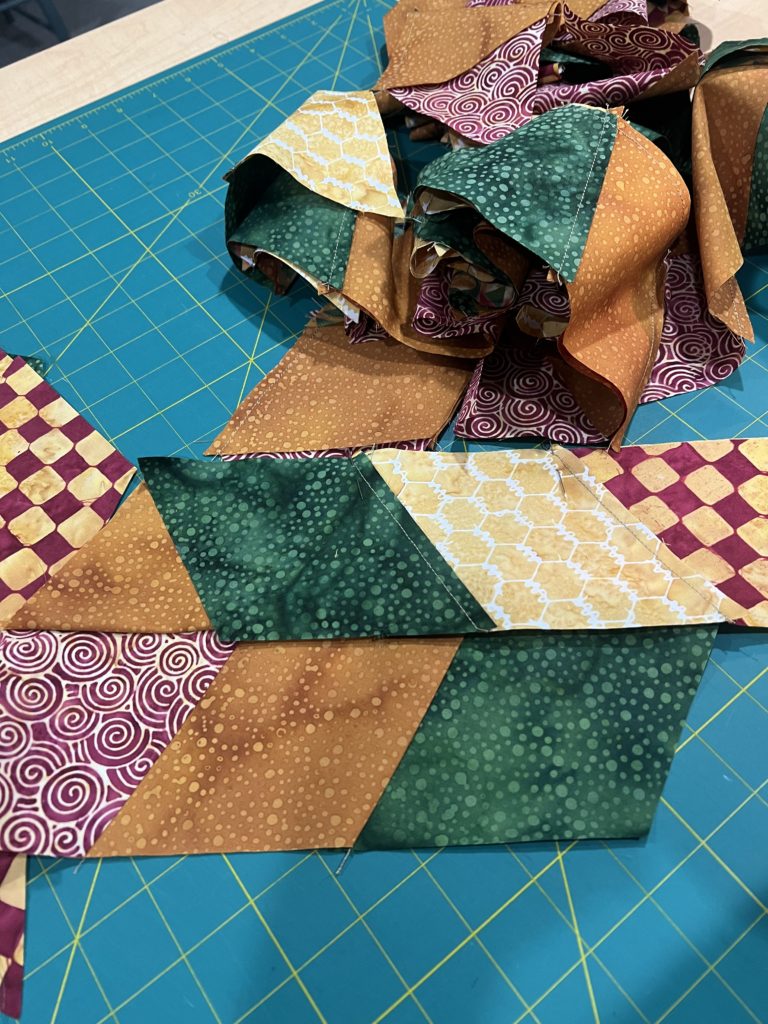

The diamonds were cut quickly and easily and made fast work of the piecing. I laid out the sections and started sewing.
I used ten fabrics for the center star and used the remaining ten for the outer border. That border was make using the same diamond shapes as the center.
Piecing the Quilt Top
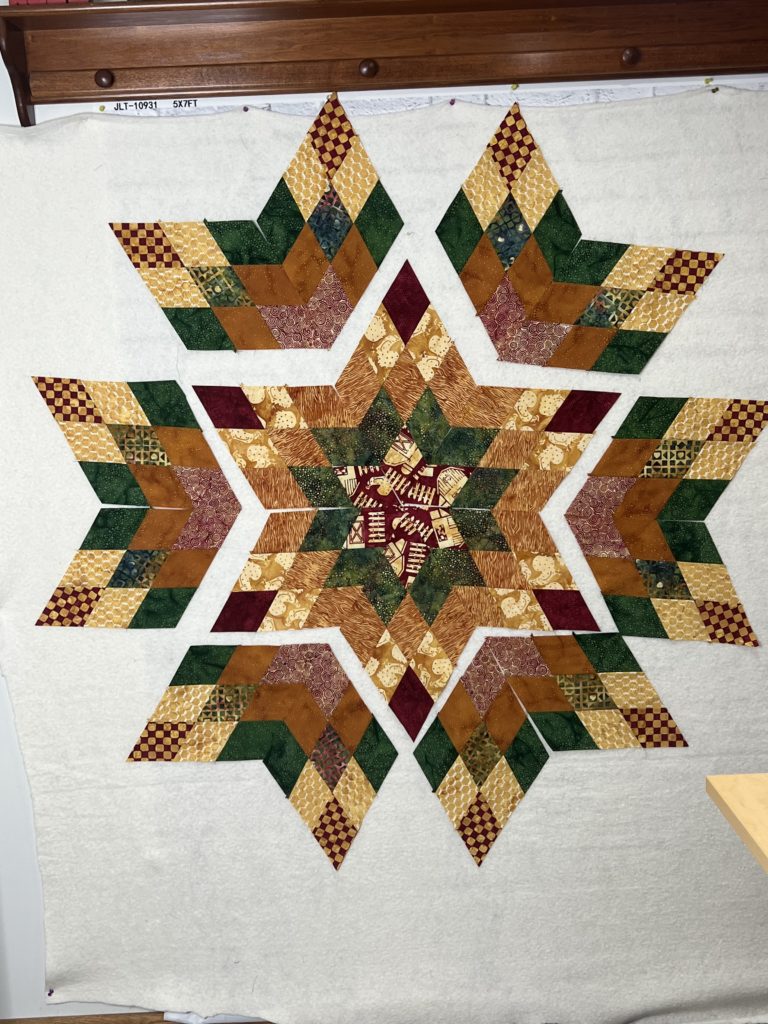
After all of the diamonds were cut it was time to piece. I started piecing and piecing and piecing and the quilt top grew and grew and grew.
- Laying out the center star sections made up of five fabrics.
- Adding the second sections of the outer star.
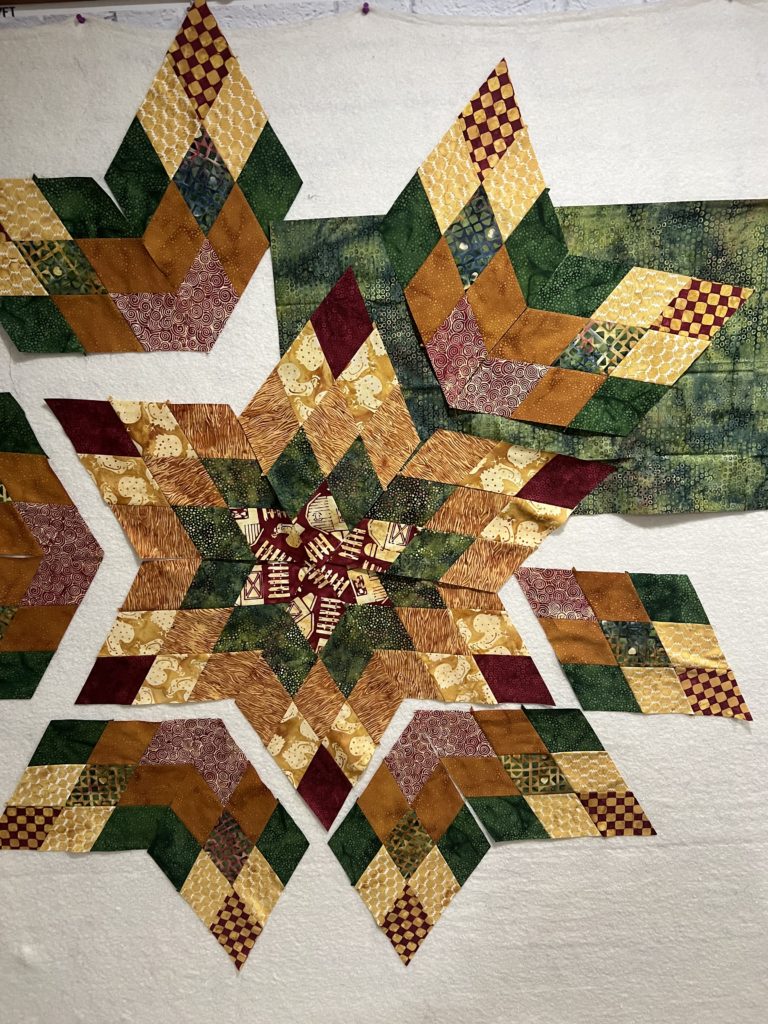
Next I auditioned various background. These two were a bit dark for what I was looking to do.
I chose a light off-white background with a small pattern in gold. Here’s where the saga began. I had some of the fabric left over from a prior project and started piecing. It ended up not being enough so I ordered more yardage. Because of how I was piecing and laying it out it STILL was not enough. I ended up piecing lots of leftover background fabrics together to finish off the sections.
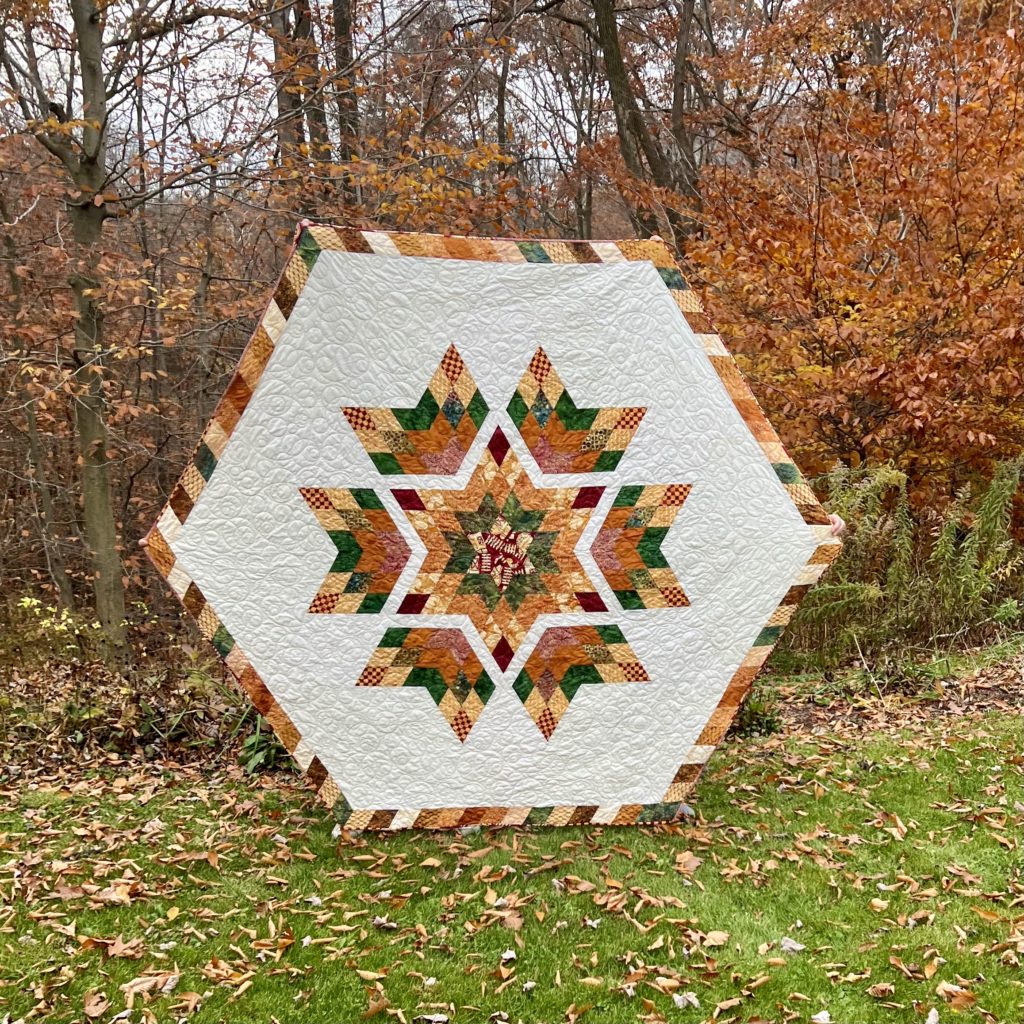
Look closely at the photo below and on the right and you will see all the pieces in the cream background.
I had planned to make it square but ran out of fabric and did not want to order even more. That is how I ended up with a hexagonal quilt.
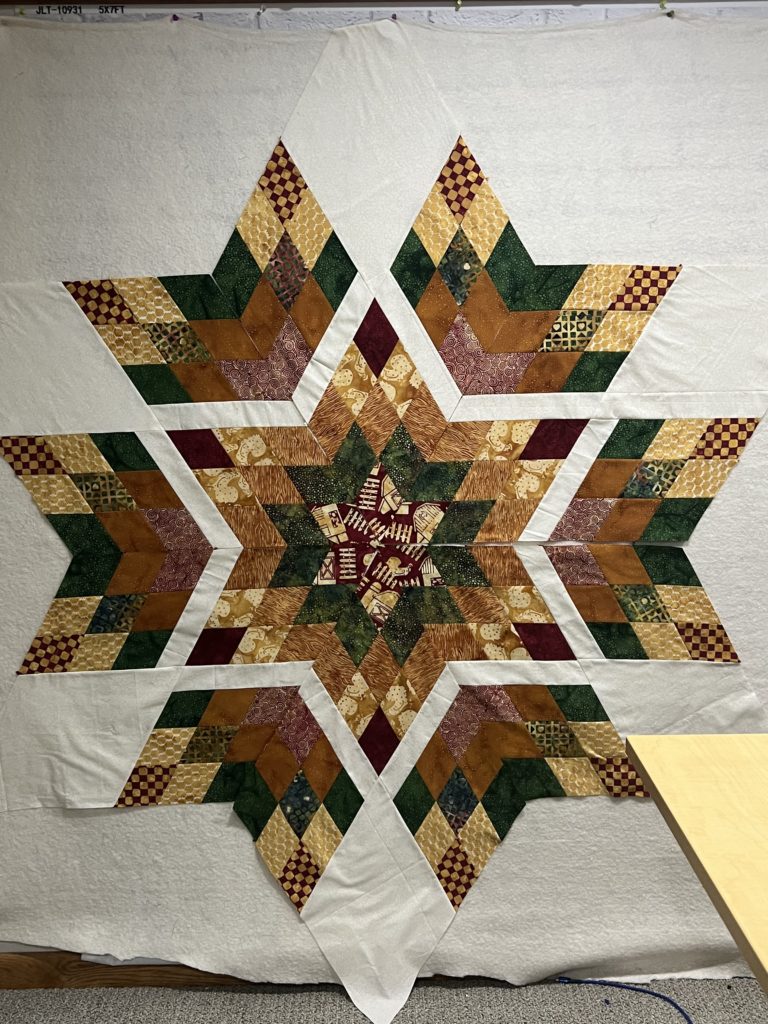
Look closely at the photo on the right and you can see all of the piecing I had to do to fill out those corners.
Quilt Specifics
To piece my quilt top I used Aurifil thread. In my machine I used Schmetz Microtex needles and to press the star sections I used my wool pressing mat from Prairie Spirit Alpacas.
This quilt is a hexagon shape and is approximately a king size so there was no way I could quilt that on my machine. It was beautifully quilted by longarmer Melinda Keppler of ScottieBelle Designs. She did a great job on an odd shaped quilt.
It took two of us to hold up the quilt for pictures!

14 Comments
Joyce Carter
December 14, 2022 at 7:33 AMClaudia, your quilt is absolutely gorgeous and the design is so amazing. Coming up with the shape and design was a work of art. You did an awesome job! I LOVE it!
createwithclaudia_7j76hs
December 15, 2022 at 7:08 AMThank you so much Joyce. I really appreciate that!
Jennifer Thomas
December 14, 2022 at 8:11 AMIt is beautiful, Claudia! What a job, piecing all of that background together to finish your quilt! Have a fabulous day!
createwithclaudia_7j76hs
December 15, 2022 at 7:07 AMThank you Jennifer. I appreciate that. Have a great day!
Εvi Tsiapari
December 16, 2022 at 3:58 PMThank you!!!!
Nice fabric ….
Brenda @ Songbird Designs
December 14, 2022 at 10:54 AMLOVE, LOVE, LOVE!! Amazing design and the photo setting really makes it sh ine!!
createwithclaudia_7j76hs
December 15, 2022 at 7:07 AMThanks Brenda! It was a perfect day to take the picture and luckily I had enough helpers!
Lori Smanski
December 14, 2022 at 4:02 PMwow but your quilt is gorgeous. I love these fabrics. they must have made working with them so much fun. thanks for sharing and inspiring. I love the look of the sides
createwithclaudia_7j76hs
December 15, 2022 at 7:06 AMThank you so much. I appreciate that. Those fabrics really are lovely.
Susan
December 16, 2022 at 9:24 AMBeautiful quilt. Love the colors. Too bad I don’t do social media.
Terri
December 17, 2022 at 12:25 PMI love this quilt. Where can I get the pattern for it?
createwithclaudia_7j76hs
December 19, 2022 at 7:23 AMThanks so much. Unfortunately I did not write a pattern for this one.
Kathryn Travers
December 17, 2022 at 1:59 PMYou created such a beautiful fall inspired quilt. Your tutorial process was excellent.
createwithclaudia_7j76hs
December 19, 2022 at 7:23 AMThank you so much.