
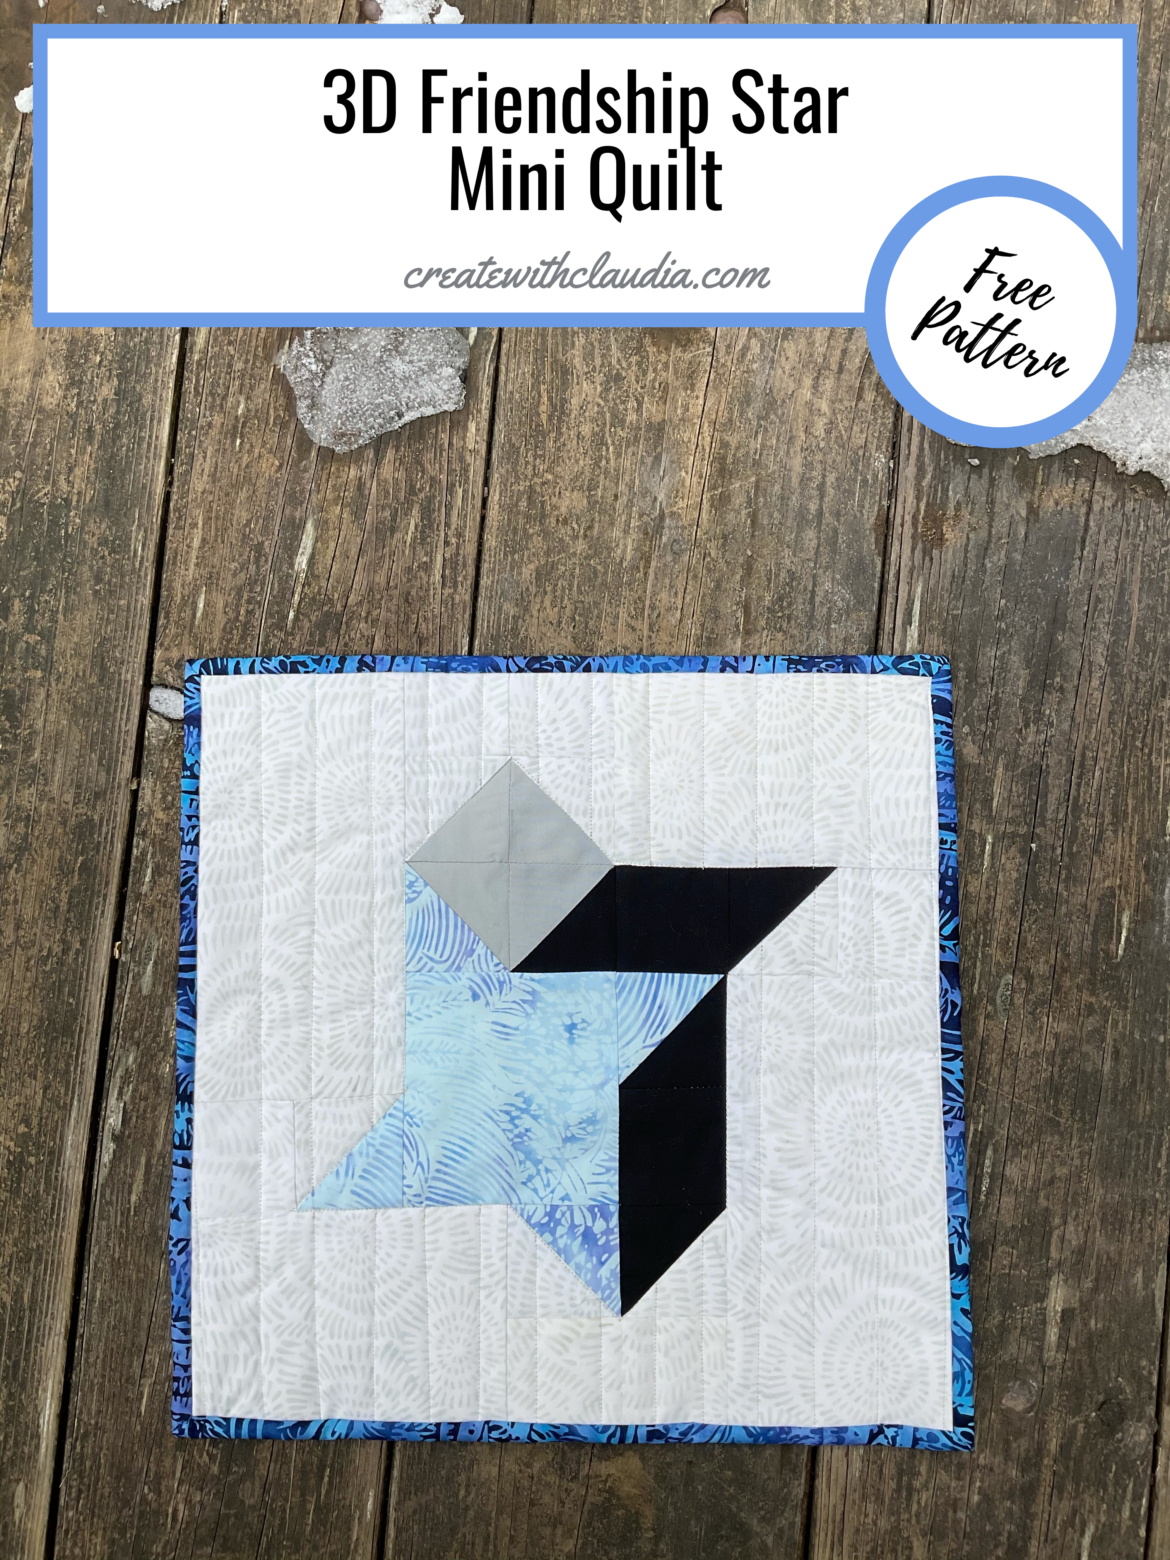
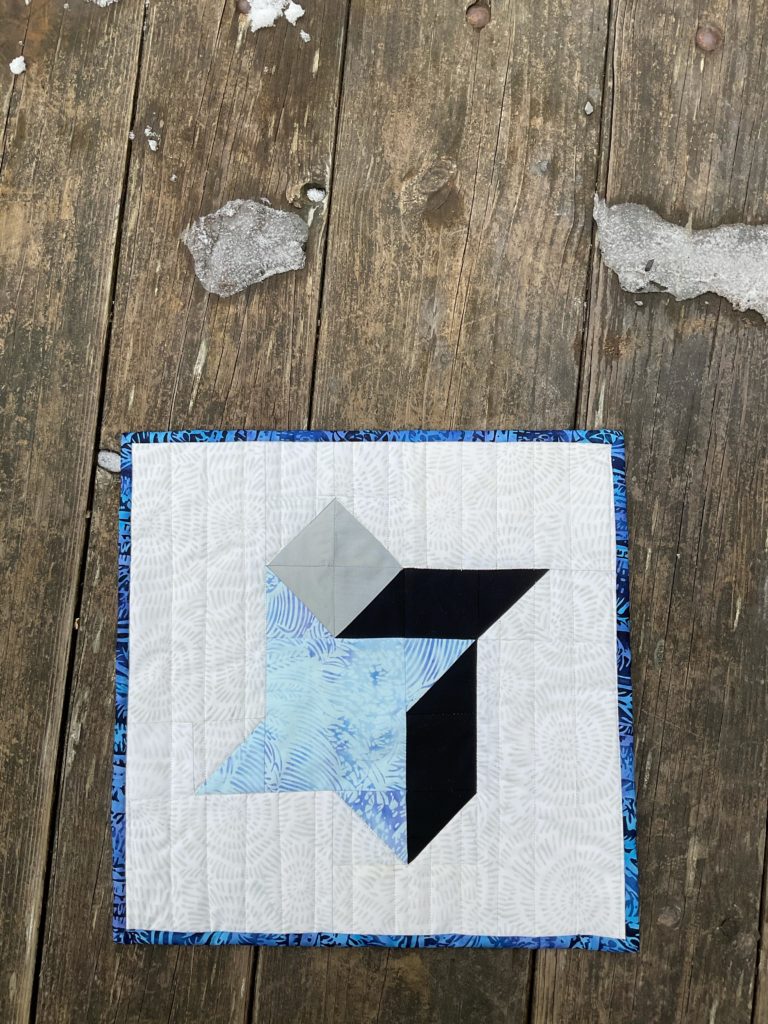
3D Friendship Star Mini Quilt Pattern
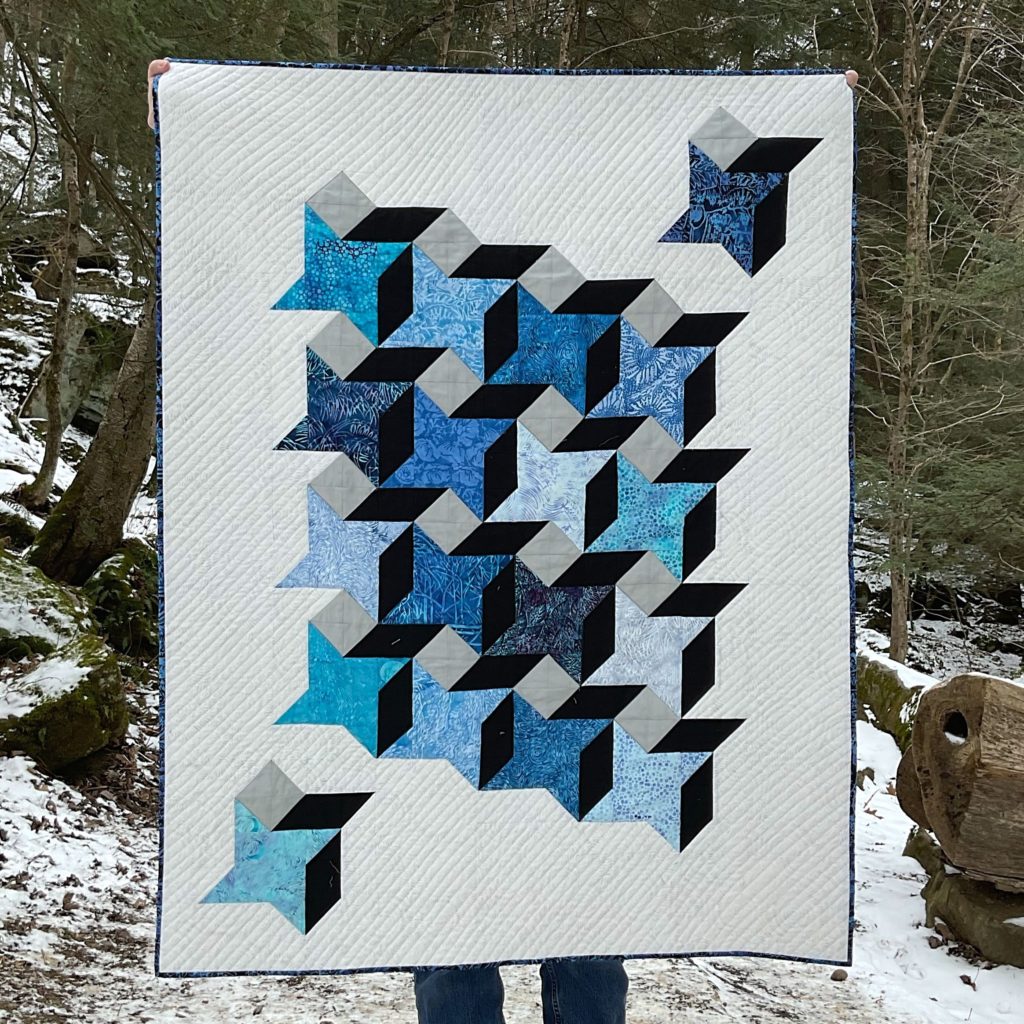
I recently designed a quilt for the February 2021 Island Batik Ambassador program. I love the piece and it will be going to a charity that will be auctioning it off to raise funds. The quilt, which I call “Pleiades”, is a sentimental one for me as the original one was made for my father many years ago. The thing I love most about this design is that it is three dimensional. Unfortunately I haven’t written the pattern for the full quilt yet, but I really wanted to bring the design into something easy to make. That is how I came up with this 3D Friendship Star mini quilt pattern.
It’s a perfect little mini that comes together in no time. In addition, because of the 4″ center, it’s an ideal block to show off your fussy cutting, or a piece of your favorite fabric from your stash.
You don’t need a lot of fabric so it’s a great way to work of some of your stash.
Grab a cup of coffee and join me in making this new twist on an old favorite.
Disclosure: The products in this post were generously provided by Island Batik, Accuquilt, Aurifil, Schmetz Needles, and Hobbs Batting.
My Inspiration for this Mini Quilt Pattern
The Video Tutorial
I always like to make a video tutorial of my small projects and you can see the one for this 3D Friendship Star Mini Quilt Pattern here.
Quilt Specifications
- Quilt measures approximately 14 1/2″ square
- 1/4″ seam allowance is used
- Read all instructions carefully before beginning
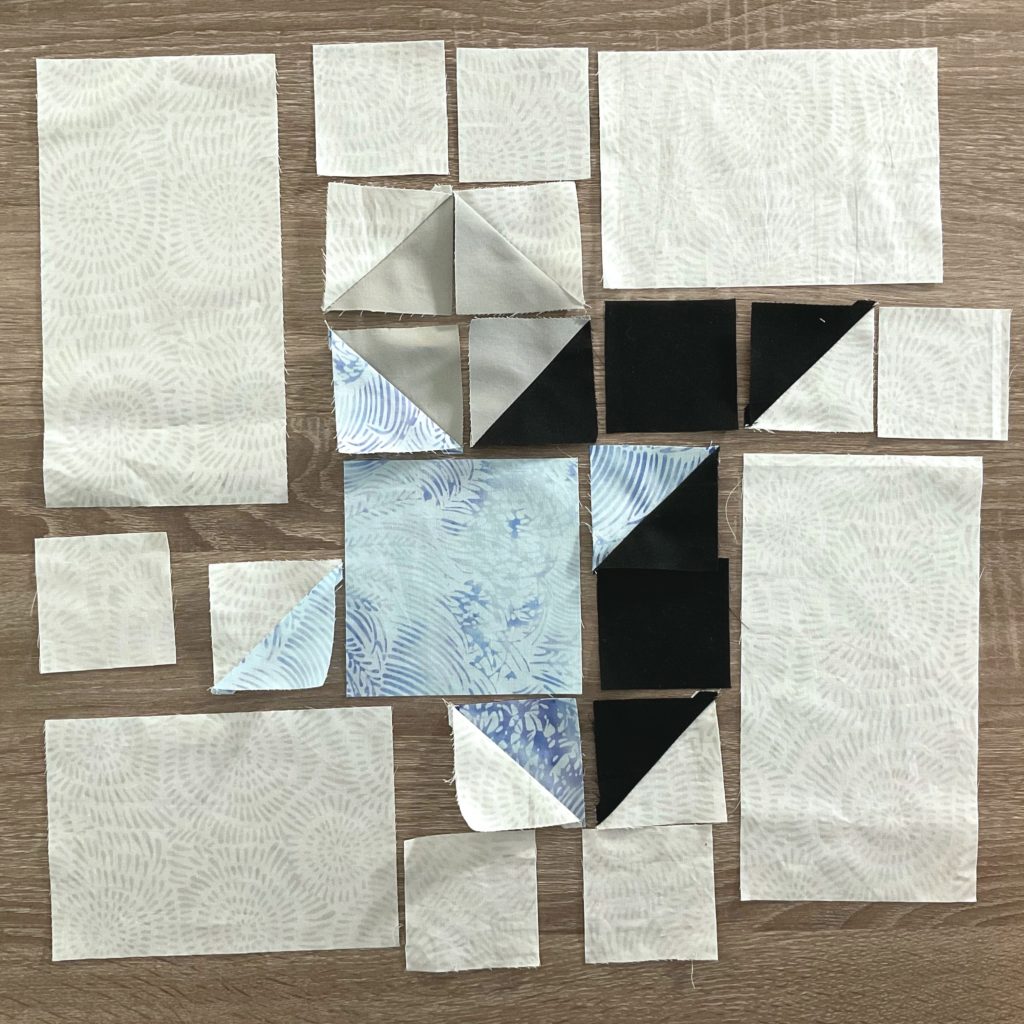
Cutting for One Block
You can find many of the items that I used to make this project in my Amazon Store.
As an Amazon Associate I earn from qualifying purchases.
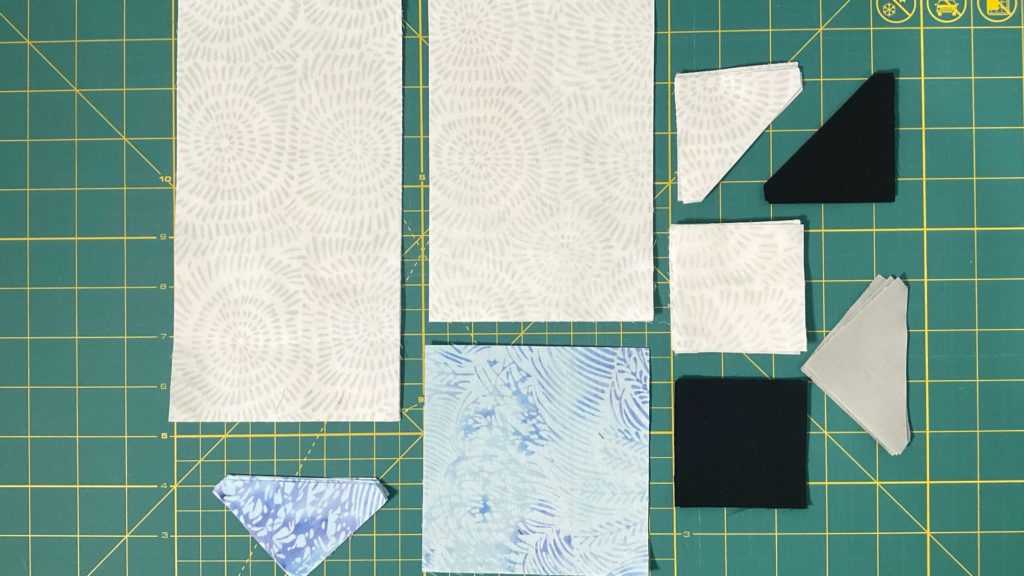
For the Background:
- Three 2 7/8″ squares – Cut in half on the diagonal
- Six 2 1/2″ squares
- Two rectangles cut 4 1/2″ x 6 1/2″
- Two rectangles cut 4 1/2″ x 8 1/2″
Gray and Black for the 3D effect:
- Gray – Two 2 7/8″ squares – Cut in half on the diagonal
- Black – Two 2 7/8″ squares – Cut in half on the diagonal and two 2 1/2″ squares
Focus Fabric:
- One 4 1/2″ square
- Two 2 7/8″ squares – Cut in half on the diagonal
Backing & Binding
- One piece of fabric, 16 1/2″ square for the backing
- Binding needed is based on your method of binding. I use 2 1/2″ strips and used about a 63″ long strip.
Get the Look
If you love the look of my mini, here’s what I used.
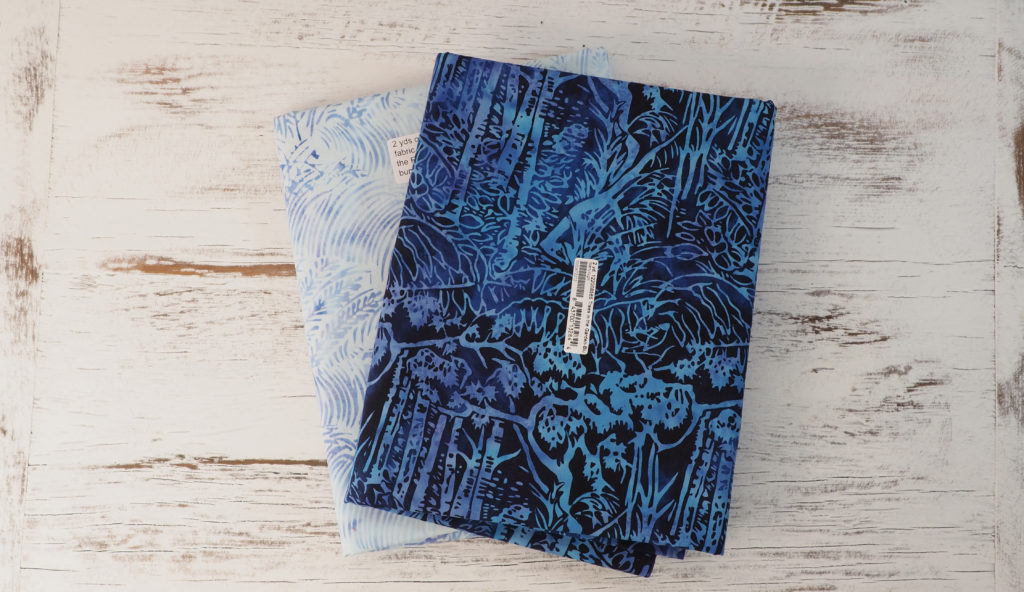
- Background and backing: “Coconut” from their neutrals collection
- Basic Black and Basic Grey: From their solids collection
- Light blue focus fabric: “Gardens of the Asylum” from the Starry Night Collection by Kathy Engle
- Binding: “Trees in the Garden – Blue” from the Starry Night Collection by Kathy Engle
All of these fabrics are in stores now.
Batting
- Hobbs premium batting
Thread
- Aurifil #6724 – Moonshine & # 5004 Gray Smoke
Tools Used
- I gave instructions for cutting the triangles from squares, however I used the AccuquiltGo! system and I got perfect half square triangles every time.
- Schmetz Needles were in my machine.
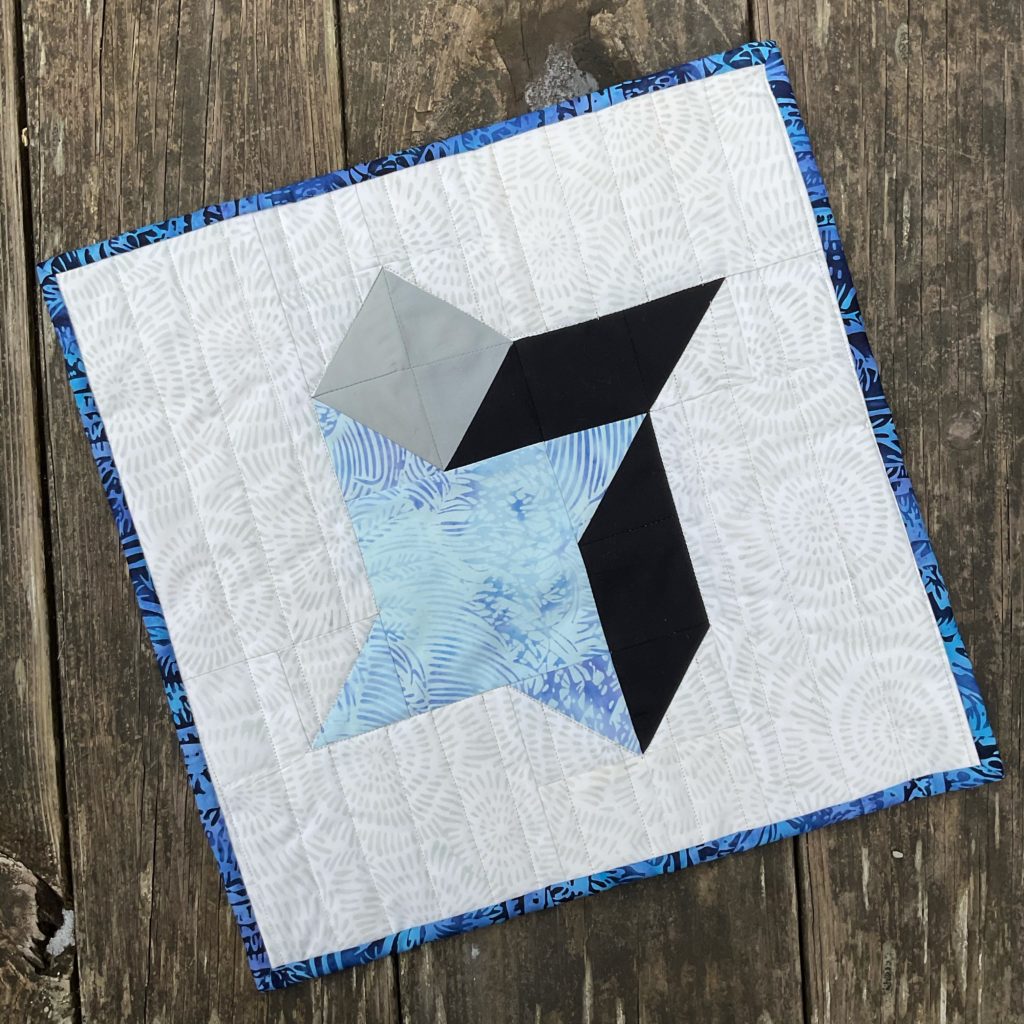
How to Make the 3D Friendship Star Mini Quilt Pattern
Important: To ensure that this block comes together easily, there is a specific order in piecing it.
Assembling the Block
First, lay out the fabric pieces as shown.
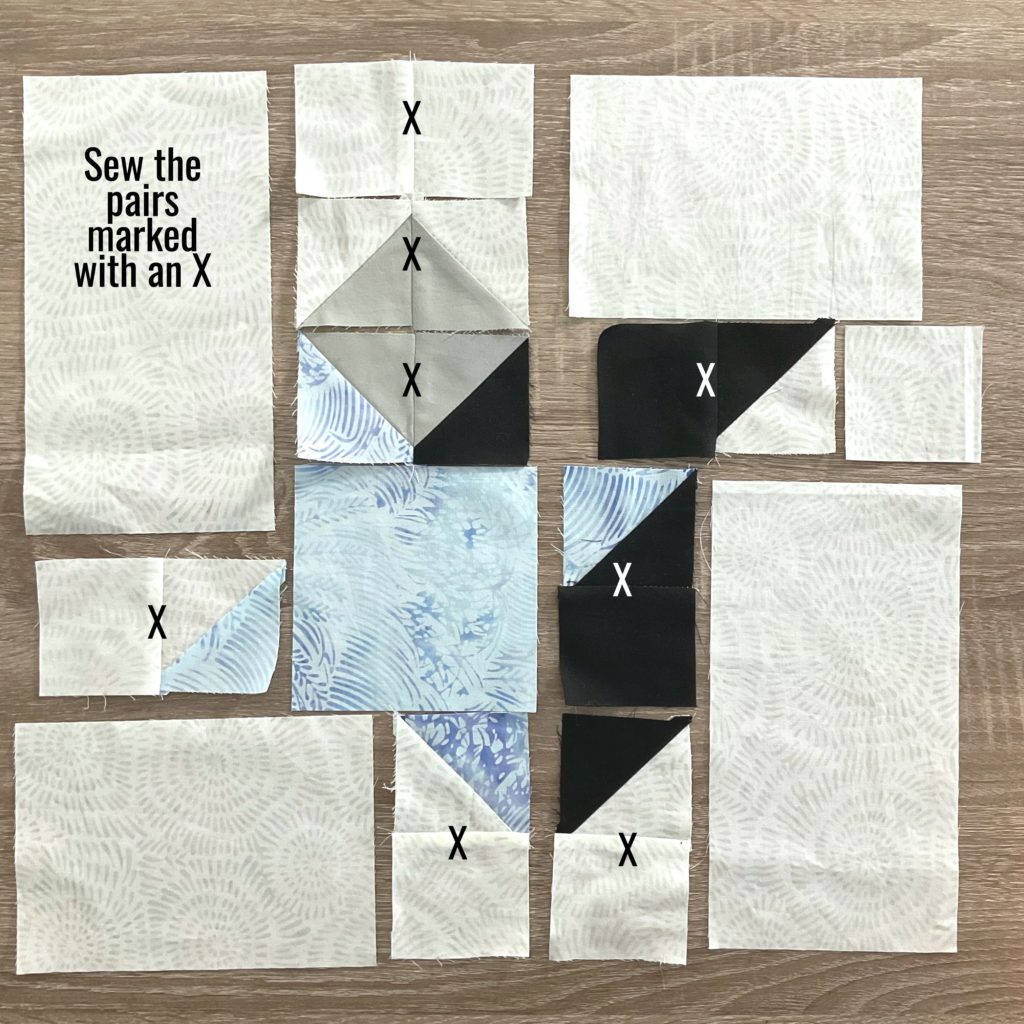
Second, sew the triangles together to make the half square triangles.
Making the Half Square Triangles
First, make the half square triangles.
Pair up the triangles. You will need the following:
- Grey and background fabric – 2 pairs
- Focus fabric and background fabric – 2 pairs
- Focus fabric and black – 1 pair
- Focus fabric and gray – 1 pair
- Black and gray fabric – 1 pair
- Black and background fabric – 2 pairs
Take one pair and line up the triangles on top of each with right sides of the fabric facing each other. Using a 1/4″ seam, sew along the long side. Press to the darker fabric. They should measure 2 1/2″ square. Repeat with the rest of the triangle pairs.
You will have 9 half square triangles.
Second, sew together the 2 1/2″ pieces as shown below.
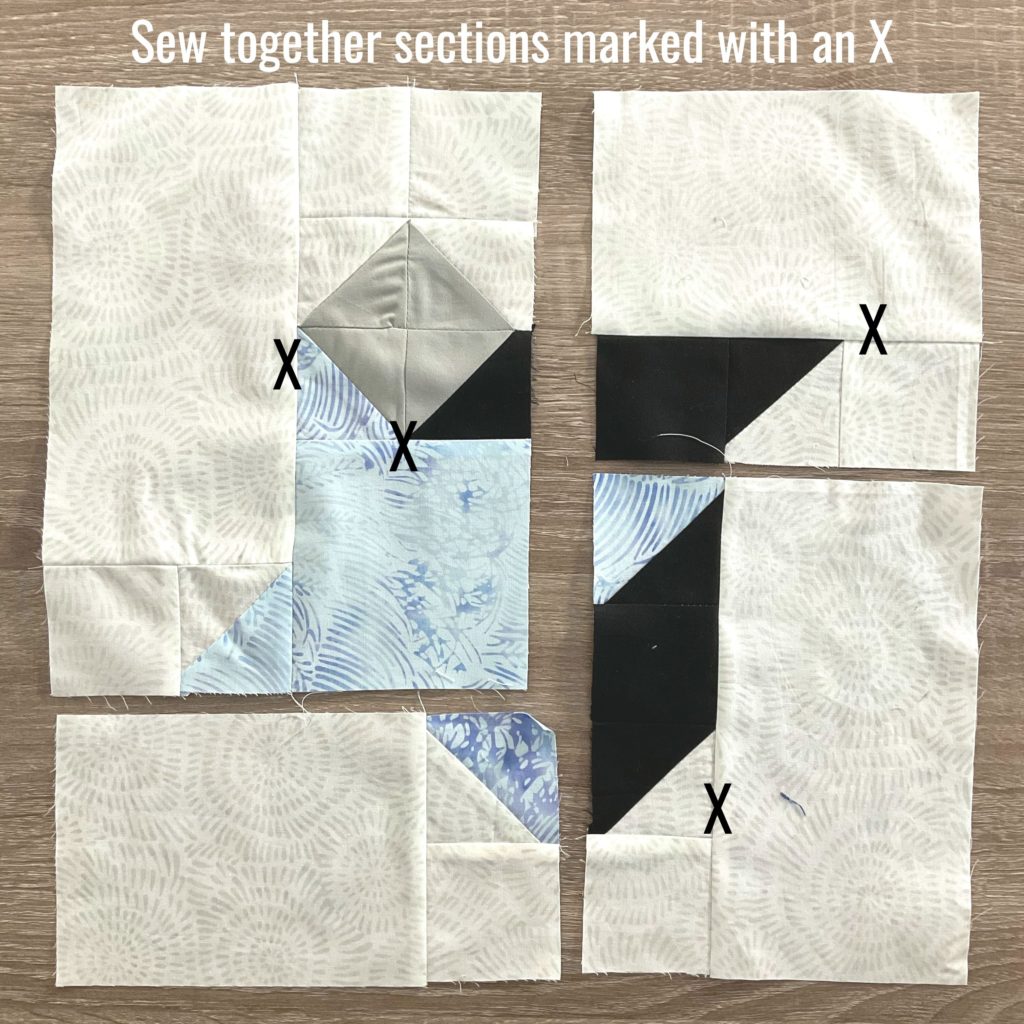
Third, keep sewing together sections as shown.
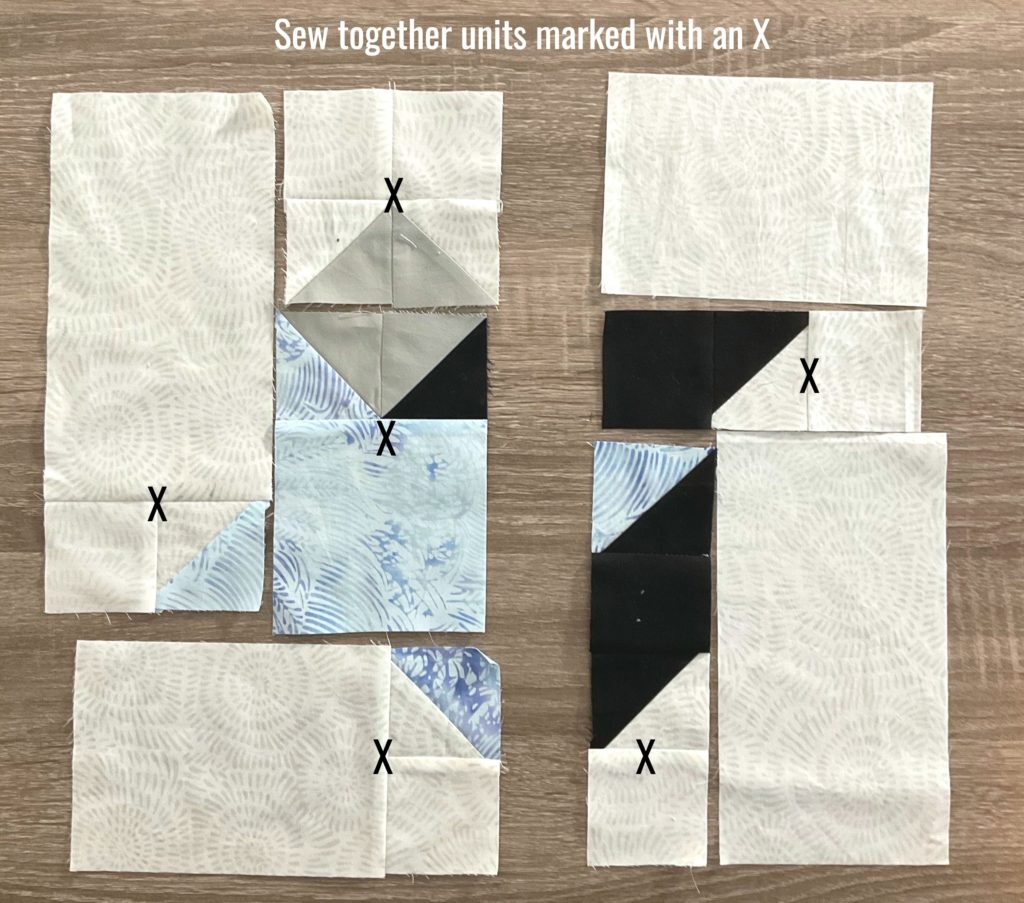
Keep on piecing….
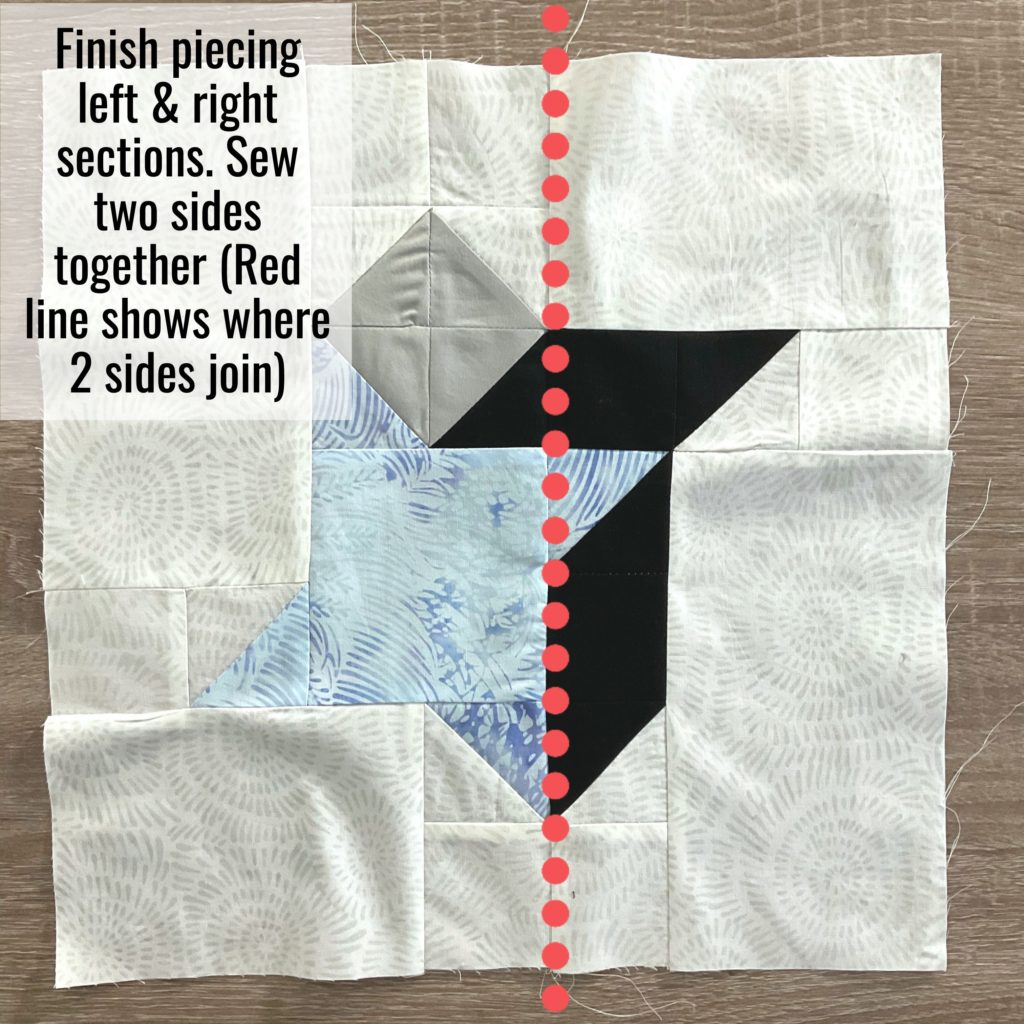
Finish Piecing
Finishing the Mini
- Lay your backing fabric on a long surface, with wrong side facing up.
- Then lay your batting on top of the backing.
- Lastly, lay your block on top with the right side facing up.
- Using your preferred method, baste the layers together.
- Quilt as desired.
- Lastly, bind using your preferred method.
Happy Quilting!
Claudia

3 Comments
Patsy
February 16, 2021 at 2:08 PMBeautiful, thank you!
createwithclaudia_7j76hs
February 16, 2021 at 2:28 PMThanks so much.
Susan
February 19, 2021 at 8:50 AMThank you for a wonderful block and tutorial.