
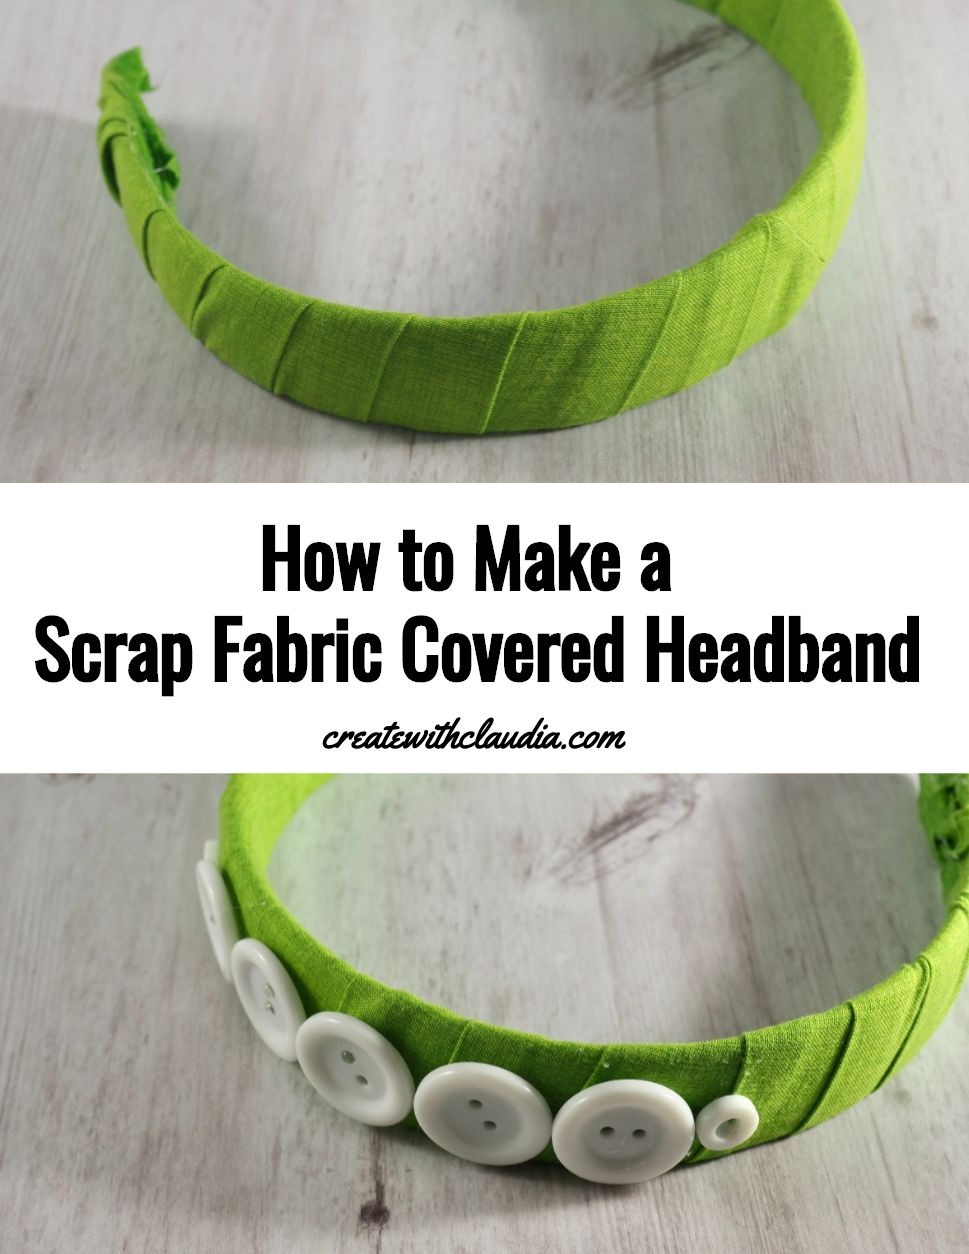
Scrap Fabric Covered Headband Tutorial
When I bind my quilts I almost always overestimate how much fabric I will need. Because of that I usually have a long strip of fabric and nothing to do with it. After binding a small wall hanging recently, I decided that I needed to do something with that strip, and I made this scrap fabric covered headband. This is one of those easy crafts that can be made in no time.
These plastic headbands are all around my house. Over the years I’ve changed my hairstyle often. When it is long, out come the headbands to keep the hair out of my face. I also have a teenage daughter. You can imagine how many of these I have laying around.
Next time I grow my hair out, I might as well pull it back with a little bit of style.
One thing to remember, while I use left over binding for this project, you don’t have to. As long as the strip is long enough, any scrap will do.
For all of my quilting friends who are reading this, I know you have plenty of scraps that you can use. Why not put some of them to use and make these pretty headbands.
Video Tutorial
For those of you who like to watch video tutorials, this scrap fabric covered headband is one of the 5 no-sew fabric projects you will find here.
Supplies You Will Need
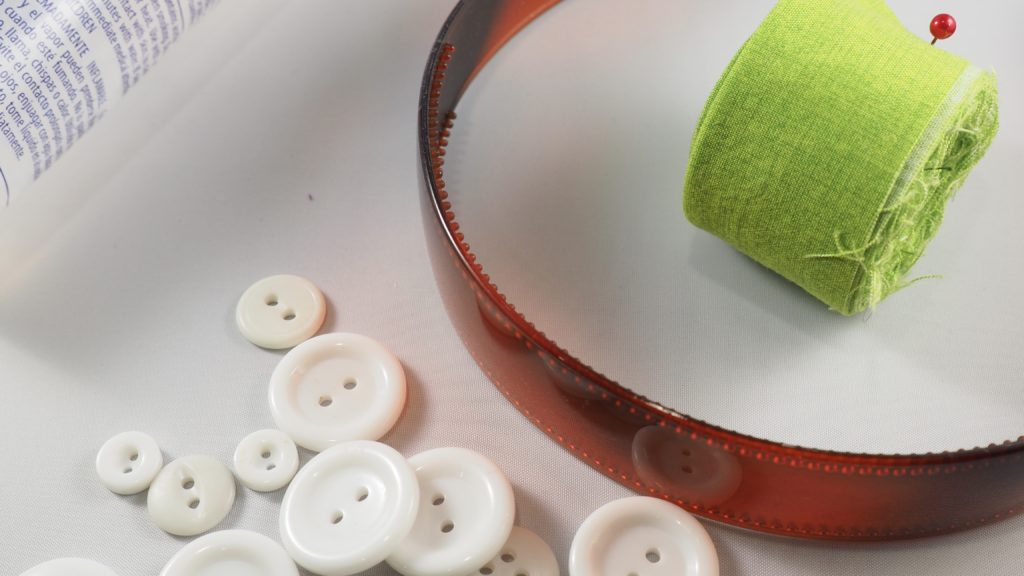
- Plastic headband
- Fabric glue
- 1 strip of fabric, 42″ long x 2 1/2″ wide
- Buttons (if desired)
- Gloves
Here Are Some Items You Can Use For This Project
You can find many of the items that I used to make this project in my Amazon Store.
As an Amazon Associate I earn from qualifying purchases.
Assemble the Scrap Fabric Covered Headband
Before starting, make sure to cover your work surface. Also, wear gloves to protect your hands and follow the manufacturer’s guidelines on the glue you are using.
Prepare the Fabric
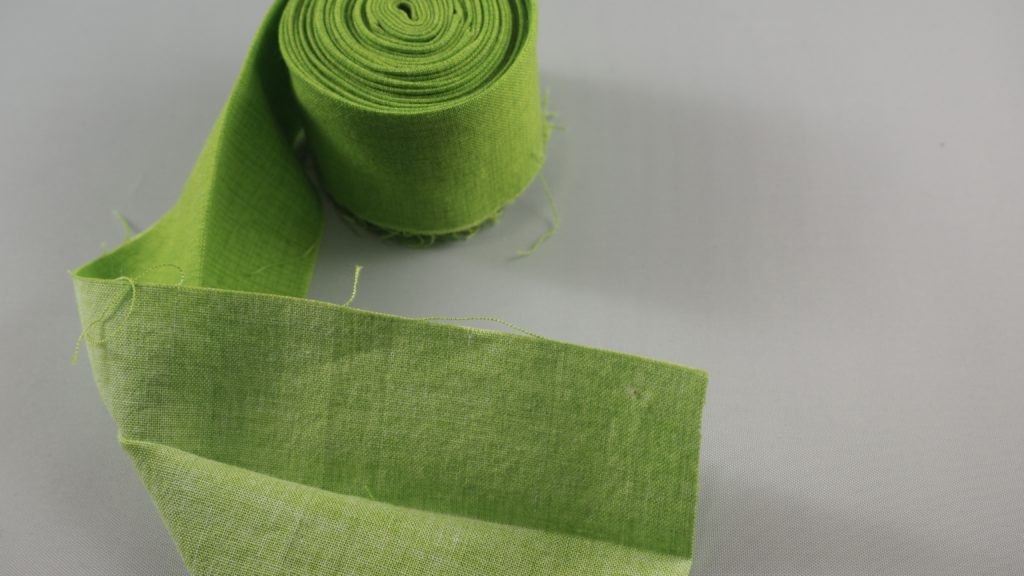
Take one strip of fabric that is approximately 42″ long by 2 1/2″ wide and fold it in half, length-wise. Press.
Note: I use left over binding, but the standard width of quilting fabric is 42″, so you can cut a strip off of a larger piece of fabric. Another option is piecing together smaller strips of 2 1/2″ wide fabric to make one long strip.
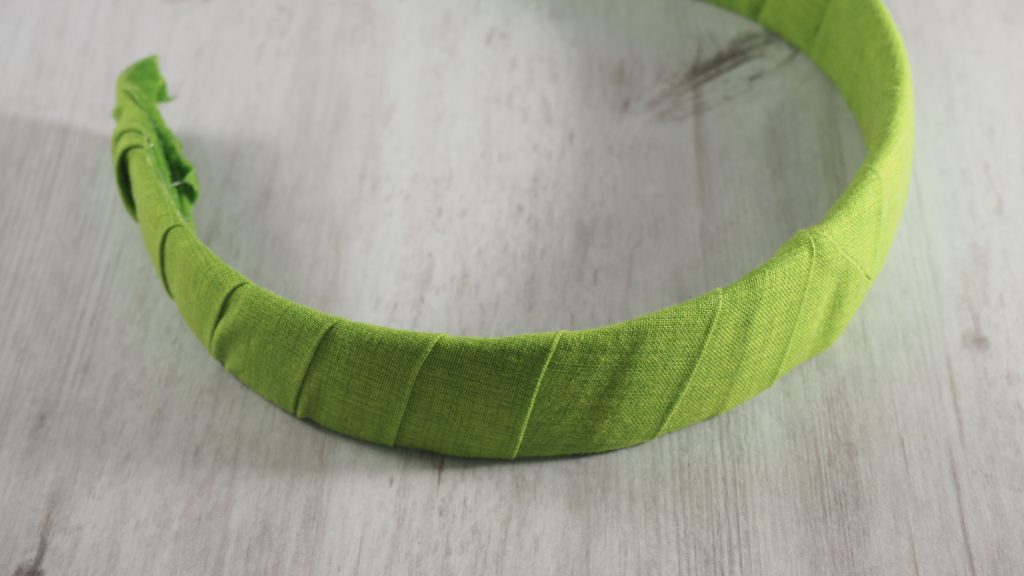
Wrap the Headband
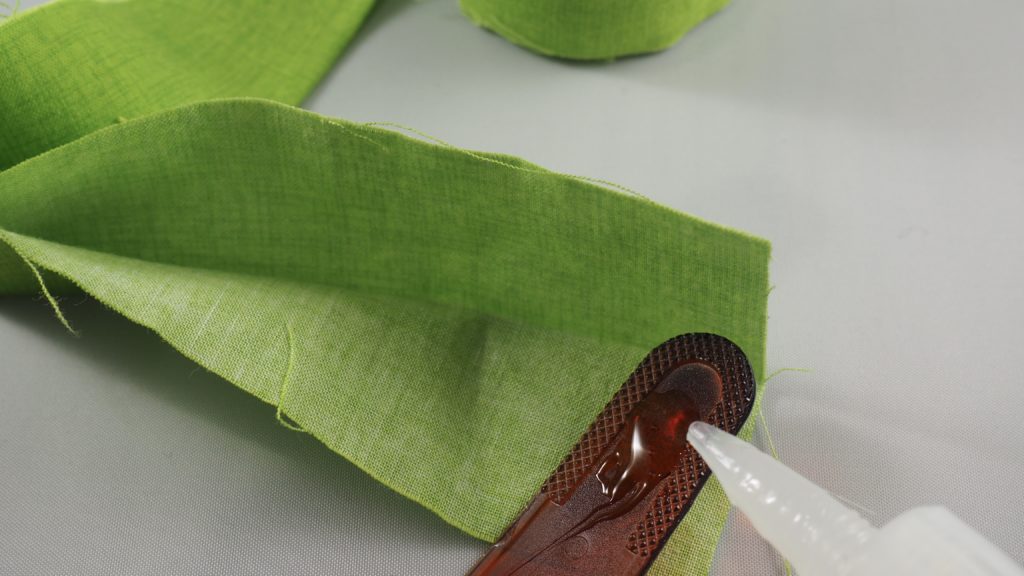
Add a drop of glue to one end of the inside of the headband.
Beginning with one edge of the fabric strip, cover the end of the headband, inserting the plastic into the fabric fold.
Start wrapping around the headband, pulling snugly. Overlap the fabric a bit so that the raw edges are covered.
After every few wraps, add a drop of glue on the inside of the headband. This will help secure the fabric.
When you come to the end, use the fold to cover the end and then cut off excess fabric, leaving about an inch of a tail so that you have enough for adequate coverage.
Manipulate the fabric and use glue to finish the headband.
If desired, glue on some embellishments, like buttons.
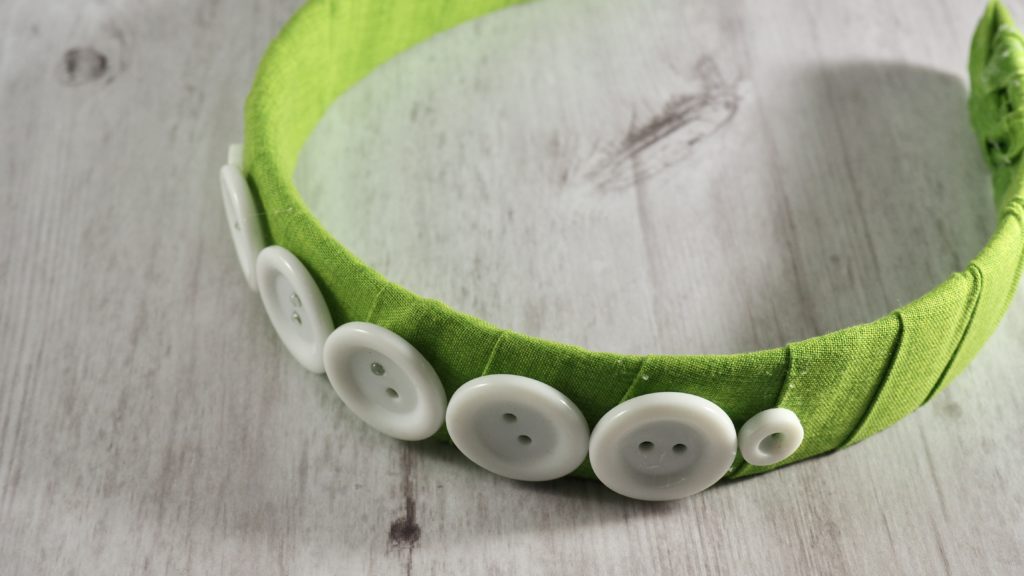
Set aside to dry completely before wearing.
If you like scrap fabric projects, then you might like some of my other projects.
Happy Crafting!
