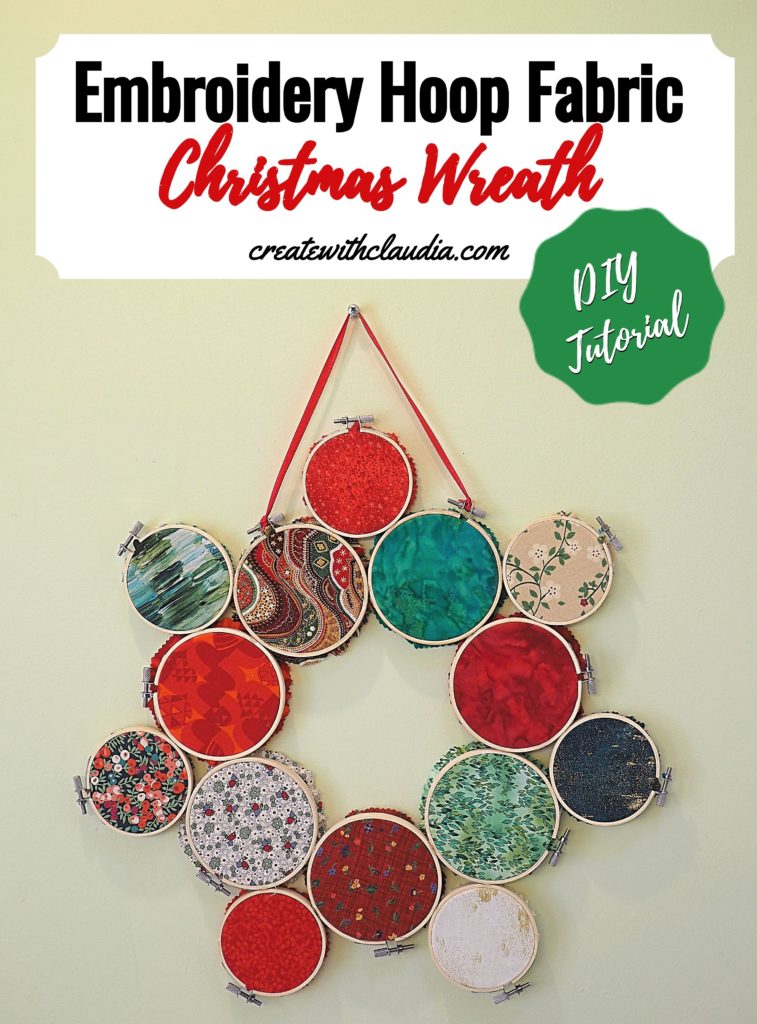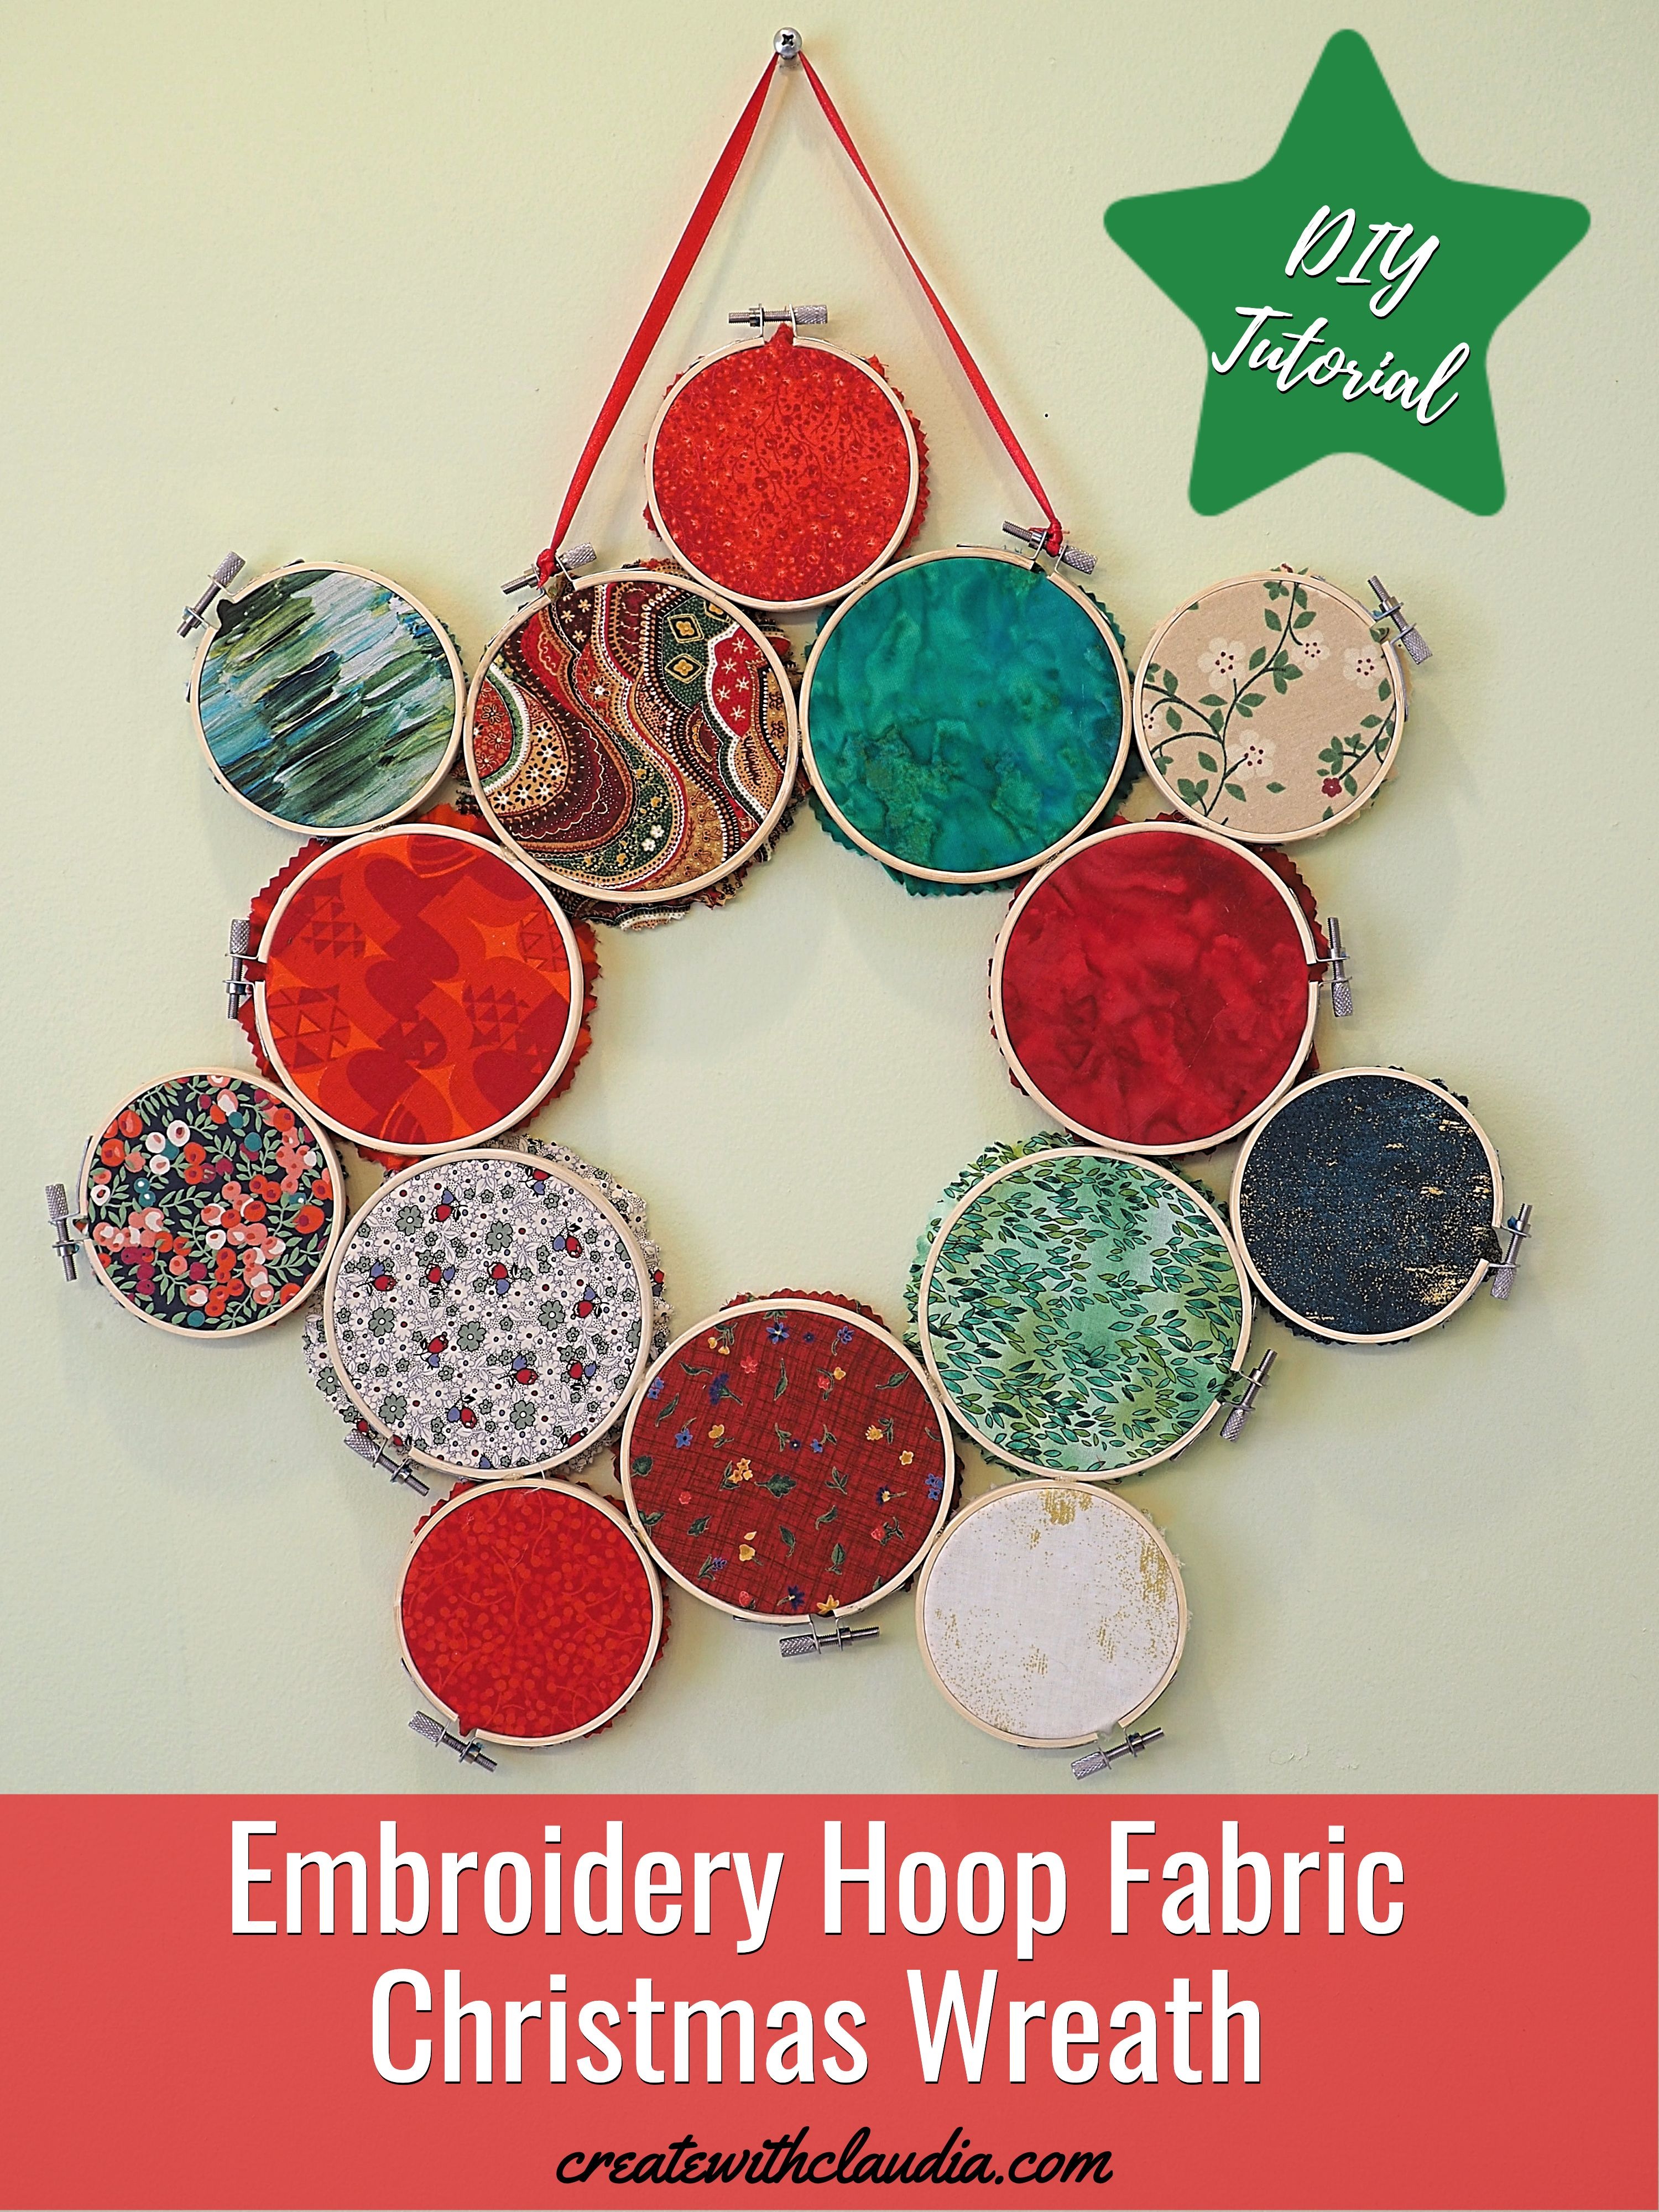
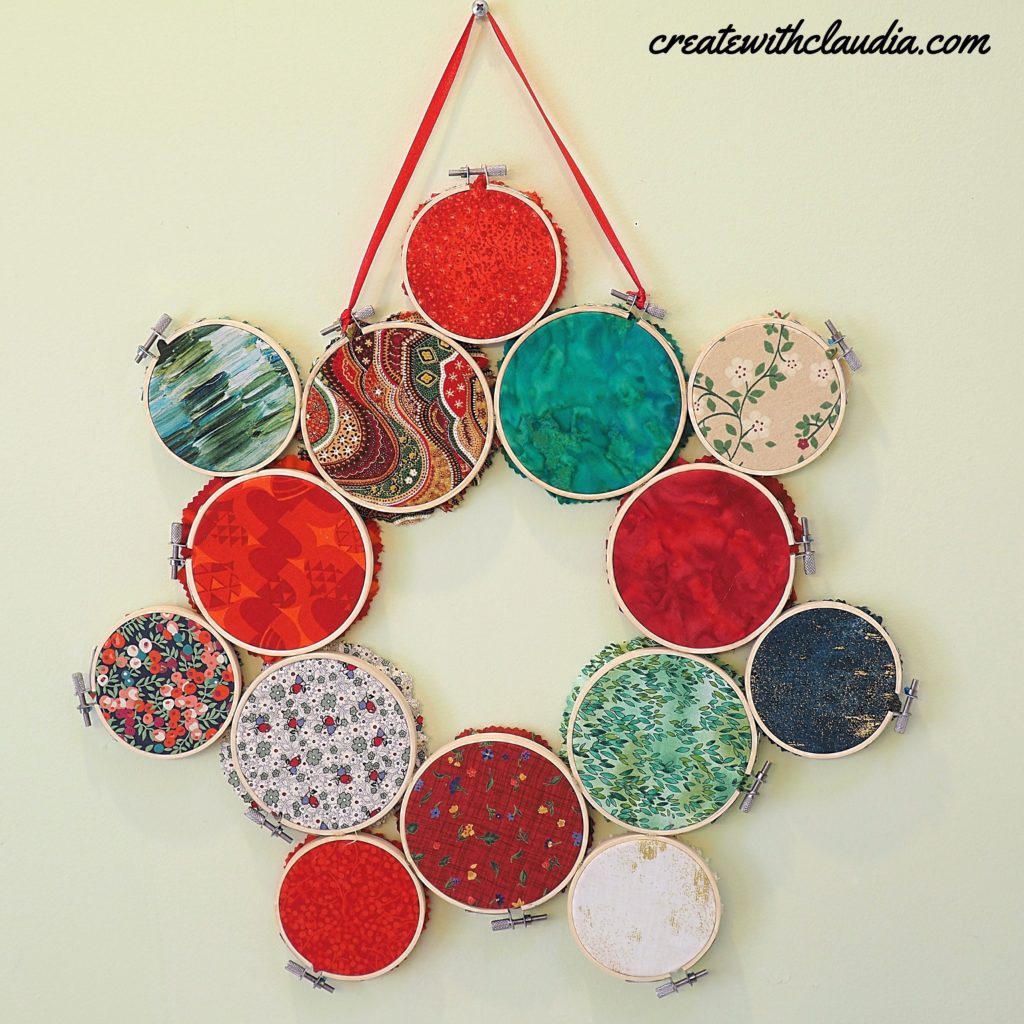
Embroidery Hoop Christmas Wreath
There is one thing you can always count on finding around my house when Christmas is coming, and that is wreaths. I just love them. From simple to fancy, I hang them on doors, over the mantel, and even on light posts. Since I like to change things from year to year, I decided to make a new one for this holiday season. The result is this festive embroidery hoop Christmas wreath.
It combines a couple of my favorite things, crafting and scrap fabric busting. Best of all, it is easy to make.
If you are a quilter, you probably have the fabric scraps you need, but if you aren’t, there are many places to purchase small pieces. The other supplies are also readily available.
I hope you give this fun wreath a try. It is eye-catching and, since you make it yourself, it is a one-of-a-kind decoration.
Supplies You Will Need
- Scrap Fabrics – Large enough pieces to cut out circles that will fit into the hoops
- Embroidery Hoops – Seven 4 inch hoops and seven 3 inch hoops
- Glue Gun (or other quick drying glue)
- Pinking shears (or scissors)
- Circle Template
- Pencil
Items that can help you with this project
Items You Can Use To Make This Project
You can find many of the items that I used to make this project in my Amazon Store.
As an Amazon Associate I earn from qualifying purchases.
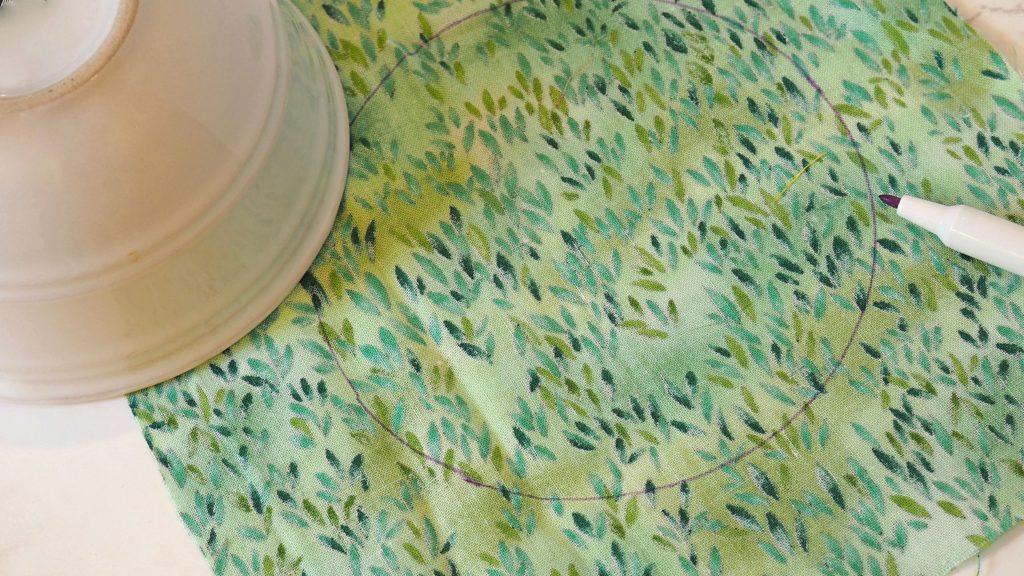
Prepare the Fabric
Find circular templates that will produce a piece of fabric that will fit in your embroidery hoops. The bowls I used measure as follows: For the 4” embroidery hoop, the bowl template is 5 ¼ inches in diameter. For the 3” embroidery hoop, the bowl template is 4 ½ inches in diameter. I suggest testing with a piece of fabric before cutting all of the circles out.
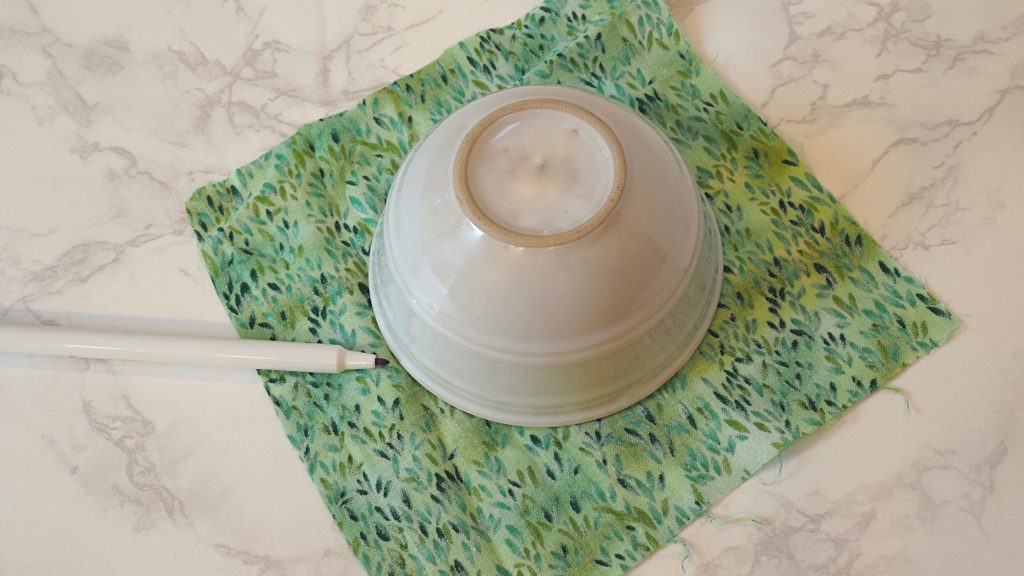
Trace around the template on your fabric and, using pinking shears, cut out on the traced line. You can use regular scissors too, but the pinking shears help cut down on fraying and add a decorative edge.
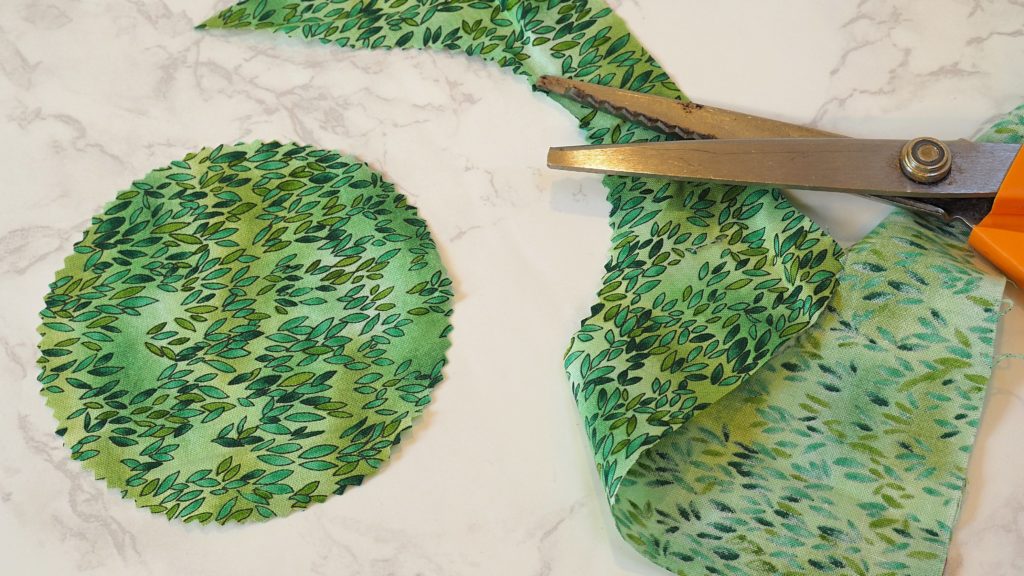
Repeat, until you have enough circles for your hoops.
Prepare the Hoops
First, if your hoops have it, remove the protective plastic film covering the metal screws.
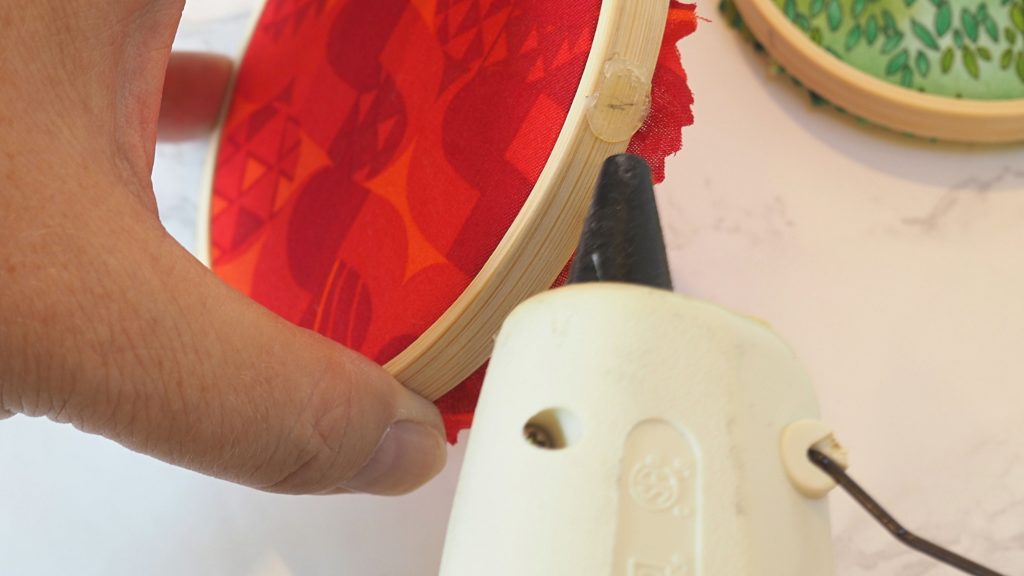
Then, separate the two pieces of the embroidery hoop. Center a circle of fabric over the piece of the hoop that does not have any hardware on it. Place the other part of the hoop and tighten the screws. Gently pull on the fabric to make sure it is taut and centered.
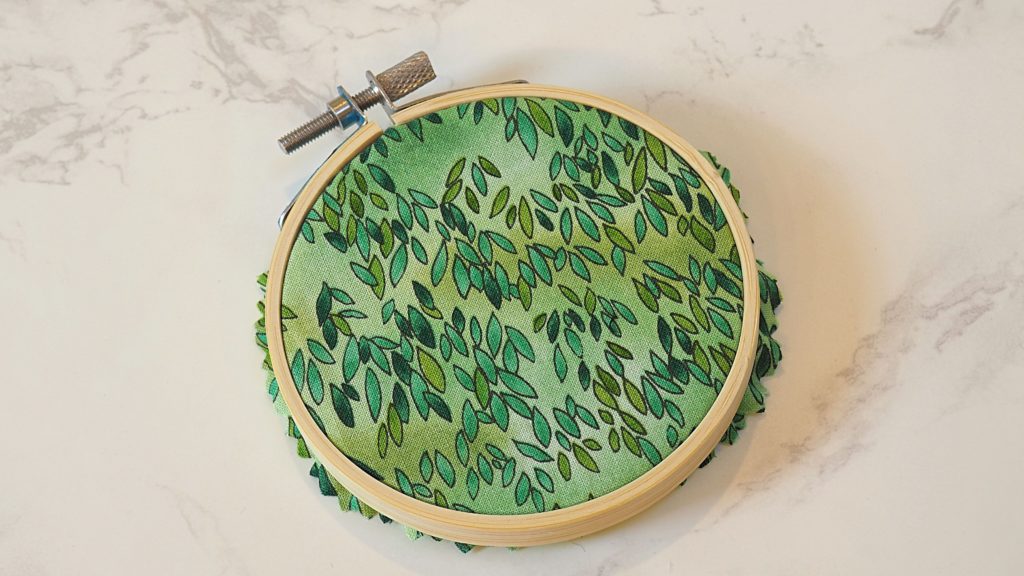
Repeat with the remaining hoops.
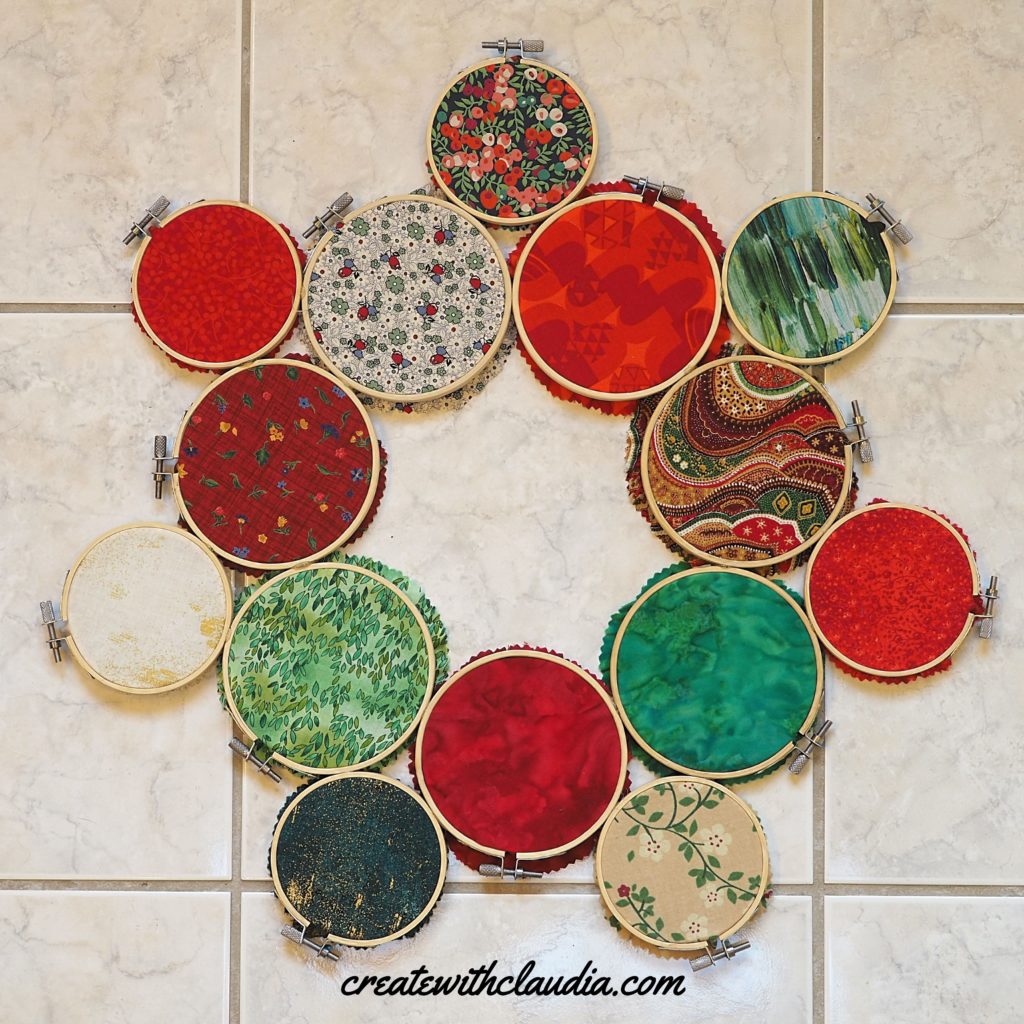
Assemble the Wreath
Using a bowl as a guide for the center circle of your wreath, lay out the 4 inch embroidery hoops around the bowl.
Note: I used the 5 ¼ inch bowl that I also used as a template for the larger hoops. It was the right size I needed.
Make sure the hoop hardware is pointing out. That will make it easier to add the smaller hoops.
Next, place a smaller hoop in between each larger hoop, with the hardware pointing out.
Glueing
Now it is time to start glueing. Work on a protected surface because the glue can spill.
Leave the wreath laying flat and glue in sections.
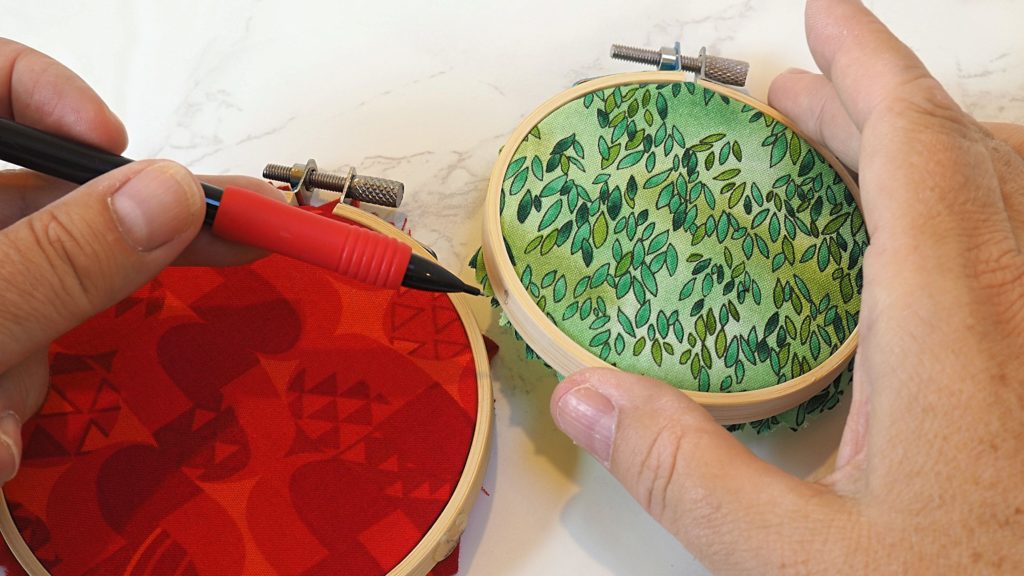
Starting with the inner ring of larger hoops, mark where two of the hoops touch. Then carefully add a drop of glue to the hoop, where the mark is, and join it to the other hoop, where that mark is. Gently hold the two hoops together, laying them flat so the wreath will hang flat, for about 15 to 20 seconds while the glue sets. Be careful not to touch the glue. It is very hot!
Periodically check the wreath as you are glueing it, to make sure everything is where you want it to be. The hoops that are not glued yet shift easily.
Note: You can also use a quick drying craft glue, but it takes longer than a glue gun to dry.
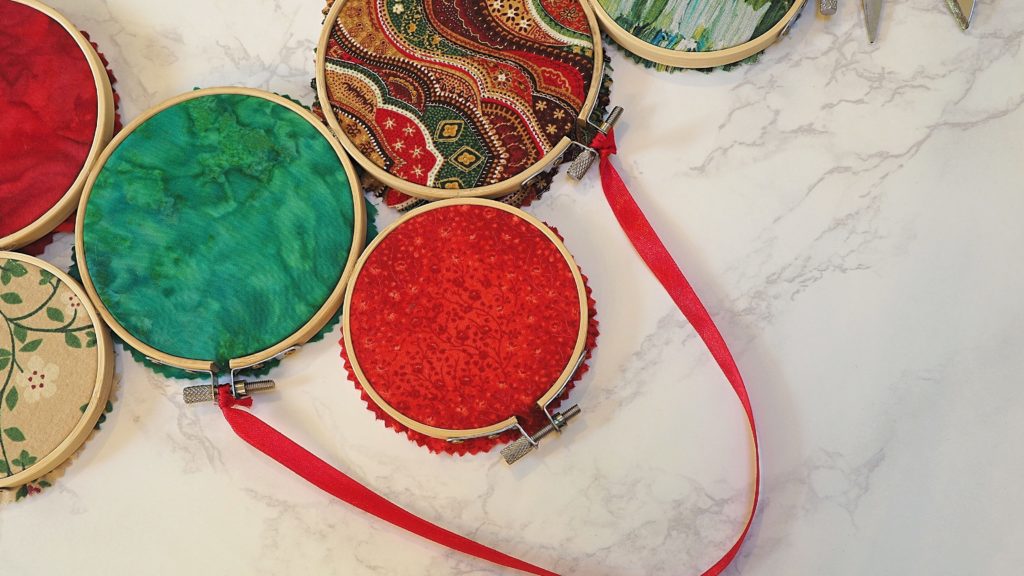
Next, it is time to attach the outside hoops. Mark where the smaller hoop touches the larger hoops. There will be a mark on two sides of the smaller hoop. Add glue to both of those marks and then, gently press it into place on the larger hoop. Lay flat on the table and hold for about 15 to 20 seconds, or until glue sets.
Repeat with remaining hoops. While adding hoops, periodically check that the wreath is still laying flat.
Lastly, once everything is in place, set aside to cool before adding a hanger.
Add the Hanger (Optional)
You can use the metal screw at the top of the one of the small hoops as a hanger, but you can also add ribbon.
Ribbon can be added to one of the metal screws of one of the small embroidery hoops, but, depending on how much glue you have used, it might not hold.
Instead, cut a piece of ribbon to your desired length and tie one end to the hardware of one of the inner rings, and then to the hardware of the inner ring next to it (as pictured).
This should be strong enough that the wreath won’t come apart.
Embroidery Hoop Christmas Wreath
Once finished, your wreath is ready to hang. Since it is made out of fabric, wood (or bamboo) and metal, I suggest not hanging it where it is susceptible to the weather.
While I used greens and reds to make my embroidery hoop Christmas wreath, the fabrics can easily be changed to reflect your favorite colors.
I’m thinking about making one for Easter. I can just imagine all of the pretty pastels that are so popular in the spring.
Happy Crafting!