

How to Take Apart Jeans for use in Quilts and Crafts
Have you ever wanted to make a quilt out of old blue jeans? Do you have a stack of them that you’ve always wanted to do something with? This tutorial is going to show you how to take apart a pair of jeans for quilting and crafting projects.
It is easier than you think and it doesn’t take much time either.
I like using denim in projects. It’s a great way to cut down on waste in the environment. Additionally it’s a money saver because you are using material you have on hand instead of going out and buying some.
Don’t get me wrong, I love buying new fabric. However, sometimes it’s nice to make do with what is on hand.
One thing to note if you are going to use denim, it is incredibly durable which makes it nice to use in certain types of quilts and crafts. However, it can be tricky to sew with. Because of that I came up with 15 tips to use when quilting with denim.
If you are ready, then grab a good pair of scissors, a seam ripper, and an old pair of jeans that you no longer want, and let’s get some usable fabric.
Video Tutorial on How to Take Apart Jeans For Quilting
If you’d like to watch the entire process, I created this video.
What You’ll Need
- A pair of jeans
- Good strong scissors
- Strong seam ripper
These items will work for this project
You can find many of the items that I used to make this project in my Amazon Store.
As an Amazon Associate I earn from qualifying purchases.
Step 1 – Remove the Pockets
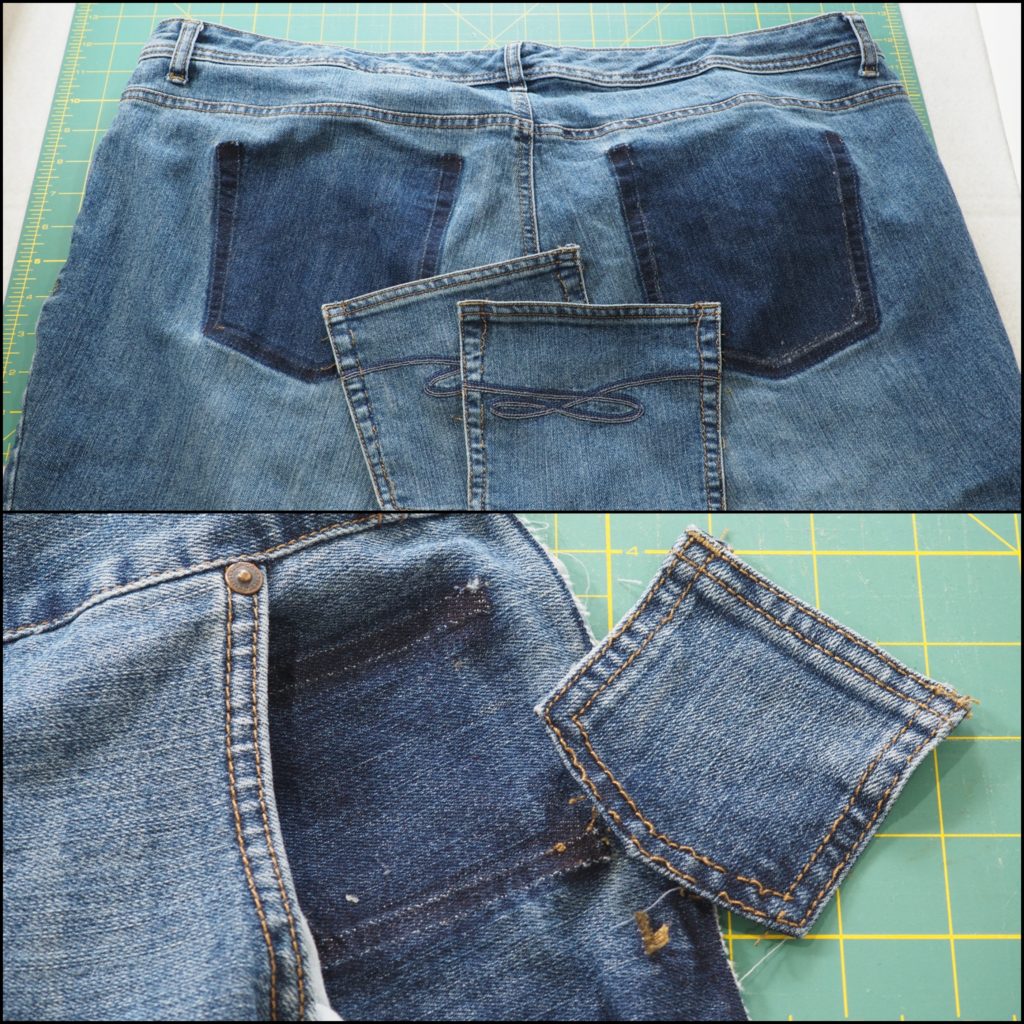
I like to start with the most tedious and time-consuming part, and that is removing the pockets. Some are harder to take off than others, so you are going to need a little patience with this step. It’s definitely my least-favorite part.
I find that the easiest way to take them off is to use my seam ripper and start at one of the corners. Start picking at the threads and pulling the pocket away. It definitely takes some manipulation, but it will come off.
Be careful using the seam ripper. These seams are tough and that tool is sharp. It’s easy to poke a finger.
Don’t forget that small pocket in the front of the pants (if there is one). Did you know that those little pockets were originally for pocket watches? I learned something new when I was writing this article.
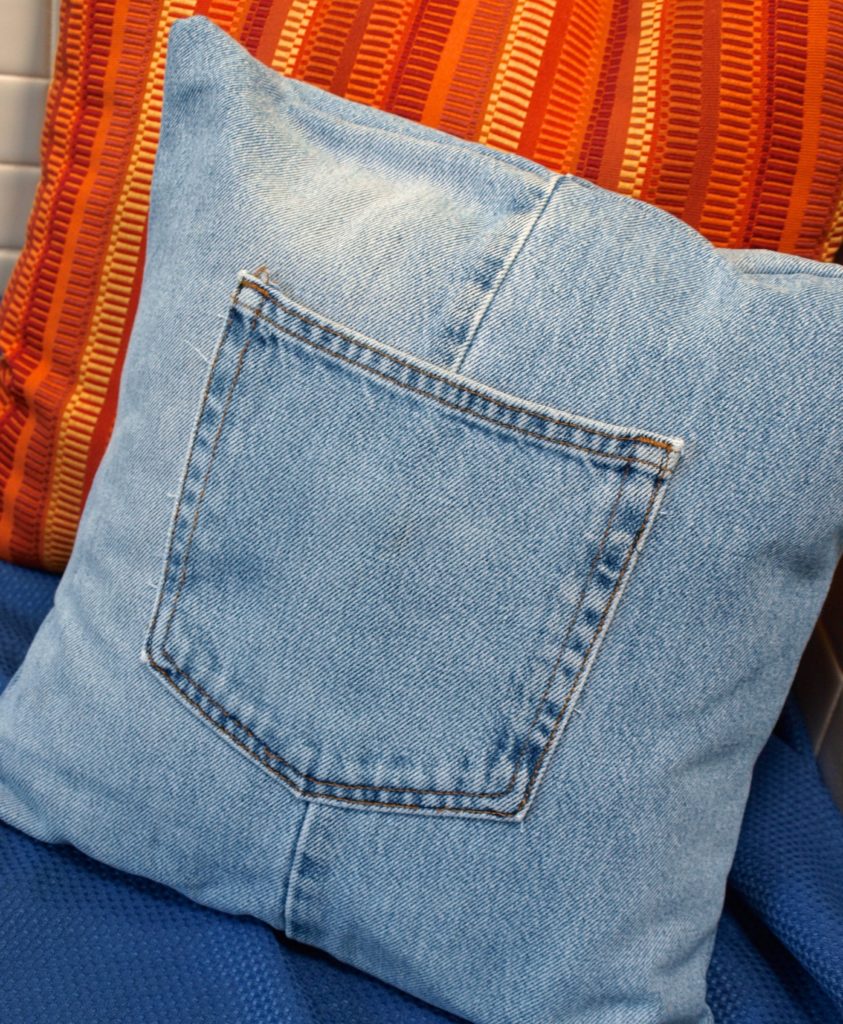
Set the pockets aside. You can make some really cute things with them.
Step 2 – Remove the Belt Loops
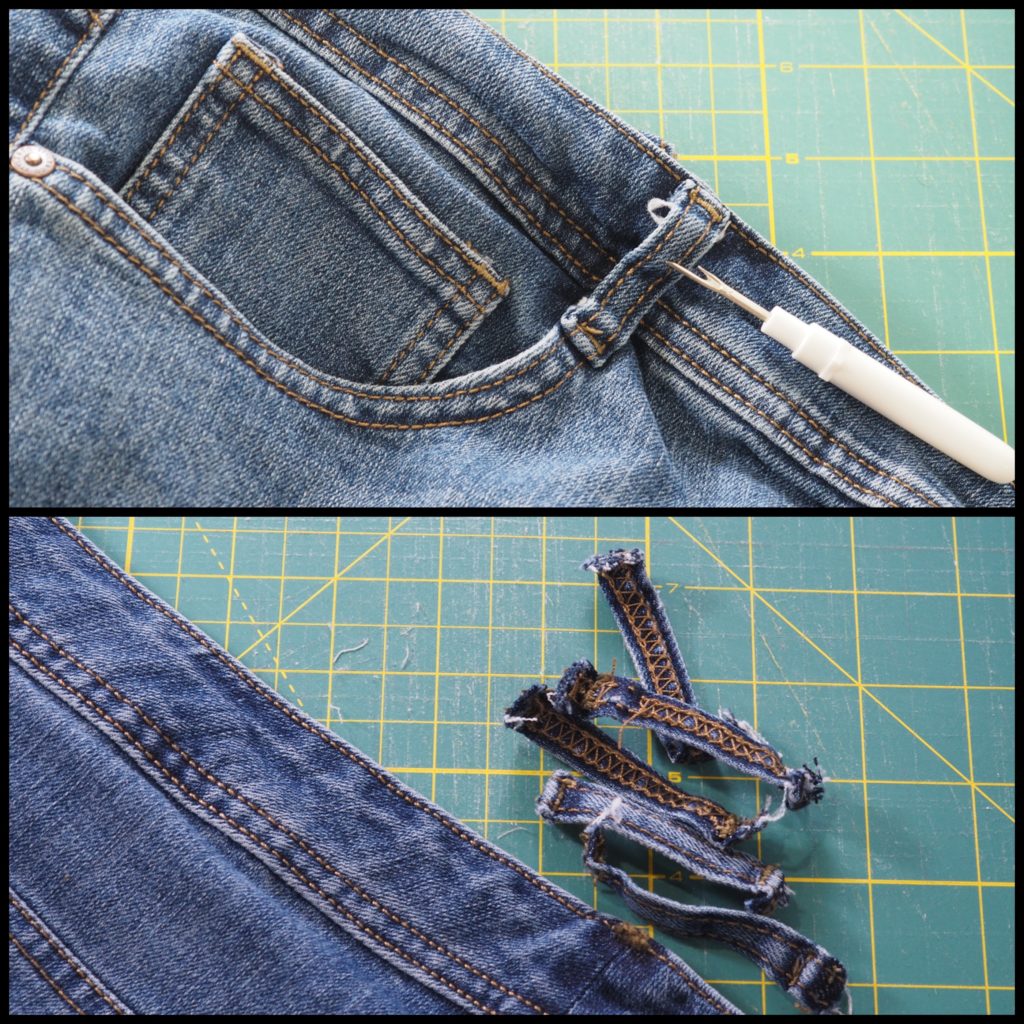
This is tedious too, but not nearly as tough as taking off the pockets. Just go around the waist band and remove all of those little strips of fabric.
Set the loops aside. They are pretty small, but I have seen projects made out of them.
Step 3 – Take Off the Waist Band
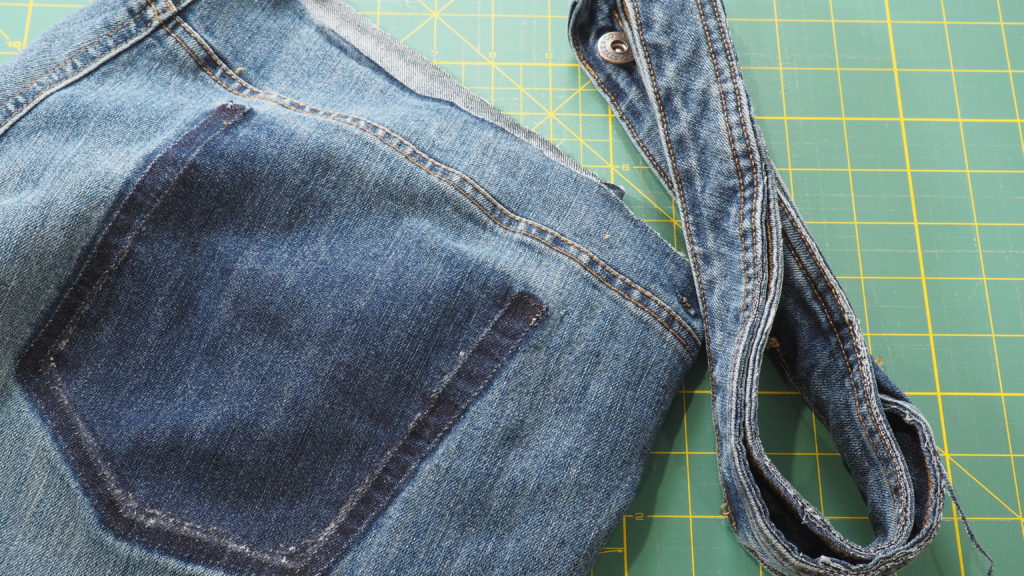
Starting on one end, above the zipper, cut around the waistband, just under the seam.
Leave the button(s) on, or take it off. This is a nice long piece that can be used for all sorts of things.
Step 4 – Cut Off the Seams Around the Front Pockets

Not all jeans that I have taken apart have these seams, but most do. Just cut them off.
The closer you cut to a seam, the more useable fabric you will have for your quilt and craft projects.
Remove the fabric that makes up the inner pocket lining, butting as closely to the denim as you can.
Step 5 – Take Off That Narrow Area Just Under the Waistband
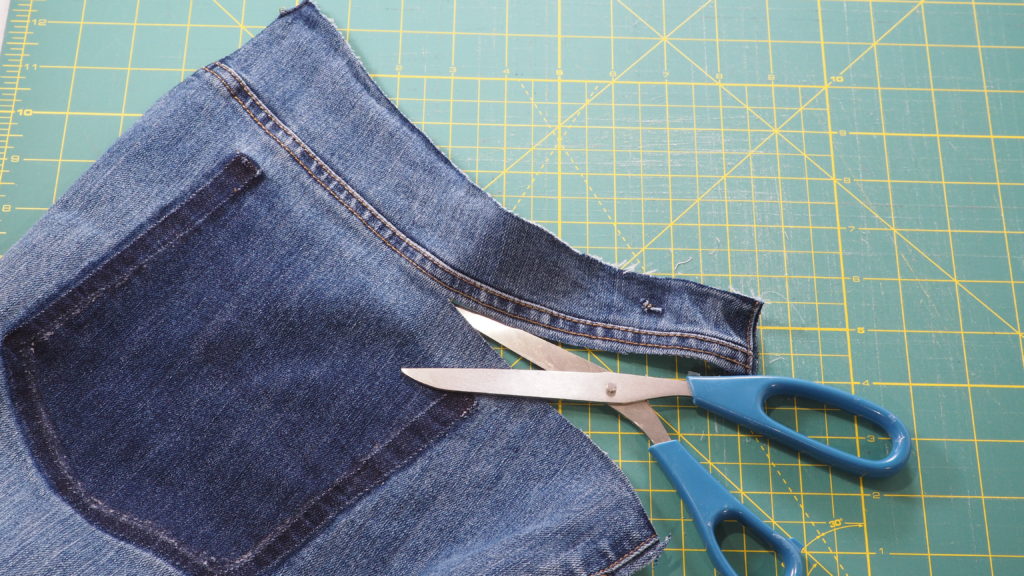
On the back side of the jeans there is a narrow area which needs to be removed. Cut it away and trim off the seams.
Step 6 – Cut Out the Zipper
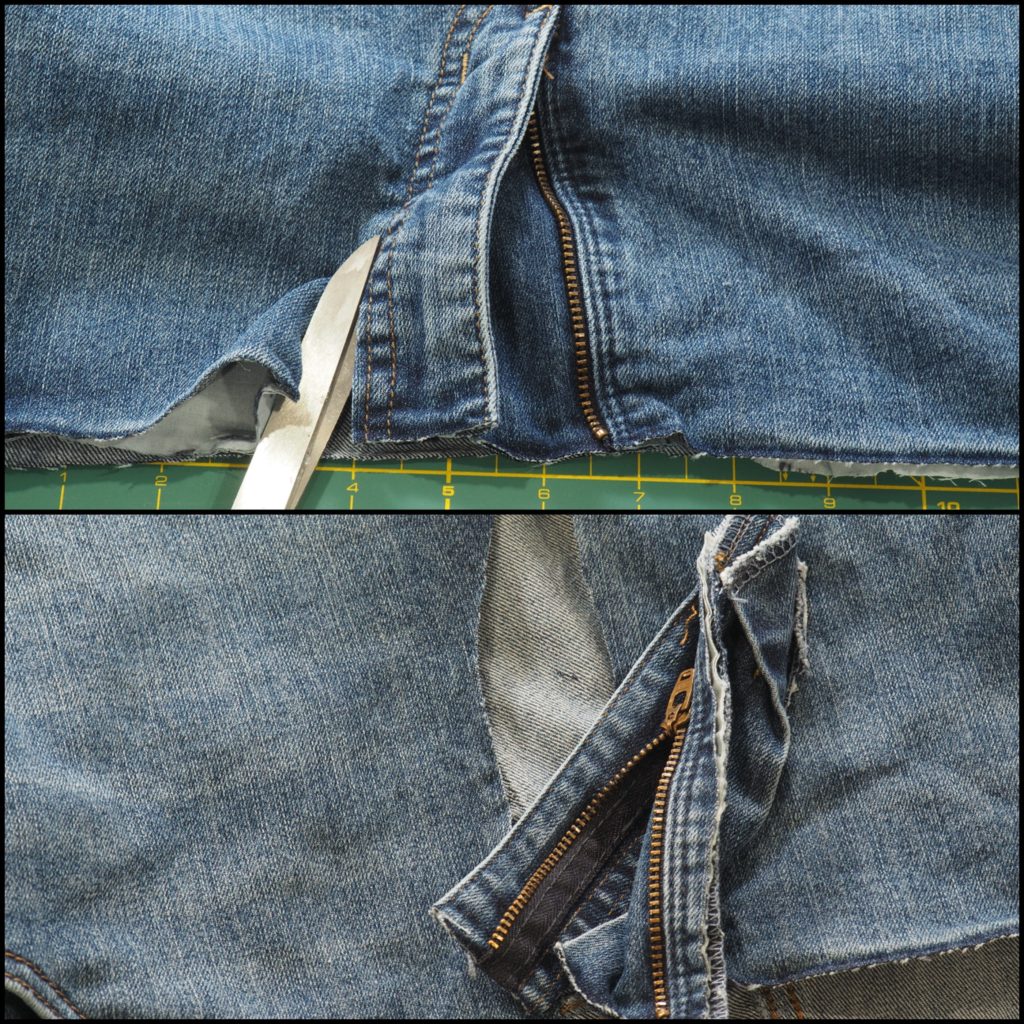
With your scissors as close as possible to the seam, cut out the zipper and the denim surrounding it.
If you want to take it a step further, remover the zipper from the denim, but it’s pretty tough to do.
Step 7 – Cut Off The Hems
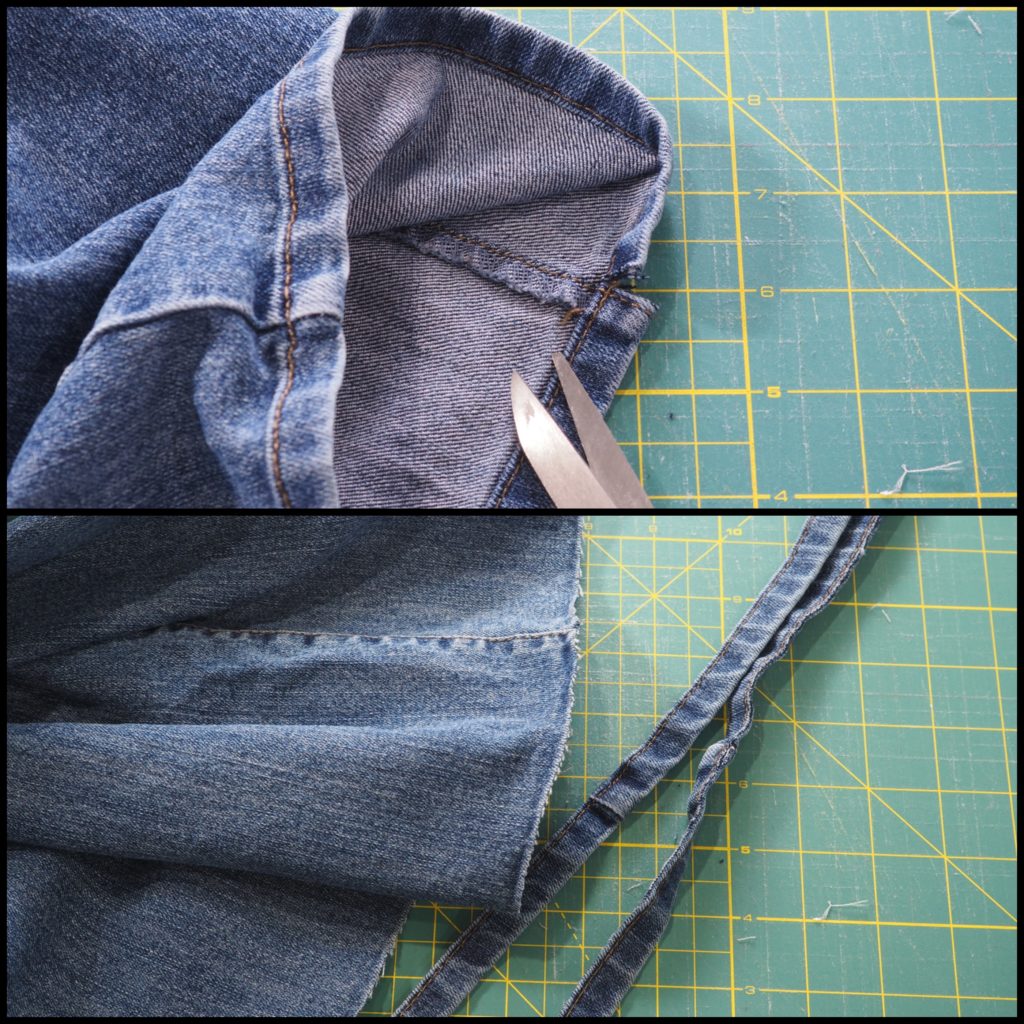
This is my favorite part of the process. I think it’s because it’s a signal that I’m almost done. It’s also really easy to do.
Just cut off the hems, as close as possible to the seam.
Step 8 – Split the Jeans in Half
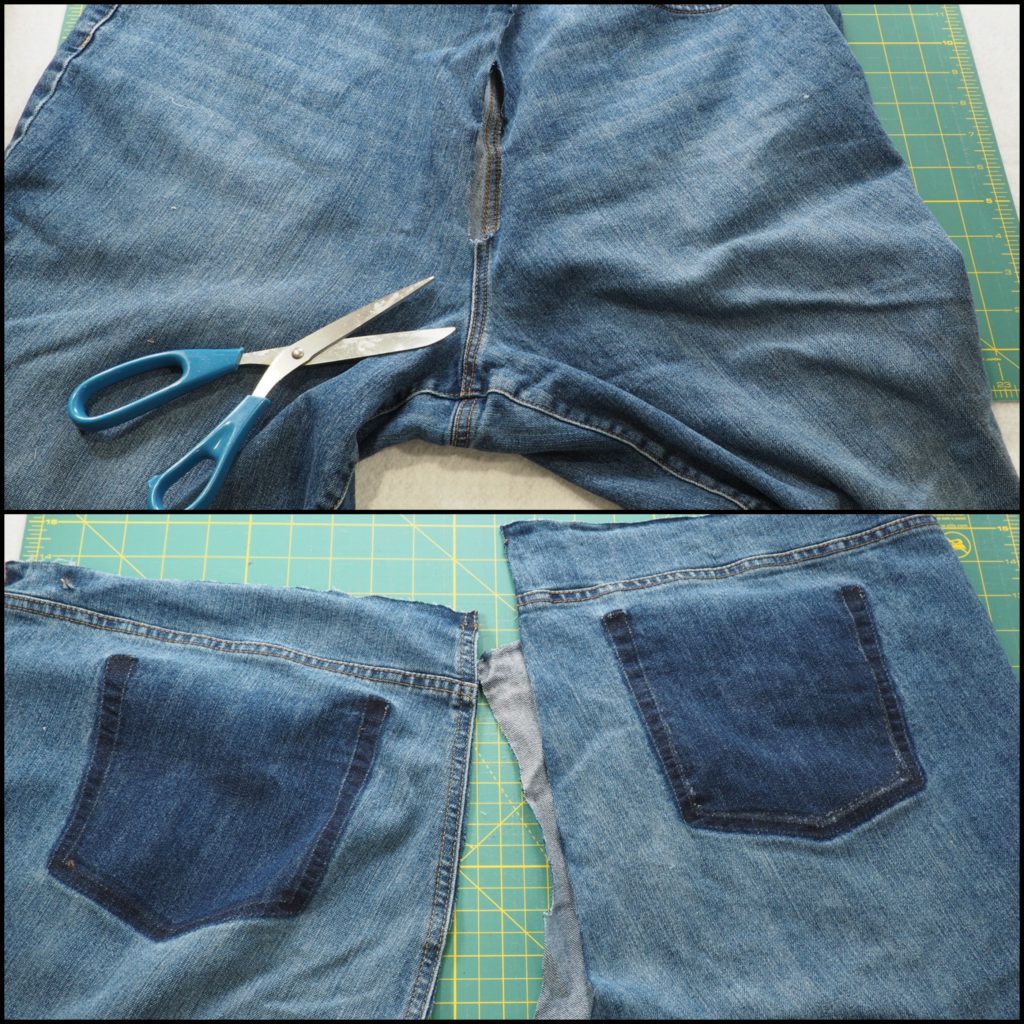
Starting at the front, where the zipper used to be, cut along the center seam from the front to the back.
Then go back and cut along the other side of the seam to remove it.
You’ll now have two pants legs.
Step 7 – Open up the Jeans Legs
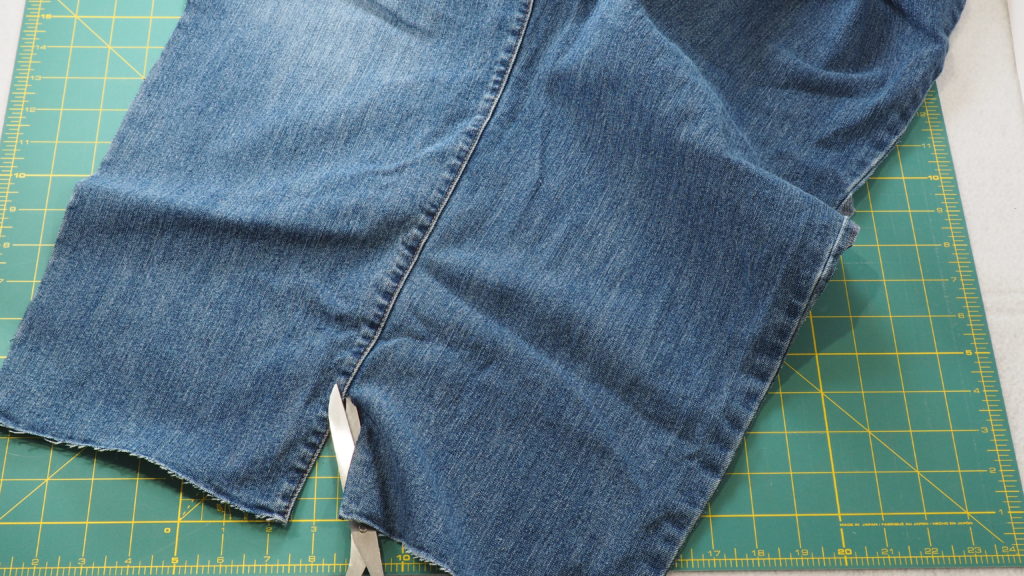
The remaining leg pieces will be like long tubes with seams on two sides.
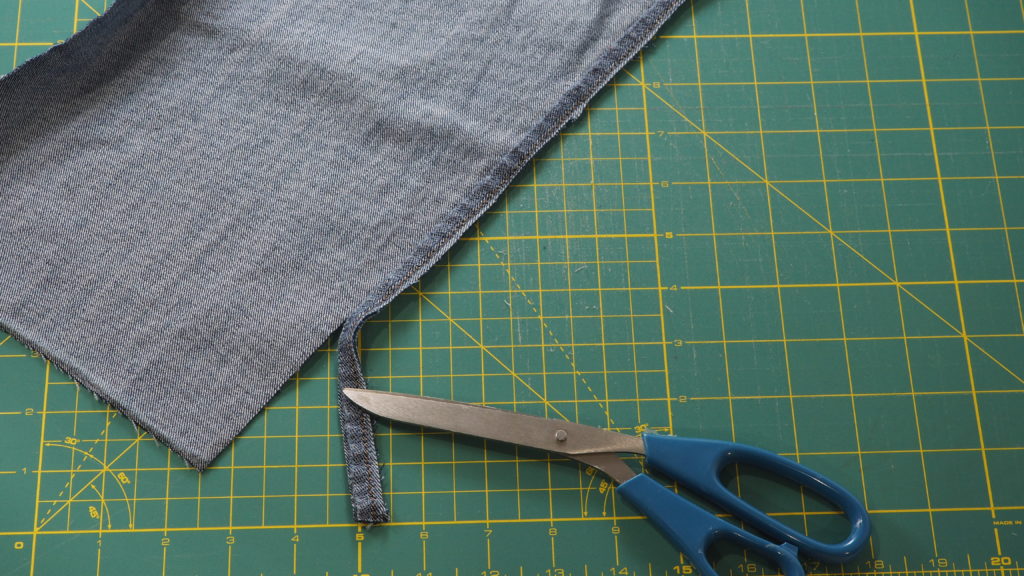
First, take one of the legs and cut along one of the long seams. Then remove that seam by cutting down the other side of it. Repeat with the other seam in the pant leg.
After this, repeat with the second pant leg.
You now have four nice sized pieces of denim fabric ready to be used.
That’s How to Take Apart Jeans For Quilting or Crafting
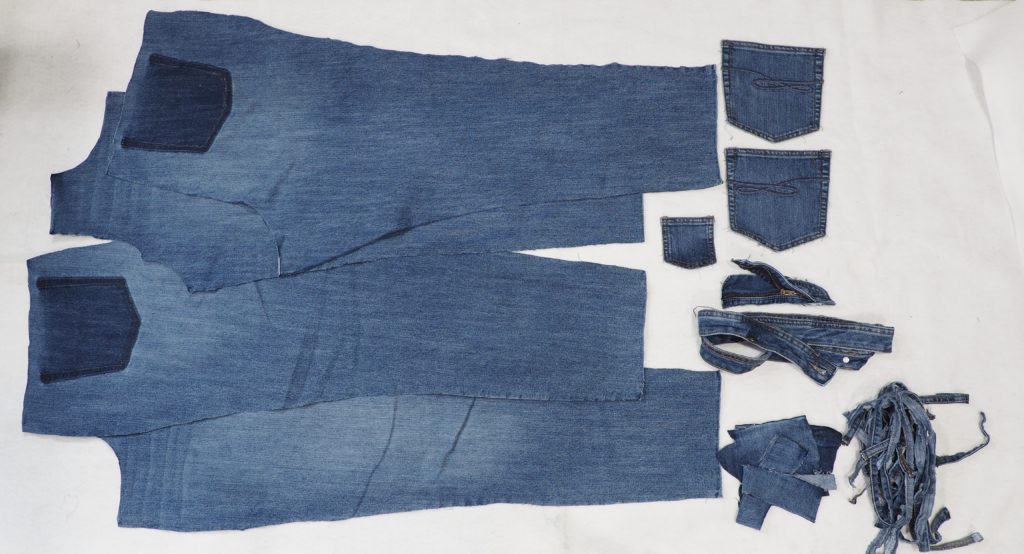
That’s all there is to it. Of course, the size of the fabric pieces you get depends on the pants size you started with.
Not only do you end up with some nice flat denim fabric that you can cut into various sizes, you also get some other interesting pieces like the zipper and all of those seams.
Projects for Your Jeans
There are several bloggers who frequently use denim in their work. Claire from Pillar Box Blue makes all sorts of beautiful and functional projects with every part of a pair of jeans.
Here are a few of my projects that you might like.

Happy Quilting and Crafting!

2 Comments
Gwynn Colvin
December 8, 2023 at 7:20 PMGreat instructions . Once I got the first pair done they just got easier and easier. Have already started on a rug . So excited
Ronna
February 4, 2024 at 2:14 AMGreat, clear and concise video!