
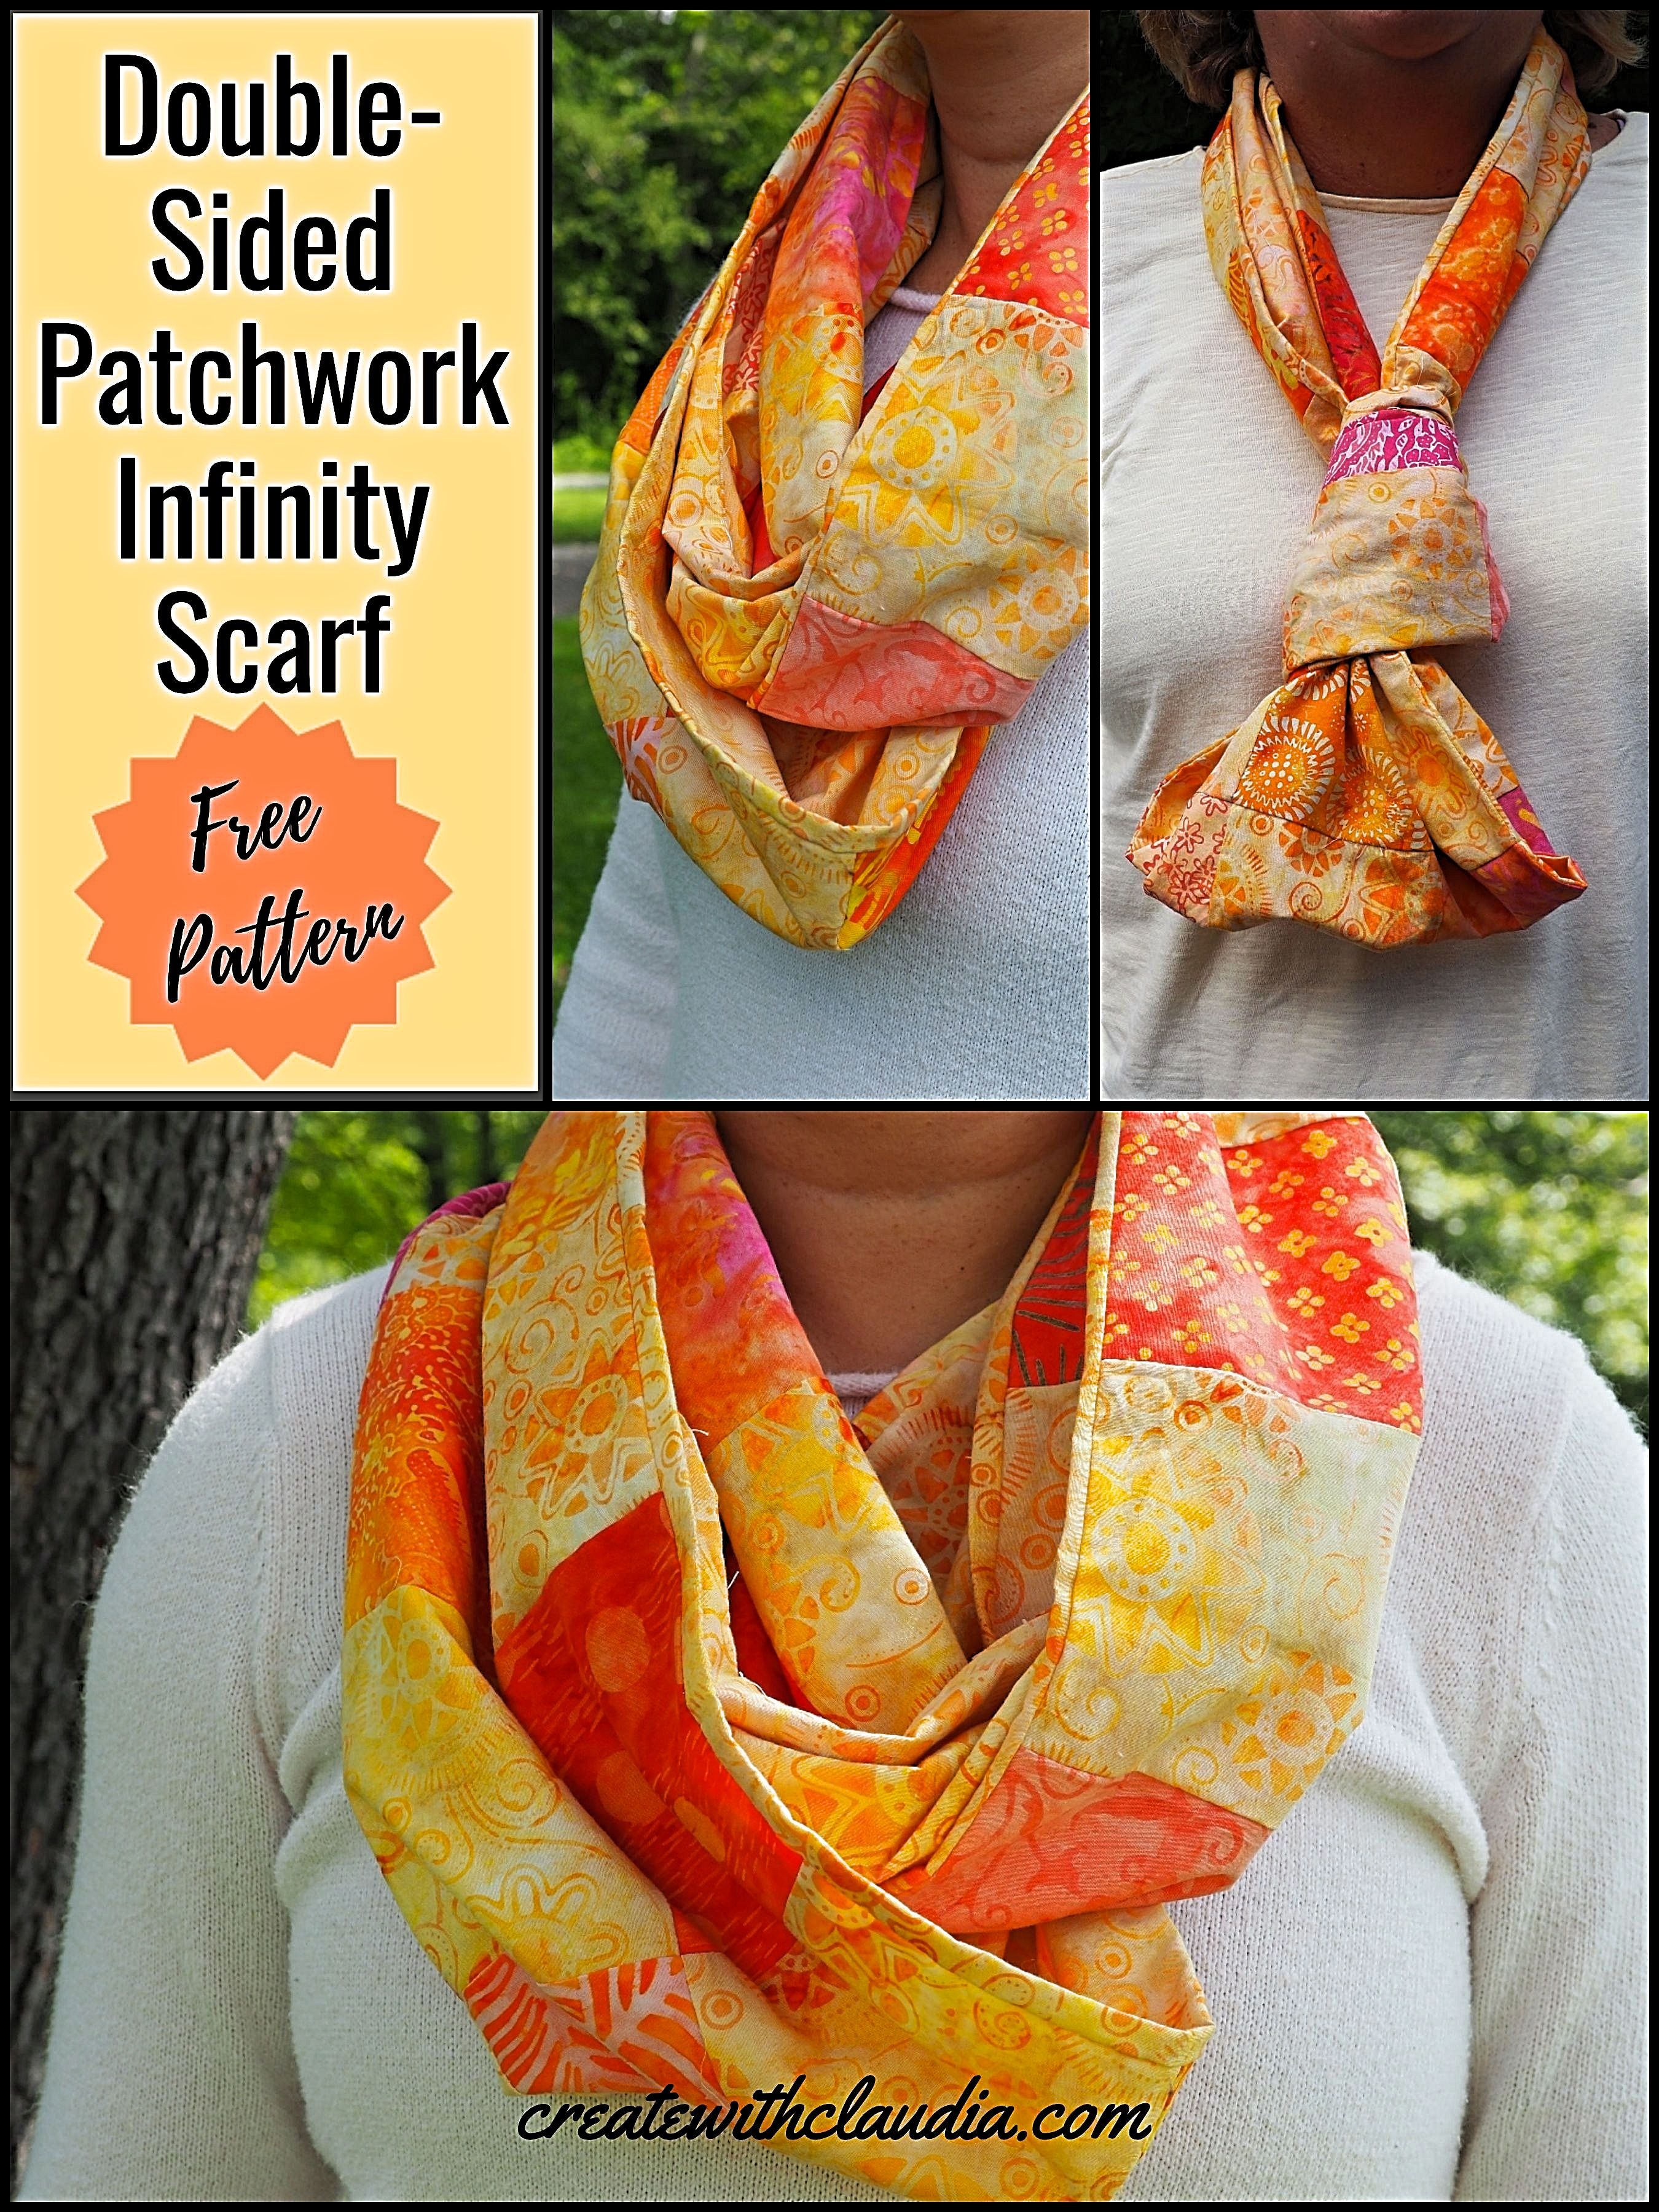
Patchwork Infinity Scarf Pattern
I have to admit that I am a little addicted to infinity scarves. They are so versatile and can really dress up an outfit. They are also surprisingly easy to make. Solid ones are nice, but they can be a bit limiting, depending on what color it is. So I decided to step up my infinity scarf game and make a double-sided one. To jazz it up, I made the one side a patchwork to show off some of my fabrics. The result is this gorgeous double-sided patchwork infinity scarf pattern.
For years I had the golden batik fabric that I used for the back side of this scarf, as well as for the focal fabric on the patchwork side. I could never decide what to do with it until I came up with this pattern, and I couldn’t be happier with the results. It’s a stunning scarf that I will wear for years to come.
Video Tutorial of the Scarf Making Process
Pattern Specs
- Scarf measures approximately 72” long X 12” wide.
- The drop from the neck, when not wrapped around twice, is approximately 35” long.
- I used batik fabric, but other cottons can be used. Because of the patchwork side, a knit jersey may not work so well, however, you could use the knit on the side with the solid fabric.
What You’ll Need
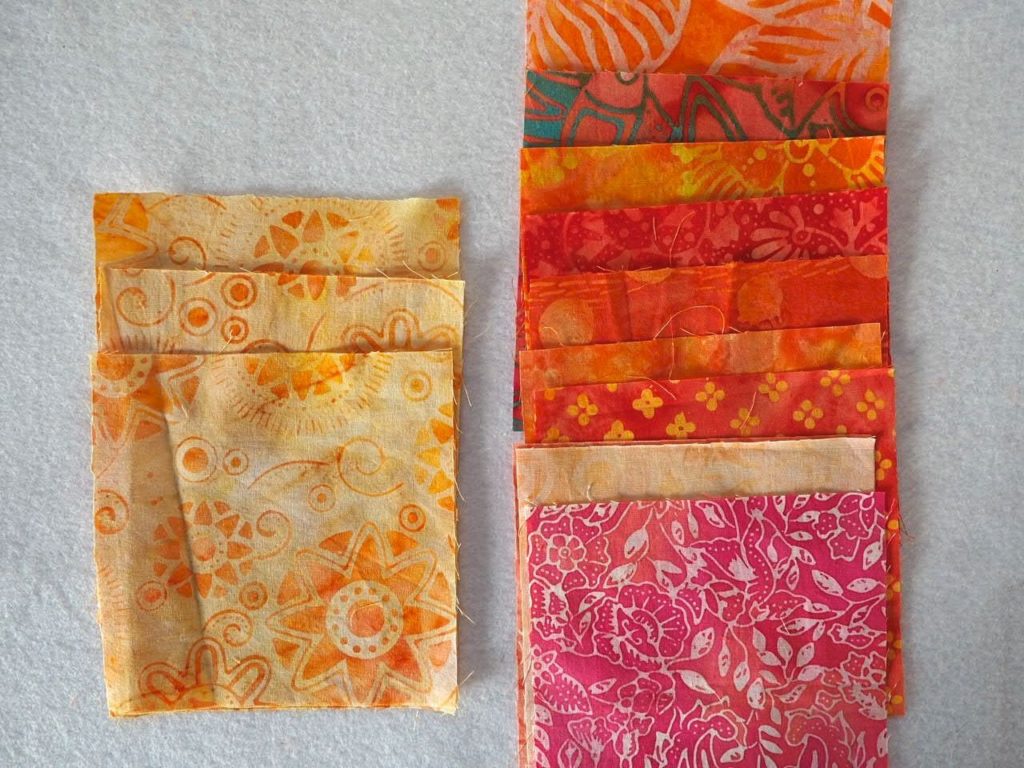
- Fabric – For the back (or solid side) – About 2 yards of the focal fabric that is used on the one side and the in the patchwork. For the patchwork – Various fabrics
- Cutting Mat
- Rotary Cutter
- Quilter’s Ruler
- Sewing Machine
- Pins
Items You Can Use To Make This Project
You can find many of the items that I used to make this project in my Amazon Store.
As an Amazon Associate I earn from qualifying purchases.
Cutting Instructions
- 1 piece 72” long x 12 1/2” wide. Note: If you do not have a piece of fabric long enough, cut two pieces 36 1/2” long x 12 1/2” wide and sew them together to make one long piece.
- 27 – 4 1/2” Squares – of focal fabric
- 27 – 4 1/2” Squares – of various coordinating scraps.
Step 1 – Piecing the Patchwork Side
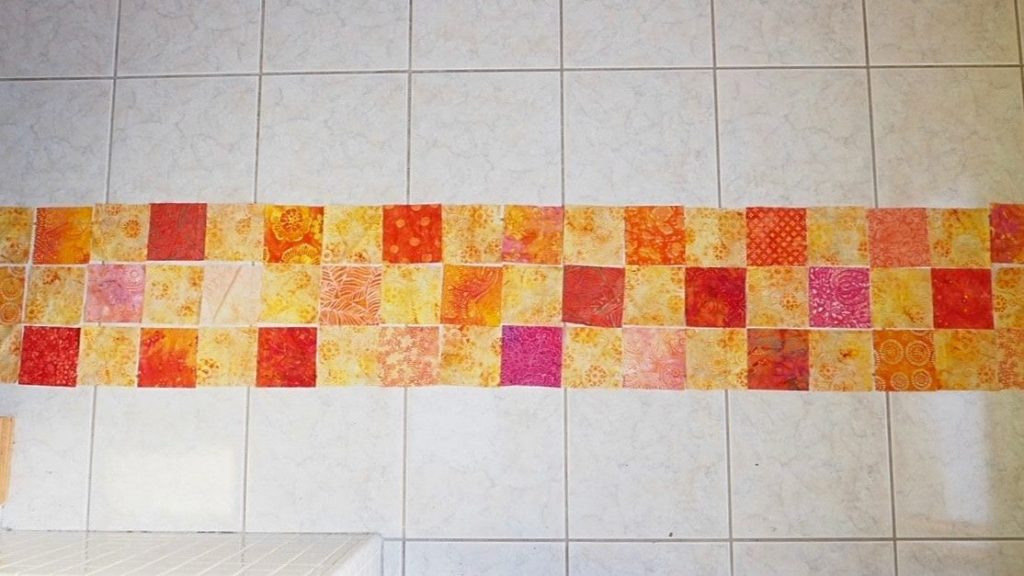
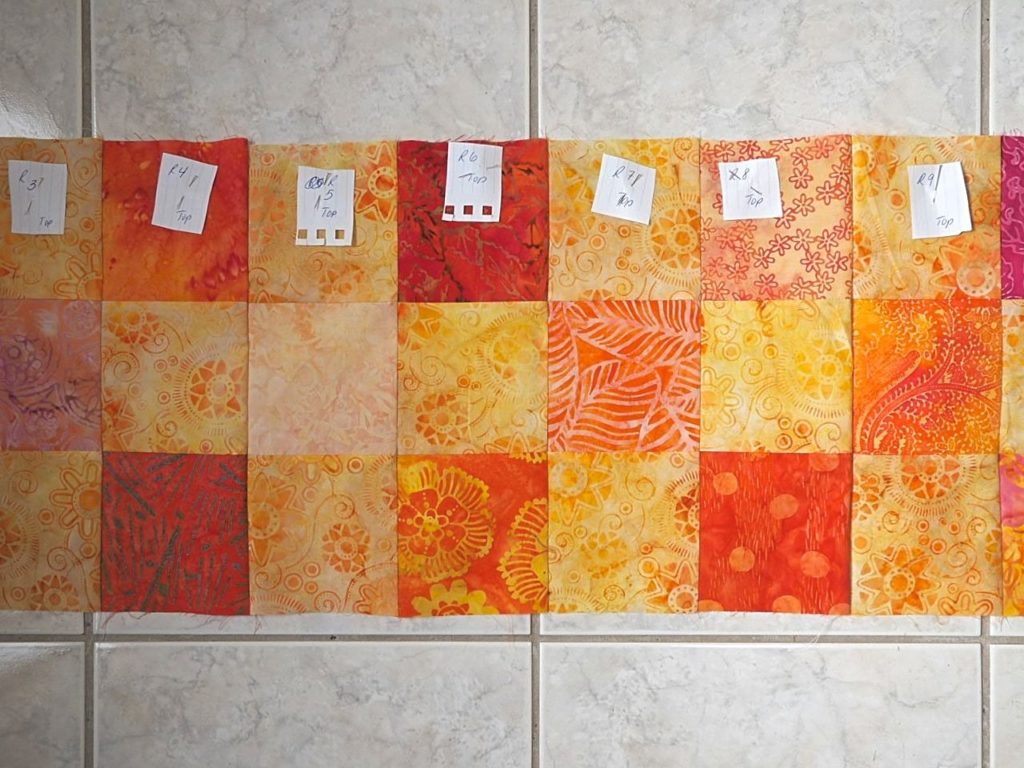
Lay out your fabric squares, 3 squares across and 18 squares down, alternating between the focal fabric and the scraps.
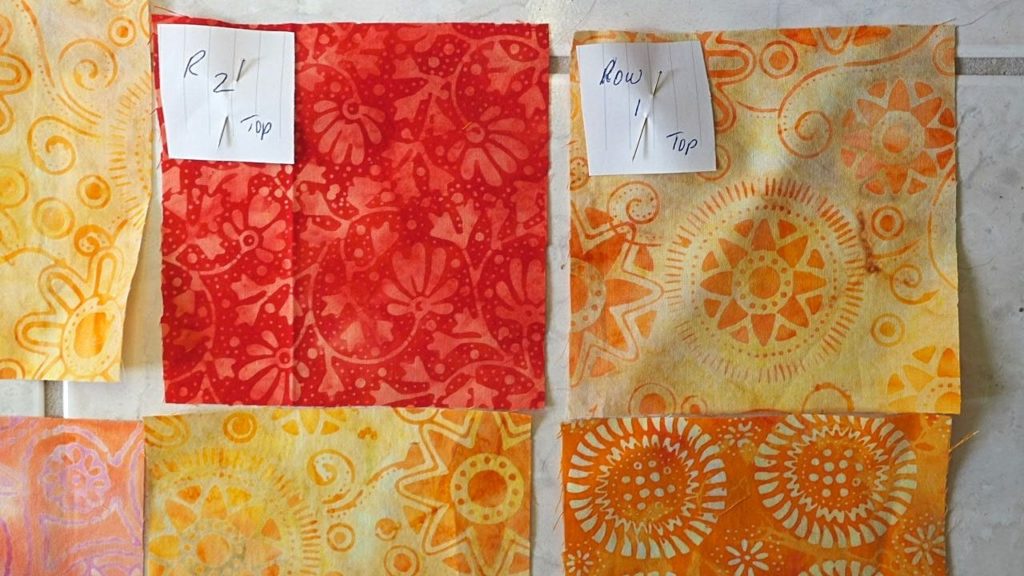
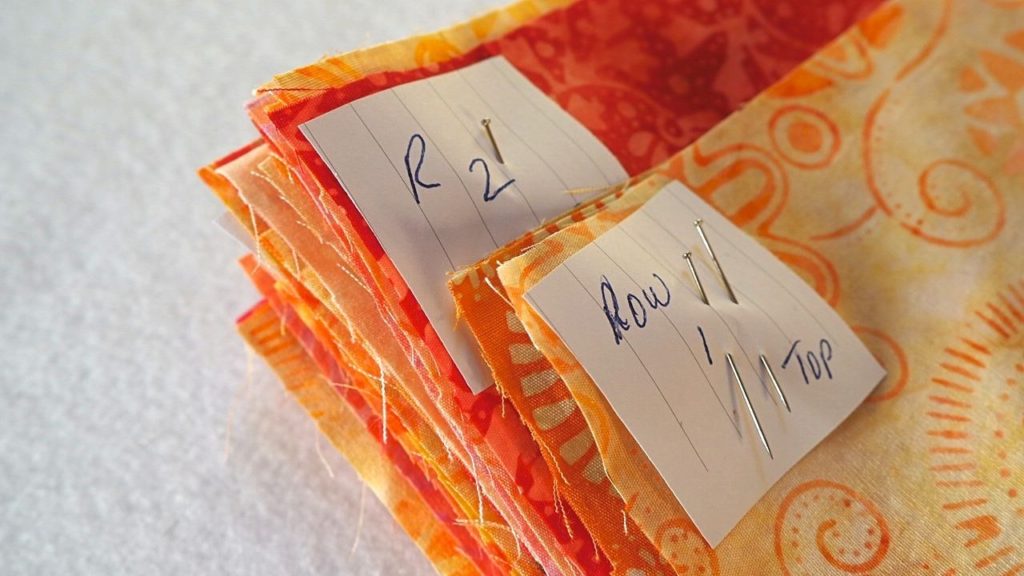
Then, making sure to keep the squares in order, prepare to sew by stacking each of the 18 rows. Number each row 1 through 18. I use a piece of scrap paper and a pin to mark the rows.

Sew each row together. Tip: I sew each row individually and keep the row number marker pinned to the top fabric to help me keep everything in order.
Press each row to the one side and alternate the pressing direction of each row. For example, press row 1 to the left, row 2 to the right, row 3 to the left until all rows are finished. That makes it easier to piece the rows together.
Lastly, sew all of the rows together. Press and set aside.
Step 2 – Prepare the Solid Side
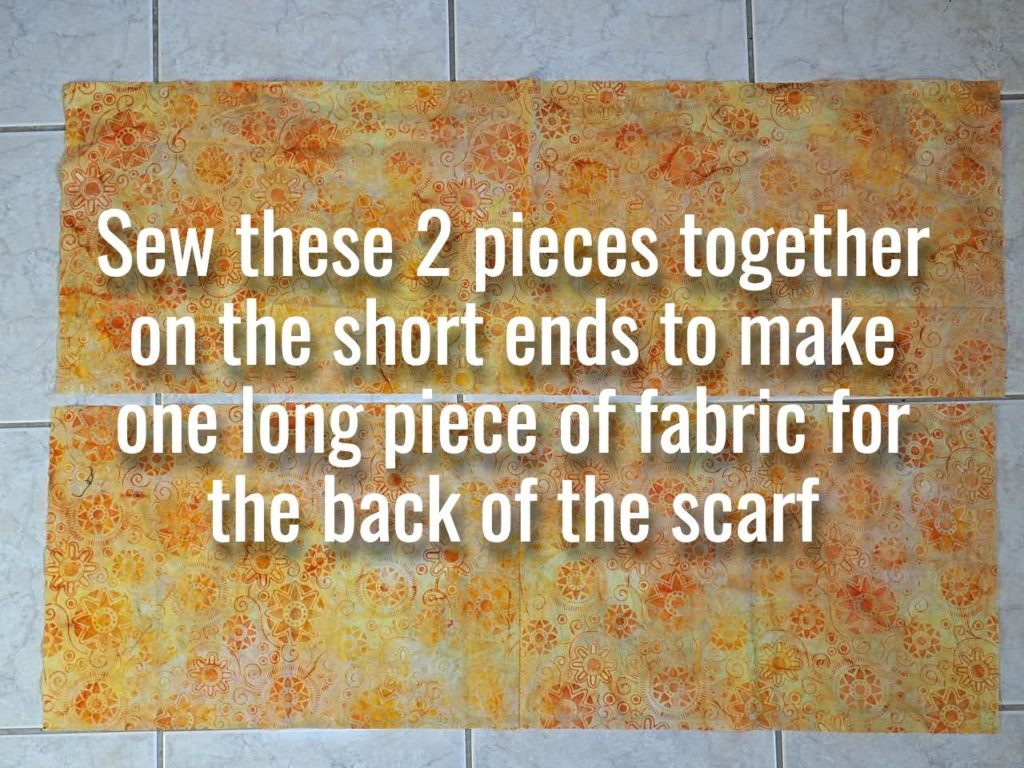
You probably aren’t going to have a piece of fabric that is 72” long, but if you do, cut one piece 72” long x 12” wide.
If you don’t, cut two pieces 36 1/2” long x 12” wide. Line up one piece on top of the other with right sides facing each other. Sew down one of the short (12” long) sides. Press open and set aside.
Assembling the Scarf
On a long surface, lay the patchwork side of the scarf down, with right side facing up. Lay the solid side of the scarf on top of the patchwork side, with the right side facing down. Line up the two sides. Remember: Right sides should be facing each other.
Using a ¼” seam, sew the 2 pieces together, along both long sides. Do not sew the two short ends. This forms a tube.
After you’ve made the tube, you may notice that the back of the scarf (not the patchwork side) may be a bit longer than the patchwork side. Just trim off the longer side of the back so that the front and back are the same length.
Important: The following part of assembling the scarf can be a bit tricky. You can see the process in the video I did showing how to make a double-sided infinity scarf. The process begins at about minute 5:50.
Put your hand in the middle of the fabric tube and reach down all the way to the other end.
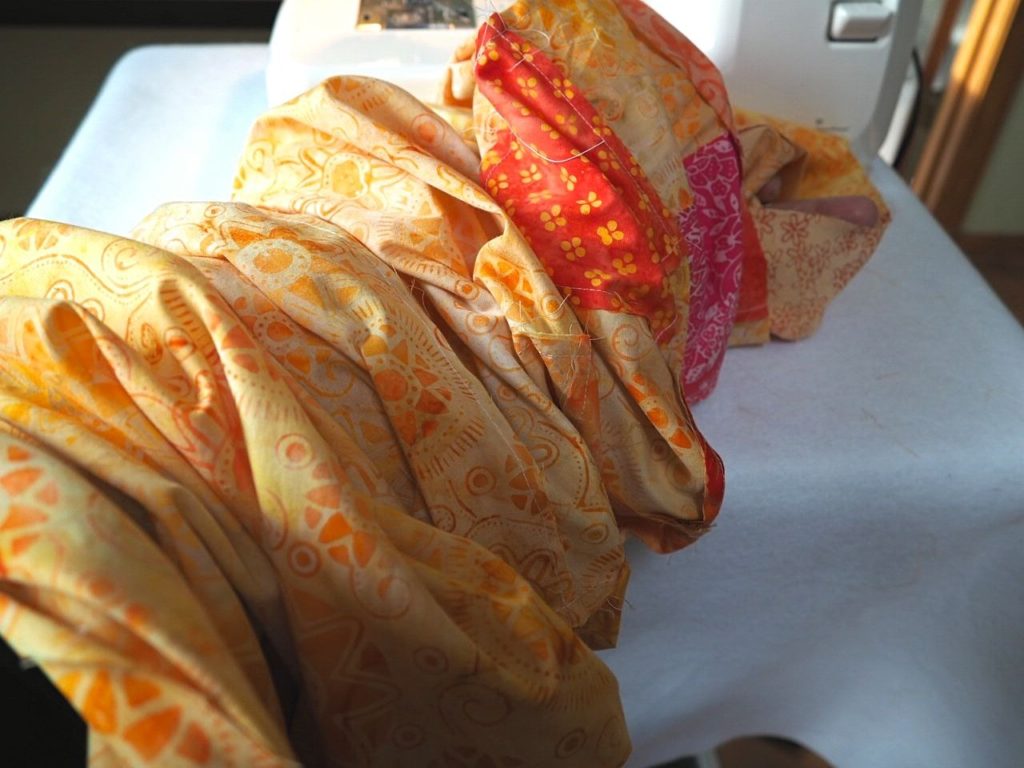
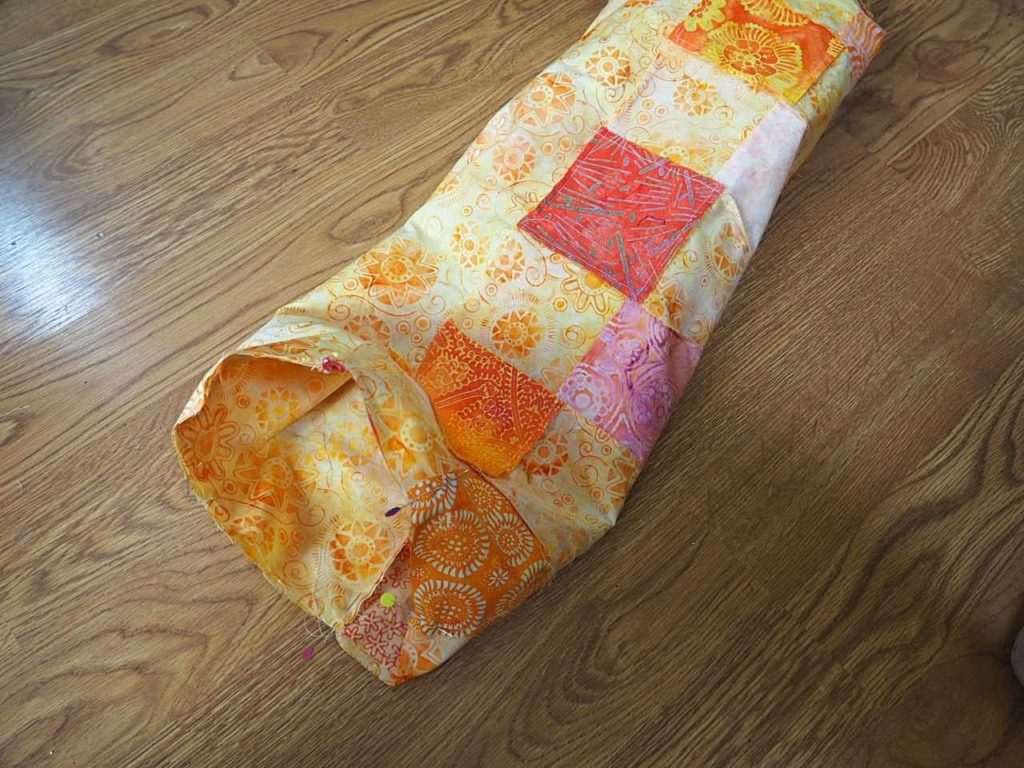
Next, grab hold of one of the edges at the other end of the tube and pull it up through the middle, stopping when the far edge reaches the edge nearest you. Line up the fabrics so that you have one opening with both of the raw edge ends.
The fabrics should be right sides together and matching. In other words, the solid should be next to the solid and the patchwork next to the patchwork. If they aren’t, the scarf will be twisted and won’t come out right.
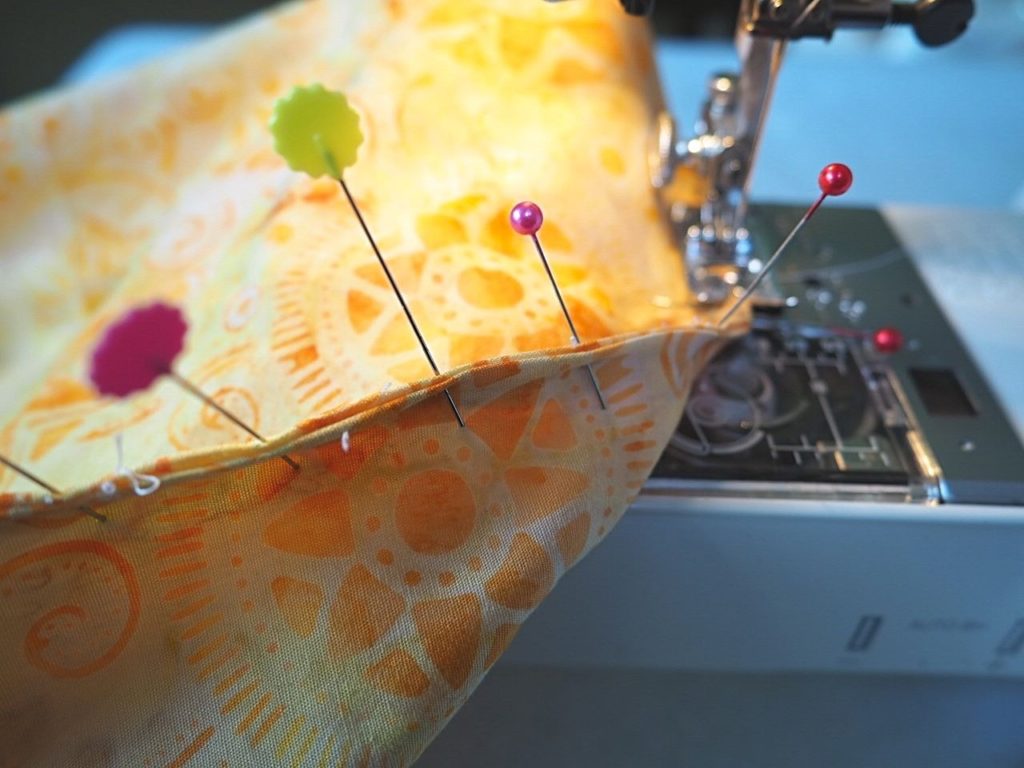
Pin around the entire circumference.
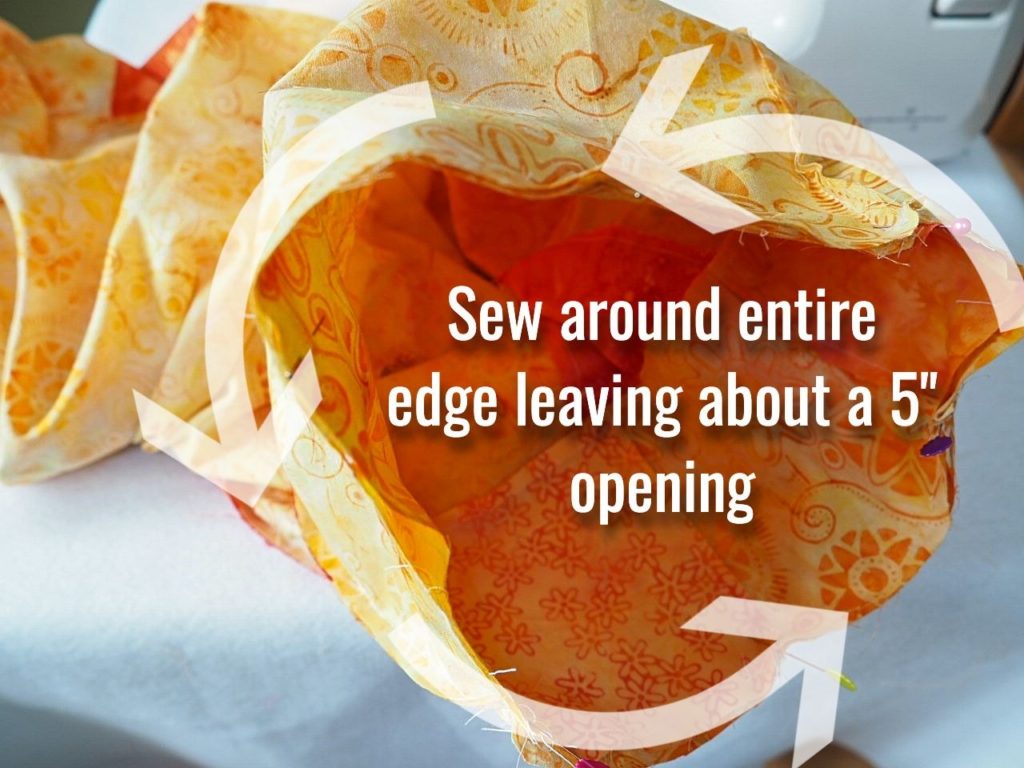
Beginning and ending with some backstitching, sew the two layers together around the edges, making sure to leave an opening of about 5” long that doesn’t get sewn yet.
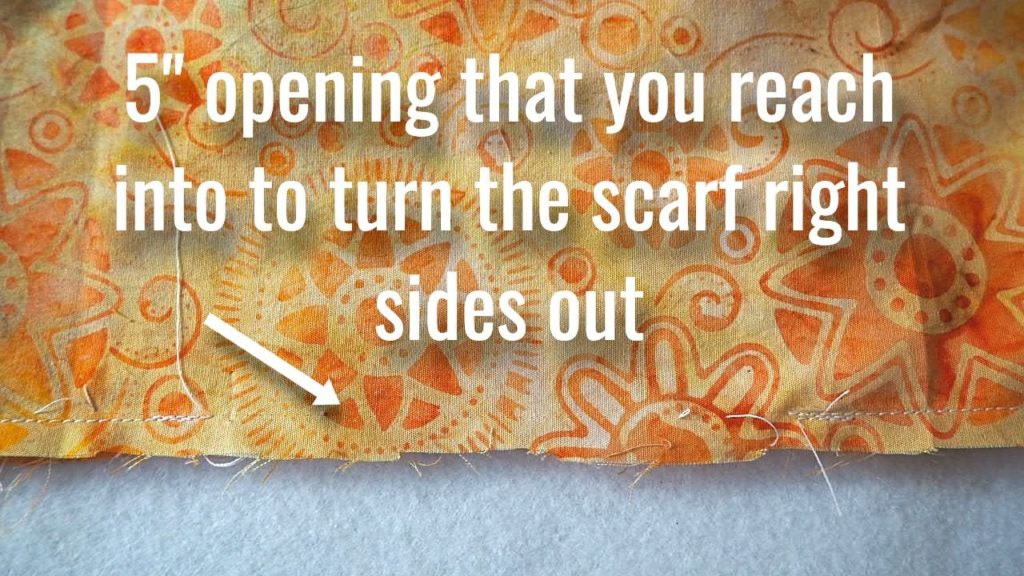
Reach in to the 5” opening that was not sewn and turn the scarf right sides out. This takes a bit of work.
Finishing the Scarf
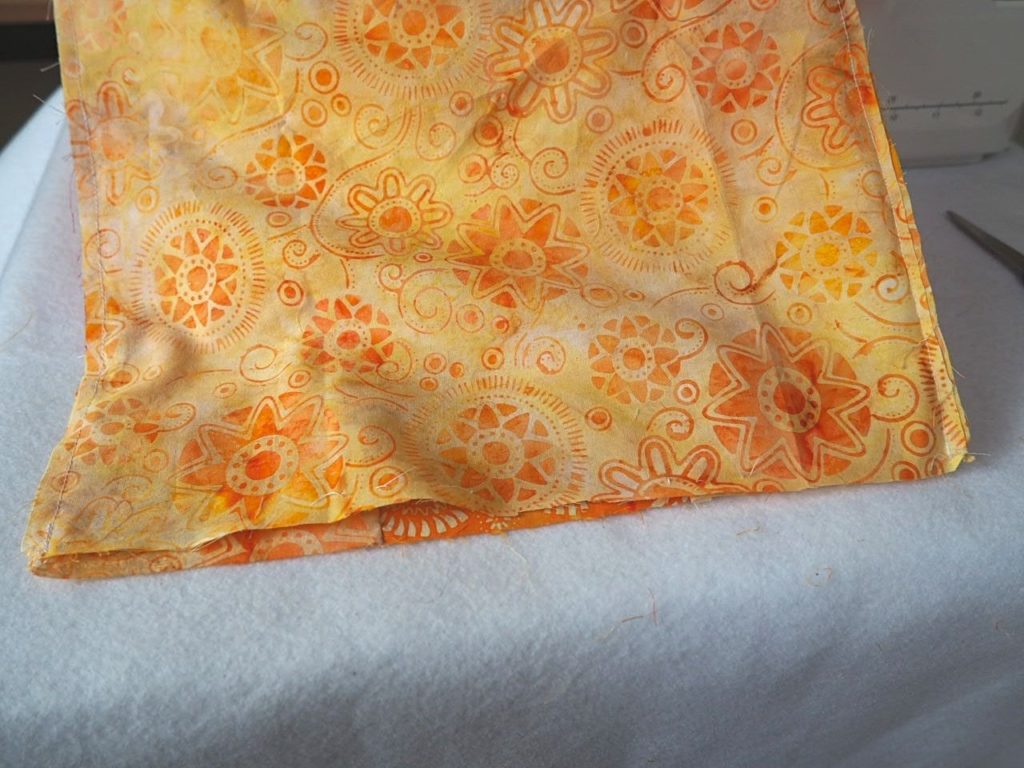
At this point the scarf is almost finished. All you have to do is close up the 5″ opening that you used to turn the scarf right sides out. Turn the raw edges of both sides under about ¼”. Because you’ve already sewn part of it, the fabric naturally wants to turn in like that, so it’s fairly easy. Pin along the opening with the edges turned under.
Lastly, sew a scant 1/8” seam along the pinned portion, beginning and ending with a backstitching. Trim off any threads and press the scarf.
That’s all there is to it!
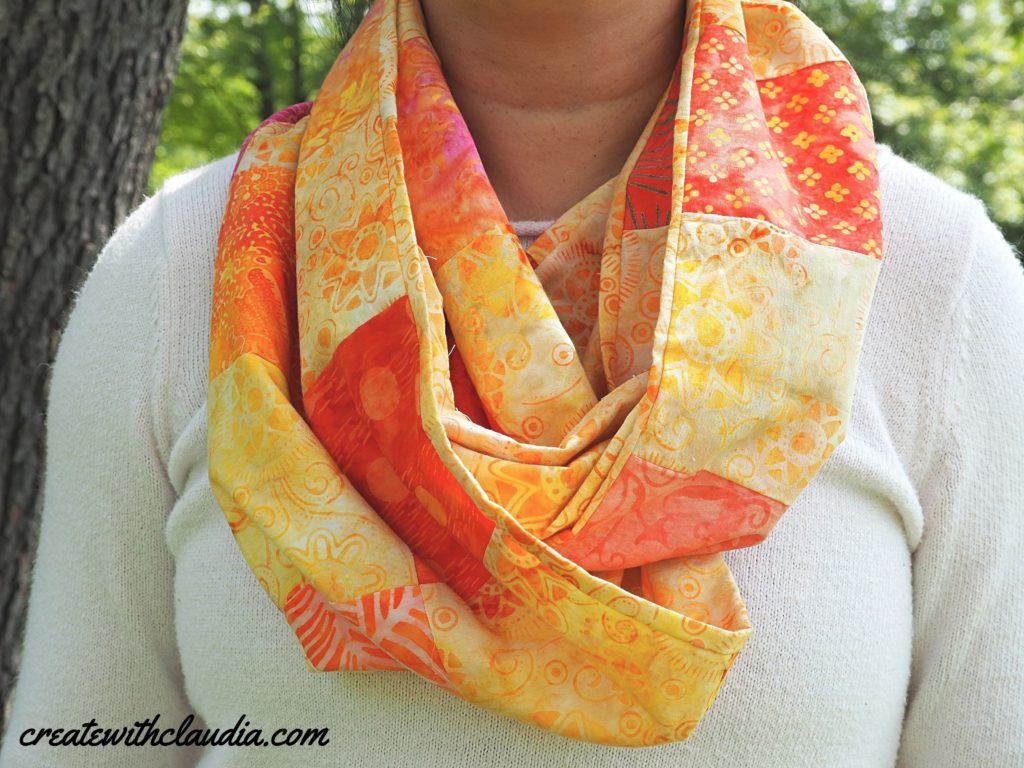
Double-Sided Patchwork Infinity Scarf Pattern
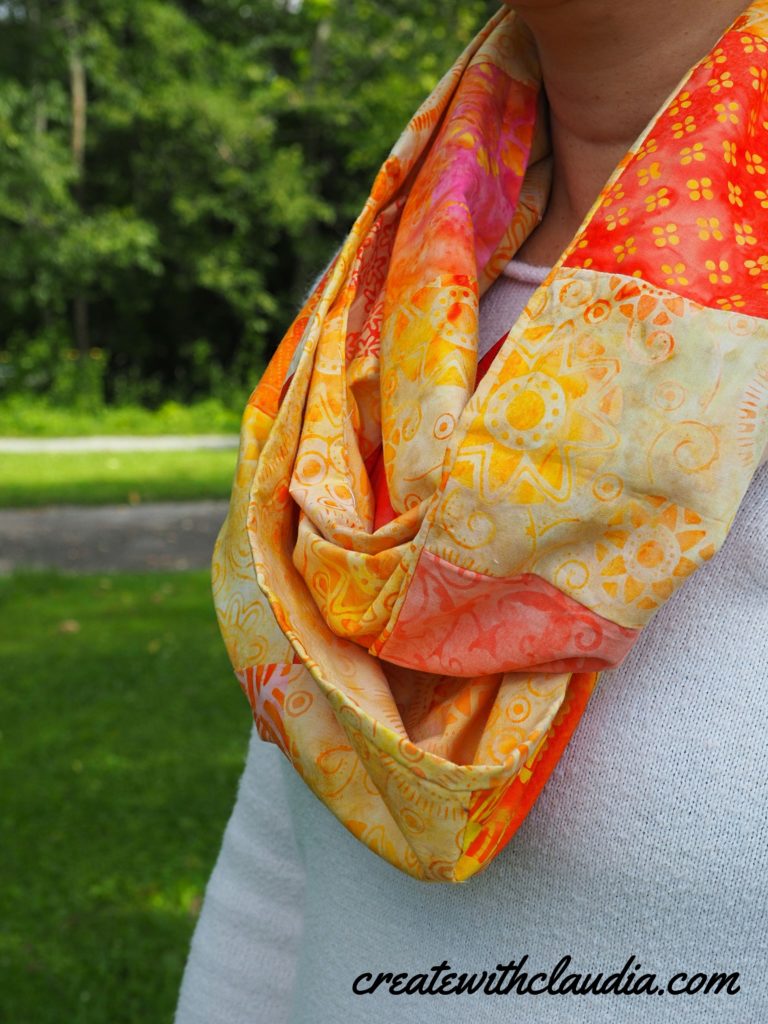
I absolutely love my scarf. I don’t normally wear yellows and oranges, so this has given some of my wardrobe a whole new look. Another nice thing about an infinity scarf is that you can wear it in a number of ways, and this one is nice and long so it gives you lots of fabric to play with. I’m thinking of trying it in shades of blue for the winter.
By using my double-sided patchwork infinity scarf pattern, you can add a gorgeous and unique fashion accessory to your wardrobe.
I hope you give it a try.

3 Comments
Lynda
September 7, 2021 at 11:46 AMThis is beautiful. I love it
createwithclaudia_7j76hs
September 10, 2021 at 6:10 AMThanks so much. I appreciate it.
Paula
November 6, 2023 at 6:56 PMI just finished making one of these for my sister. I’m a novice at sewing and your instructions were great. Thank you!!