
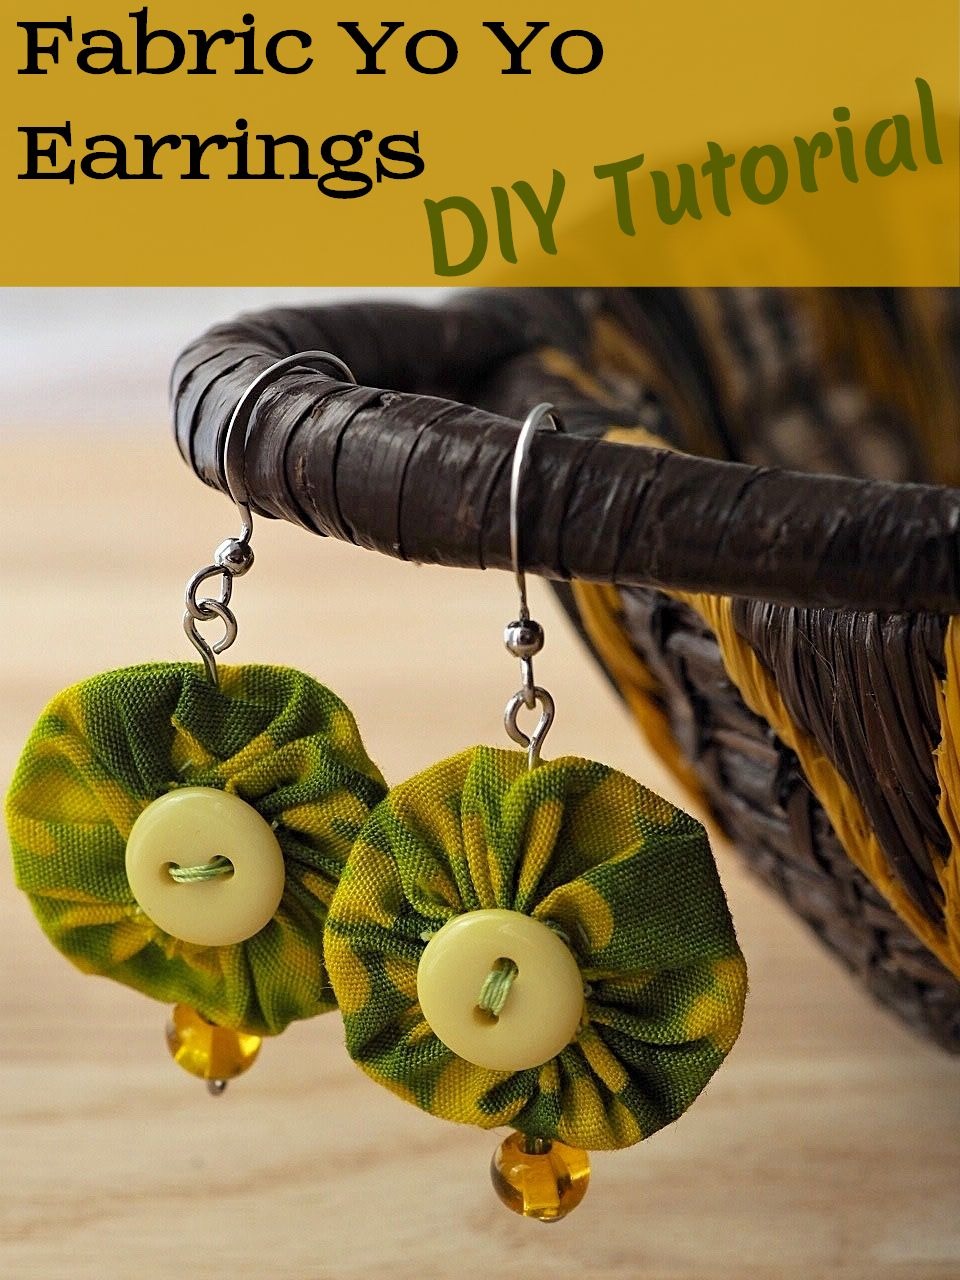
How to Make Fabric Yo Yo Earrings
Do you like wearing unique accessories? Do you like making your own jewelry? Then this project is for you. I love making these earrings. They are fun and flirty and look great. You can have your own pair in no time at all. Learn how to make fabric yo yo earrings with this easy-to-follow tutorial.
I went with green and gold for my pair. I had some small scraps of cute batik fabric left over from another project and loved the colors. For the embellishments I chose coordinating buttons and beads to go with the fabric.
Supplies Needed
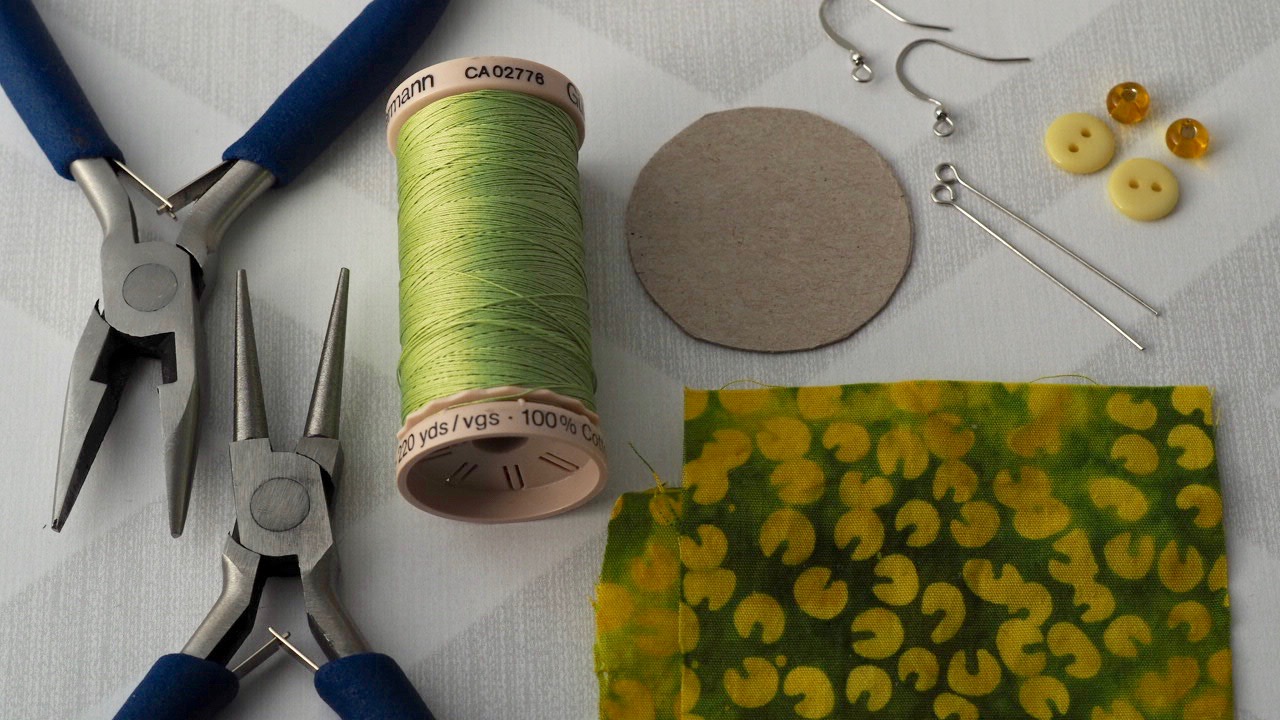
- Fabric – I used batik fabric. The texture is a bit stiffer which is good for this project.
- Buttons
- Beads
- Jewelry Fixtures including eye pins and earring hooks
- Flat and round nose pliers
Note: I have a set like this one which has everything I need to make these earrings.
As an Amazon Associate I Earn From Qualifying Purchases.
Measurements
These are the measurements I used for my earrings. You can make them as small or as large as you’d like.
- Finished earring: From the top of the hook to the bottom of the bead is approximately 2″.
- Circle template: About 1 1/2″ in diameter which makes a yo yo about 1″ in diameter.
- Eye pins: 1 1/2″ long


1: Make the Yo Yo Template
- Cut a piece of cardboard large enough for the circle shape you are using.
- Trace around the circle template and cut it out.
2: Cut Out the Fabric Circles
- Using the template as a guide, cut a circle out of the fabric, about 1/4″ larger than the cardboard.
3: Sew Around the Edge of the Circle

- Using a strong thread, and using the template as a guide, sew around the outside of the circle. Tie a knot at the beginning to secure the thread. I use an easy running stitch. That makes it easy to pull closed when done stitching around the template.
- When you have gone all the way around, remove the cardboard. Don’t trim the thread yet.
- Gently pull both ends, the knotted and the loose one, and close the shape. To get the circle, you may need to manipulate the fabric.
- Tie a knot to secure the yo yo. I add a few extra stitches in the center to make sure the yo yo doesn’t come undone.
The Finished Yo Yos
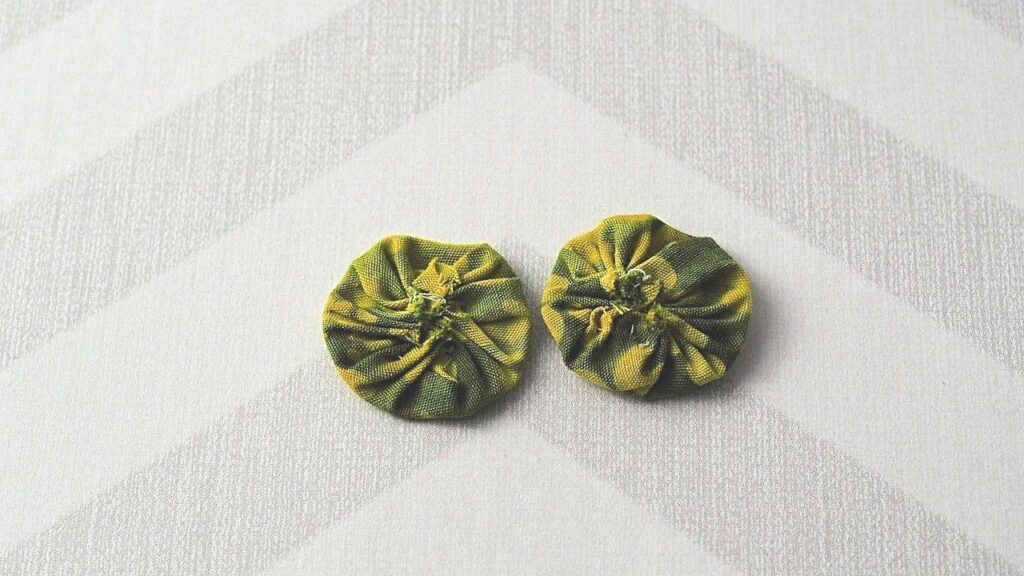
Finish up the two yo yos, making sure that they are as symmetrical as possible.
Note: There are also easy-to-use yo yo makes that you can use in place of this method.
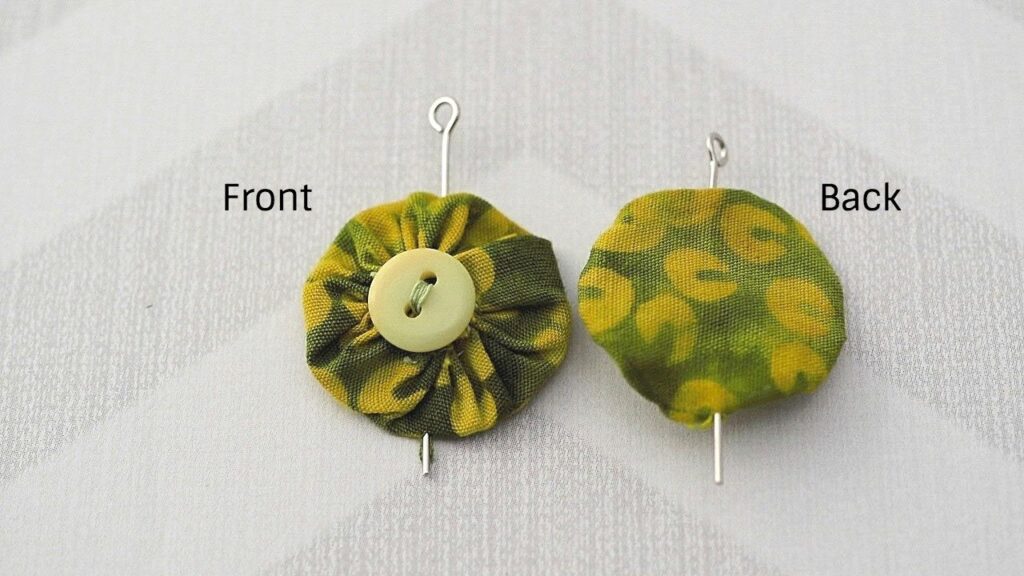
4: Add the Button
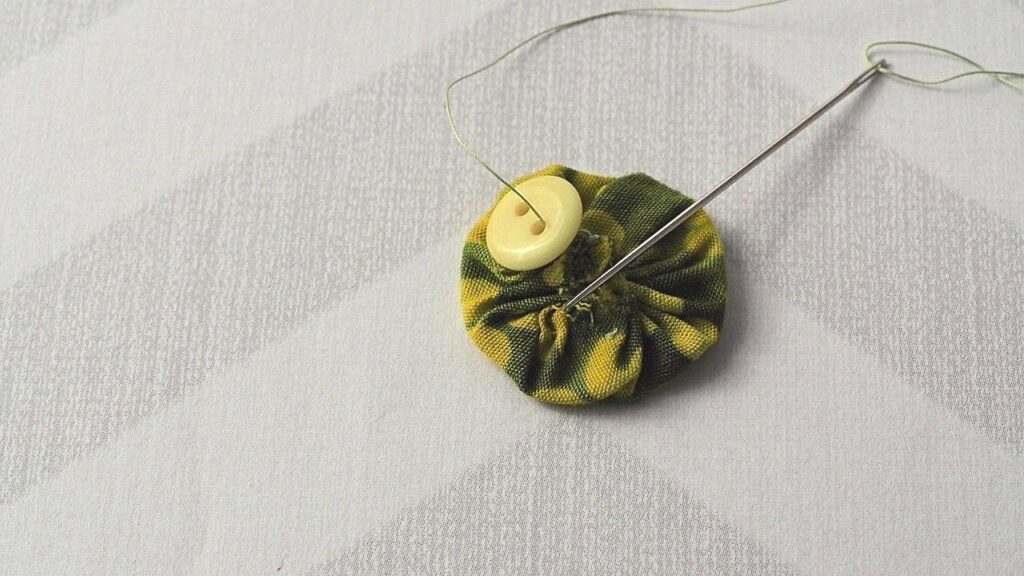
Sew the button in the center on the gathered side, not the flat back side. This covers up the raw edges. Be careful not to sew through to the back side of the yo-yo.
5: Add the Eye Pin
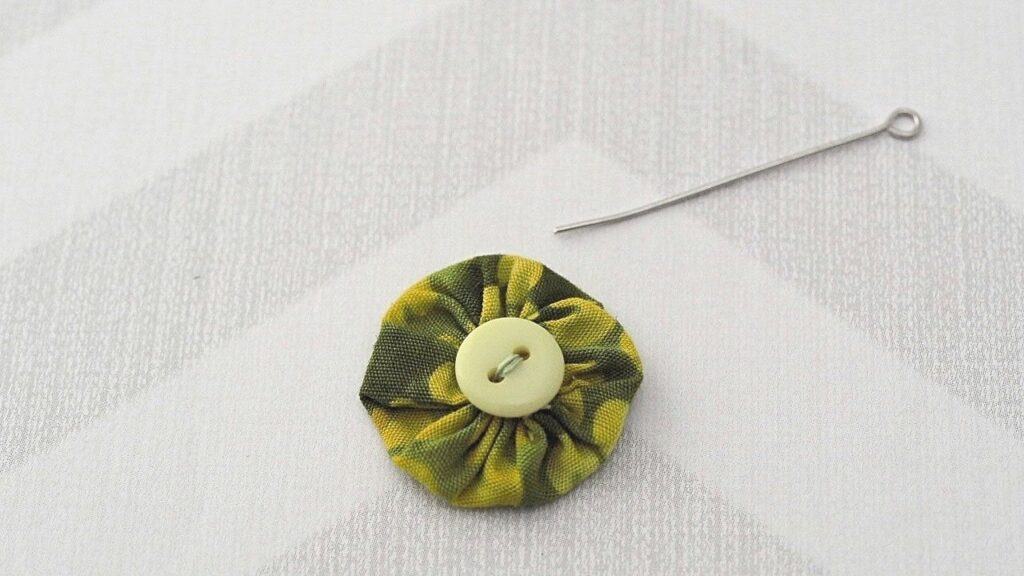
Insert the eye pin through the top of the yo yo, going through the center (between the layers), and coming out at the bottom.
A large needle to make a small hole in the fabric may help with this process since the tip of the eye pin is flat.
Make sure your eye pin is long enough that there will be room for the bead at the bottom.
6: Add the Bead
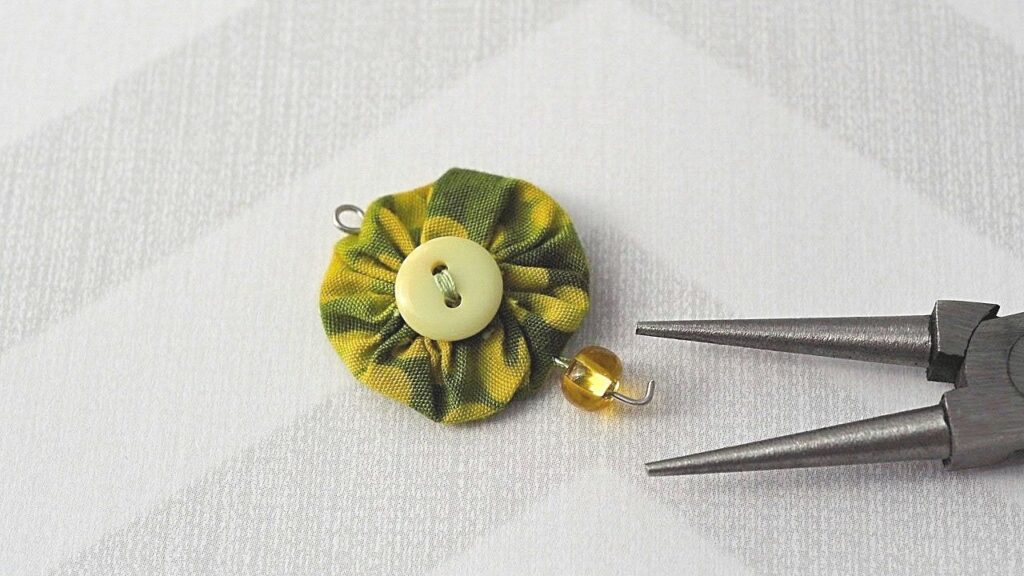
- Add a bead onto the eye pin.
- Form a small loop at the base to ensure that the bead doesn’t fall off.
- Gently squeeze the loop closed so that the bead doesn’t fall off and that the loop doesn’t snag a sweater.
- Repeat on second earring.
7: Add the Earring Hook
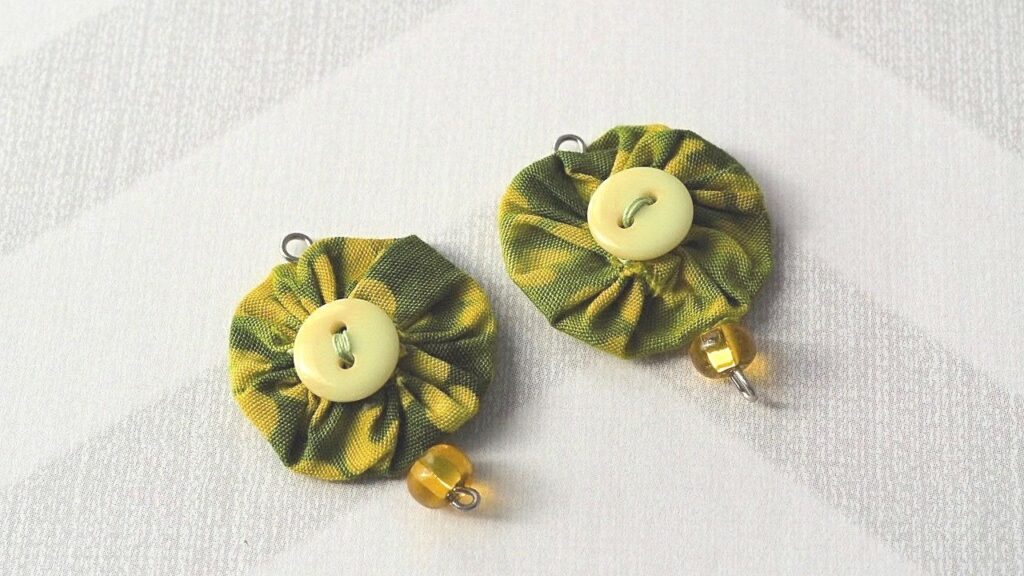
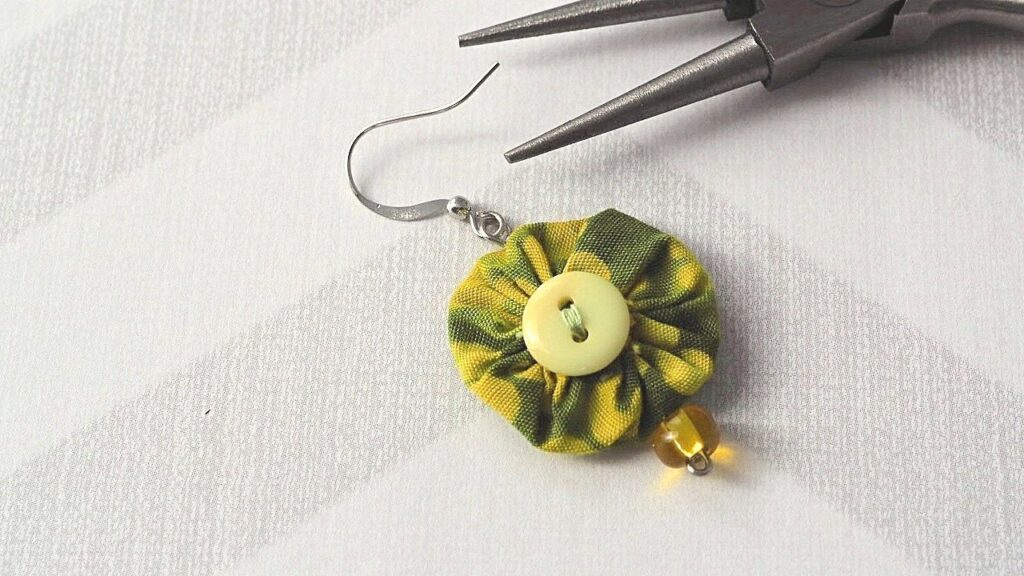
- Carefully open up the hole of the eye pin just enough to slip the earring hook on.
- Gently close the eye pin hole to secure the hook.
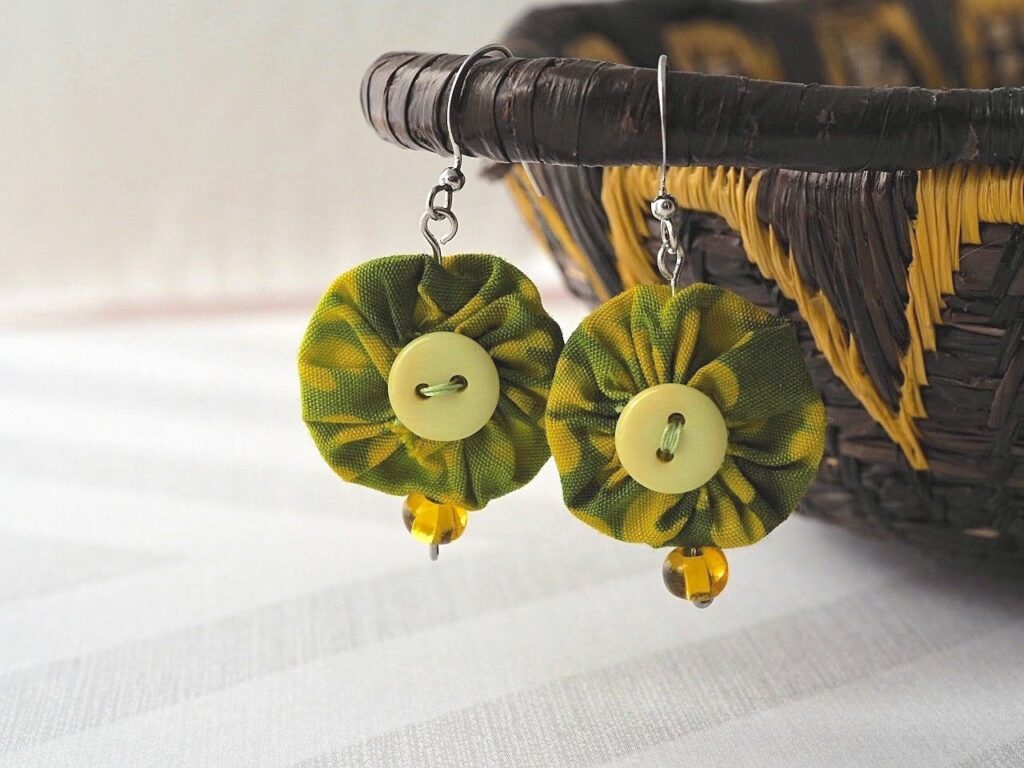
The Finished Earrings
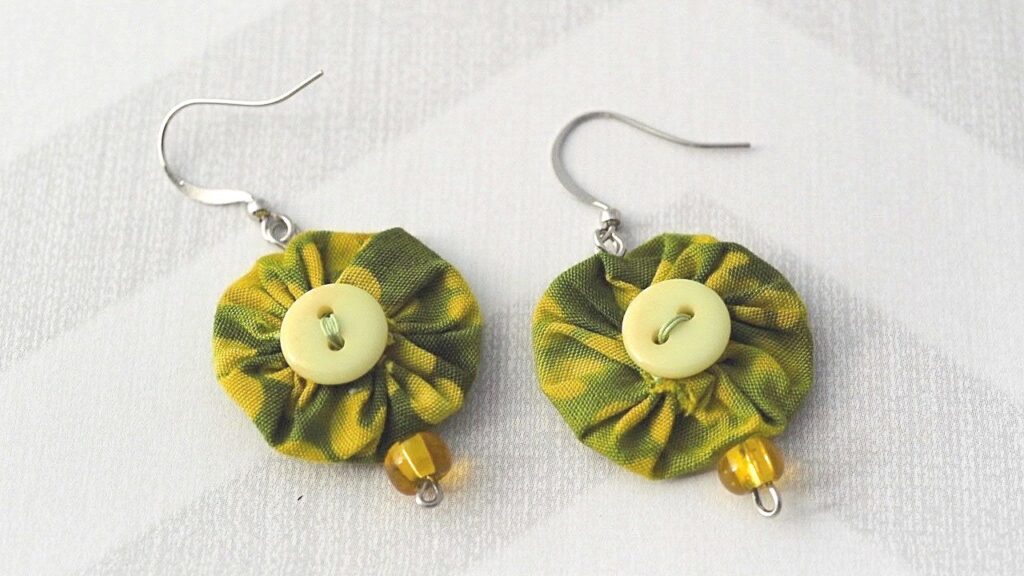
That is all there is to it. Now you have a unique and gorgeous pair of earrings. Change up the fabrics and embellishments to make them look completely different. Wouldn’t they look cute in a holiday theme?
Whatever you decide to do, I’m sure they will look terrific!

2 Comments
Nancy
September 24, 2025 at 3:05 PMThese are really cute and what a fun way to make something different with yo-yos!
createwithclaudia_7j76hs
September 26, 2025 at 6:37 AMThanks so much Nancy. They are so fun to make!