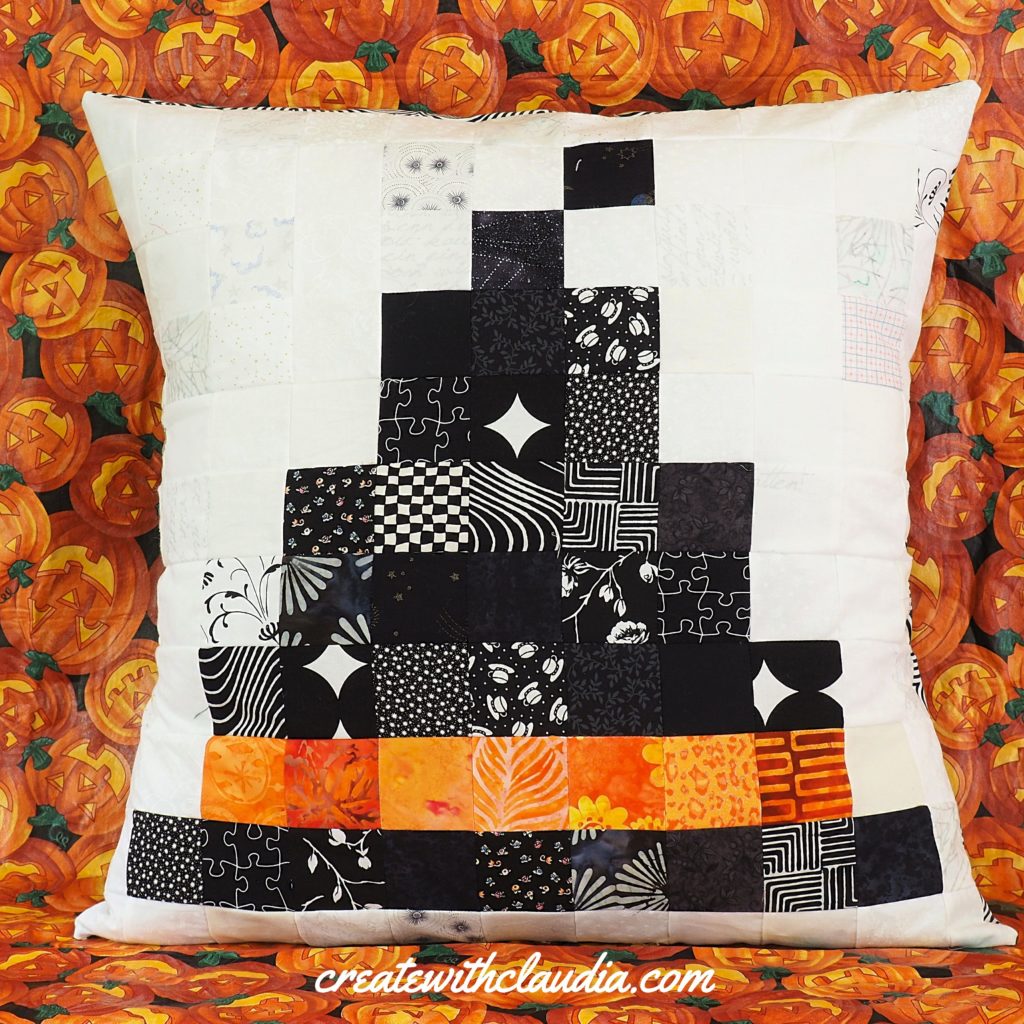
Witch’s Hat Pillow Pattern – Pixelated
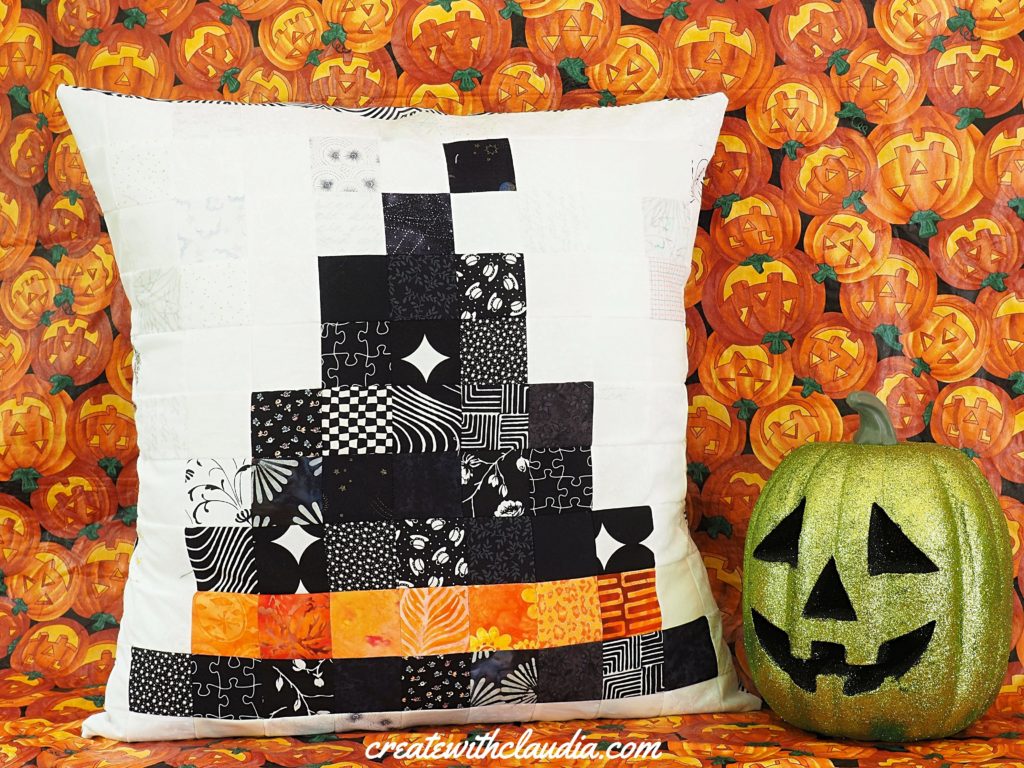
I love it when Halloween rolls around. All of the spooky decorations I see everywhere make me smile and, as a result, make me want to create something fun for the holiday. If you follow my blog, then you know that I have been working on a series of holiday pillow cases. My Halloween contribution is this pixelated witch’s hat pillow pattern.
It’s fun and whimsical, and it adds a nice touch of festive décor to a room. Not only that, but it is easy to make and another one of my scrap buster projects.
You would think that with all of the fabric projects I’ve been doing, I would not have many scraps left, but that does not seem to be the case. That is ok though. I just have to make more fun projects.
If you are looking for a new throw pillow for your halloween décor, then think about giving this one a try.
Pattern specs:
- Finished pillow case measures 22” square and will fit a 24” pillow insert (fits better with an insert that is not too thick)
- A scant 1/4” seam allowance is used
Supplies Needed:
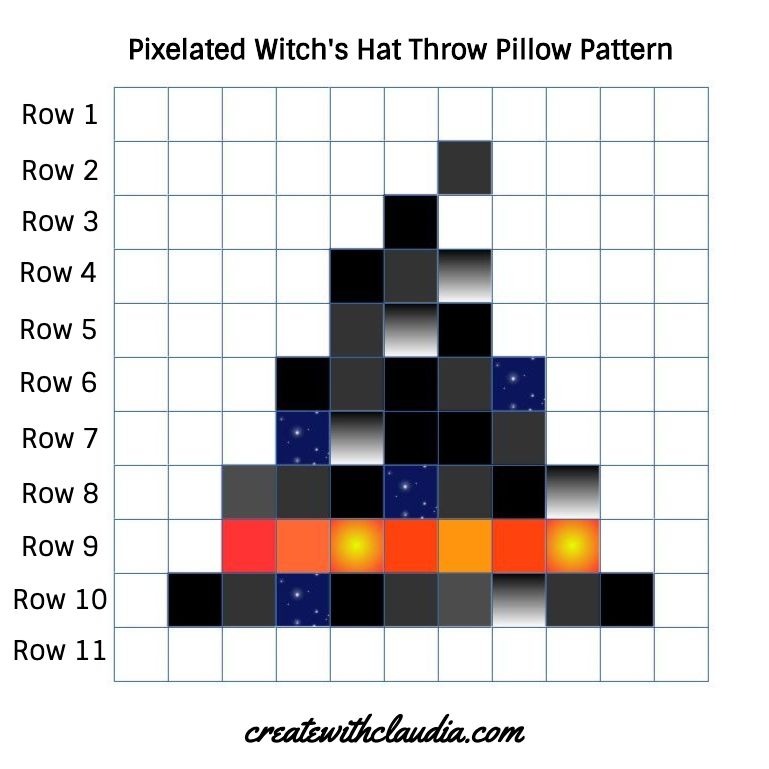
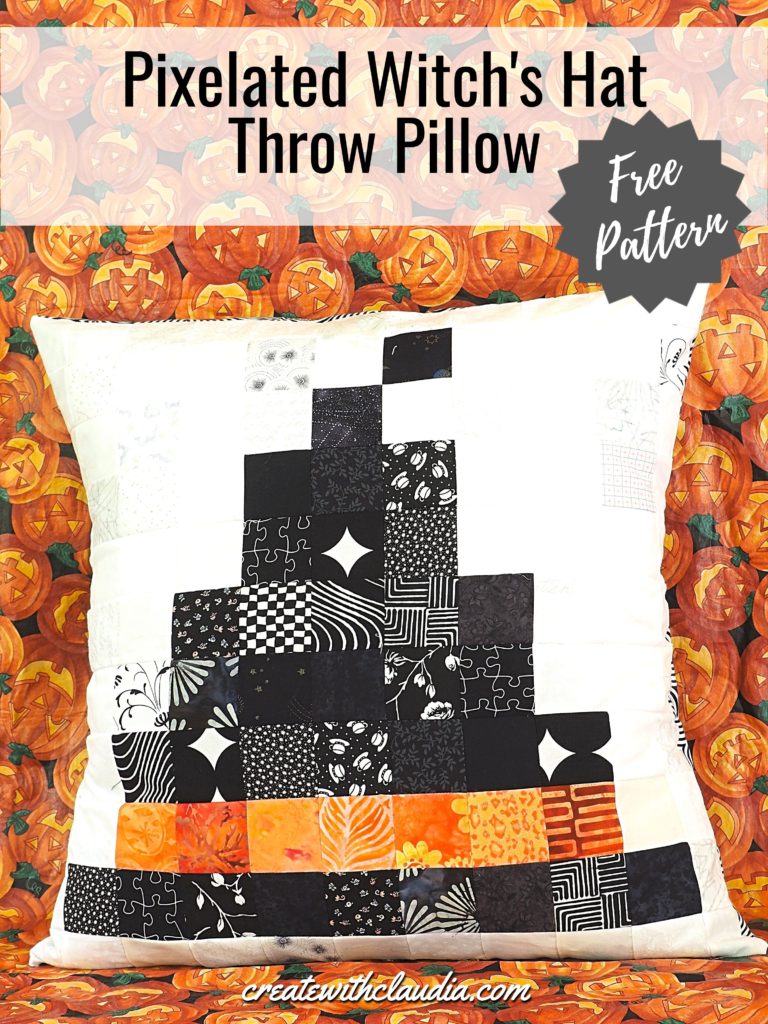
Front design of pillow case – Scrap fabrics cut into 2 1/2” squares (121 in all)
- Blacks – 34 squares
- Oranges – 7 squares
- Various shades of white and off-white – 80 squares
- For the back – 2 pieces of fabric, both cut 22 1/2” X 16”
- 24” pillow form – A flatter pillow insert should be used
- General sewing supplies
Items You Can Use To Make This Project
You can find many of the items that I used to make this project in my Amazon Store.
As an Amazon Associate I earn from qualifying purchases.
Step 1 – Lay Out the Design
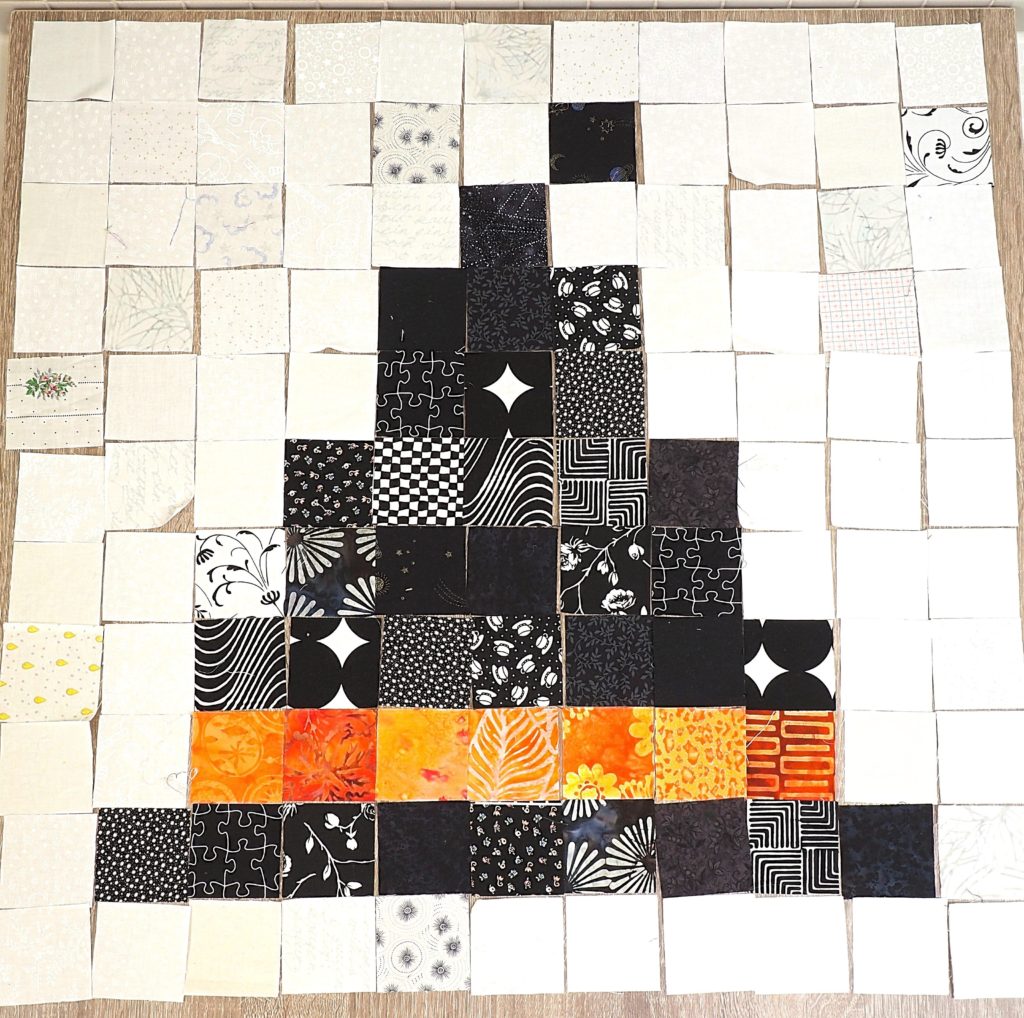
On a large, flat surface, lay out your squares, following the pattern grid.
Step 2 – Prepare To Sew
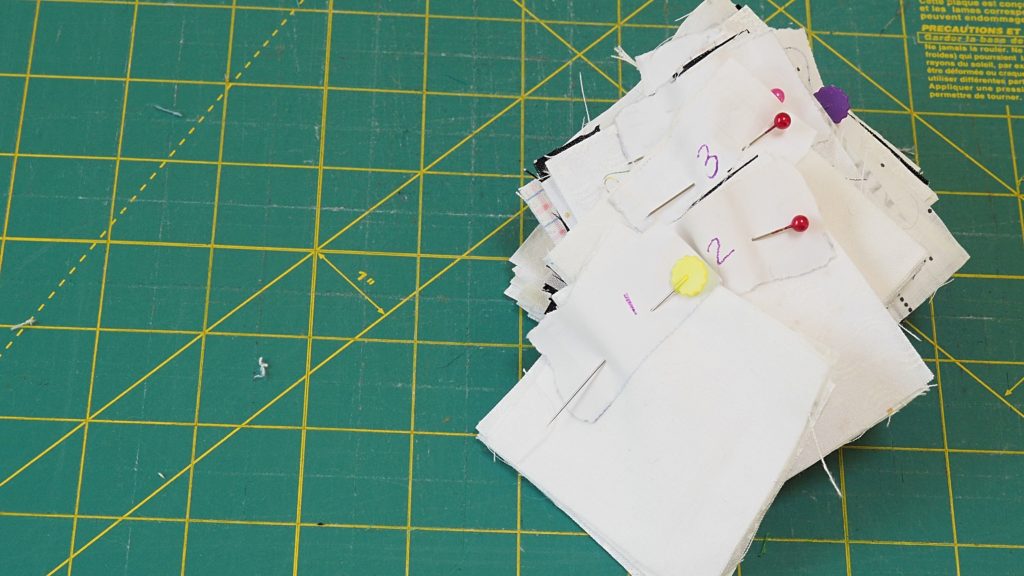
- Organize the fabric rows carefully, so the squares do not get mixed up.
- First, cut 11 small pieces of scrap paper, number them in sequential order and set them aside.
- Next, start with the top row (row 1), pick up the squares in order, and form a stack of squares for that row. Make sure the left piece of the row is on top.
- Finally, take the scrap of paper with the number 1 on it and pin it through the stack for that row. Pin it in the top left of the square so you’ll know where the top corner is.
- Repeat with the rest of the rows.
Step 3 – Sew The Front
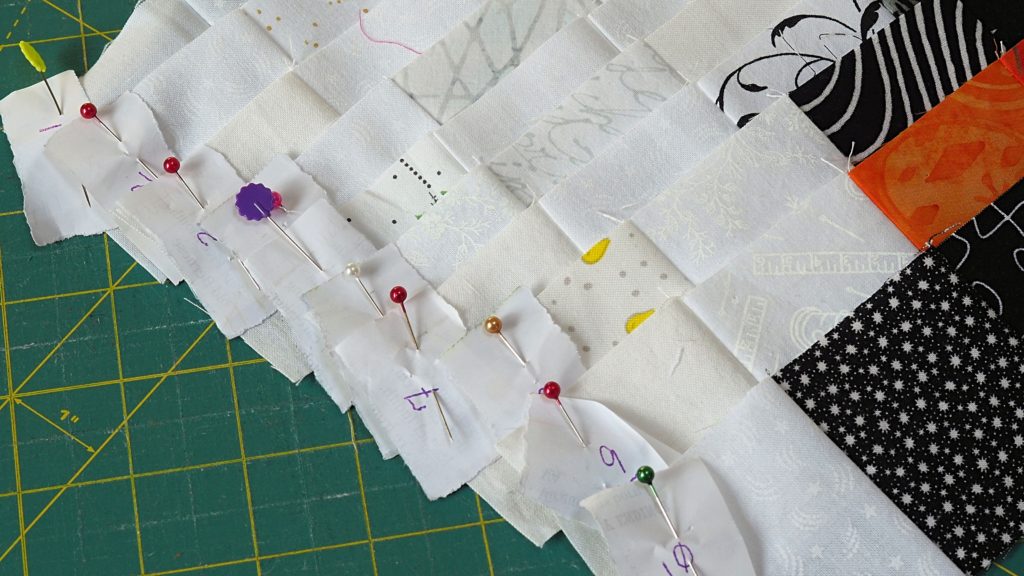
- Sew the individual squares together, row by row. Use care to keep them in the correct order. Leave the paper marker with the row number on it, pinned to the top left corner of the row so you know the positioning. Hint: When sewing the individual squares together, I sew pairs and put a pin in the left square. That way I know which way it gets joined to the other pair.
- After all of the individual rows are done, start sewing them together. Take care not to sew over the paper row number, but keep the labels in place until the front of the pillow case is done.
- Press the completed top. If you used the 1/4” seam allowance, your top should measure approximately 22 1/2” X 22 1/2”.
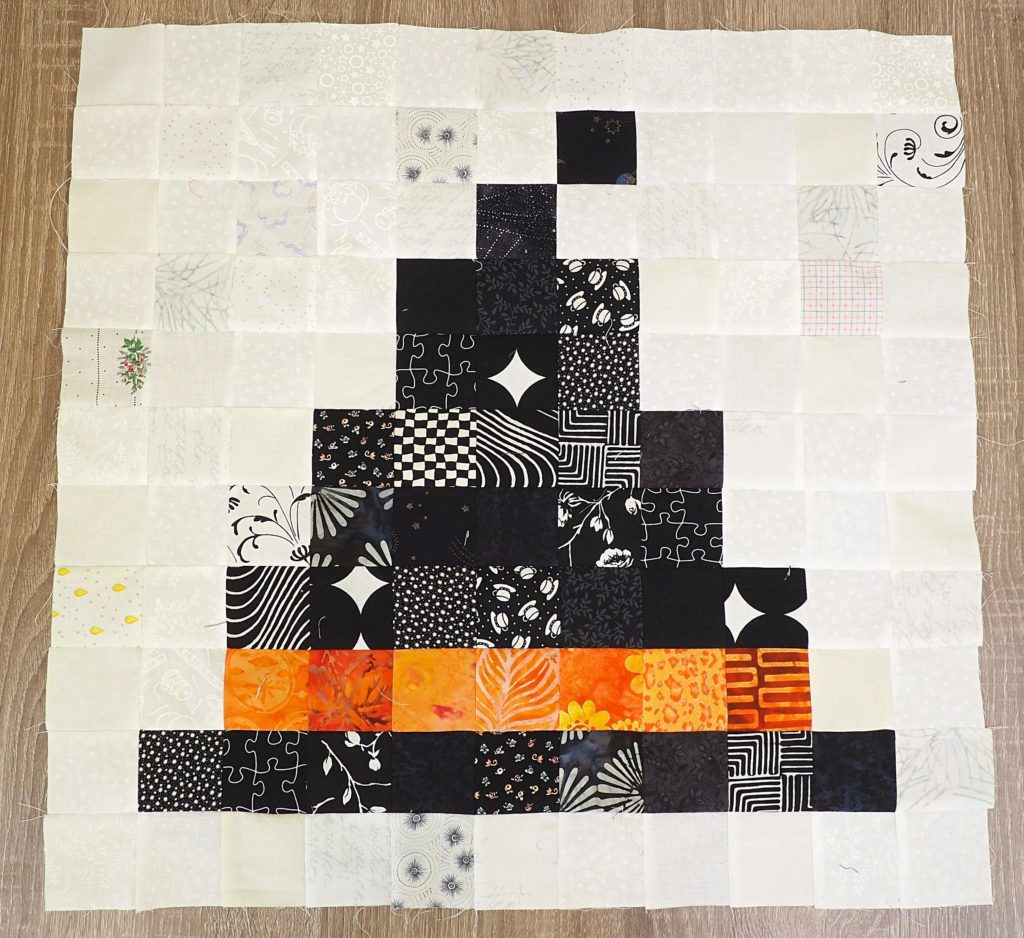
Pressing tip: When piecing the individual rows for the witch’s hat pillow pattern, make sure to press each seam in the same direction and alternate that direction with each row. For example: Press row 1 seams to the left, row 2 seams to the right, row 3 seams to the left and so on. This will make it easier nest the seams when joining the rows.
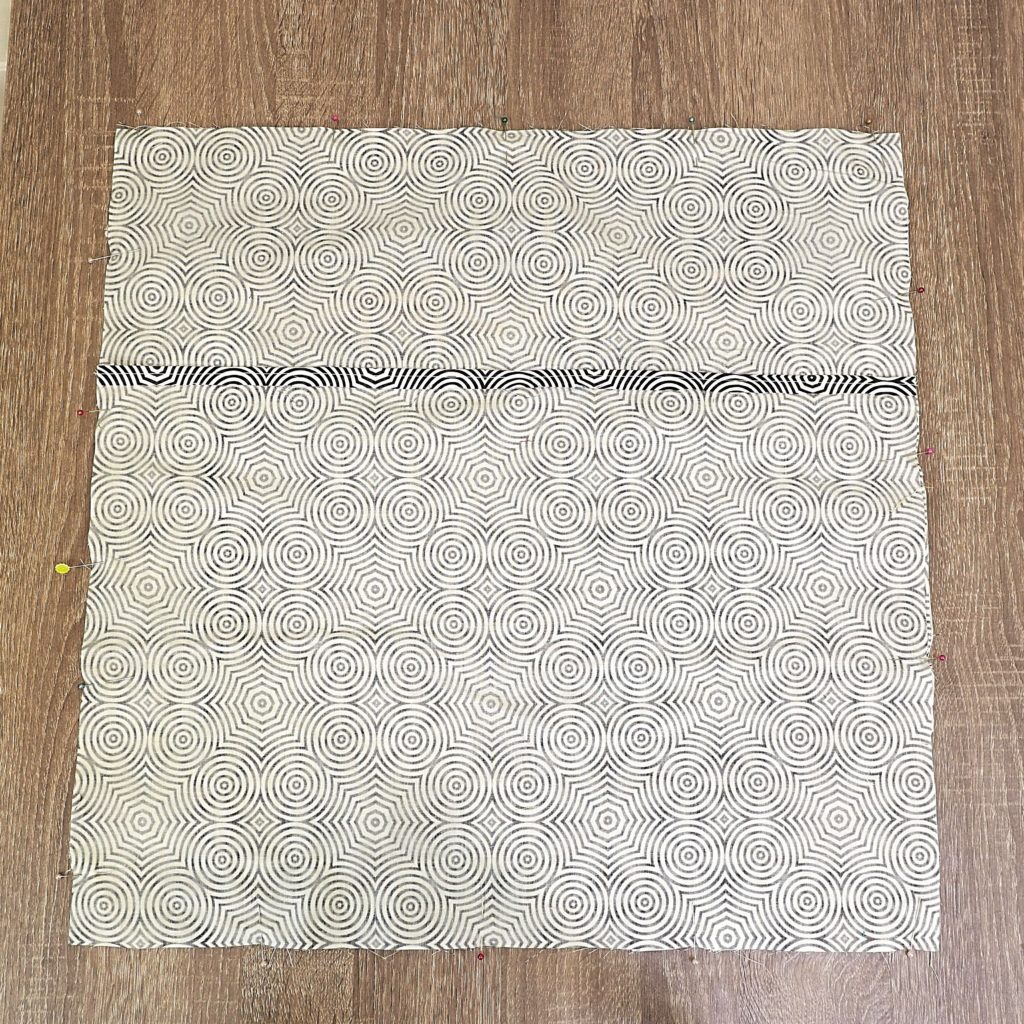
Step 3 – Prepare The Back
- Take one of the large pieces of back fabric and lay it, wrong side facing up.
- Fold over one of the long edges about 1/2” and press.
- Sew down the long edge.
- Repeat with the other piece.
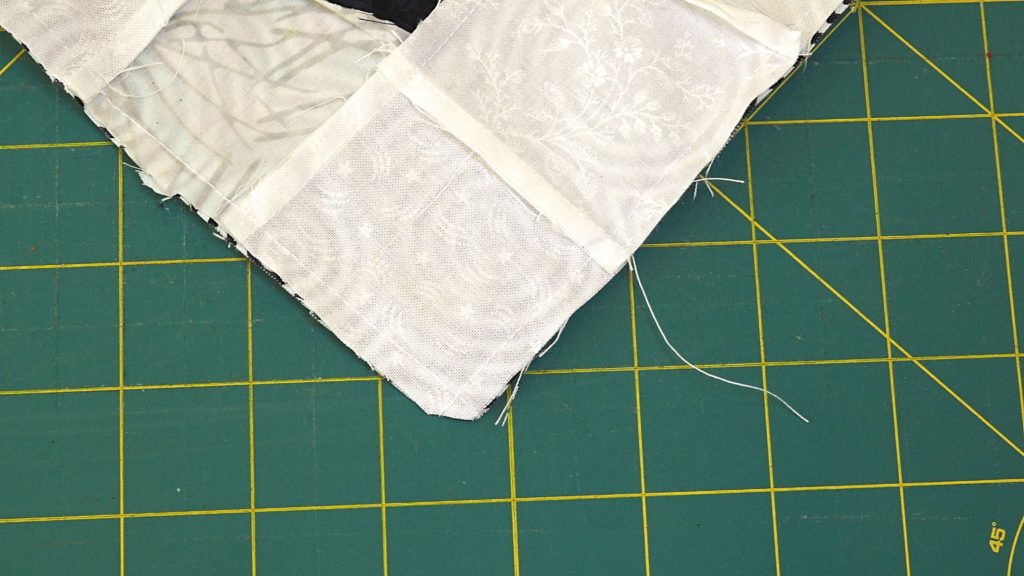
Step 4 – Assemble The Pillow Case
- First, lay the completed front of the case on a flat surface, right side facing up.
- Then lay one of the back pieces, right side facing down, on top of the front piece, lining up all of the edges. The finished long edges will be in the middle of the pillow.
- Next, lay the second back piece, right side facing down, with the unfinished edges lined up on the bottom and sides. The finished long edge will be overlapping the other piece of the backing.
- Pin front and back together, around the outside of the entire case.
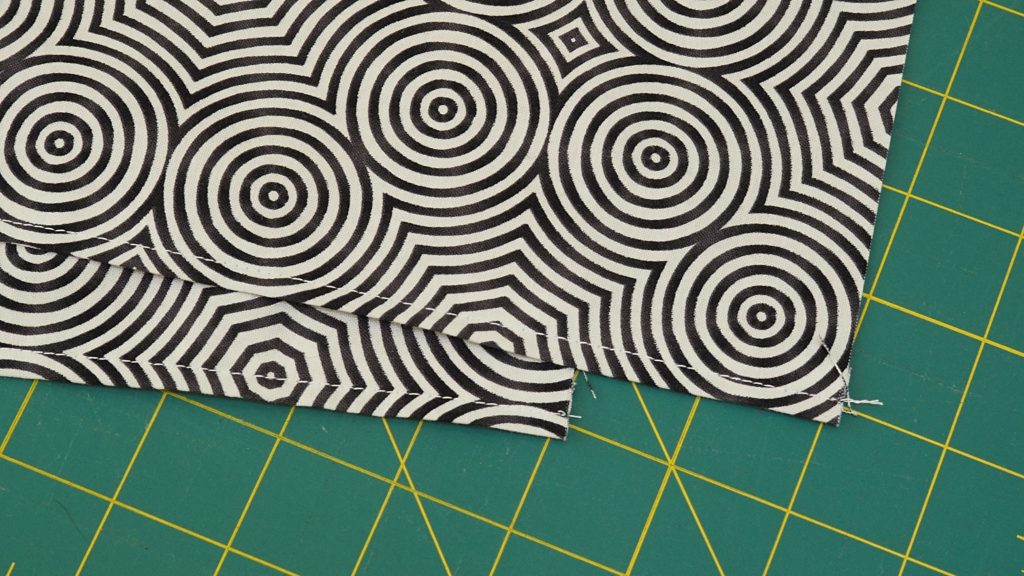
- Sew around the outside, using a 1/4” seam allowance. For extra stability, backstitch along the edges where the opening in the back will be.
- Finally, trim off the corners.
Step 5 – Finish the Pillow
- Turn the case right side out, carefully pushing out the corners.
- Insert the pillow form.
Love This Witch’s Hat Pillow Pattern!
When the days start getting shorter and the temperatures start getting cooler, you know that the ghosts, goblins and candy overload are not too far away. It’s a great time of year, and Halloween is such a fun holiday to decorate for. Add to your festive decorations with this adorable pixelated witch’s hat pillow pattern.
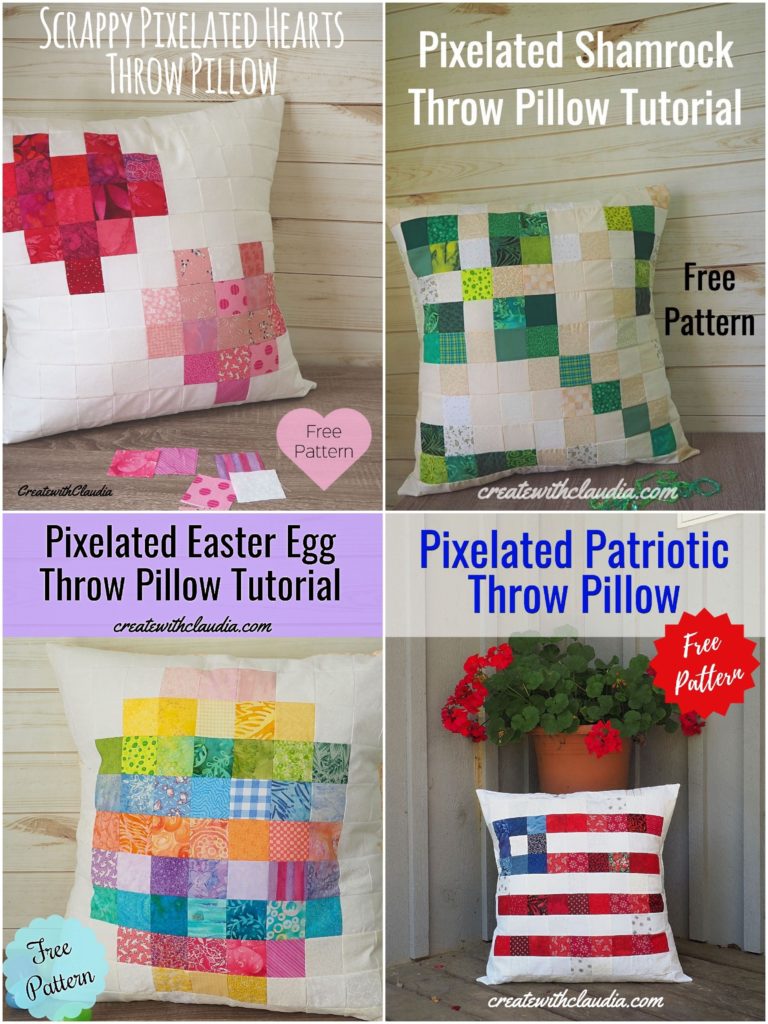
And if you like this design, check out the other ones in my holiday series. You’ll be ready for any occasion with one of these throw pillows.